User Manual
A living guide to using the app: the stash, designs, the editor, jelly rolls, settings, and syncing.
A living guide to using TideStitch, current as of version 1.9 (34). Sections grow as features land.
What TideStitch is
TideStitch lets you audition real fabric in real blocks before you cut a single piece. You photograph your fabrics, drop them into a quilt block, and see them tiled at true scale, so a 6″ swatch in a 12″ block repeats the way it actually would in cloth. It's built for iPad first, runs on iPhone and Mac, and (once iCloud is set up) syncs your stash and designs across your devices. The Mac version is the same app with a few desktop touches, see Using TideStitch on Mac.
There are four places to work, and where you switch between them follows the device: a tab bar along the bottom on iPhone, a row across the top on iPad, and a sidebar on Mac. The four are:
- Stash: your fabric library of individual swatches and jelly rolls.
- Designs: the quilts you're building.
- Patterns: the quilts you're actually making, as cut lists and sew orders. It starts empty and fills up as you ask for patterns.
- Resources: everything that isn't your quilt. Settings (seam allowance, cutting mode, backups), the free cutting calculators, this manual, and the ways to reach us. See The Resources tab.
On iPad and Mac there's a fifth, Studio, between Patterns and Resources: a full block designer for drawing your own blocks from scratch. It's a separate unlock (see What's free, and what the unlock buys), and the tab is there whether or not you've bought it, so you can see what it is. A phone can't fit the canvas, so on an iPhone the tab doesn't appear at all and the Resources tab carries a short About Studio card instead. See The Studio tab.
Everything you do saves automatically. There's no save button to remember, and most edits can be undone.
Getting started
When you first open the app, every tab is empty. The usual path is: add a fabric or two to your Stash, then start a Design and paint those fabrics into a block. You can also go fabric-first with a jelly roll: declare the roll, photograph its strips, and the app suggests patterns that fit what you have. Or start from scratch with a Design Your Own board and rough out your own layout with the drawing tools.
When a quilt is ready to sew, Make Pattern works out what to cut and how to piece it, and puts that quilt in the Patterns tab so you can find it again at the cutting table without going back through the editor.
Using TideStitch on Mac
TideStitch runs on Mac as the same app you use on iPad, so your whole stash and every design behave exactly the same, and (with iCloud on) sync across your Mac, iPad, and iPhone. The rest of this manual applies as written; a handful of things just adapt to a desktop with a pointer and keyboard:
- A sidebar instead of a tab bar. The sections (Stash, Designs, Patterns, Studio, Resources) sit in a left sidebar on Mac. That's Mac-only: iPhone and iPad both keep the tab bar (along the bottom on a phone, across the top on an iPad), because four flat destinations don't earn a column, and on iPad the control that swapped between the two sat close enough to the back button to throw you out of the quilt you were editing.
- Click instead of tap. Everywhere the manual says "tap," click with the mouse or trackpad. "Tap a swatch, then tap the patch" becomes click, then click.
- Control-click to delete. Where iPad uses press-and-hold to bring up Delete on a swatch, jelly roll, or design, on Mac you Control-click (or right-click) the card instead. The same confirmation dialog appears, and deletes are still permanent.
- No camera, add from your library. A Mac has no rear camera, so the Take Photo option is hidden. Adding fabric starts from your photo library: Choose One (crop it) is the main button, with Add Several from Library for bulk import. Everything after that (the square crop, the details form, the real-world size) is identical to iPad.
- Hover to preview. Move the pointer over a swatch, block thumbnail, or design and it lifts slightly with an accent ring, so you can see what you're about to click.
- Zoom with the buttons or keyboard. Trackpad pinch isn't reliable on Mac, so the canvas zoom cluster (−, fit, ↔, +, the quarter turn, the ruler, and the photo button for a reference photo) stays visible above the quilt, on the painting canvas and on the drawing canvases alike. It's wired to the standard Mac shortcuts: ⌘− zoom out, ⌘0 zoom to fit, ⌘8 fit the width, ⌘= (⌘+) zoom in, ⌘R turn the view a quarter turn, and ⌘9 for actual size.
- Measure the screen once. A Mac can't tell TideStitch how large its screen is, so the first time you ask for actual size it offers to measure: lay a rotary ruler on the glass and line the marks up. See Actual size.
- Undo and redo from the keyboard. ⌘Z undoes your last change and ⌘⇧Z redoes it, in the design editor and on freeform boards, matching the Undo button in the top bar.
- A resizable window. Drag the window to whatever size suits you; it won't shrink below a minimum that would break the layout.
The Stash tab
The Stash holds two kinds of fabric: loose fabric swatches and jelly rolls. A segmented control at the top switches between them (Fabrics, shown first, and Jelly Rolls), and each fills the full width as a scrolling grid. The + New button beside the control (under it on a phone) is context-aware: it adds a swatch on the Fabrics tab and a jelly roll on the Jelly Rolls tab. Select, on the other side of the switch, is the way into working on several swatches at once.
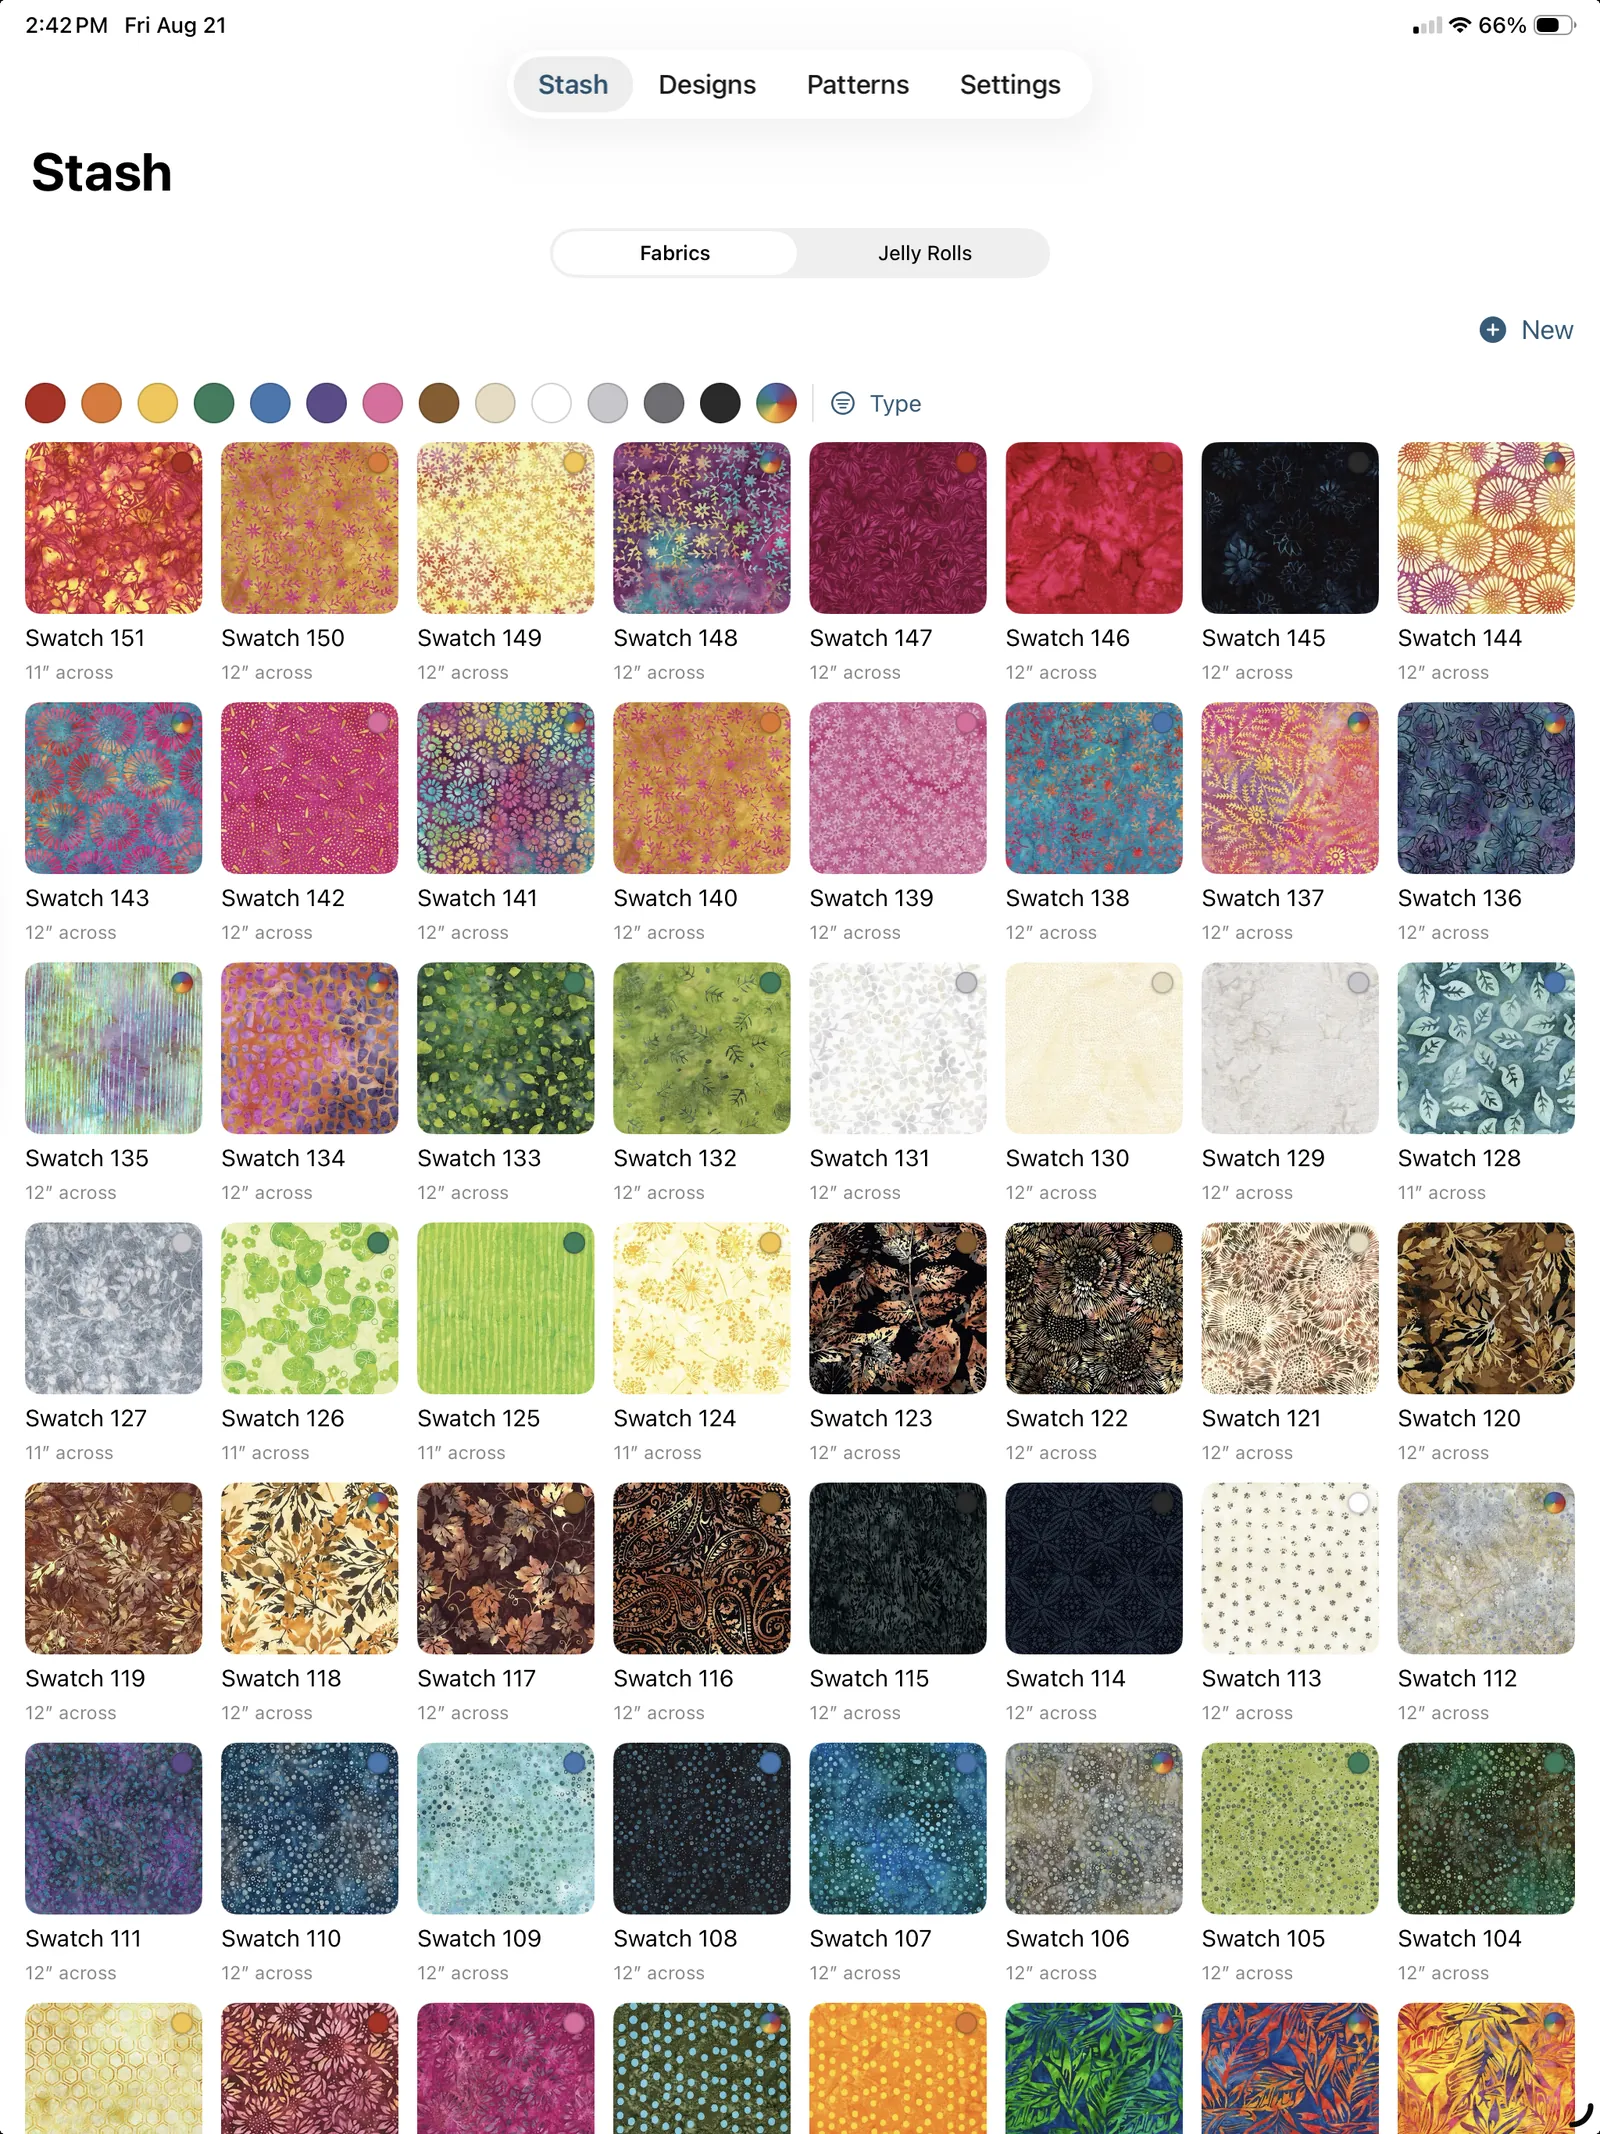
Adding a fabric swatch
- With Fabrics selected, tap + New.
- Choose how to bring in the photo:
- Take Photo: use the in-app camera. A framing box shows the square (or the long strip for a jelly-roll) your swatch will be cropped to, with everything outside it dimmed but still visible, so you can keep your cutting mat in the shot for scale, the on-screen hint says exactly that: "Fill the square with your fabric. Keep your cutting mat in view to size prints." Tap the grid button (top right) to lay a rule-of-thirds grid inside the box for lining up a directional print; it's off until you ask for it.
- Choose One (crop it): pick a single photo and crop it yourself.
- Add Several from Library: multi-select as many photos as you like at once; each is auto-cropped to a square. This is the fast way to load a lot of fabric.
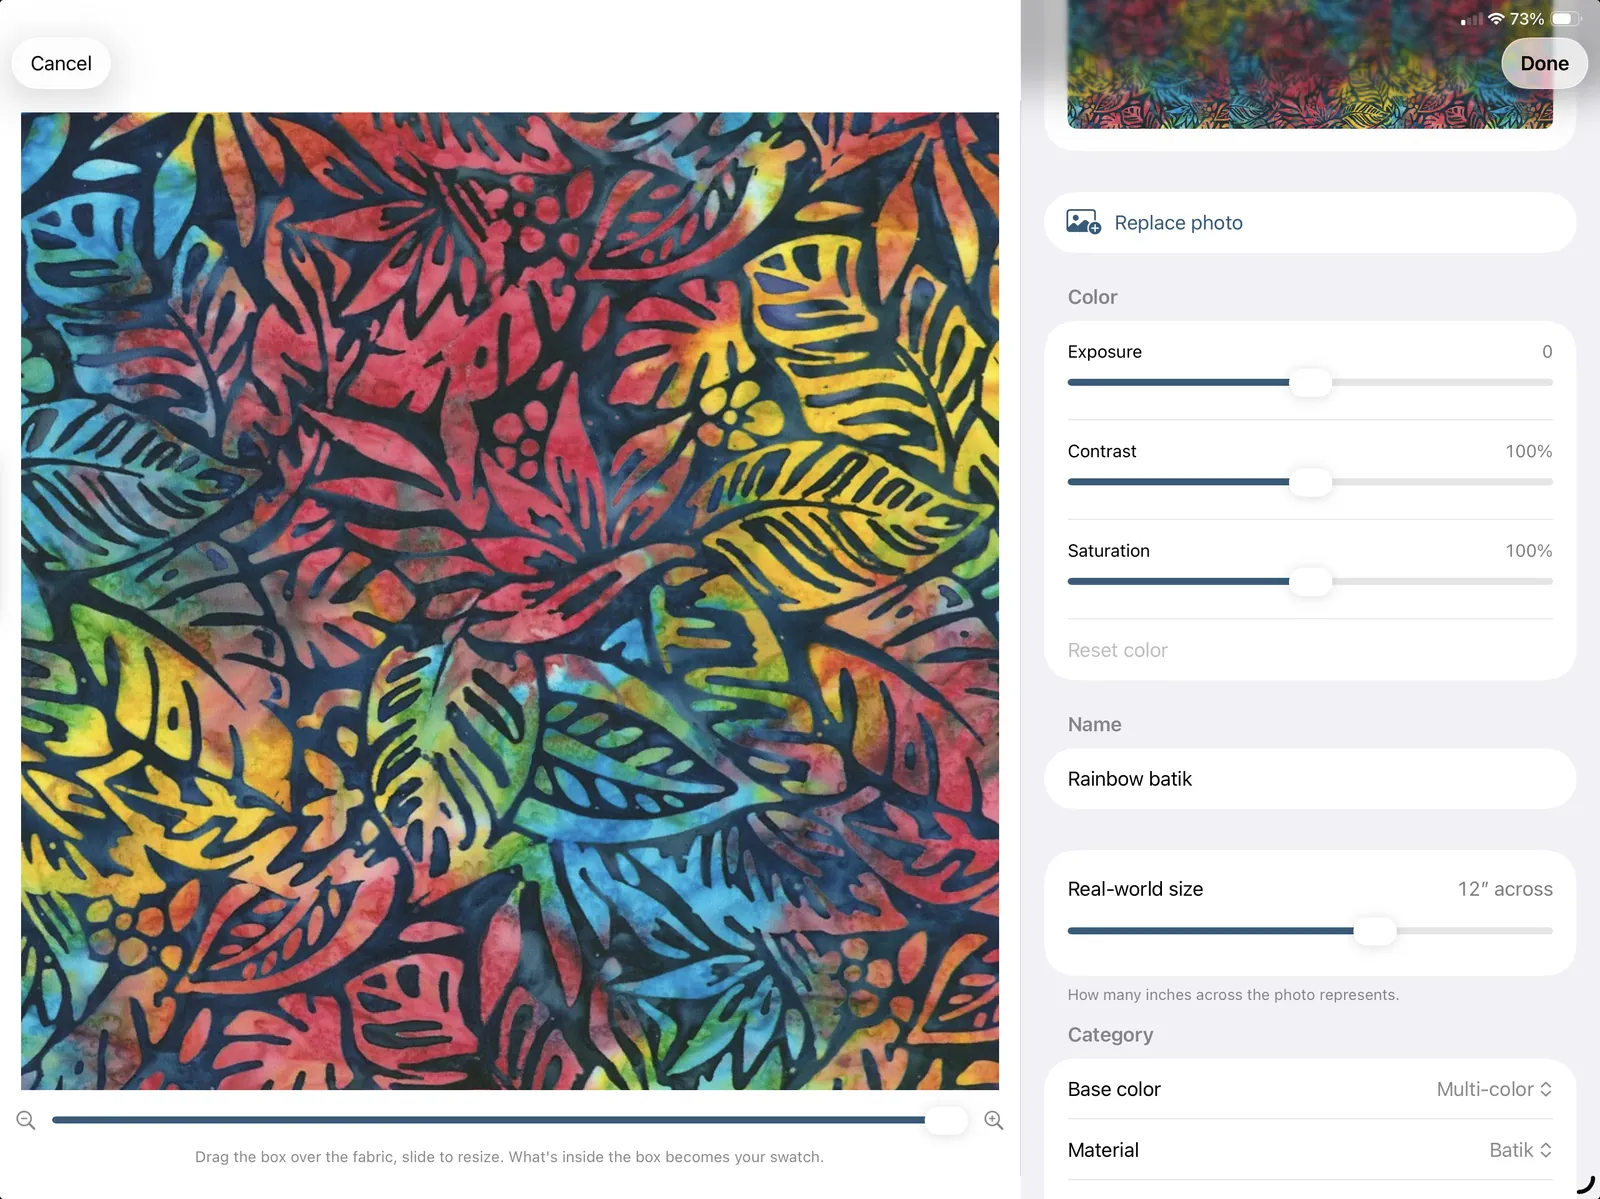
- For a single photo you land in the swatch editor, where the crop and the details live on one screen:
- Crop by dragging the box over the part of the fabric you want and sliding it larger or smaller. It's live, so everything else updates as you drag.
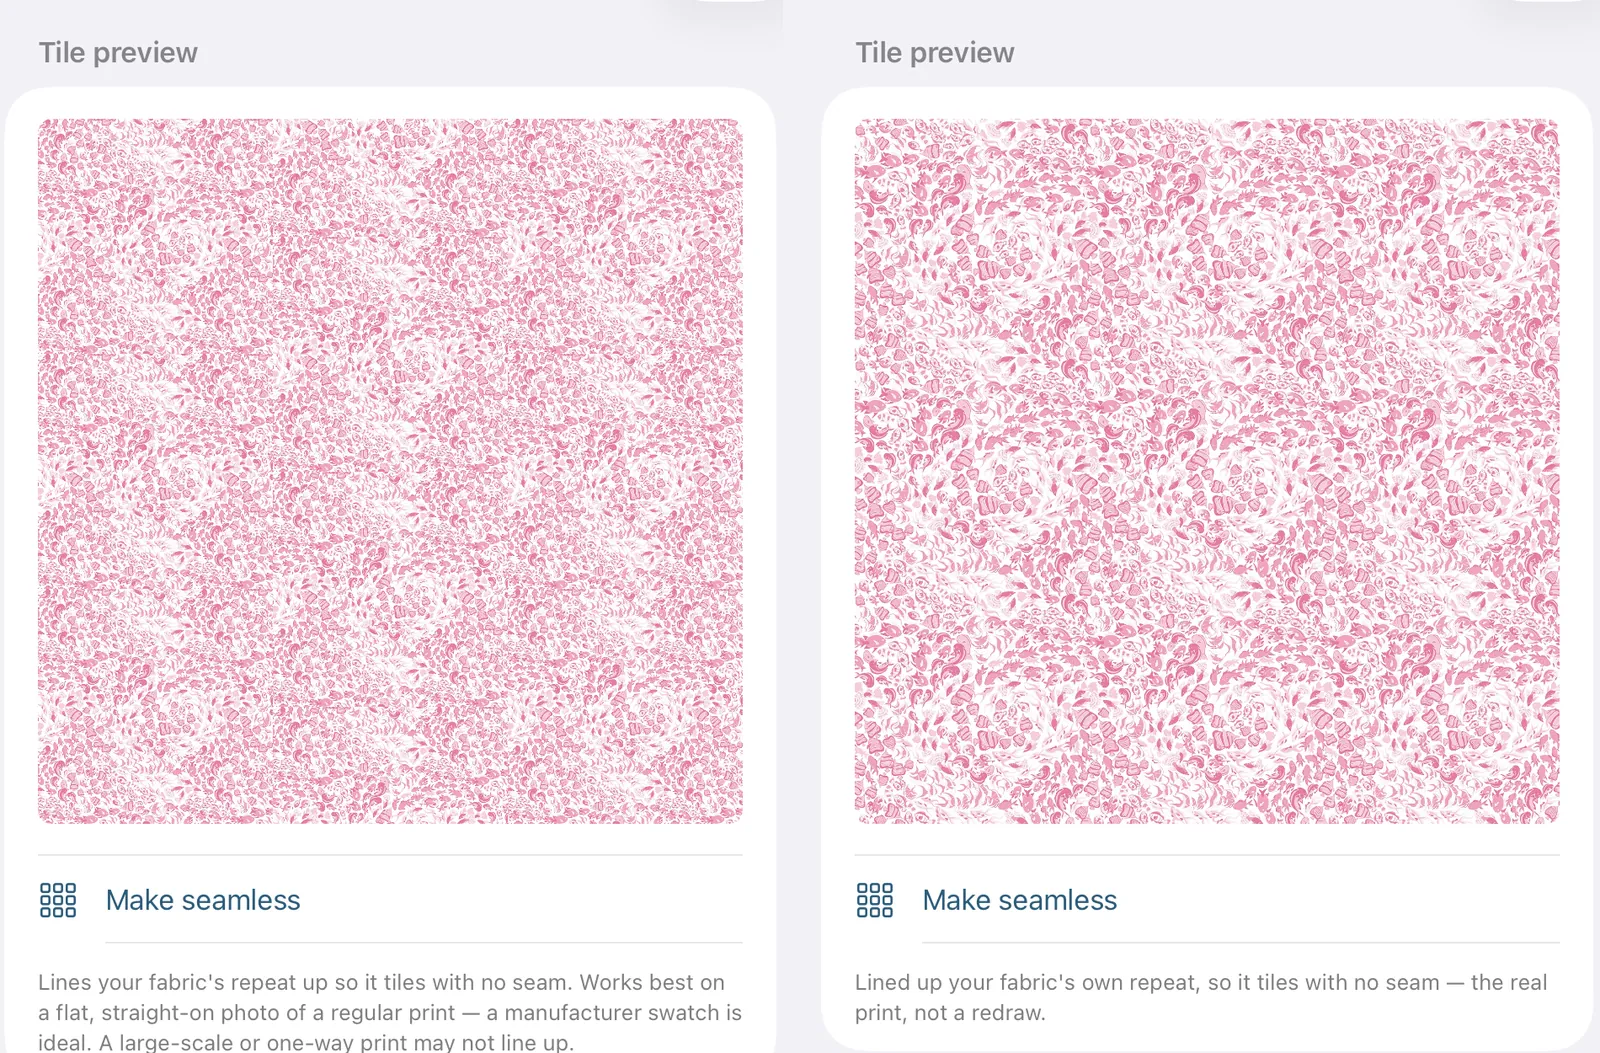
- A tile preview shows the fabric repeated, so you can see how it reads as yardage.
- Give it a name (e.g. "Blue floral").
- Set the real-world size, right under the crop: how many inches across the photo represents (1″–18″). This is what makes the tiling scale correctly later, so it's worth getting roughly right.
- Optionally set a Category: Base color, Material, and Print style. All three are optional and default to None, they just make a big stash easier to filter later (see Filtering the stash). You can always set them afterward when editing the swatch.
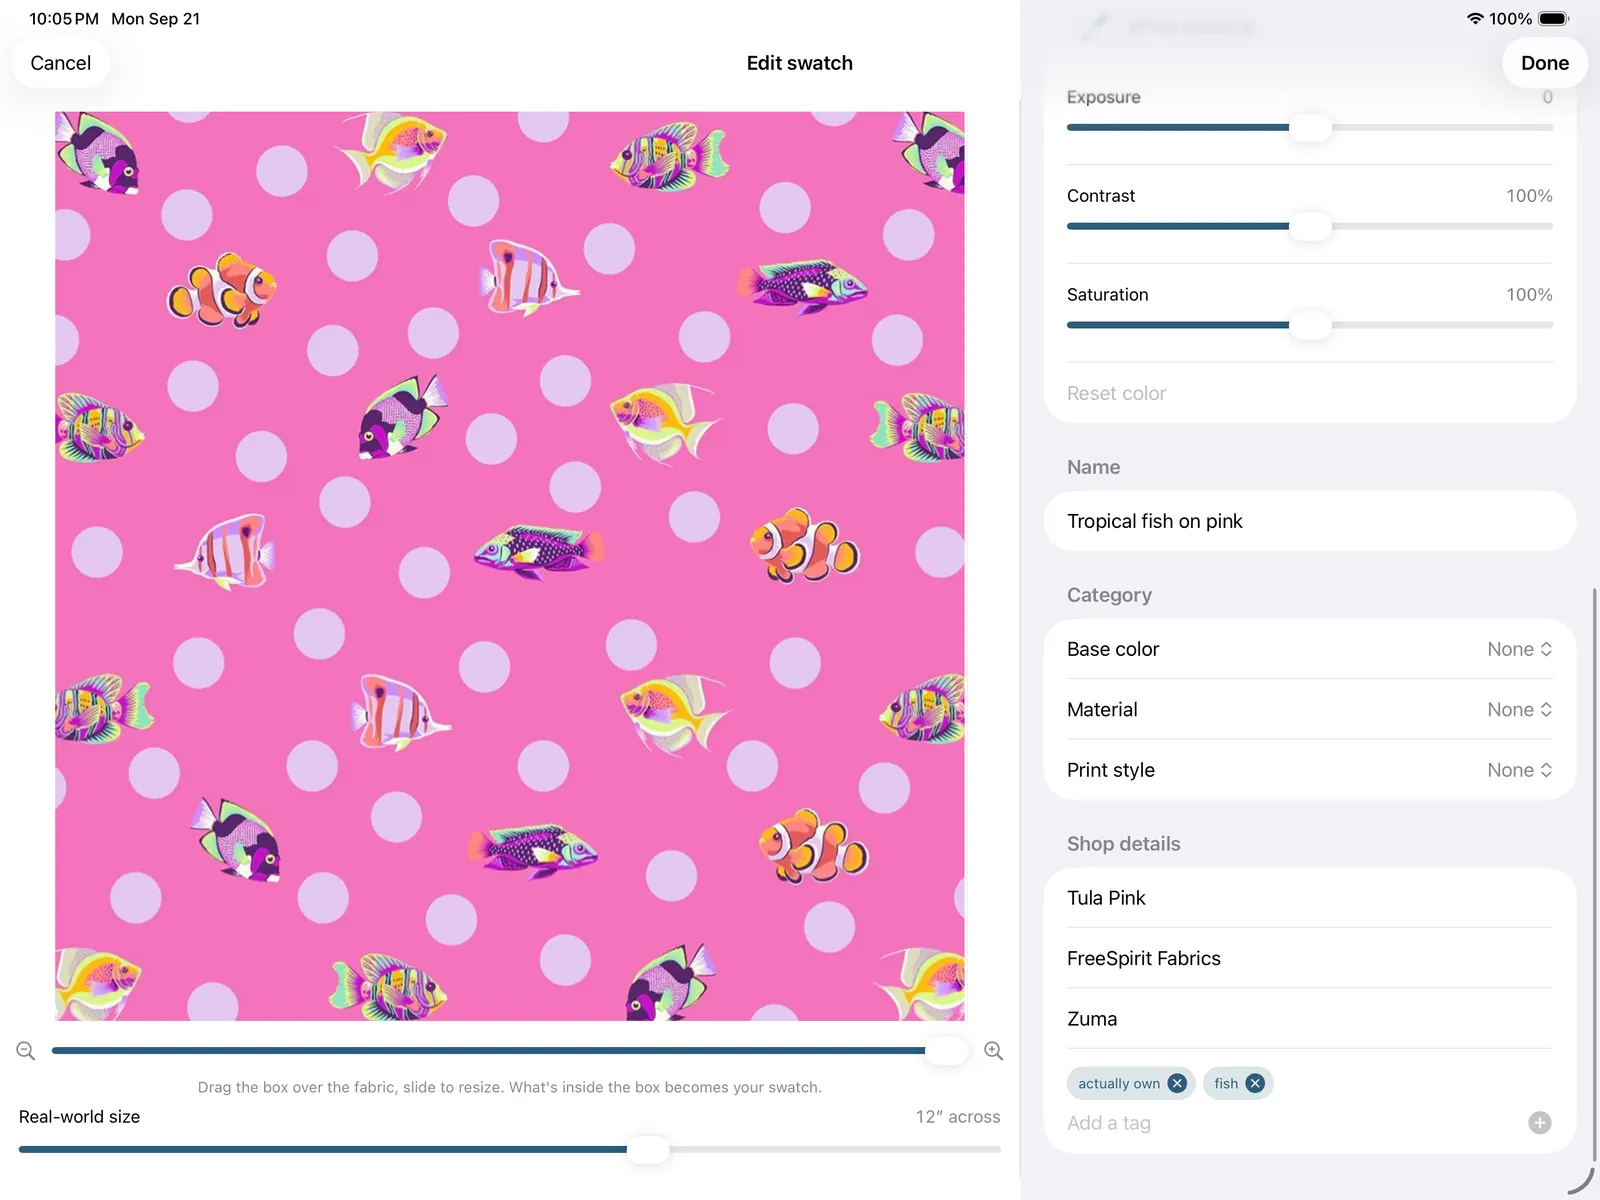
- Optionally add Shop details: Designer, Manufacturer, Line / collection, and any tags you like. All optional, and like the category they're only there to make a big stash searchable later. Each field suggests names you've typed before, so a line you buy a lot of is one tap the second time.
- Color adjustment if the photo needs it: see Fixing a photo that came out wrong below.
- Tap Save.
The editor arranges itself around the space it's given, so you're never squinting at a postage stamp: the crop sits beside the controls on an iPad in landscape or a roomy Mac window, above two columns of controls on an iPad in portrait, and in one scrolling column on a phone. Same controls throughout, just laid out for the room.
Make a print tile without a seam. Under the tile preview sits a Make seamless button. Real fabric repeats across a bolt; a single photo of it doesn't, so when a swatch tiles you can see the join where one copy meets the next. Tap Make seamless and TideStitch finds the print's repeat and lines it up so it tiles cleanly. It works out for itself what it's looking at: a stripe or a dot print gets redrawn clean from your fabric's own colors, which trades the photo's texture for flat color but carries the lines and dots perfectly across every tile, while a busier print keeps its real pixels, cropped to a whole number of repeats. It never changes the swatch's scale, and if it can't find a clean repeat it says so and leaves the photo alone rather than faking one, so a fabric it can't help is no worse for the try. It's happiest on a flat, straight-on photo of a regular print, a manufacturer swatch is ideal; a large-scale or one-way print may not line up.
Changed your mind about the photo? Use Use a different photo right there in the editor rather than starting over (the same button reads Replace photo once the swatch is saved, which is where it earns its keep, see below).
When you Add Several from Library, a quick Shop details (optional) step lets you set the Designer, Manufacturer, Line, and tags for the whole batch at once, and naming a line numbers them for you ("Named Blossom 1 to 12. You can rename any of them later."). The color and type categories still come in blank, so tag those per swatch afterward from its details.
Editing or deleting a swatch
Tap any swatch to open its details, where you can:
- Rename it.
- Adjust its real-world size. Because fabric is drawn at true scale, this directly changes how large the print reads in your blocks: size a swatch to match its patch and it shows as one clean piece instead of a repeat.
- Recrop it: the crop box is right there, so drag it over a different part of the fabric or resize it and watch the tile preview keep up.
- Replace the photo entirely with Replace photo, which offers Take Photo and Choose Photo. The new photo is cropped at the same shape as the old one (square for a swatch, long for a jelly-roll strip) and takes its place.
- Set its Category, Base color, Material, Print style, or change one back to None. This is where you tag fabrics you added in a bulk import.
- Set its Shop details, Designer, Manufacturer, Line / collection, and tags, the same fields the add screen offers, editable here per swatch.
Recrop or replace? They fix different problems, and picking the wrong one is a wasted trip:
- Recrop reframes the photo you already have. Use it when the fabric is fine but the frame is off: too much background at the edges, or the part of the print you want sitting half outside the box.
- Replace photo swaps in a completely different photo. Use it when the photo itself is the problem: badly lit, out of focus, or shot at the wrong angle. Recropping can't rescue any of those, because the pixels don't get better when you crop them.
Either way it stays the same fabric. The name, real-world size, and category are untouched, and every design already using it repaints itself with the new pixels, from the stash tile to the design canvas to the library thumbnail. That is the whole point: deleting the swatch and adding the photo again makes a different fabric with a new identity, which leaves every quilt you have already painted still pointing at the old photo. Once a swatch has a base color, a small color dot appears in the corner of its stash tile so the stash reads at a glance.
Fixing a photo that came out wrong
Fabric photographed in a dim living room reads wrong in every mockup you make from it, and going back for a better photo isn't always practical. So the editor's Color section can correct one, two ways.
The precise fix is the White balance eyedropper at the top of the section. If you shot the fabric next to something whose true color you know, a white, gray, or black reference card, even a scrap of white paper, tap White balance, say which card you used (White, Gray, or Black), and tap that card in the photo. It reads the color cast off that known-neutral spot and lifts it off the whole photo, and the fabric's real color comes back with it. A small chip shows what it applied ("Gray card"), and its ✕ clears just the white balance. If you tap something it can't read, a blown-out white, a spot so dark it's mostly camera speckle, it tells you and changes nothing rather than guessing.
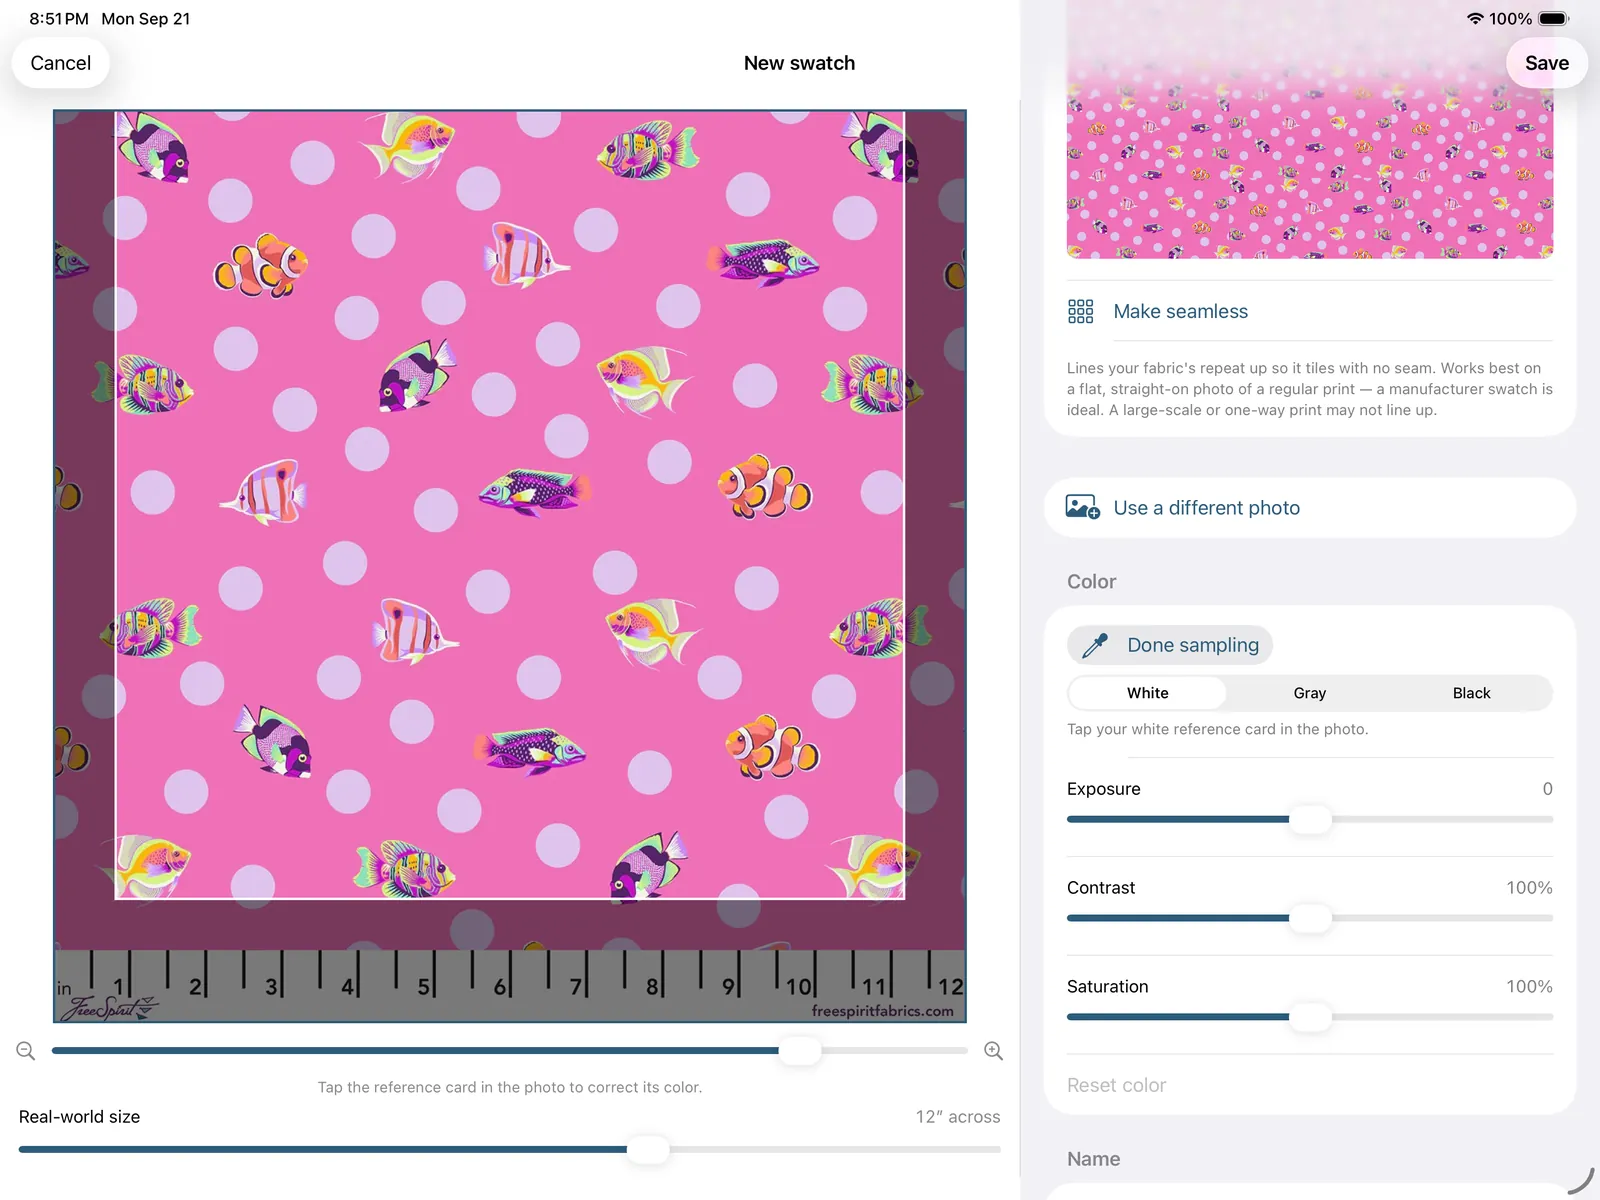
Under it are three sliders, for a photo that just needs nudging by eye:
- Exposure, for a photo that came out too dark or too bright.
- Contrast, for one that looks flat and washed out.
- Saturation, for when the color itself is off, the usual "make my teal look like my teal."
Everything here adjusts the swatch wherever it appears, so a corrected photo fixes the stash tile, every design using it, and the pattern's fabric list in one go. Reset color puts the whole section, the white balance and all three sliders, back where it started.
This is a color-correction bench, not a photo editor. It's here to fix the light the fabric was shot in so the fabric looks like the fabric, it won't sharpen, retouch, or restyle, and it isn't meant to.
To delete a swatch, press and hold it, choose Delete, and confirm in the dialog that appears; deletes are permanent and can't be undone, so the confirmation guards against a stray tap.
If the fabric is painted into any of your quilts, the confirmation says so before you commit: "It's used in 3 designs, and those patches go back to unfilled." That's exactly what happens, the designs keep their layout and every patch wearing that fabric simply goes empty, ready to be repainted. A fabric nothing uses deletes without the extra sentence.
Doing something to several at once. Tap Select above the fabric grid to enter selection mode (it's on the Fabrics half; jelly rolls are managed a roll at a time), tap the swatches you want, or Select All, and the title counts them as you go: "14 Selected." Two things can then happen to the batch. Cancel leaves selection mode without touching anything.
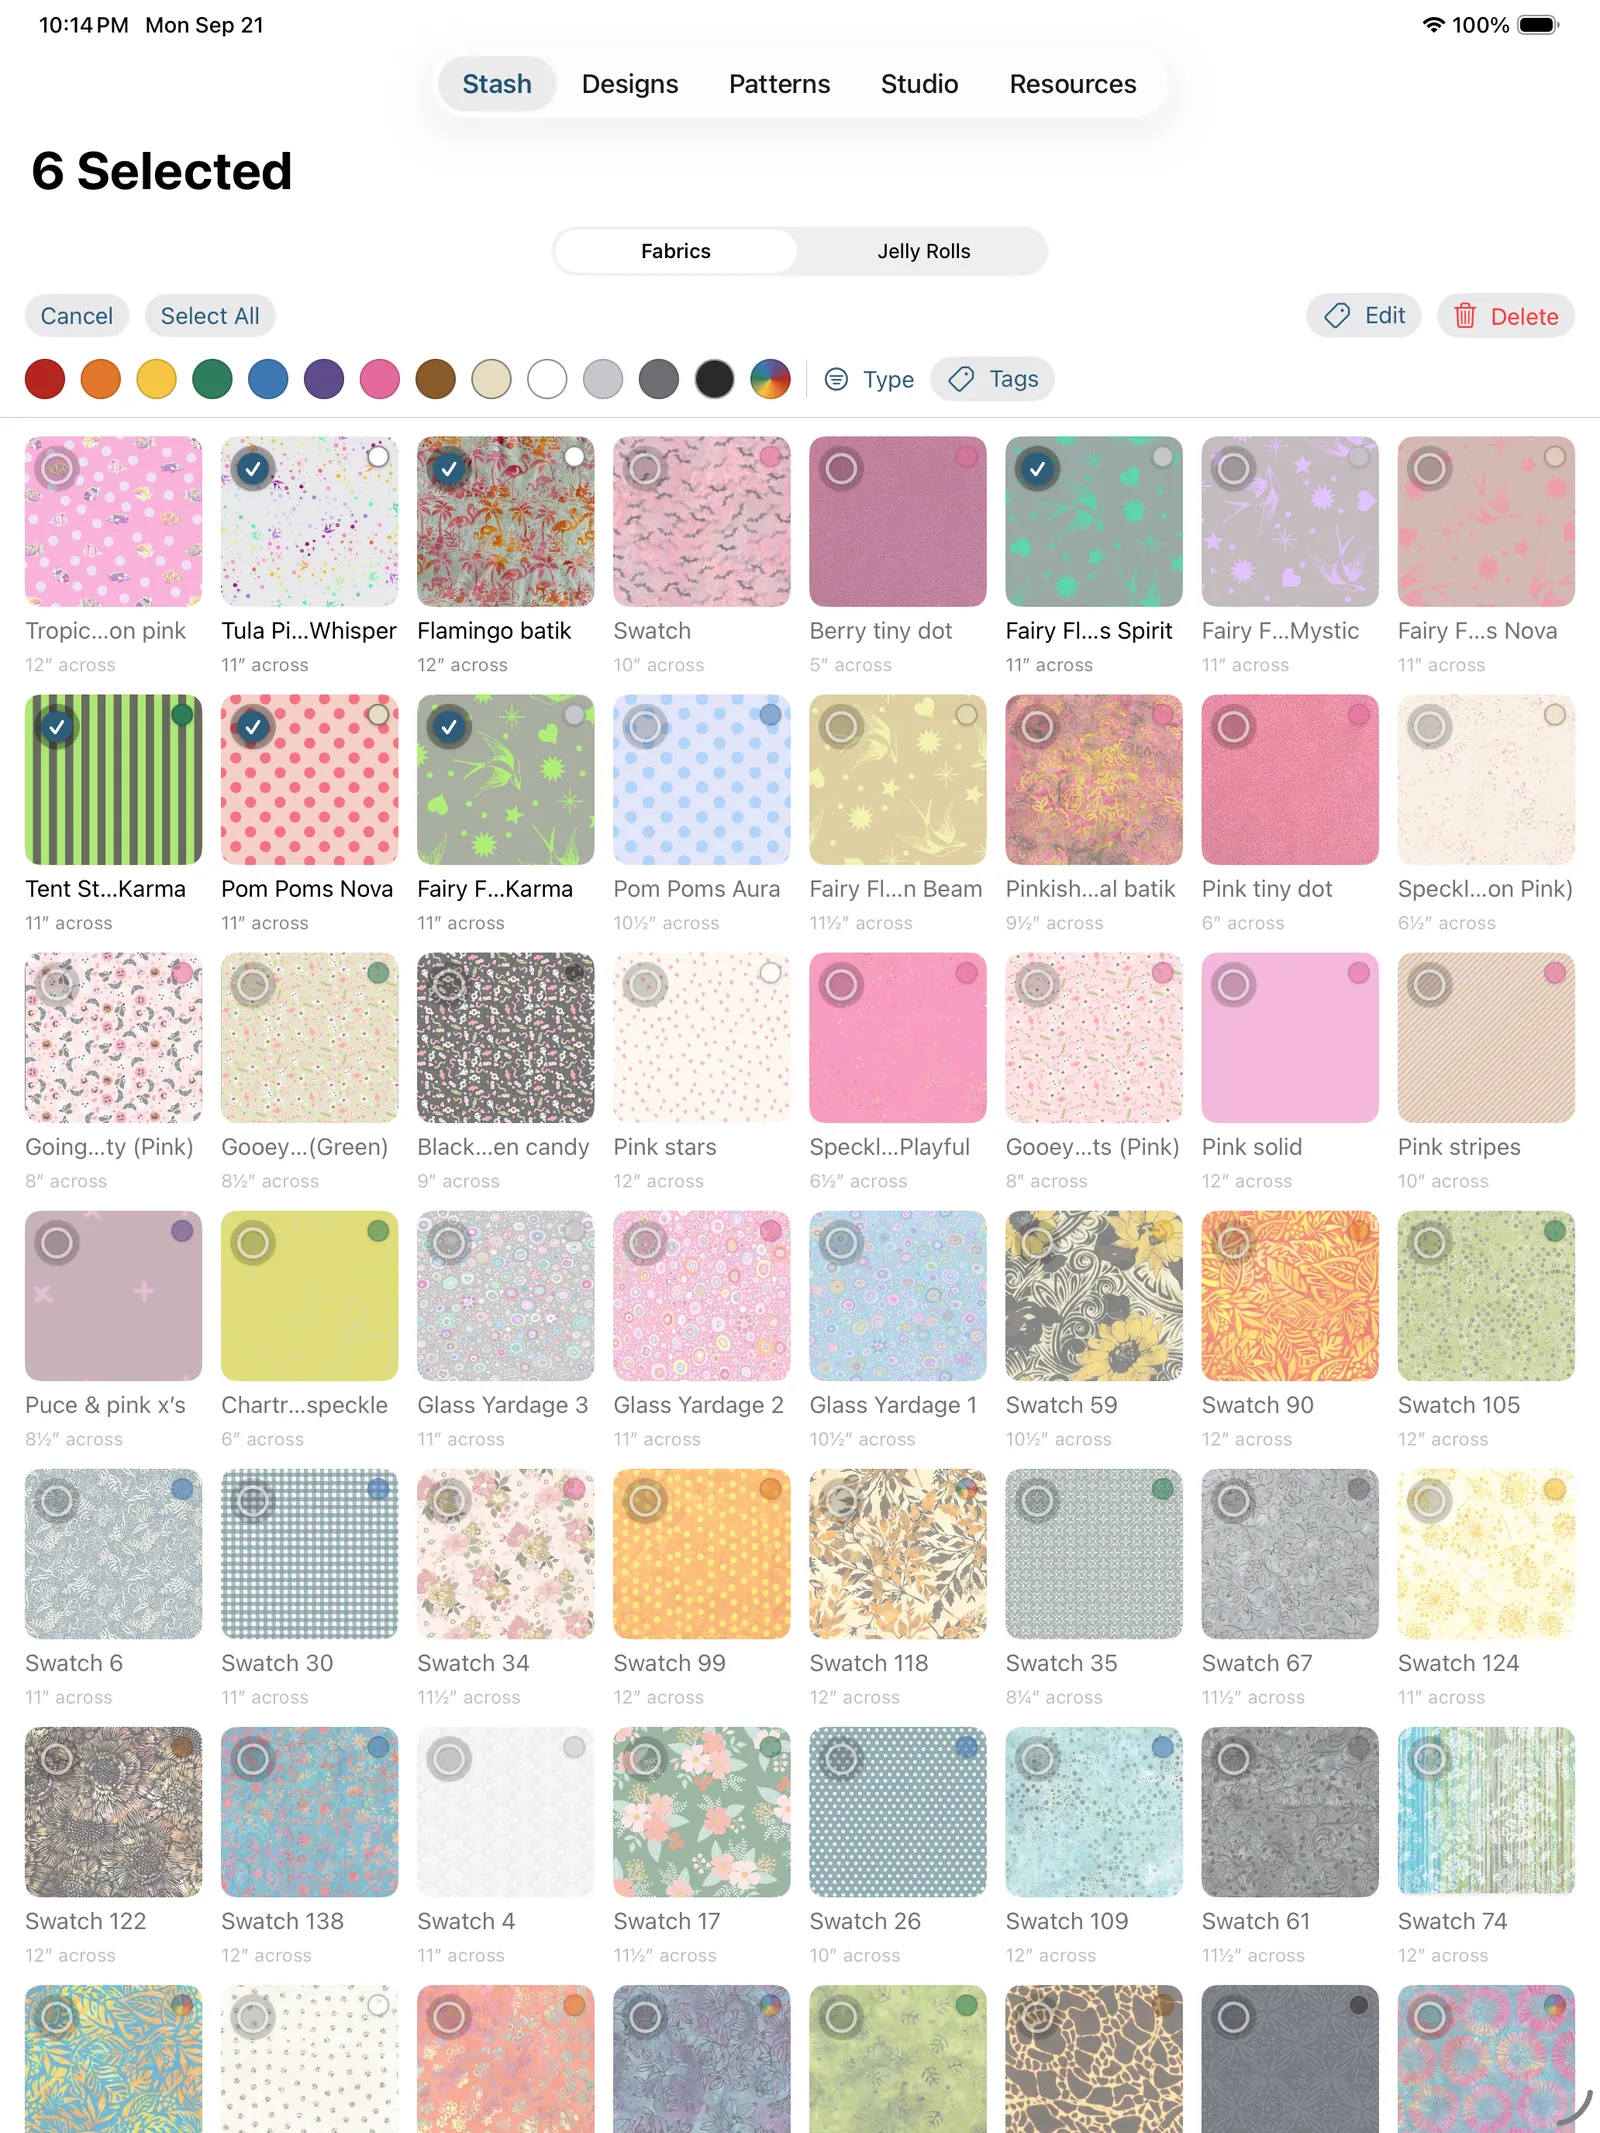
Delete removes the lot after one confirmation ("3 fabrics will be removed. This can't be undone."), and exactly like a single delete it warns first if any are painted into a quilt ("They're used in 5 designs, and those patches go back to unfilled.").
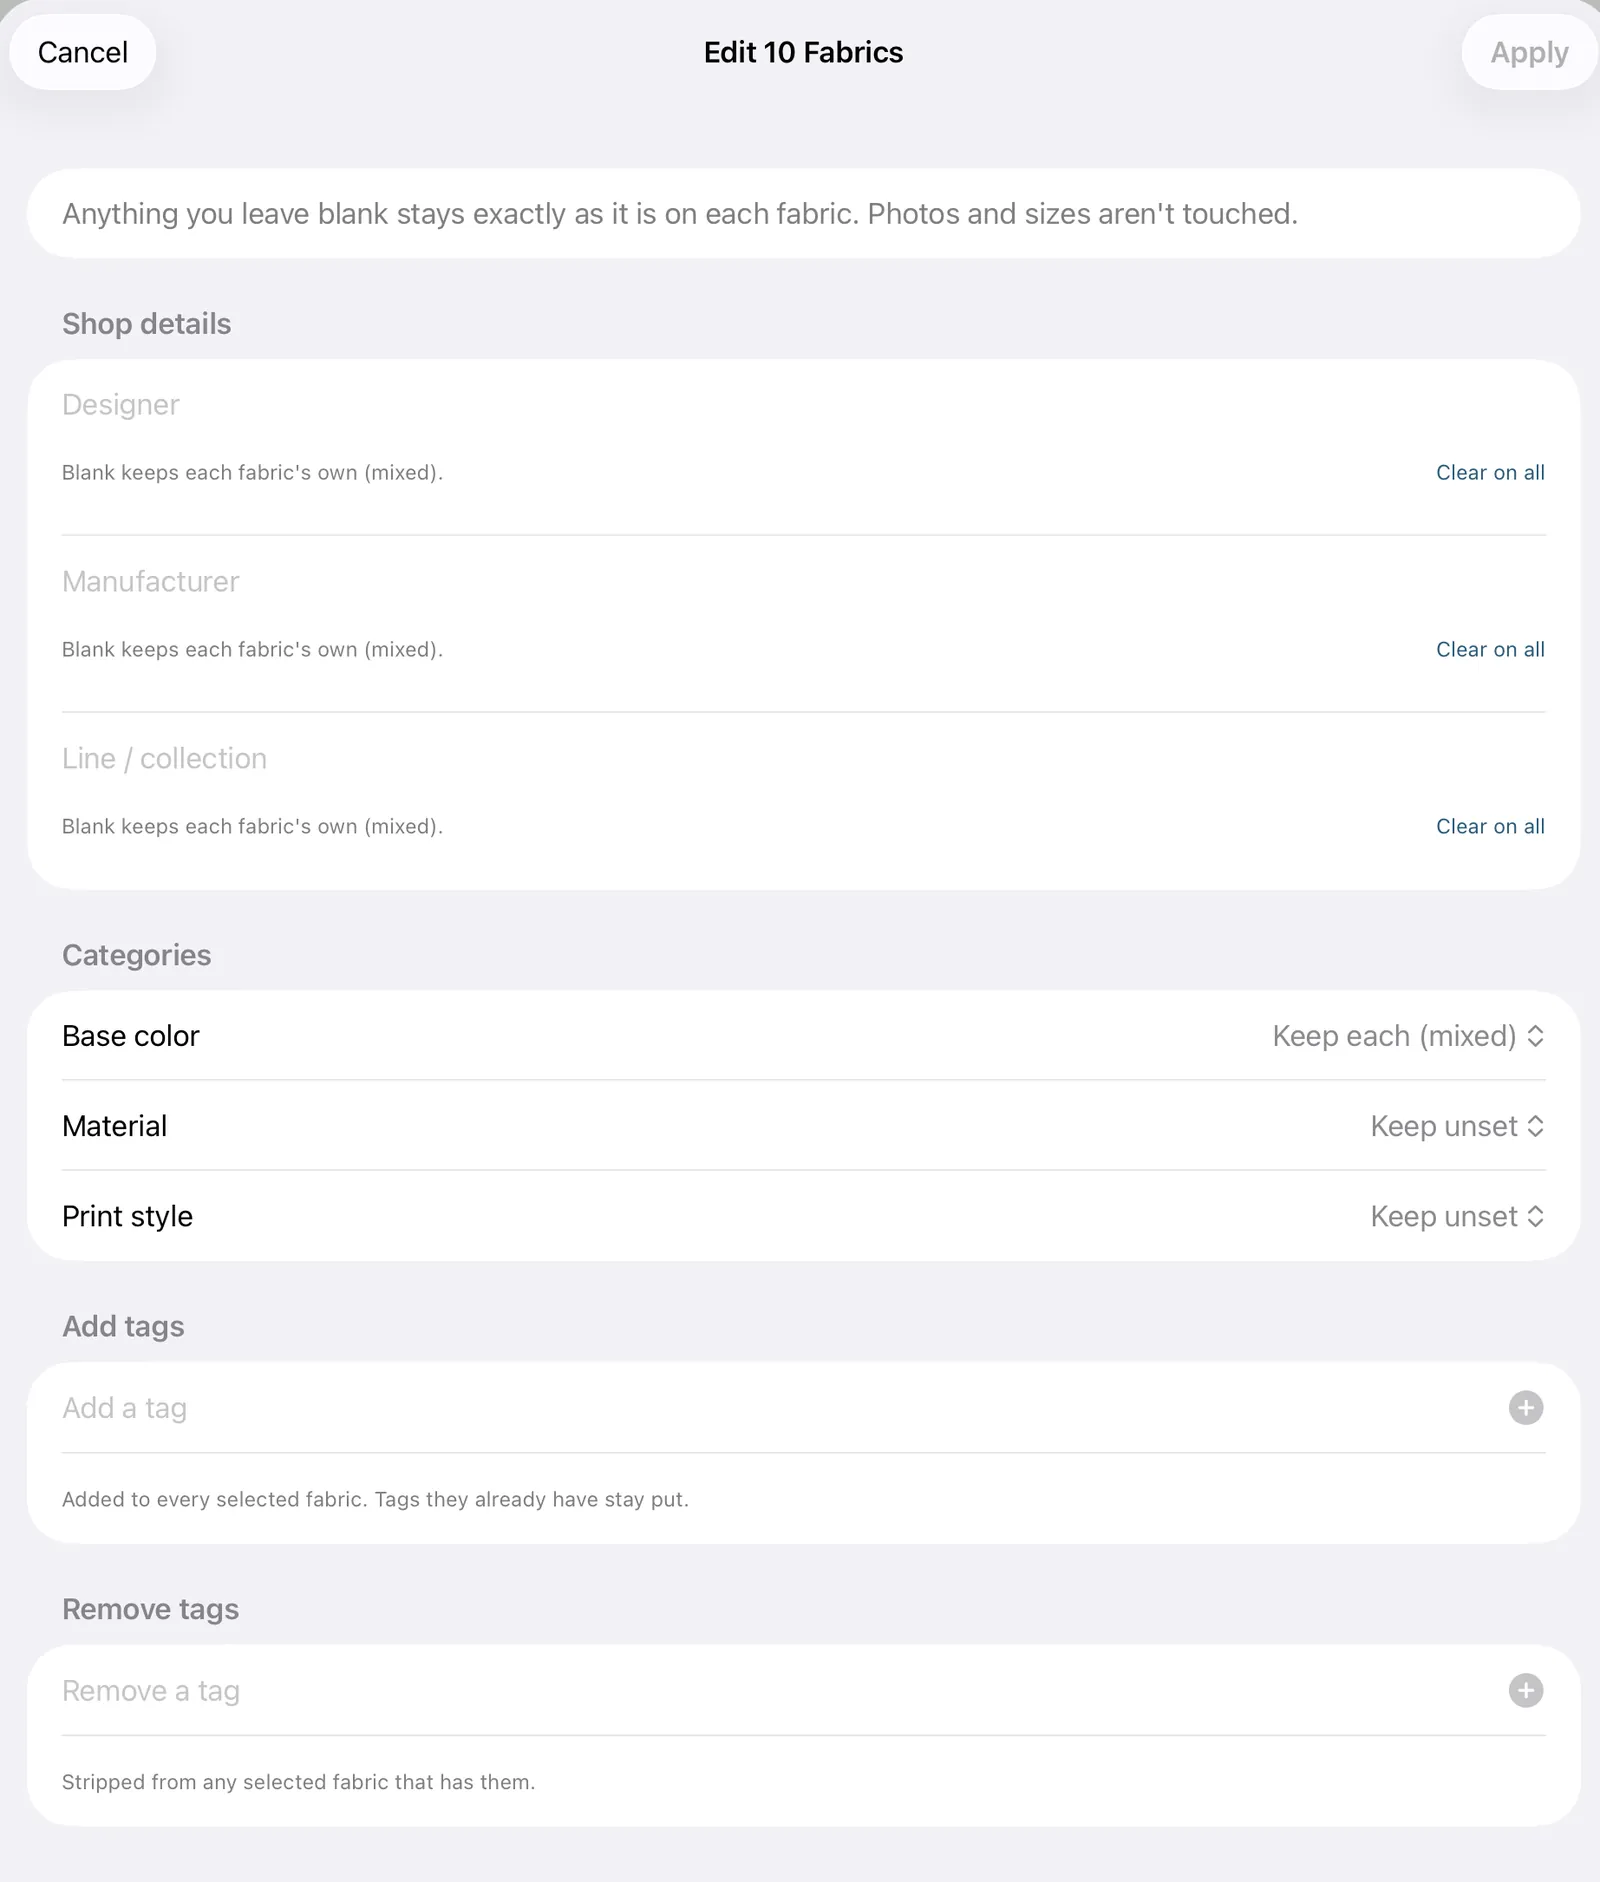
Edit opens the metadata half of the swatch editor pointed at the whole selection: Designer, Manufacturer, Line / collection, the three category axes, and tags, each with the same autocomplete off your own stash, so a bulk edit reuses spellings you already have rather than minting near-duplicates that split the filter. It's the answer to a line you bought before you were filling shop details in, or forty scraps that all want tagging "actually own."
Anything you leave blank stays exactly as it is, and the sheet says so on every field rather than asking you to take it on trust. In the single-swatch editor an empty Designer means "this fabric has no designer," because empty is the value. Across fourteen fabrics that reading would be data loss: the fourteen may each have a different designer and the sheet opened blank. So every single-valued field tells you what leaving it alone would keep, "Blank keeps “Tula Pink” on all 14" when they agree and "Blank keeps each fabric's own (mixed)" when they don't, and the category pickers open on Keep Pink or Keep each (mixed) rather than a bare "unchanged." Emptying a field is its own deliberate gesture, Clear on all, which turns the row red and offers Keep to back out of it.
Tags add and remove; there's no "replace all." Add tags puts a tag on every selected fabric and leaves the ones they already carry alone. Remove tags strips the named ones from any fabric that has them, and only offers tags the selection actually carries, since the rest have nothing to strip. Naming the same tag in both is impossible; the most recent gesture wins and drops it from the other.
Apply asks once, with a plain summary of what's about to happen and to how many fabrics. Photos, real-world sizes and jelly-roll membership are deliberately out of reach here: those are measured off one specific piece of fabric, and there's no honest way to set them for fourteen at once.
Filtering the stash
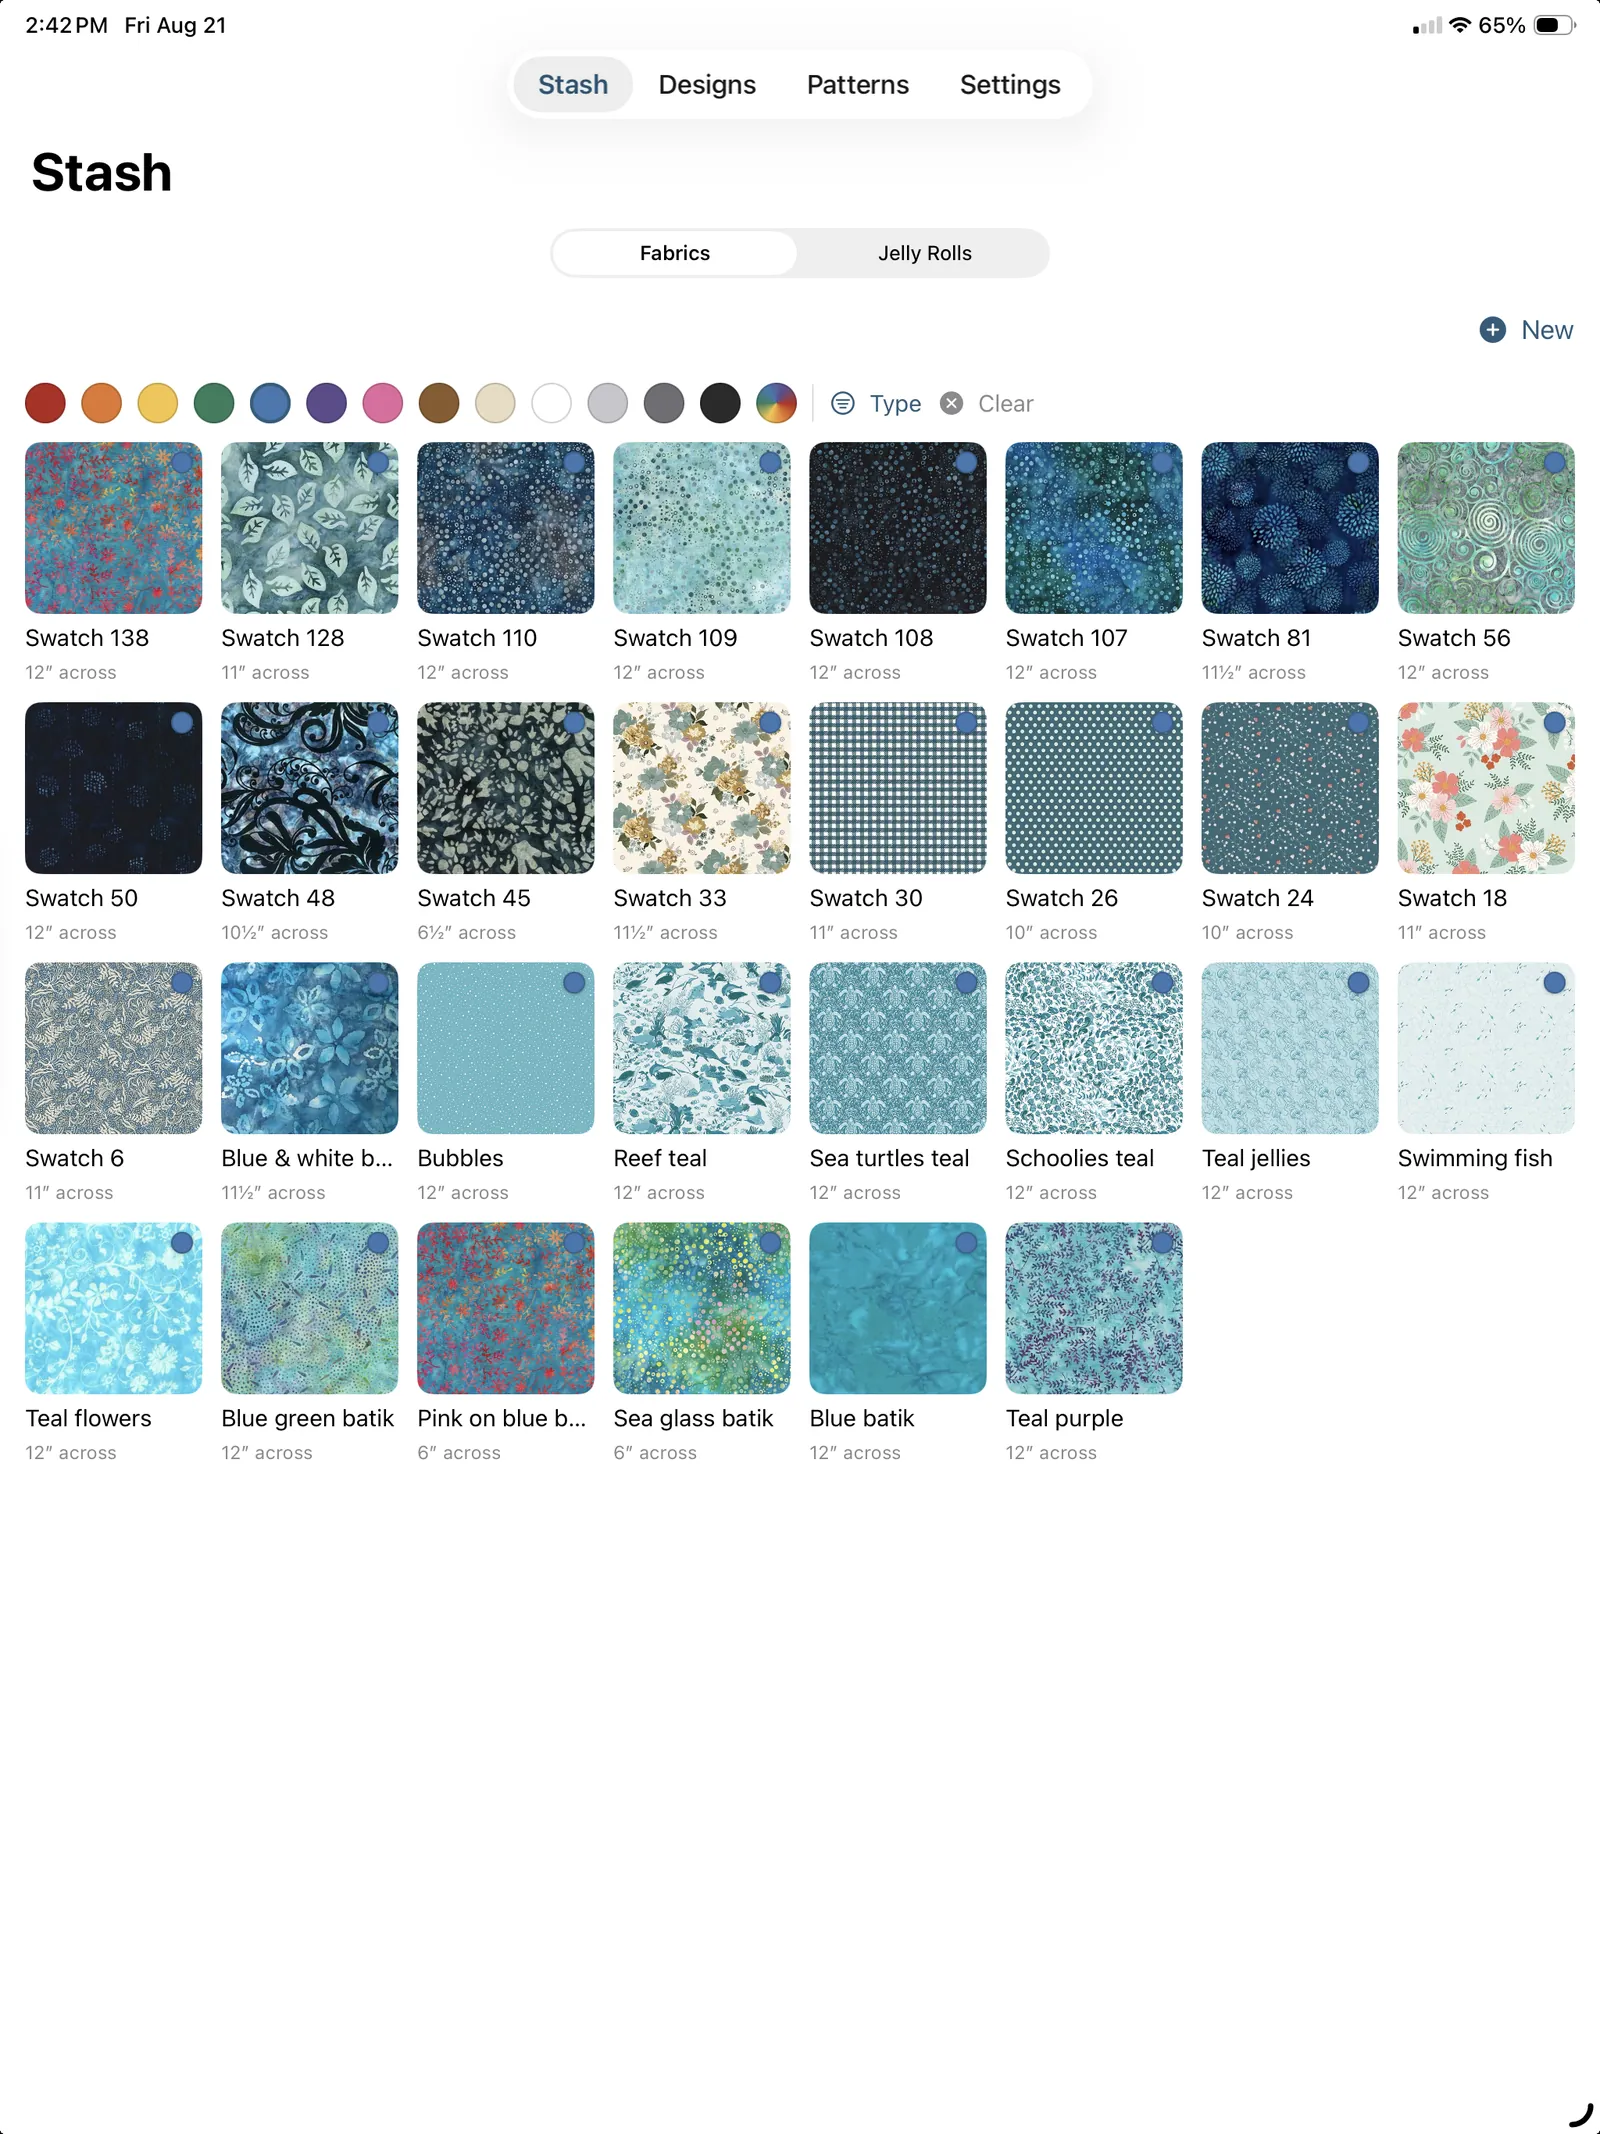
Once your stash grows, use the filter row above the swatch grid to narrow it. The whole band above the grid is pinned, the Fabrics / Jelly Rolls switch, Select, + New and the filters all stay put while the swatches scroll underneath, because a filter you have to scroll back to the top to reach is a filter you stop using at two hundred swatches.
- Tap one or more color dots to show only those base colors. Tap again to unselect.
- Use the Type menu to filter by Material and/or Print style (each entry is a checkmark toggle).
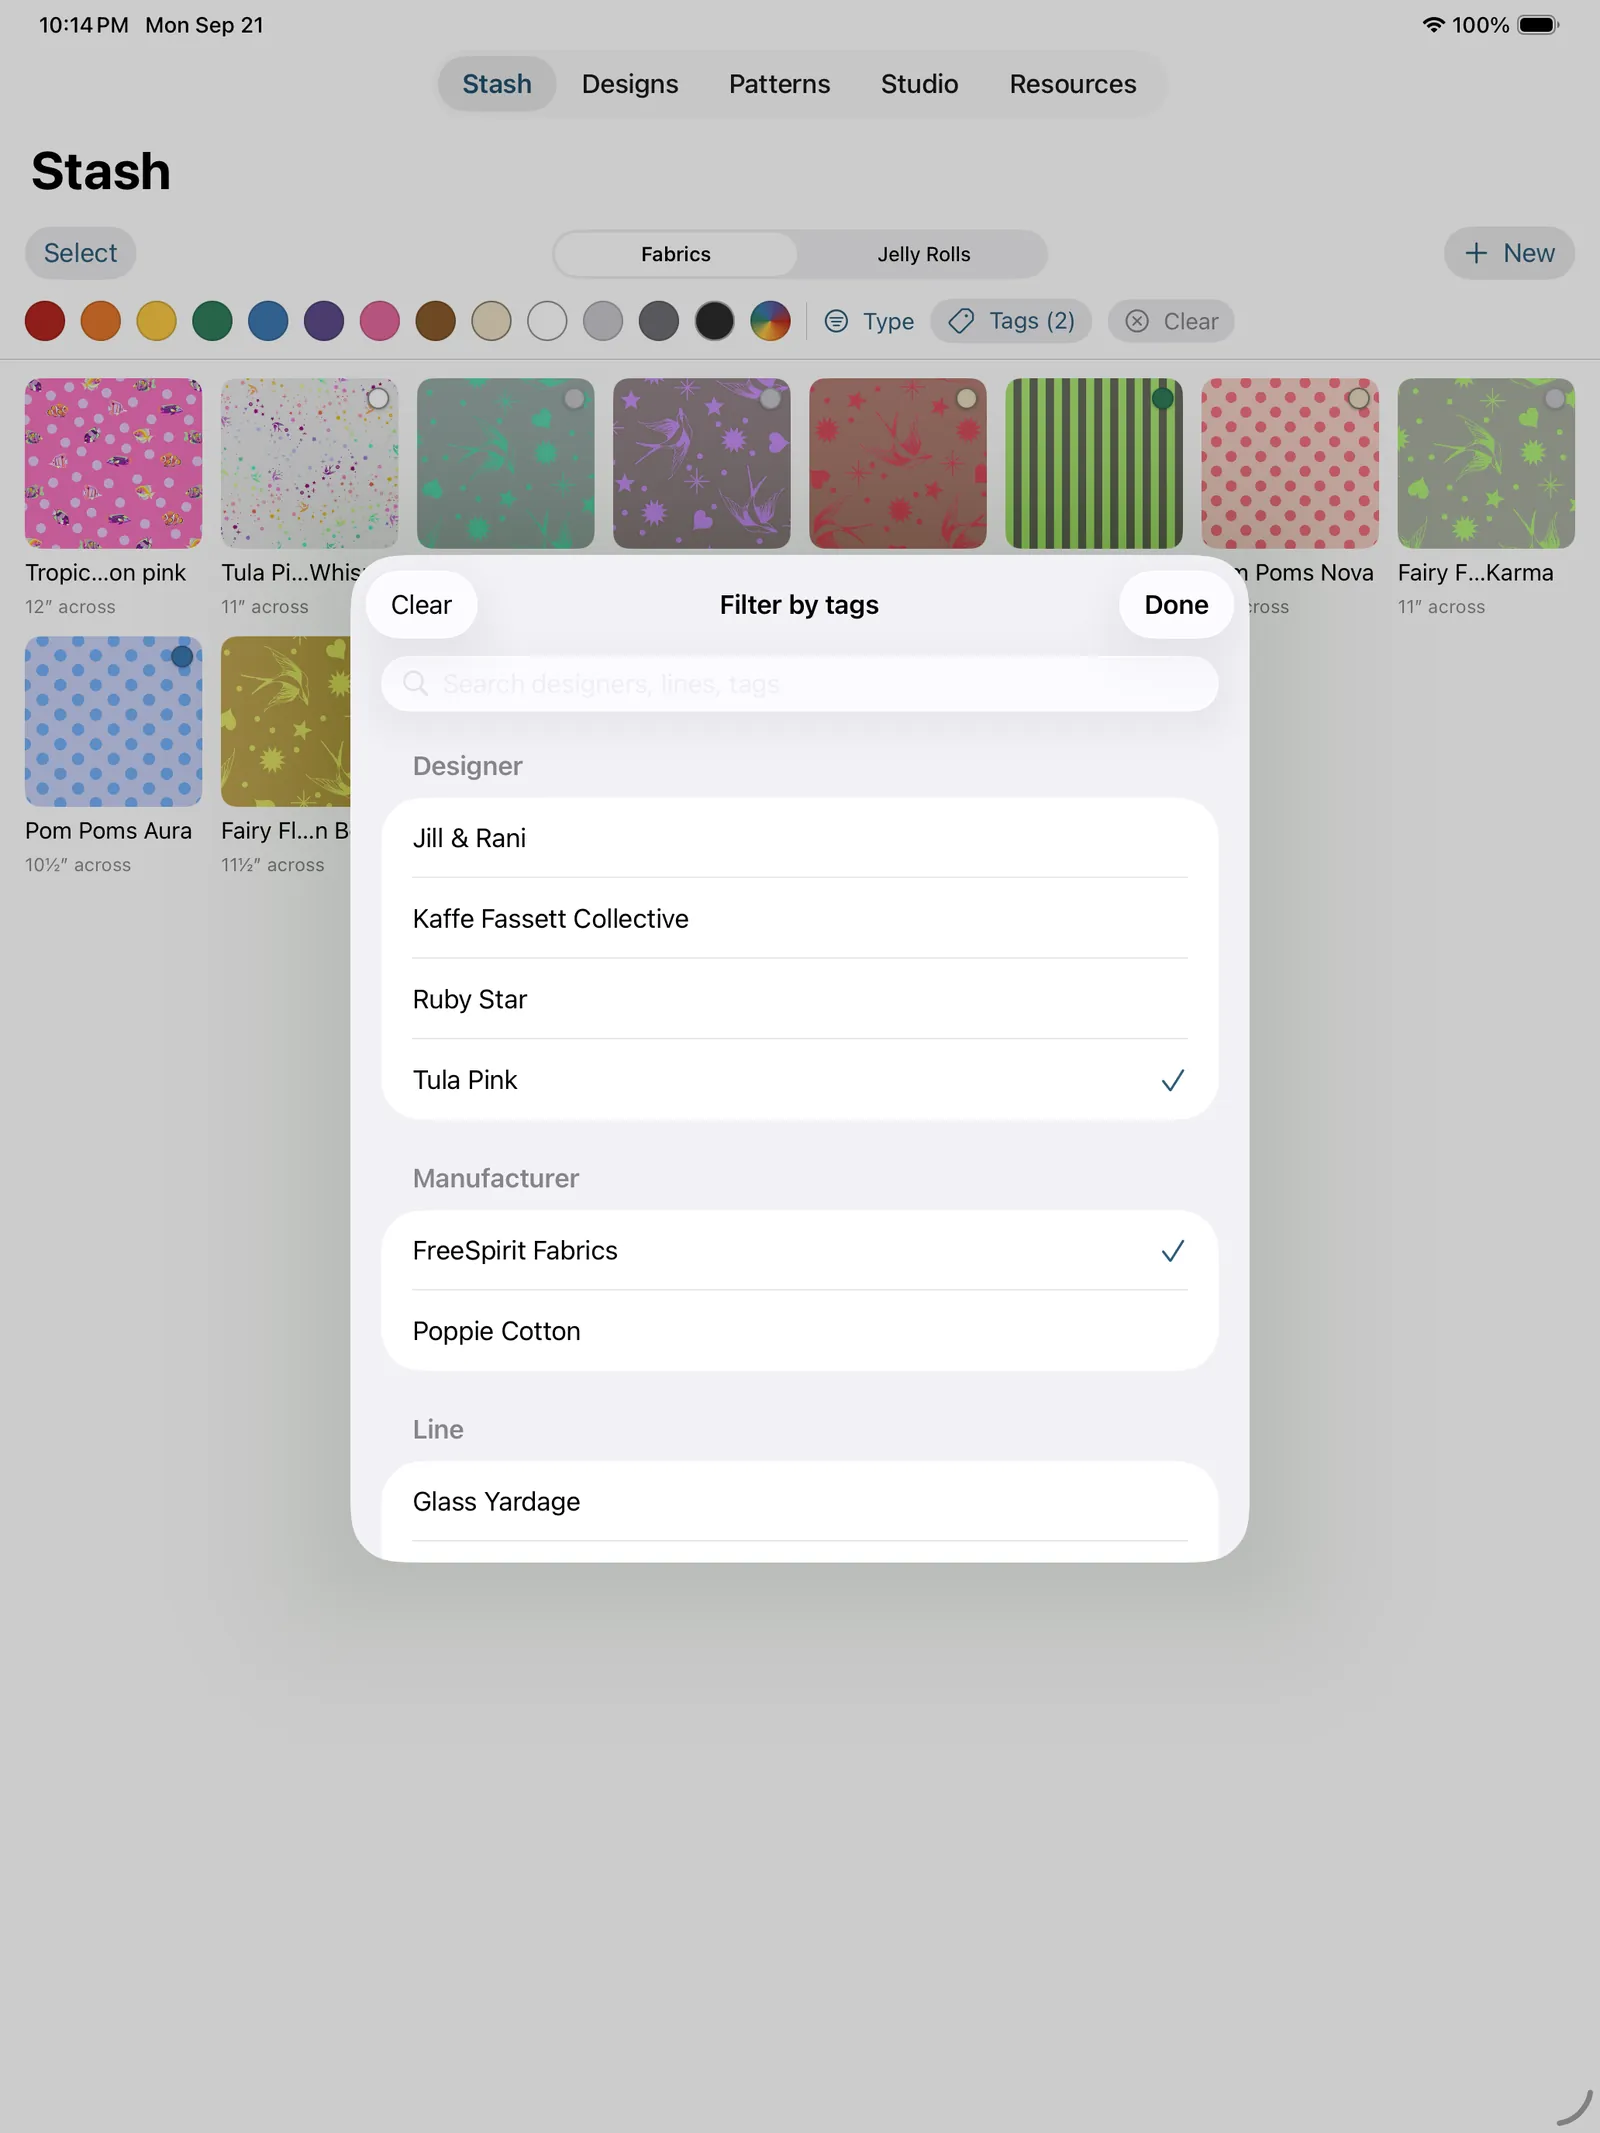
- Use the Tags button to filter by the shop details you've entered, Designer, Manufacturer, Line, and Tags. It opens a searchable sheet, since there can be a lot of names, where each is a checkmark; Tags (N) counts how many are active.
- Filters combine sensibly: within one axis, matches are ORed (Red or Blue, this designer or that one); across axes they're ANDed (a blue batik from that one line). The counts on Type and Tags show how many of each are active.
- Tap Clear to reset to the whole stash. If a filter hides everything, the grid shows "No fabrics match. Tap to clear filters.", and tapping that line clears them.
Swatches with nothing set are Uncategorized: they show whenever no filter is active, and are hidden only once you filter on an axis they don't have.
Jelly rolls
A jelly roll is a bundle of pre-cut fabric strips (classically 2.5″ wide). TideStitch treats it as its own thing because the patterns you'd make from it are strip-based.
Creating a jelly roll
- In the Stash, switch to the Jelly Rolls tab and tap + New.
- You land on the jelly roll's detail screen. Set:
- Name
- Strips: how many strips are in the roll (1–80).
- Strip width: usually 2.5″ (1″–4″).
- Strip length: typically around 42–44″ (20″–60″).
Photographing strips
In the Strips section, tap Add. The photo flow is the same as for swatches, except photos are cropped to a long rectangle and scaled so the strip's width renders at true size. Photograph as many strips as you like; the header tracks "X of Y photographed." You don't have to shoot every strip to start designing.
Strips are editable after the fact, just like swatches. Tap a strip to open its details, where you can rename it, adjust its real-world size, tap Recrop strip to reframe the photo, or tag it with categories. Press and hold a strip for Delete if a photo didn't work out; you can always photograph it again with Add.
Starting a design from a jelly roll
Once you've photographed at least one strip, tap New design from this jelly roll. This opens the pattern picker (see below).
To delete a jelly roll, press and hold its card in the Stash, choose Delete, and confirm; this removes the roll and all its strips, and can't be undone.
The Designs tab
The quilts you're building, newest activity first.
Gallery or list, your choice. Designs opens as a gallery of quilt pictures, because you know your own quilts by looking at them. The menu at the top right switches to a list, which trades the big pictures for names, sizes and more rows on screen. The choice sticks per tab, so picking gallery here doesn't reshape the Patterns tab, which you use at a different moment for a different reason.
Either way: tap a design to open it, swipe left to delete, and press and hold (Control-click on Mac) for a menu to Rename, Save As New, or Delete it without opening it.
Starter designs
When you first open TideStitch, your Designs tab already has a few ready-made quilts (a Nine-Patch, an Ohio Star, and a Log Cabin) so you have something to explore right away. They arrive painted, so they read as finished quilts rather than three empty grids, and they're marked read-only: open one and you can look at it, view its pattern, and see how it's put together, but the editing tools are hidden and a lock badge reads "Starter design, read-only." The original always stays as it is; editing makes your own copy.
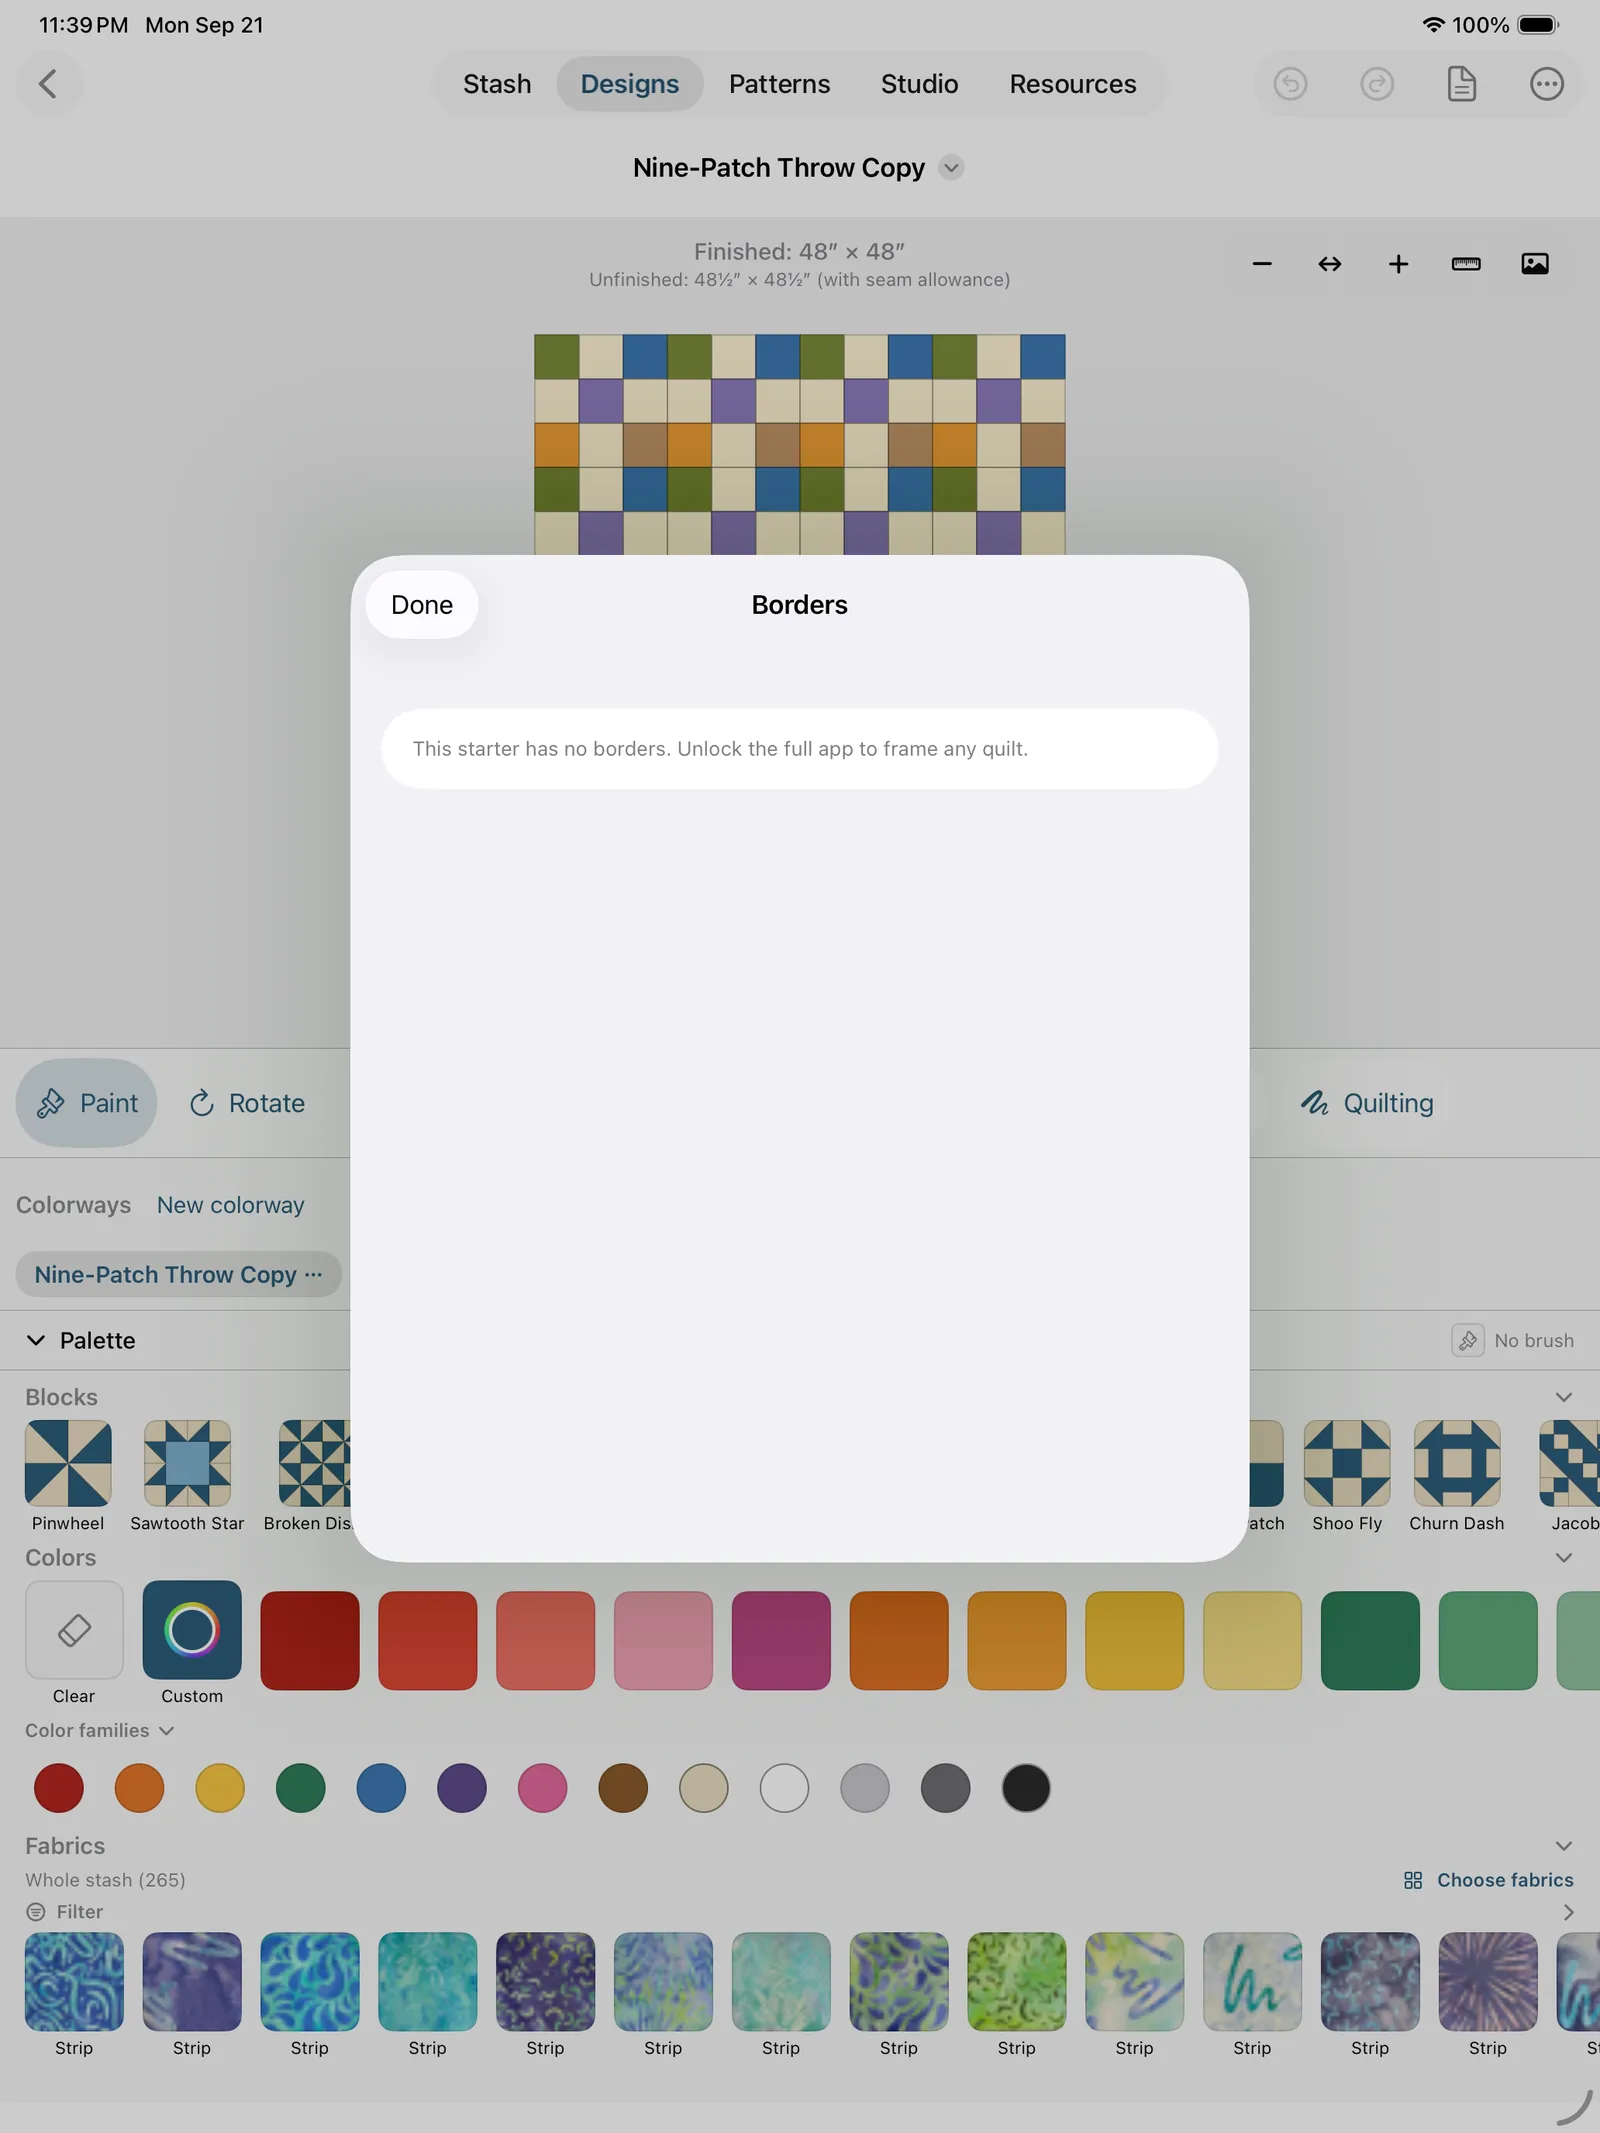
Before the unlock, that copy is a free sandbox. The button reads Paint This Starter (in the top bar and on the banner), and what it opens is your own copy of that quilt with every patch yours to paint from your own stash, the full pattern on screen (fabrics, cut list, sew steps, finishing) and no charge against your four free designs. What it holds fixed is the shape: rows, columns and finished size are locked (the Layout row explains and offers the unlock), and so are the borders: a starter that has them keeps them, with only their fabric open to change, and the three bundled starters have none, so Borders on a starter copy simply says "This starter has no borders. Unlock the full app to frame any quilt." PDF export stays with the unlock, like everywhere else. You get one live copy per starter: once you have it, the button reads Open My Copy and takes you back to it, painted as you left it. Delete it and you can start that starter over. Save As New from a starter copy makes an ordinary design, and that one counts.
Once you own the app the same button reads Duplicate to Edit, and the copy is a full design with nothing locked.
Don't want them? Swipe left to delete any you don't need; they only ever seed into a brand-new, empty library. If you delete one and want it back, Try a starter (under + on the Designs tab, and in the empty state when the tab is bare) drops in a fresh copy.
Copying a design (Save As New)
Press and hold any design in the list for Save As New, or use ••• → Save As New while you're in the editor. It makes an independent copy: same blocks, same layout, same fabrics, its own quilt from then on. Change one and the other doesn't move. A freeform board copies its colorways along with it, and the board you're working on is left exactly as it was.
Use it when you want a different quilt that starts from this one, resizing a queen into a matching baby quilt, say, or trying a whole new layout without losing the first. If you only want to try different fabrics on the same layout, you want a colorway instead: it's free, and it keeps both versions inside the one design where you can compare them.
The copy is a real design in its own right, so if a free-design limit is in effect it counts toward it. On a starter design this same action reads Duplicate to Edit, which is how you get an editable copy of a read-only quilt.
Copies name themselves the way Finder does: "Ohio Star Sampler" gives you "Ohio Star Sampler Copy", then "Copy 2", "Copy 3" as those names get taken. Copy a copy and it re-roots rather than stacking up, so you never end up with "Copy Copy". Rename it to something you'll recognize at the cutting table.
Sharing a design with another quilter
Press and hold any design of your own in the list for Share…, or use ••• → Share… in the editor. TideStitch packs that one quilt into a .tidestitch file (its layout, borders, colorways, the fabrics it wears with their swatch photos, and any block you drew that it's built on, and nothing else from your library) and opens the share sheet, so AirDrop, Messages, Mail and Files are all there. It was built for a class: hand one file to the room and nobody needs wifi or an account. Your own copy is untouched; sharing it doesn't change or lock anything on your end. On a Mac, Share… saves the file for you to send however you like.
On the other end, tap the file (in Messages, Mail, or when AirDrop hands it over) and TideStitch opens straight onto the design. It arrives read-only, with a banner that reads "Shared with you, read-only": look at it, view its pattern, and tap Duplicate to Edit to make your own copy you can paint and change. The fabrics come into your stash so the quilt shows up colored, and importing the same file twice adds nothing the second time. A file that's already sitting in Files opens the same way through Settings → Backup & Restore → Import Library….
A shared design isn't one of your designs, so it never counts toward the free-design limit. Your Duplicate to Edit copy of it is yours, and it counts and is treated exactly like a design you made from scratch: preview-only pattern until the unlock, full pattern after. (It is not a starter, and doesn't get a starter's free pattern.) You can share your copy on; the original shared design isn't yours to share, so the app doesn't offer it. A block that was sent to you "just for you" stays that way inside a design too: TideStitch won't share a design that's built on one.
Starting a block design
- Tap + ("New design").
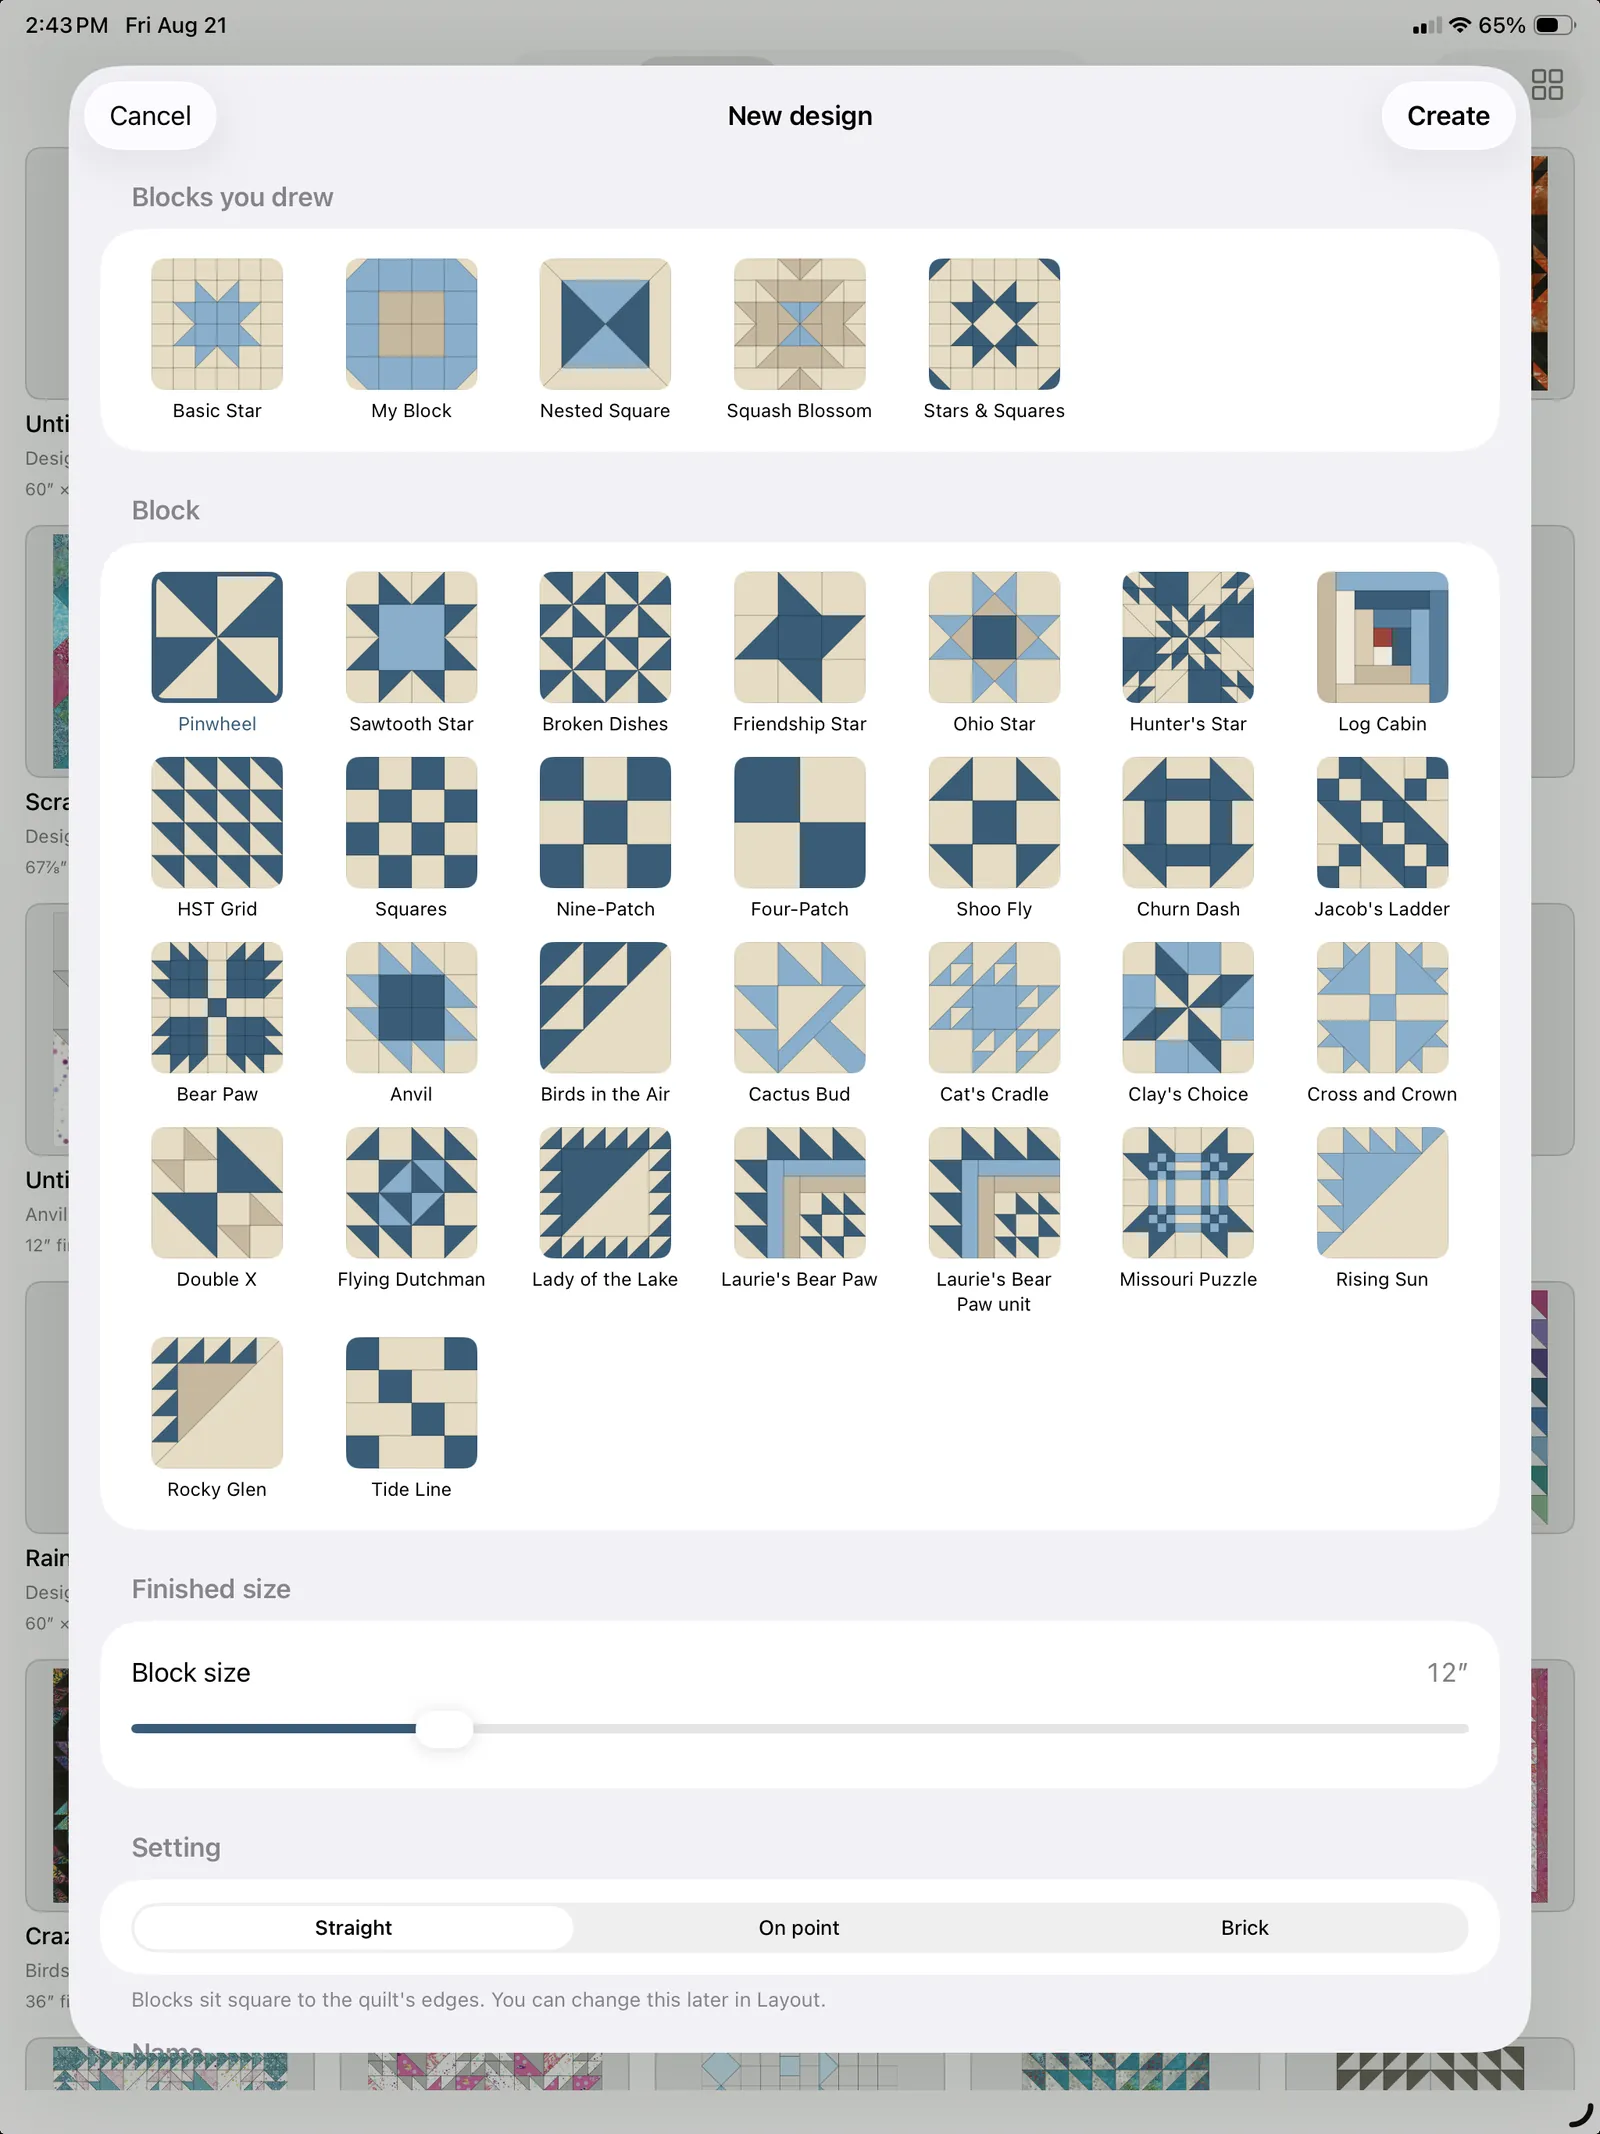
- Pick a block from the grid of thumbnails. There are 51, in two groups.
- Set the finished size of one block (4″–40″). (The HST Grid and Squares have their own controls instead; see below.)
- Optionally name it, then tap Create. The editor opens.
The built-in blocks are: Pinwheel, Sawtooth Star, Broken Dishes, Friendship Star, Ohio Star, Hunter's Star, Log Cabin, Nine-Patch, Four-Patch, Shoo Fly, Churn Dash, Jacob's Ladder, Bear Paw, the HST Grid (a half-square-triangle canvas you size and color freely), Squares (a plain one-patch grid of squares), and LeMoyne Star.
The LeMoyne Star is free, no unlock needed: pick it and size it like any other block, from a 4″ miniature up to a 40″ showpiece. It's the classic eight-point block, eight 45° diamonds set into four corner squares and four side triangles with Y-seams, and it carries the full pattern any other block gets: a real cut list (at 12″: 3″ diamond strips, 4″ corner squares, a 6½″ side-triangle square), the set-in sew order with its own little drawings, and the Ring · Point · Row · Cell · Single one-tap paint control. Want more diamonds per point, or a straight-seam background instead of Y-seams? That's the Stars row below, a Basic feature (see the next section).
Below them, from the included block pack: Anvil, Birds in the Air, Flying Dutchman, Double X, Cat's Cradle, Missouri Puzzle, Cactus Bud, Tide Line, Laurie's Bear Paw (and the single paw unit it's built from), Rising Sun, Rocky Glen, Clay's Choice, Lady of the Lake, Cross and Crown, Square Deal, Mesa, Simple Star, Double T, Hovering Hawks, Devil's Claw, Storm at Sea, Blackford's Beauty, Annie's Choice, Arrowheads, Variable Star, Cathedral Window, Texas Treasures, Cube Lattice, Bouquet, Amish Barn Star, Rectangle Blocks, Amish Diamond, Jewel Box, and Windblown Square. They behave exactly like the built-ins: paint them, tile them, rotate them, and make a pattern from them.
Why the size slider skips numbers
The slider doesn't move in even steps, it lands on the sizes that block can actually be cut at. A block drafted on a five-grid (Rocky Glen, Rising Sun, Cross and Crown) divides into fifths, so it wants a multiple of 2½″: 10″ and 15″ land, 12″ doesn't. A four-grid block like Clay's Choice cuts cleanly at nearly every common size.
That's why dragging can feel like it jumps, and it's deliberate: the alternative is a 12″ Rocky Glen whose pieces measure 2.4″, which no ruler has a mark for. When a size would leave you cutting something unmeasurable, a note under the slider says so and points you at the three nearest sizes that do work ("Cuts clean at 10″, 12½″, or 15″"). The same note appears under Block size in the Layout sheet, for the same reason.
Dragging follows your thumb both ways: let go between two cuttable sizes and the slider takes whichever is nearer, up or down. The one place a size only ever moves up is when you pick a block, because that's a number you didn't choose. Bear Paw cuts at 7″, 10½″, 14″, 17½″ and 21″, so selecting it lifts the 12″ default to 14″ rather than dropping it to 10½″: choosing a block never shrinks it out from under you. A block that was drafted at a size of its own keeps that size exactly.
In the Layout sheet the control is a stepper rather than a slider, so + and − walk that same ladder a rung at a time (7″ → 10½″ → 14″) and gray out at either end. A quilt already sitting on an awkward size is left alone: it stays there and keeps warning until you tap.
If a block cuts cleanly nowhere, or at exactly one size, there's no ladder worth landing on and both controls go back to plain half-inch steps, warning as they go. That's mostly a block you drew yourself; it keeps a size you can't otherwise reach within reach.
Blocks under half an inch finished get a gentler caution rather than a fault: they'll cut, they're just fiddly.
Straight or on point, from the start
Block quilts also get a Setting picker here, Straight, On point, or Brick, so you can start a diagonal or staggered quilt rather than converting one later. It's the same setting the Layout sheet holds, and everything under Setting: straight, on point, or brick applies. Unit grids (the HST Grid and Squares) don't get it: they're one continuous field of units, with no blocks to turn.
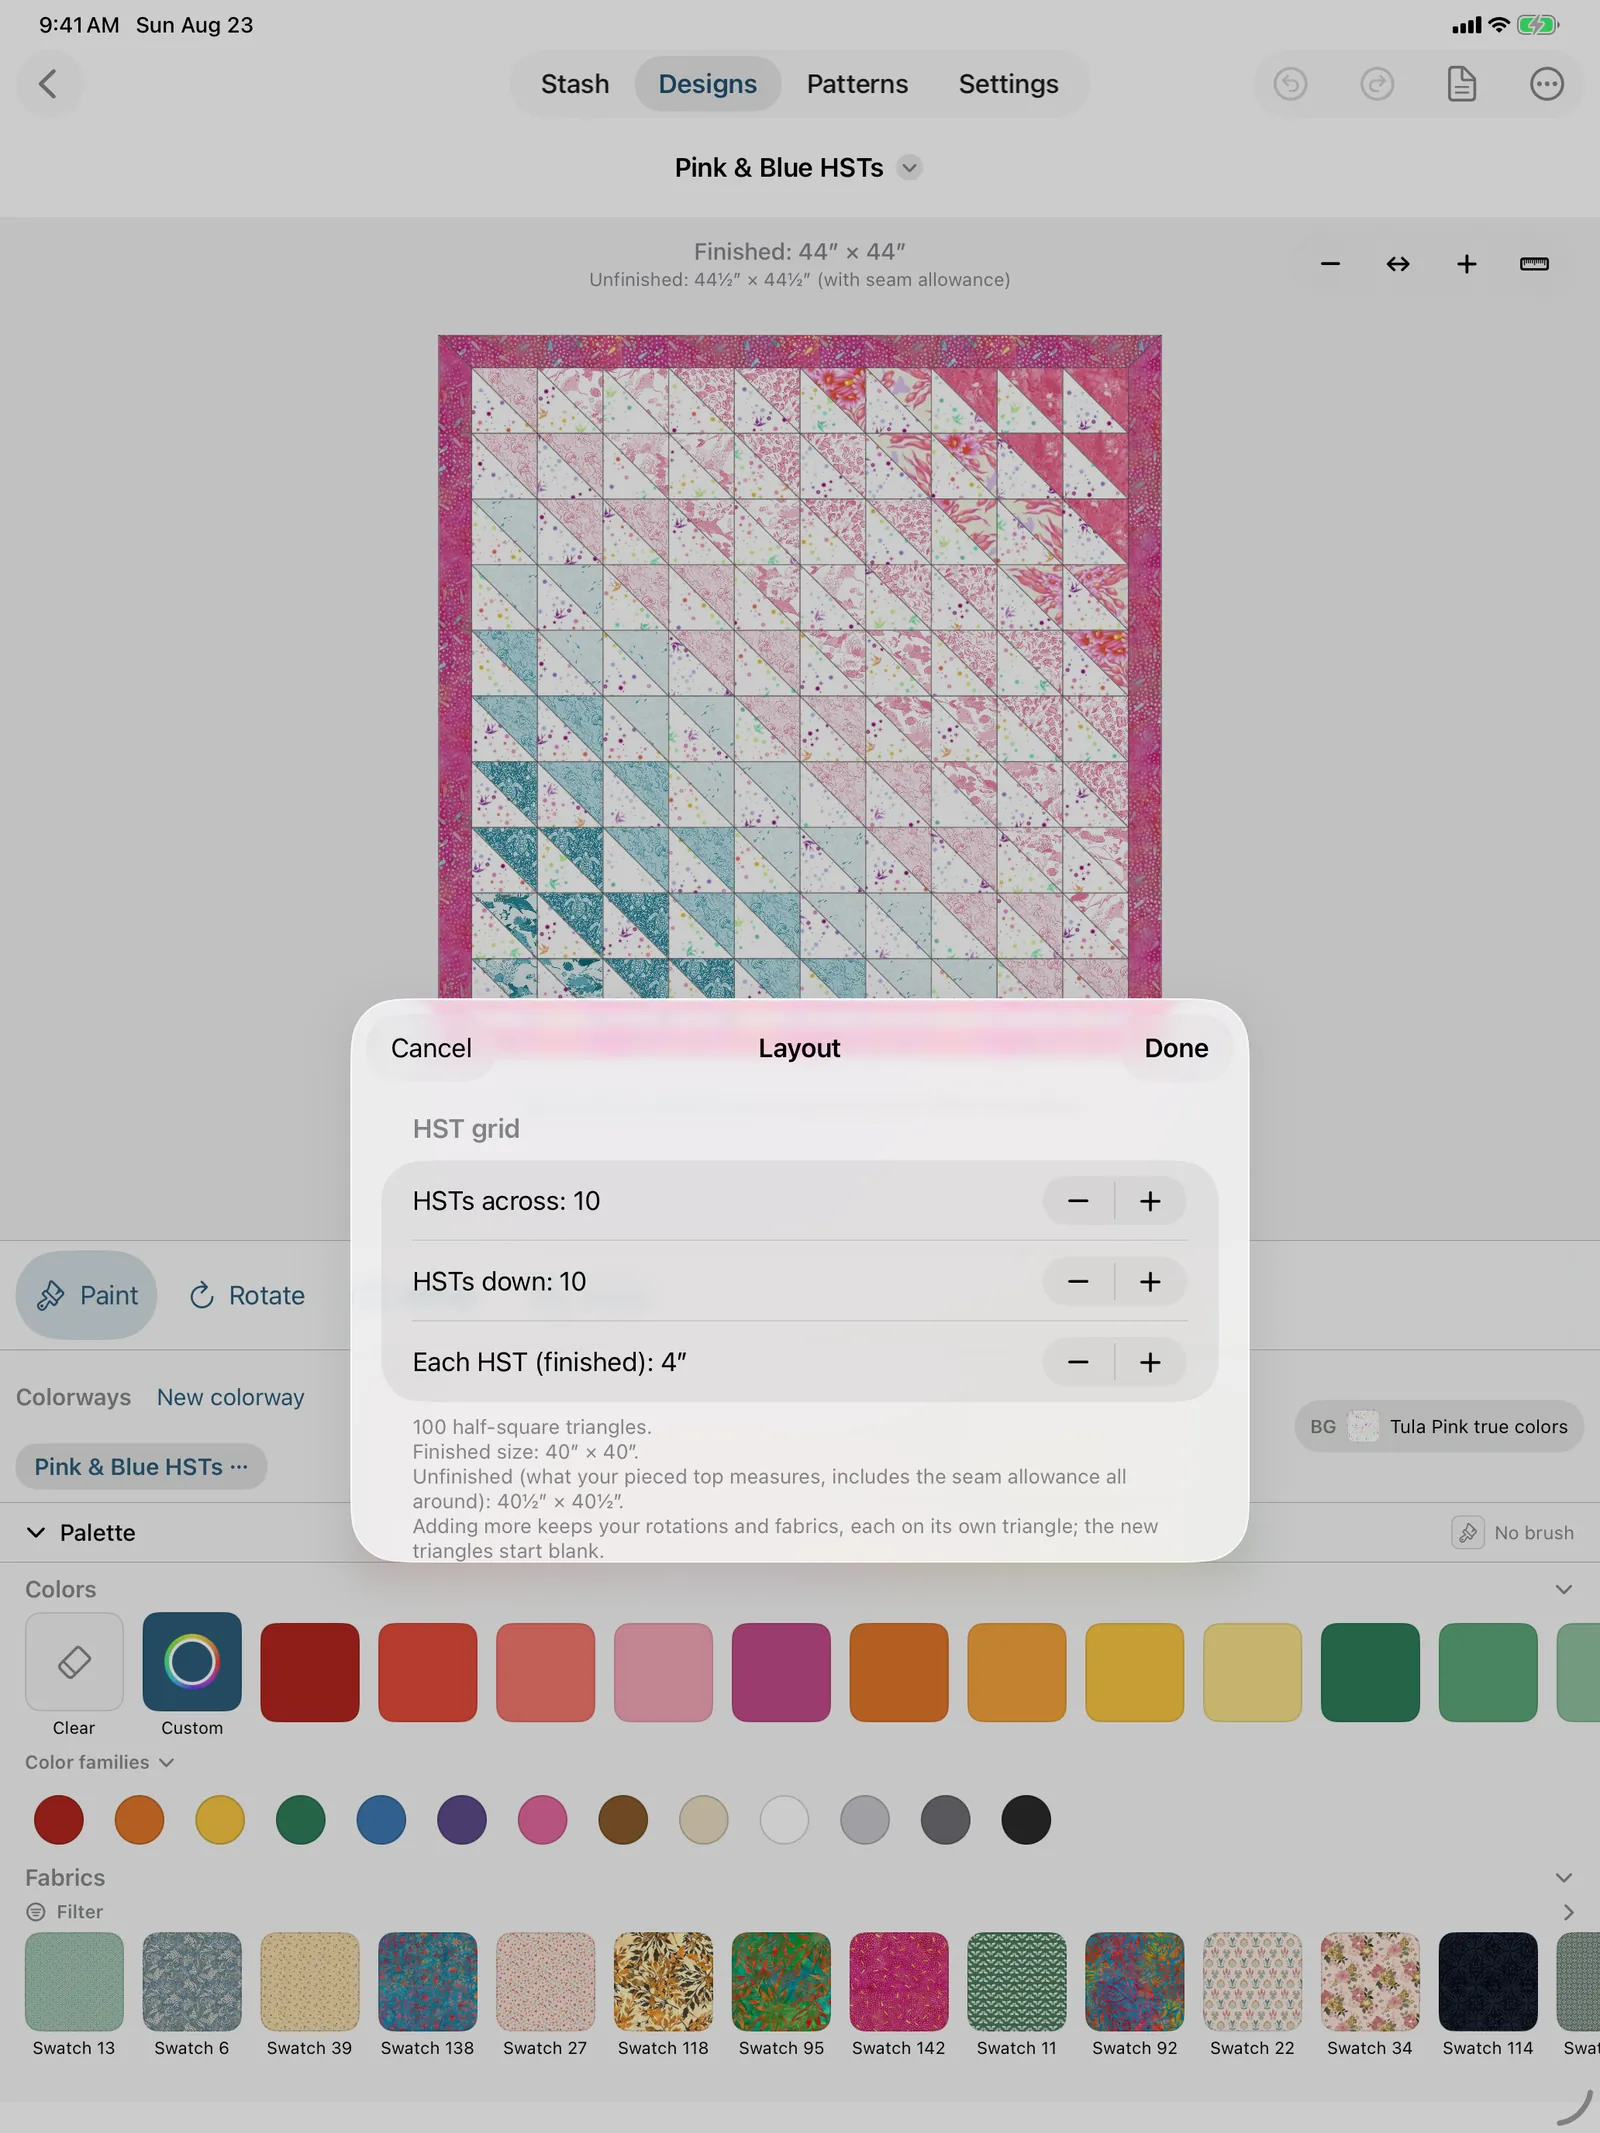
Sizing an HST Grid
When you pick the HST Grid, the size slider is replaced by a small set of controls:
- HSTs across and HSTs down (2–128 each) set how many half-square triangles make up the grid (default 8×8). Type a number straight in or nudge it with the arrows, a hundred-across grid shouldn't be a hundred taps.
- Size by lets you choose how the size is defined:
- Each HST: set the finished size of a single triangle unit (1″–8″).
- Whole top: set the finished width of the entire grid (12″–120″) and the unit size is worked out for you.
- The footer shows the live math: each HST's finished size, what it squares up (cuts) to using your current seam allowance, and the finished width × height of the whole top.
Sizing a Squares one-patch
When you pick Squares, the size slider is replaced by controls for a plain grid of squares:
- Each square (finished) sets the finished size of one square (1″–12″). Its cut size is that plus a seam allowance on every edge, a 3″ square cuts at 3½″ with a ¼″ seam.
- Size by lets you drive the grid two ways:
- Grid count: set how many squares across and down (1–40 each). The finished top is simply the count times the square size, 10 × 12 at 3″ makes a 30″ × 36″ top of 120 squares.
- Target size: enter a target width and height, and the app offers the two whole-square sizes that bracket each target, the multiple just below and just above, so you never end up with a partial square. It preselects whichever lands nearest (a tie picks the smaller, to save fabric). Pick one per dimension and the footer shows the exact landed size before you create.
- The footer always shows the landed top size, the cut size per square, and the total count.
Resizing one later keeps your fabric where you put it. Both grids get a Layout button on the tool rail that reopens these same controls, and changing the count remaps every fill by position, anchored top-left: a square you painted in row 3, column 2 is still in row 3, column 2 afterwards. So growing a 4-across Squares design to 9 extends the picture instead of scrambling it. Shrinking drops the fills whose square is gone, and says how many before you apply.
Starting an eight-point star
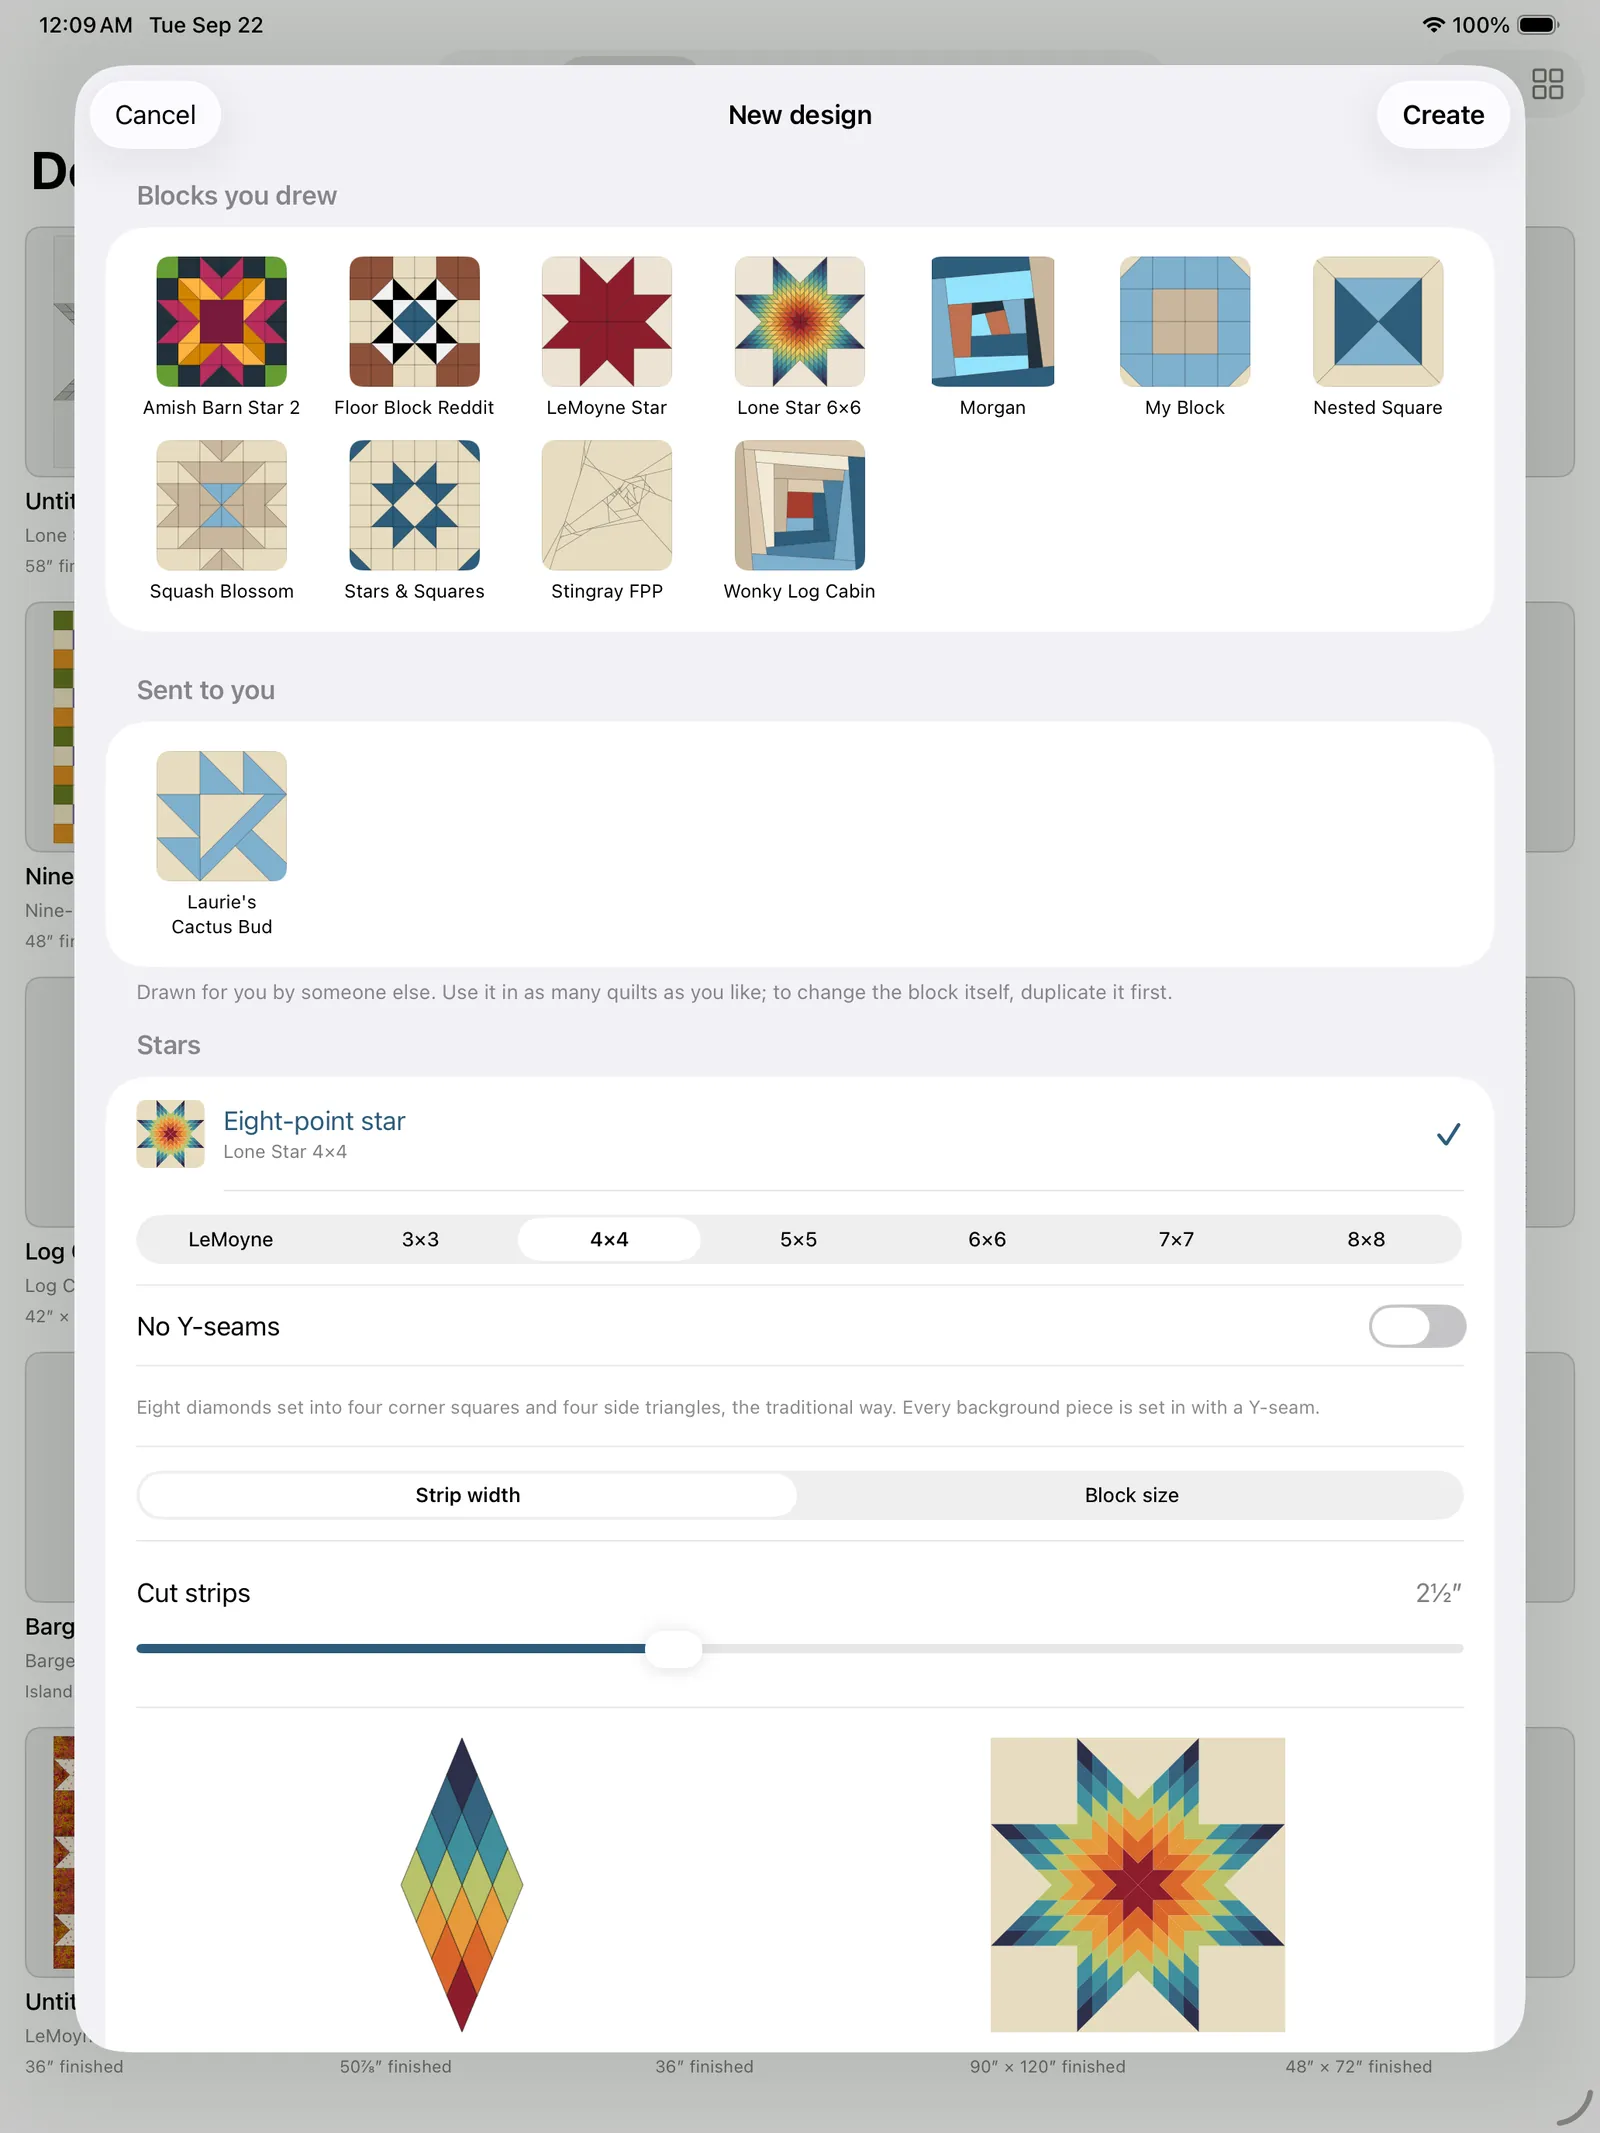
Above the block thumbnails there's a Stars row, and it's the one entry on this screen that makes a block rather than picking one. That's different from the plain LeMoyne Star tile in the thumbnail grid above, which is free and needs none of this. Tap the Stars row and choose diamonds per point: LeMoyne builds the same eight-diamond block as the free tile, but through the generator, so you can also flip on No Y-seams; and 3×3 through 8×8 build each point out of a grid of smaller diamonds, which is a Lone Star, the whole quilt center in one block. (On a phone the sizes are a menu rather than a row of segments; same choices.) No Y-seams splits the background so every seam is straight; the trade is eight extra seams in the background, invisible on prints and visible on solids. A LeMoyne gets a finished-size slider like any block. A Lone Star is sized the way patterns write it, by strip width, with the finished block read back to you underneath, and you can flip to Block size if you'd rather work the other way round. Either way the footer tells you exactly what to cut: the strip width, the 45° subcut spacing, and your seam allowance, and it nudges you if the size lands somewhere no ruler has a mark (12″, 15″, 18″ and 24″ LeMoynes all land within a hair of one; 8″, 10″ and 14″ don't). Below the size, a Lone Star gets a Colors block: one point of the star drawn as an upright diamond of small diamonds, with the whole star beside it. Tap a small diamond and it takes the brush color; the star next to it repaints all eight points at once, because a Lone Star's points are one diamond unit sewn eight times, so you only ever color one. See Designing a Lone Star by the diamond for the fills and the spin. Create saves the star into My Blocks and opens a quilt one block across, so the star is the top. Add borders in Layout, and use the block again in any grid you like. Stars come with the unlock; before that the row is there with a Basic badge and tapping it shows you what it costs.
Starting a jelly-roll design (the pattern picker)
When you start from a jelly roll, instead of picking a block you pick a pattern. The picker is fabric-first: every pattern shows a thumbnail, a short description, and how it fits your roll:
- "Uses N of your Y strips" when you have enough.
- "Needs N strips (you have Y)" in red, and the row is dimmed and unselectable, when you don't.
That way you can see what a pattern would cost even if you can't make it yet. The current patterns are Bargello, Jelly Roll Race, Rail Fence, Strip Twist, and Strip Patchwork. Some note extra fabric needed (e.g. for borders). Tap one to create the design and jump into the editor.
Bargello is the exception: it's a quilt you design rather than one you pick, so tapping it opens a two-step flow instead of making a design straight away. See below.
Designing a bargello
A bargello is made by sewing your strips into a tube, cutting that tube into columns of different widths, and unpicking each column at a different point so the colors climb and fall in waves across the quilt. TideStitch does the tube maths; you shape the wave.
Tap Bargello in the pattern picker and you get two screens.
Step one: build the gradient
Every photographed strip becomes one band of the gradient, so the order you put them in is the color ramp.
- Drag to reorder. The usual arrangement runs light to dark and back, with the top band first.
- Light → Dark (top right) sorts them for you by how light or dark each strip actually is, read from the photos. It's a starting point, not a verdict, rearrange freely afterwards.
- A bargello needs at least 6 photographed strips. Below that the screen says so and won't continue. Between 6 and 8 it continues but points out that 8 or more makes a smoother gradient.
Tap Shape the Wave when the ramp looks right.
Step two: shape the wave
This is the real design screen: a live preview built from your actual strip photos, over controls that change it as you watch.
- Presets re-seed the whole wave at once: Single Diagonal, Classic Wave, and Mirrored Wave. Start from one and edit, or build from scratch. Once you hand-edit anything, the design remembers itself as custom.
- Columns: a stepper for how many columns the quilt has, up to 99.
- Tap a column to select it, then:
- Widen or narrow it in ¼″ steps. Column width is the wave's speed: narrow columns make the color climb steeply, wide ones stretch it out.
- Up and Down rotate that column's colors by one band, which is the same thing as unpicking the tube at a different seam. This is what actually makes the wave move.
- The readout under the preview gives the finished size and what it costs in fabric: how many tubes to sew and how many strips of each print that takes, e.g. "cuts 3 tubes: 2 strips of each print, 24 in all." If your wave needs more strip-sets than the roll holds, it says so.
- The preview honours actual size just like the design editor, so you can check a band against the real fabric before you commit.
Tap Generate and the design opens in the editor like any other.
Changing it later
A bargello isn't frozen once made. Edit Wave, the button on the hint bar under the canvas, reopens the wave editor with your columns exactly as you left them, so you can widen a column or roll the colors on and regenerate.
Starting a Design Your Own board
The + button is a menu: alongside New design it has Design Your Own, a freehand board you draw on yourself instead of picking a ready-made block. See Design Your Own (freeform boards) below for the full walkthrough. Setup asks for:
- Start with: a Blank grid (10 × 12 cells of 6″) or a Sampler (4 × 5 cells of 12″, one cell per block). Both make the same kind of board; Sampler just sizes the cells for blocks and reminds you where the Blocks tool is.
- Size by: which way round you want to work. Cell size is the graph-paper way: pick a cell and how many across and down, and the finished size follows. Quilt size starts where most of us actually start, at "I want a twin," and works the grid out from that.
- In Cell size mode: a cell size, the size of one square cell (2″–18″), and a grid, how many columns and rows (2–48 each). Cells are always square, so the whole top is a clean grid of squares. The footer shows the finished top size that makes (e.g. 10 × 12 squares of 6″ → a 60″ × 72″ top).
- In Quilt size mode: pick a preset (Crib, Throw, Twin, Full, Queen, King) or step the width and height yourself; stepping off a preset shows Custom by itself. If you plan to add a border later, set Planned border, each side and the board is sized to leave room for it, so board plus border lands on the size you asked for (you still add the border itself in the Borders editor). Under that, Cells that fit exactly lists every cell size that divides your quilt evenly; tap one and the slider jumps to it. You can still drag the slider anywhere else, and the footer tells you the truth about what that costs: cells that don't divide the size evenly round the grid down, and it says by how much on each side (a border makes up the difference). Columns and rows are shown but not editable in this mode; flip back to Cell size to nudge them by hand. Flipping modes never changes the board on its own.
- An optional name, then Create.
Boards always start in Grid mode; you can switch to Radial once you're in.
The design editor
This is where the actual designing happens. The block (or quilt, or strip pattern) is rendered on the canvas, with your tools and fabrics on a group of three shelves that sit under it on a tall screen and beside it on a wide one. A readout above the canvas shows two sizes: the finished size (e.g. "Finished: 12″ × 12″"), the quilt once it's bound, and the unfinished size just below it, what the pieced top measures flat, with the seam allowance still on its outer edges. For jelly-roll designs the readout instead reminds you how many strips the pattern uses.
The three shelves
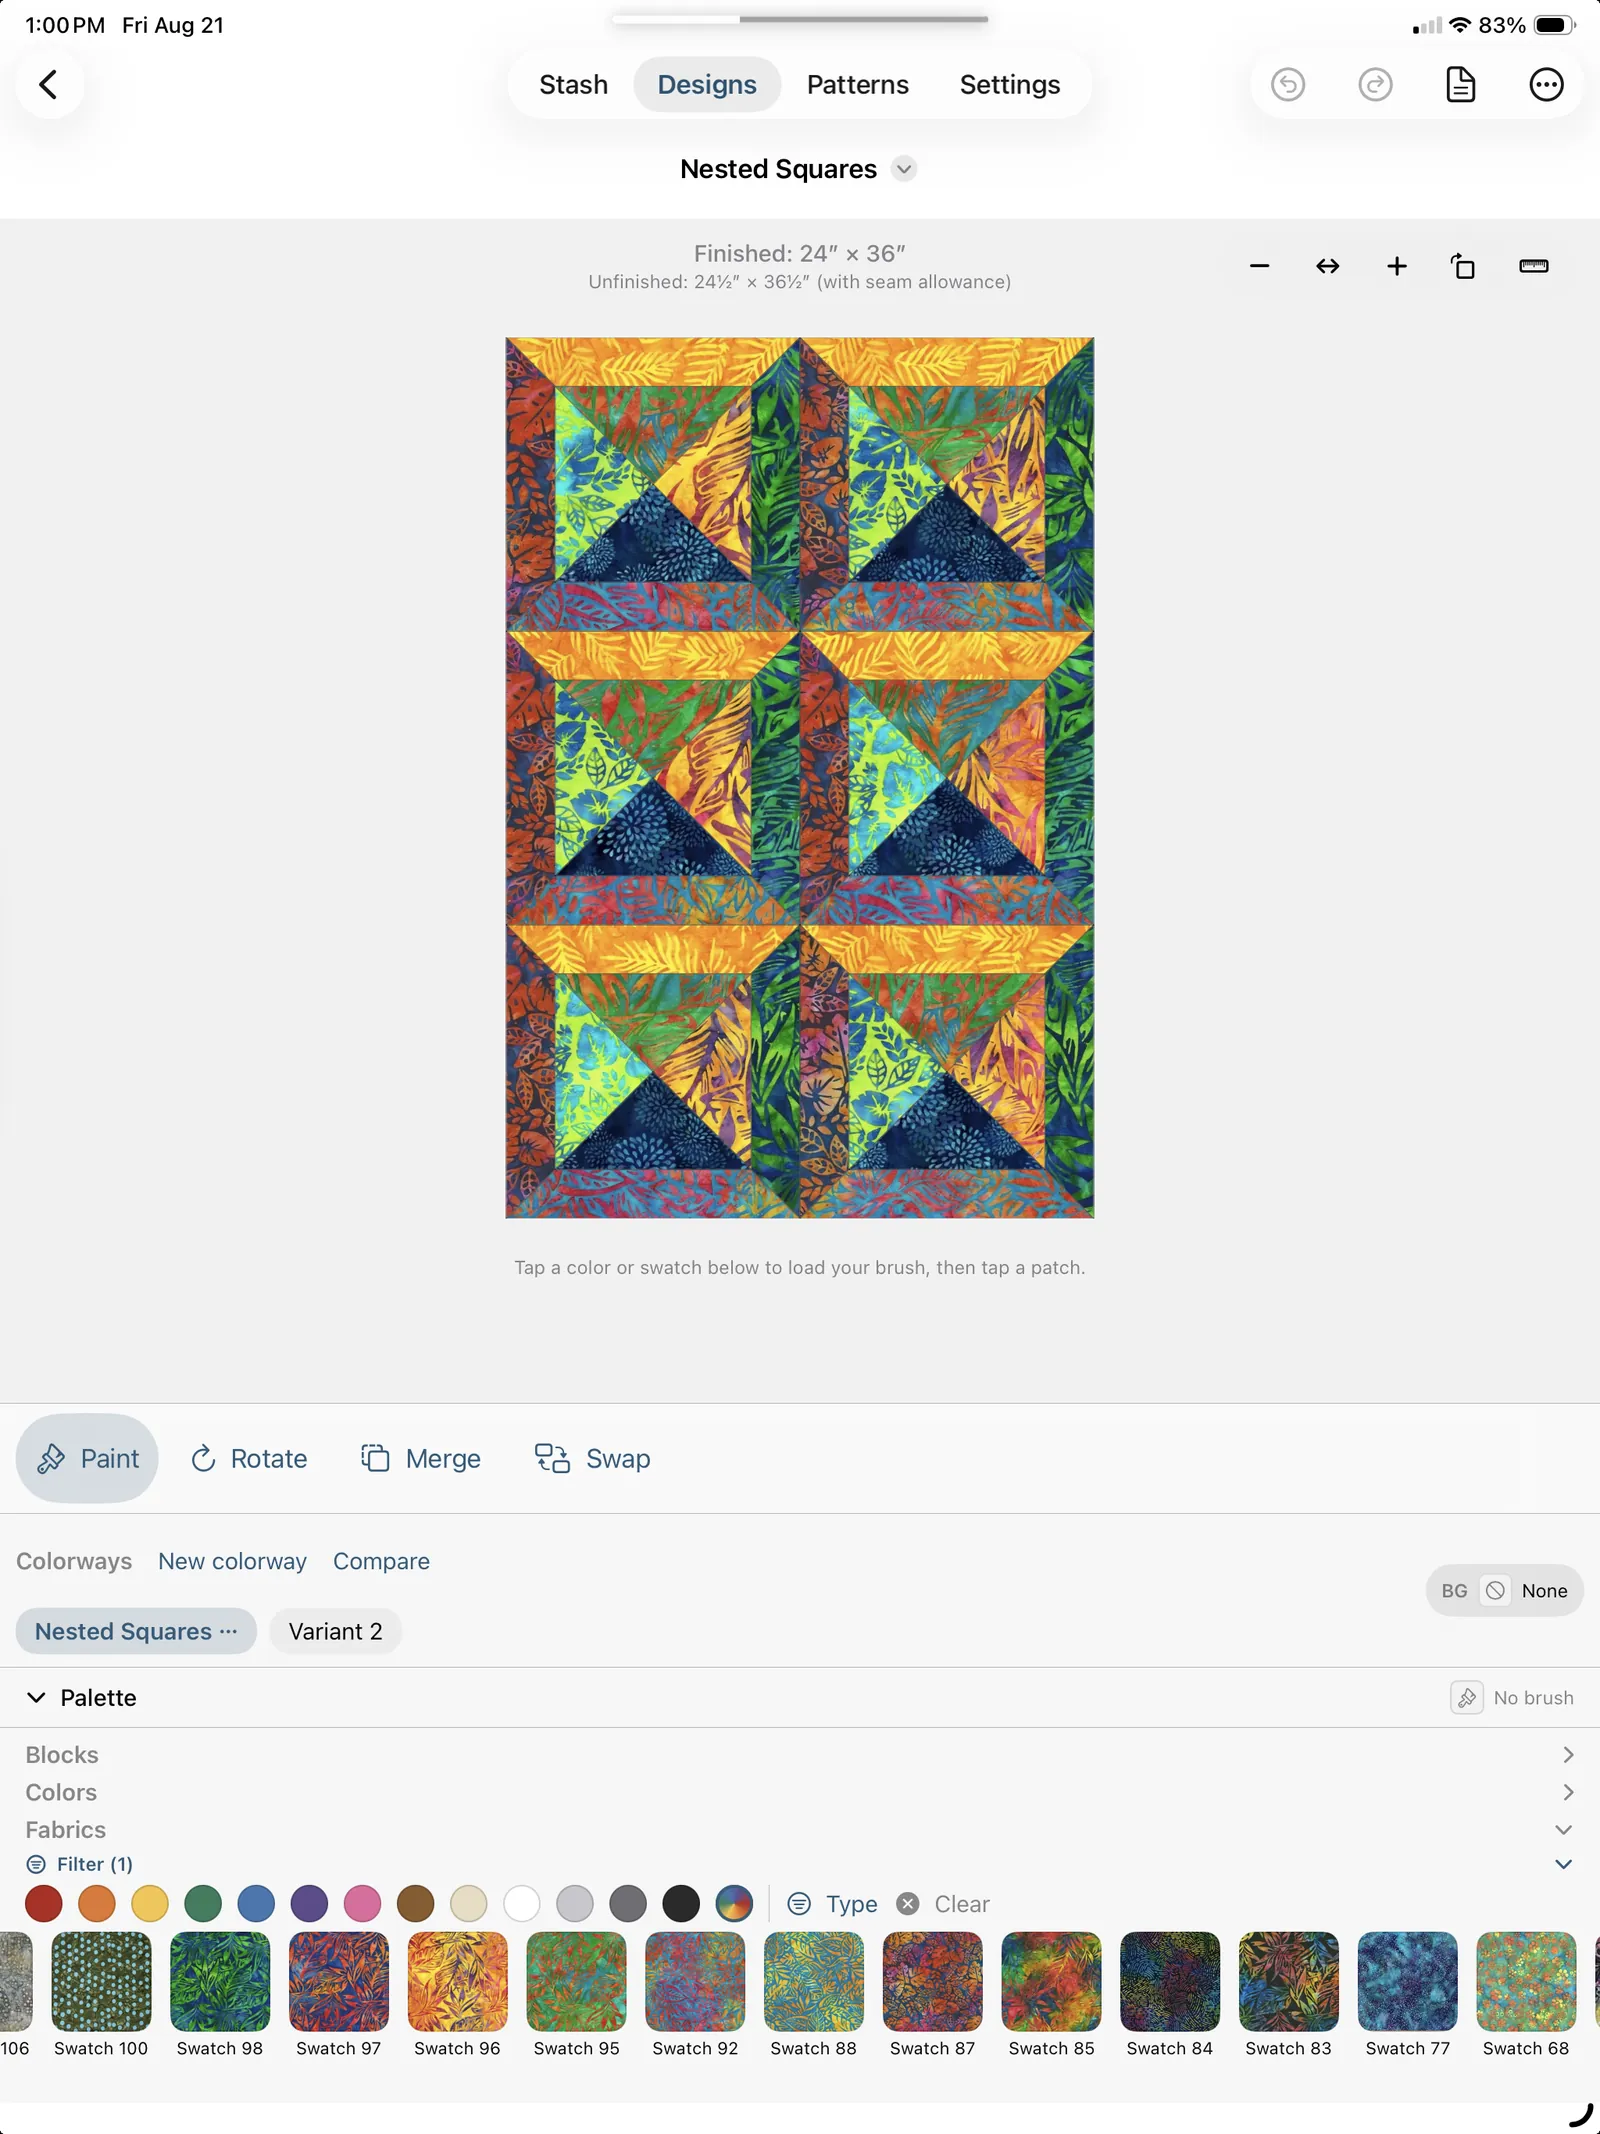
Everything under the quilt (or beside it) is one group of three bands, in the same order every time, in the block editor and on a Design Your Own board alike:
- The tool rail: what a tap on the quilt means. Paint is always there, joined by whichever of Rotate, Merge, Swap and the drawing tools this design has. One tool is in hand at a time, each carries its word as well as its icon, and tapping the one you're already holding drops you back into Paint. Past a divider sit the design's document buttons, Background, Borders, Layout and Quilting: not tools you paint with, but one tap each into the controls that change the whole design. Borders and Layout open their sheets; Background turns the palette itself into a ground-setter until you tap Done, and Quilting turns it into the quilting preview's controls the same way.
- The colorway strip: which colorway your next stroke lands in.
- The palette: what you're painting with.
Anything you do to the document rather than to the quilt is up in the top bar instead: Undo, Redo, Pattern, and the ••• menu. See The top bar and the More menu.
The three shelves travel together, and where they go depends on the shape of the space rather than on which device you're holding:
- Taller than it is wide (a phone or an iPad in portrait, a tall Mac window): the group stacks under the quilt, the tool rail running across the top of it.
- Wider than it is tall (a phone or an iPad in landscape, a wide Mac window): the group stands beside the quilt on the right, the tool rail turned vertical on the outer edge where a hand holding an iPad already rests. The quilt gets the full height.
A short screen is a wide screen, and spending the axis that has room is the whole reason for the second arrangement: stacked on a landscape phone, a 48″ quilt was rendering about the size of a postage stamp.
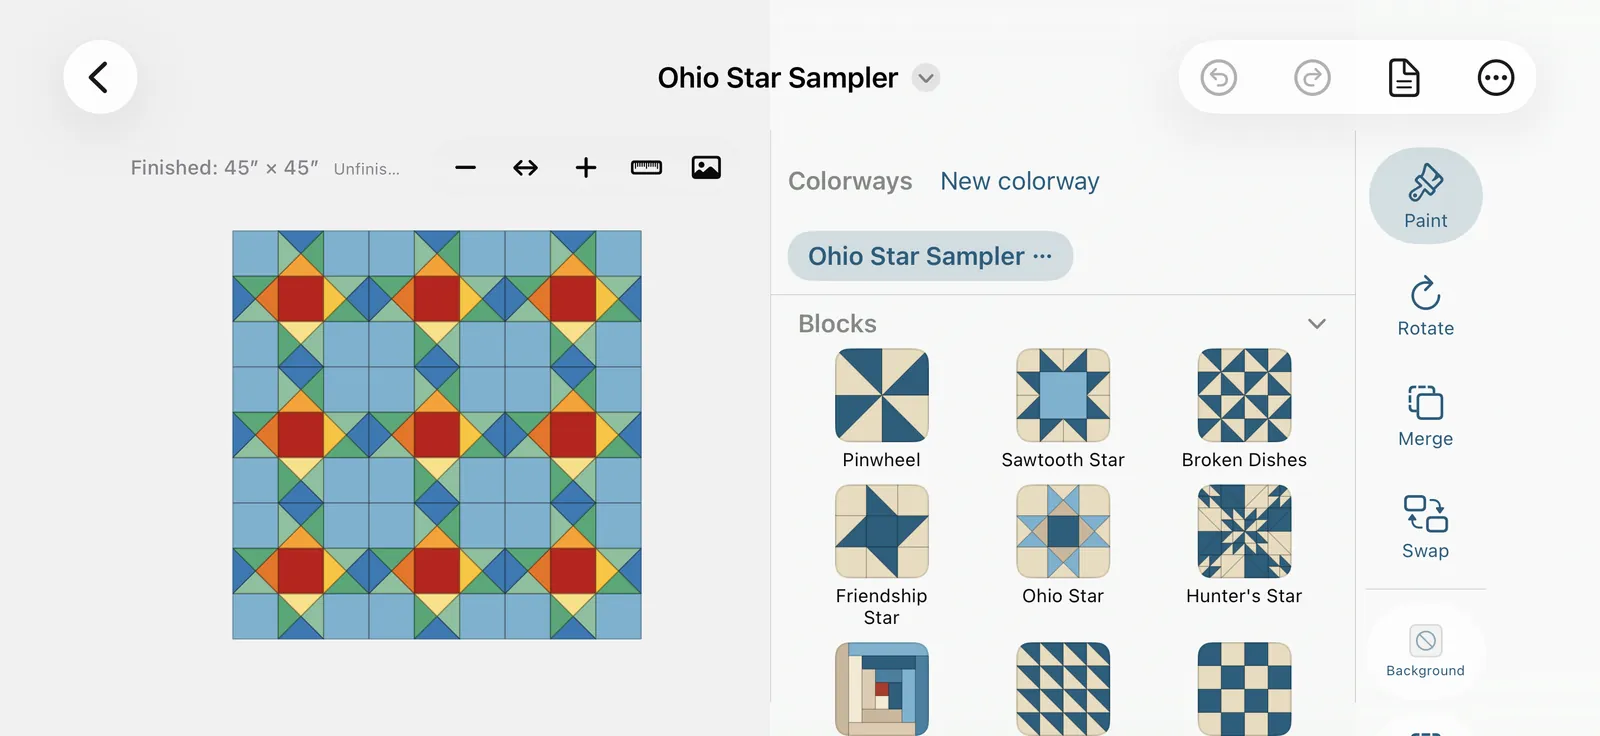
On a phone the tab bar gets out of the way, either way up. A phone has so little height that the bar is one of the biggest single things standing between you and the quilt, and it costs that screen twice over: its own height, plus the band of empty tray the palette has to leave under its last row of swatches so they can clear it. So the editor hides it in portrait as well as landscape and hands both back to the canvas. Nothing becomes unreachable: the back chevron is where it always is, and the tabs come back the moment you leave the editor. An iPad held either way keeps its tab bar, and so does a Mac window with room in it. Neither is short of height, and hiding their tabs would cost you navigation to buy a quilt that isn't short of room.
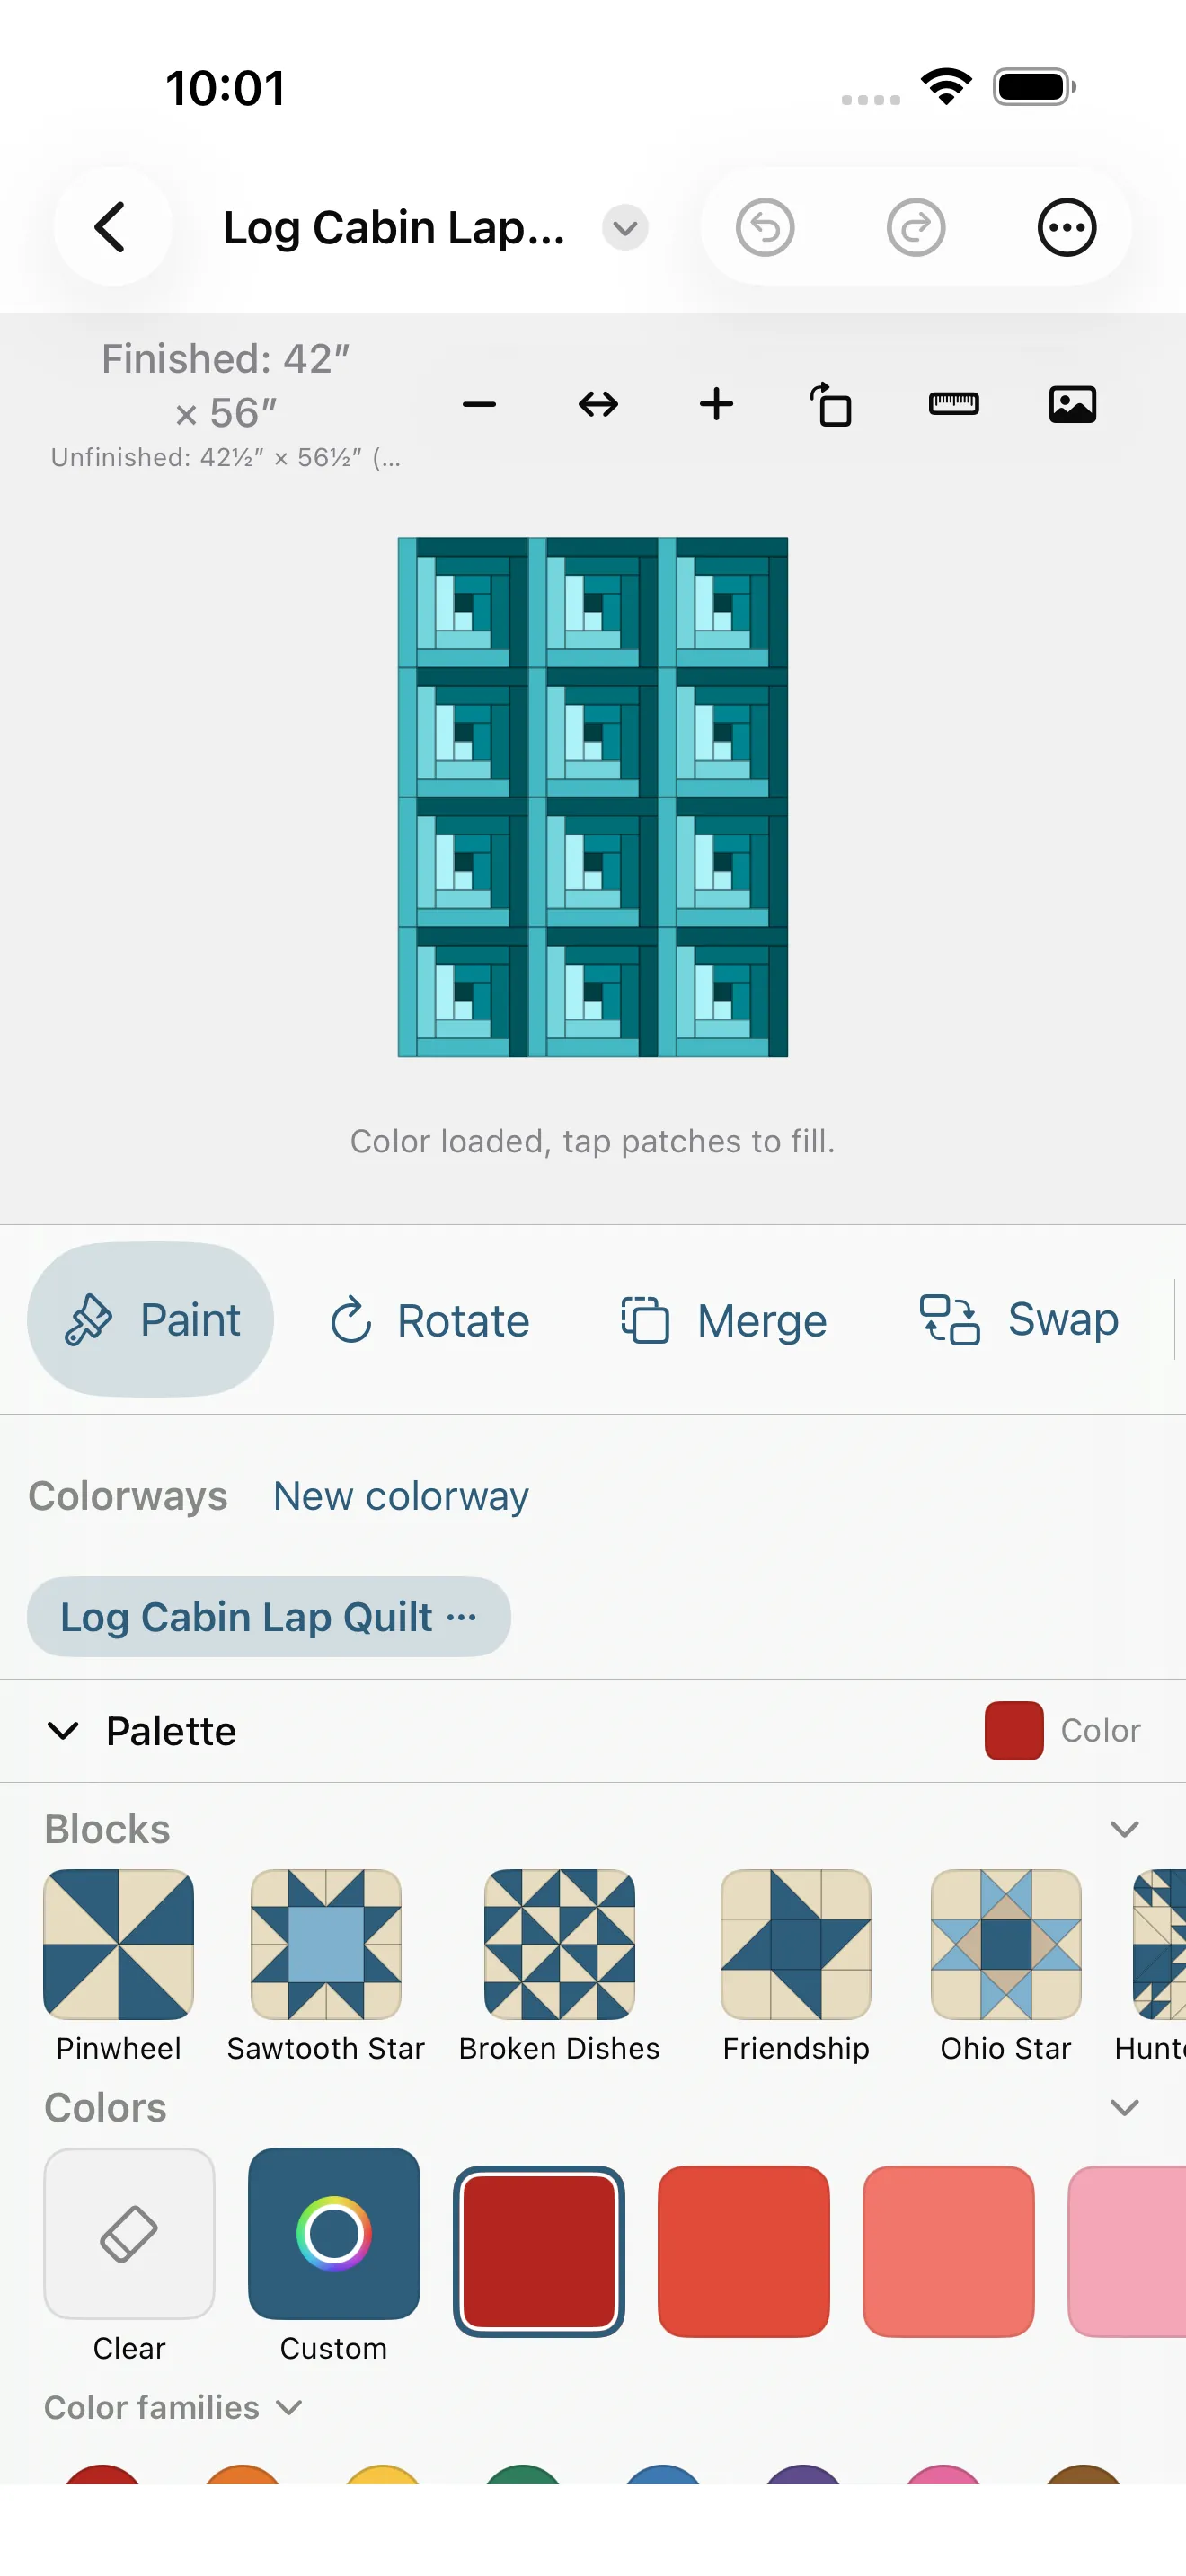
On a phone the empty control bar goes too, held either way. Merge and Swap put a bar under the canvas; Paint and Rotate have nothing to put there. On a roomy screen that slot stays open anyway, so the quilt never changes size when you change tools. On a phone it isn't breathing room, it's a third of the picture: measured on a portrait iPhone, the quilt rendered 120 points and the empty slot held 56, in the tool that's in your hand nearly all the time. Sideways it's no kinder, even on a Max: the palette stands beside the quilt and the quilt is fitted to the height, so the same 56 points come straight off the picture. So on any phone the slot is handed back, and the quilt resizes once, animated, when you deliberately pick up Merge or Swap.
Opening and closing the palette
Stacked under the quilt, the palette is a drawer with a Palette handle across it. Tap the handle to shut the tray and hand that room back to the quilt; tap it again to bring the tray back. The chevron points the way it's about to move, and the swatch on the handle's right-hand end is the brush currently in your hand, so closing the tray never costs you the answer to "what am I about to paint with."
The handle sits below the tool rail and the colorway strip rather than above them, because those two stay put through a collapse. The only thing it moves is the tray.
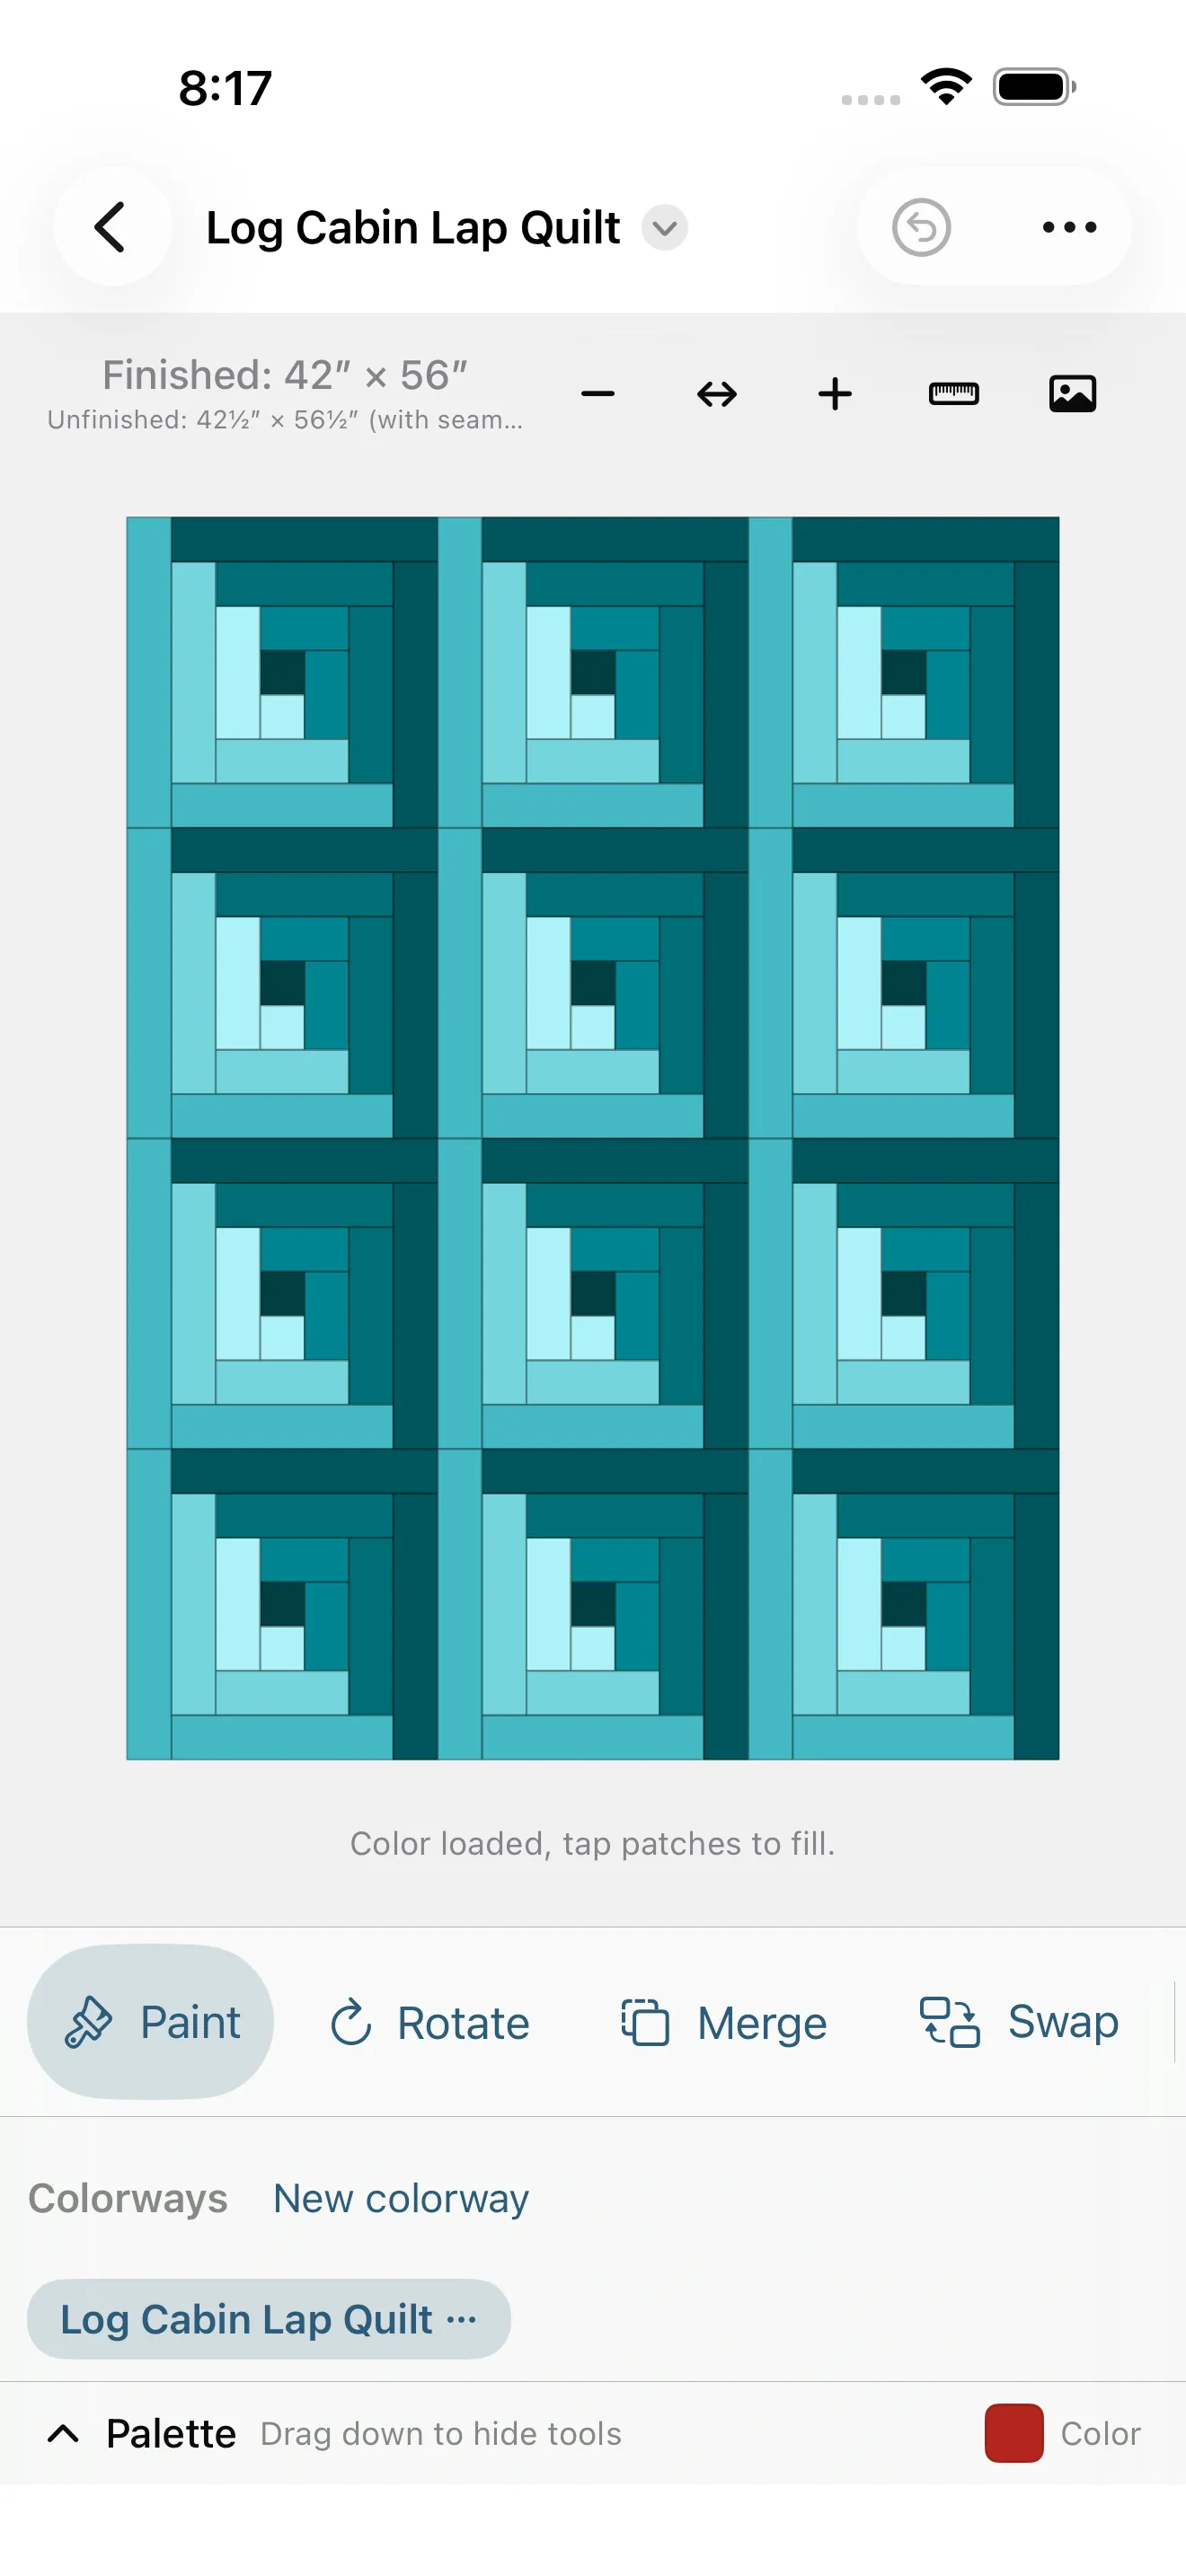
Drag the handle down from shut and the whole band goes away. That's a third height, and it's reached by the gesture rather than by the tap: the tool rail, the colorway strip and the handle all slide off the bottom edge, and the quilt gets the entire container. What's left is a small Palette pill floating on the canvas's bottom edge, still carrying the swatch you're holding. Tap it, or drag it up, and everything comes back. The ladder reads the same way in both directions (drag down for less palette, drag up for more), so there's one gesture to learn rather than a mode with a switch of its own, and the tap goes on meaning exactly what it always meant. VoiceOver gets it as a named action, Hide palette and tools, since a flick isn't reachable any other way.
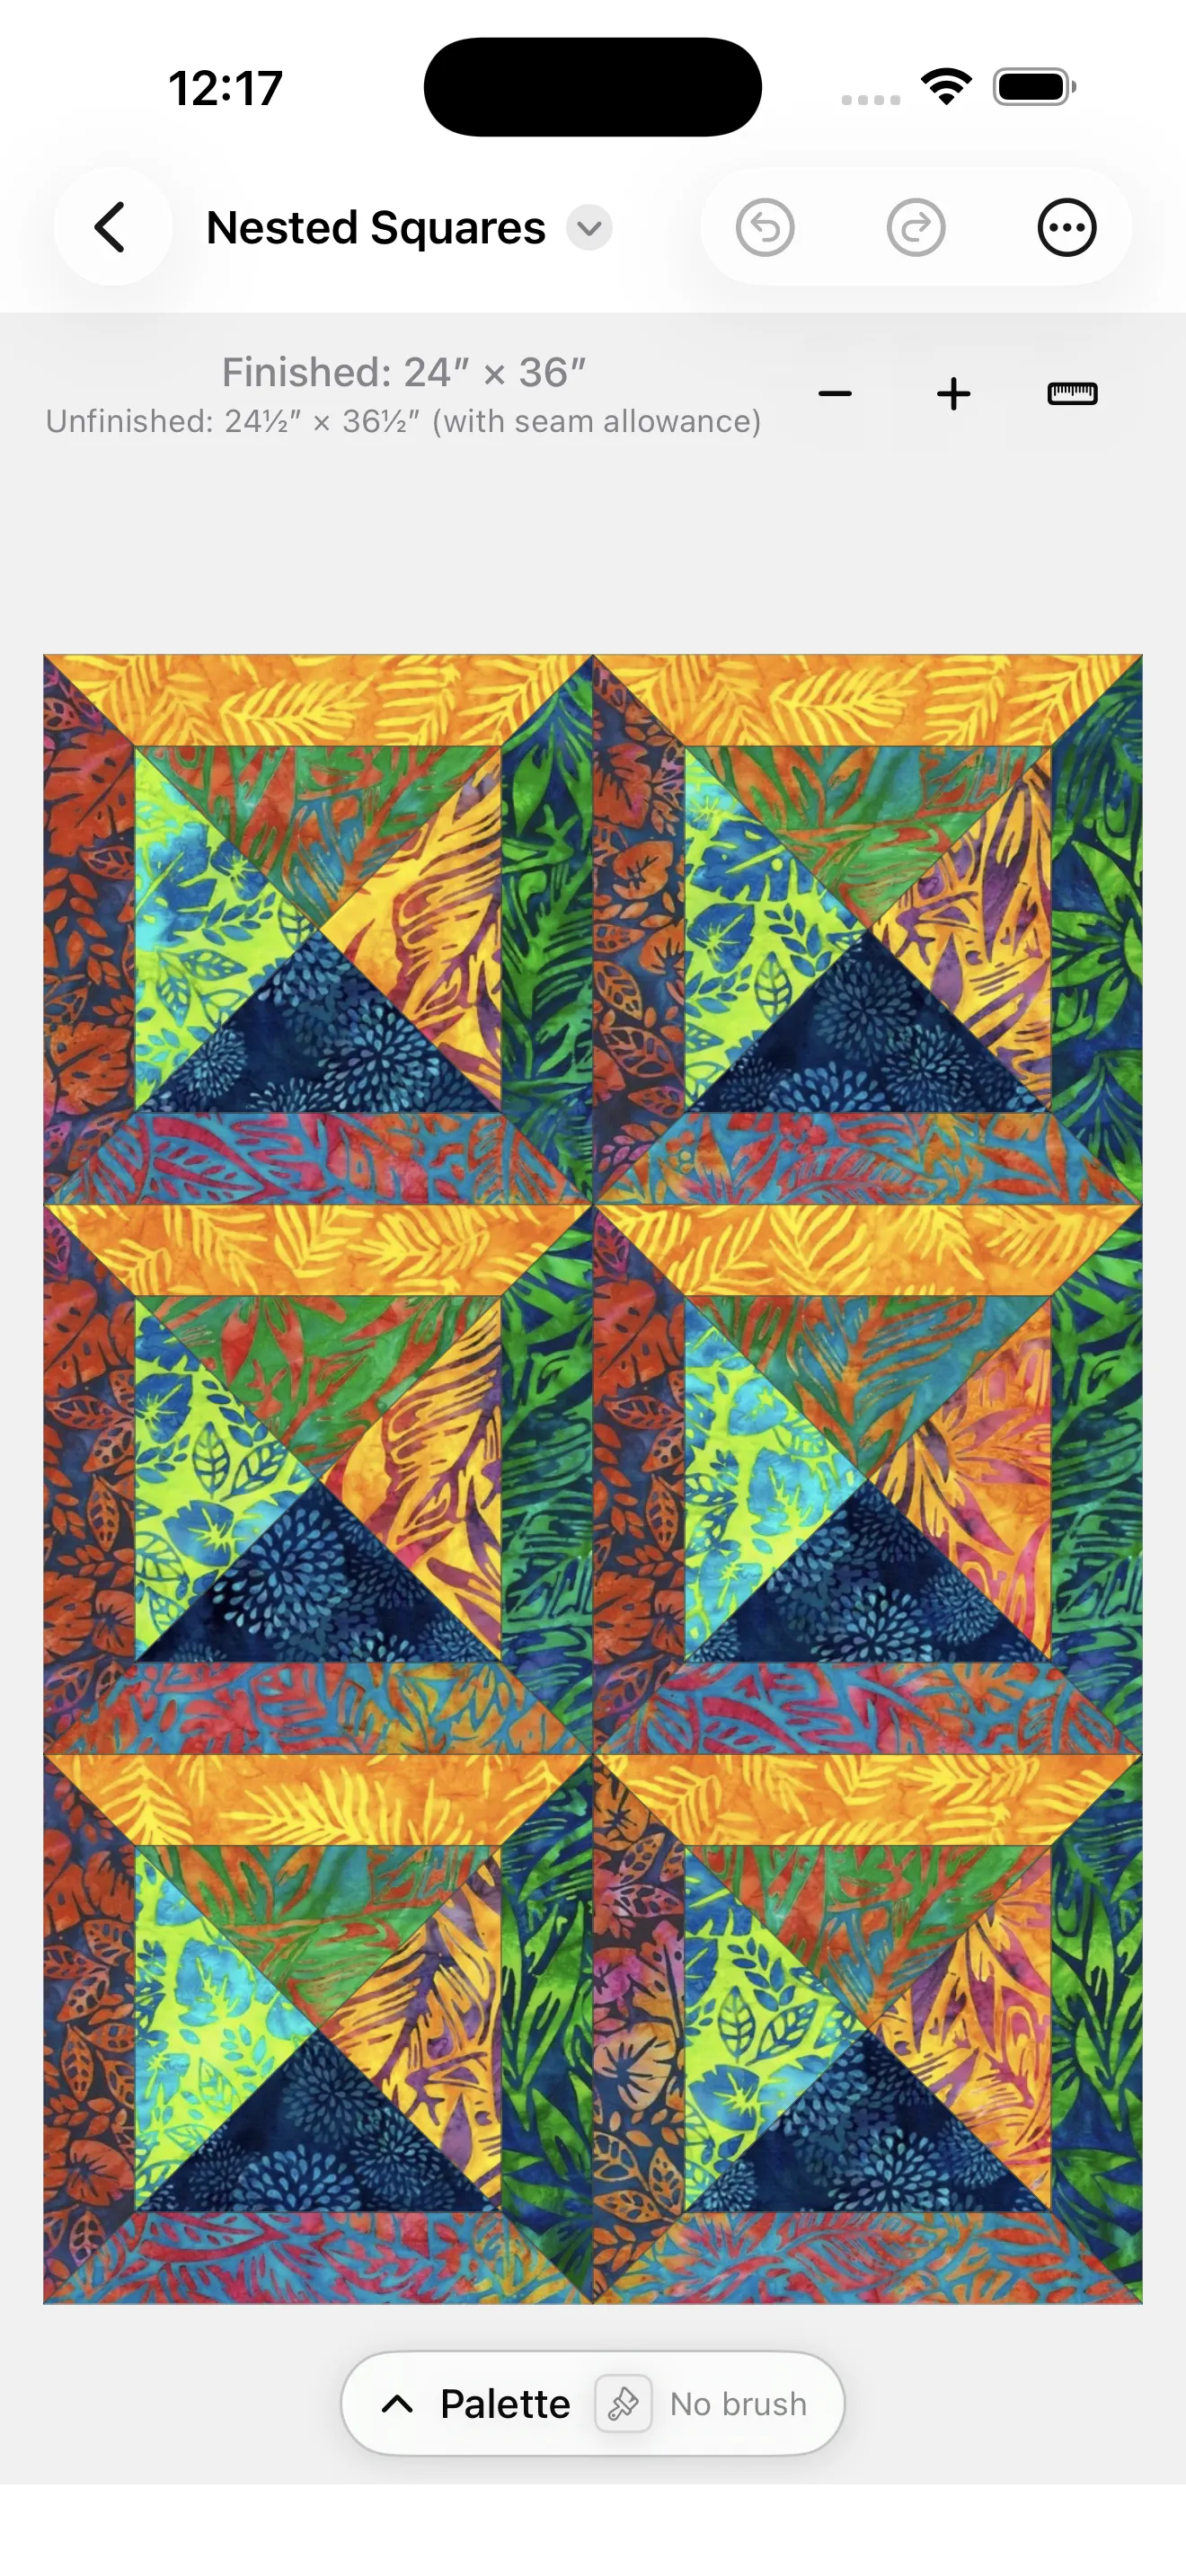
It's worth the most on a phone. Shut, that band is still about 190 points of tool rail, colorway row and handle, which on a portrait phone was more than the quilt itself was getting.
There's no handle when the palette stands beside the quilt, and that's deliberate. Collapsing a side column hands back width, and the quilt there is a fitted near-square bound by the screen's height, so it would render at exactly the same size with the palette gone. A lid that costs you a control and returns nothing isn't worth having; the collapse is a height feature, and beside the quilt height isn't the axis that ran out. The drag-away above is withheld there for the same reason, and the quilt keeps the tab bar too.
Zooming in to place fabric
Pinch to zoom into the canvas and drag with one finger to pan around, which is handy for getting precise on small patches.
A small cluster of buttons sits next to the size readout, just above the quilt. Left to right: − to zoom out, fit to snap back to the whole quilt, ↔ to fill the width, + to zoom in, a quarter turn, the ruler for actual size (below), and on any design you paint by hand a photo button, which drops a reference photo under the board to trace from (see Tracing over a photo). The cluster lives above the canvas on purpose, so it never sits on top of a patch you're trying to paint, and it's always there, which matters on a Mac where trackpad pinch isn't reliable.
Three of them come and go, and their absence means something. fit only appears once you've moved away from the full view. ↔ and the quarter turn only appear where they'd actually make your quilt bigger, so a square quilt on a tall screen shows neither: it already reaches both edges and it's already the right way up. A button that would visibly do nothing is worse than no button, so the app doesn't offer one.
The drawing canvases have all of it. The Line tool and the radial compass on a Design Your Own board carry the same controls, ruler and photo button included, so you can zoom in on a fine grid, turn a long board sideways, or hold a real ruler against a cut without putting the tool down first. The turn survives a switch between Grid and Radial, too. The compass draws with one finger, so panning there is two fingers rather than one.
Spending the side gutters
A quilt is drawn to fit the canvas whole, so a quilt whose shape is taller than the space it's sitting in is bound by its height, and the width left over down each side is width its own proportions forbid it from using. No amount of extra room fixes that: a portrait window can't make a tall quilt wide. On a 13″ iPad in portrait, a 59⅜″ × 79¼″ quilt drew about a third of the way across the screen with nothing beside it.
↔ trades those gutters for a scroll. One tap and the design spans the canvas edge to edge. It's taller than the screen from then on, so drag up and down to see the rest, and fit puts it back.
It's a mode, not a one-off nudge, which is what makes it survive the rest of what you do: open or shut the palette, turn the device, resize the window, and the quilt re-solves and still spans the width. Asking for a zoom any other way (a pinch, − or +, fit, actual size) drops it. On a keyboard it's ⌘8.
Turning the view a quarter turn
The one move that makes a quilt bigger without trading anything away: a long quilt fits a wide space much better lying down. Tap the quarter turn and the picture turns. The button lights up while it's on, because that's the only thing on screen saying the view is what moved.
Nothing about the quilt turns with it. The size readout still prints the real finished size, and the cut list, the sew order, the PDF and the design's thumbnail in the library are all untouched. It's a way of looking, not a property of the design, so it isn't saved either: reopen the quilt and it's upright again. (This was worth being fussy about. A quilter cutting fabric to a number that moved when they tilted their head is the worst bug this app could have.)
Painting follows the turn, so a tap still lands on the patch under your finger, and it works the same on the drawing canvases. It composes with ↔, which is where the two together earn their keep: turned and spanning the screen. There's one turn rather than four, because 180° fits exactly like 0° does, so a second press simply puts it back. On a keyboard it's ⌘R, and fit deliberately keeps the turn, so one tap changes one thing.
Seeing it at actual size
Tap the ruler button (or ⌘9) and the design is drawn at true physical size: a 3″ patch measures three real inches on the glass. Lay a piece of the actual fabric against the screen and you can see whether the print reads the way you pictured it, at the size you're going to cut it.
- A small Actual size badge appears over the canvas. When the quilt is bigger than the screen, which it usually is, the badge says "Pan to see the rest", and you drag around it like any zoomed view.
- A measuring bar appears along the bottom, marked in inches. It's there so there's always a known length in reach to check against your rotary ruler, even when the quilt's own edges are off-screen.
- Tap the ruler again, or fit, to come back.
On an iPhone or iPad, TideStitch already knows the screen's size, so actual size is exact from the first tap. On a Mac it can't know, so the first tap offers to measure the screen once: see Actual size in Settings. You can recalibrate any time, and the measurement is remembered per screen.
Tracing over a photo
Sometimes the quilt you want to make is already in front of you: an antique in a photo, a sketch on graph paper, something you saw at a show. The photo button at the right-hand end of the zoom cluster drops a reference photo under the board, so you can paint each patch from it instead of squinting between two screens.
Tap it for a small popover. With no photo loaded it offers Add from Photos… and Add from File… (a screenshot or a scan you saved to Files comes in upright) and one line saying what the feature is; once one is in, it carries an Opacity slider, a Size slider, Replace from Photos… and Replace from File…, and a red Remove Photo. Tap outside to close it. The button fills in and tints while a photo is loaded, like the turn and ruler buttons beside it, so you can tell at a glance that a quilt has one.
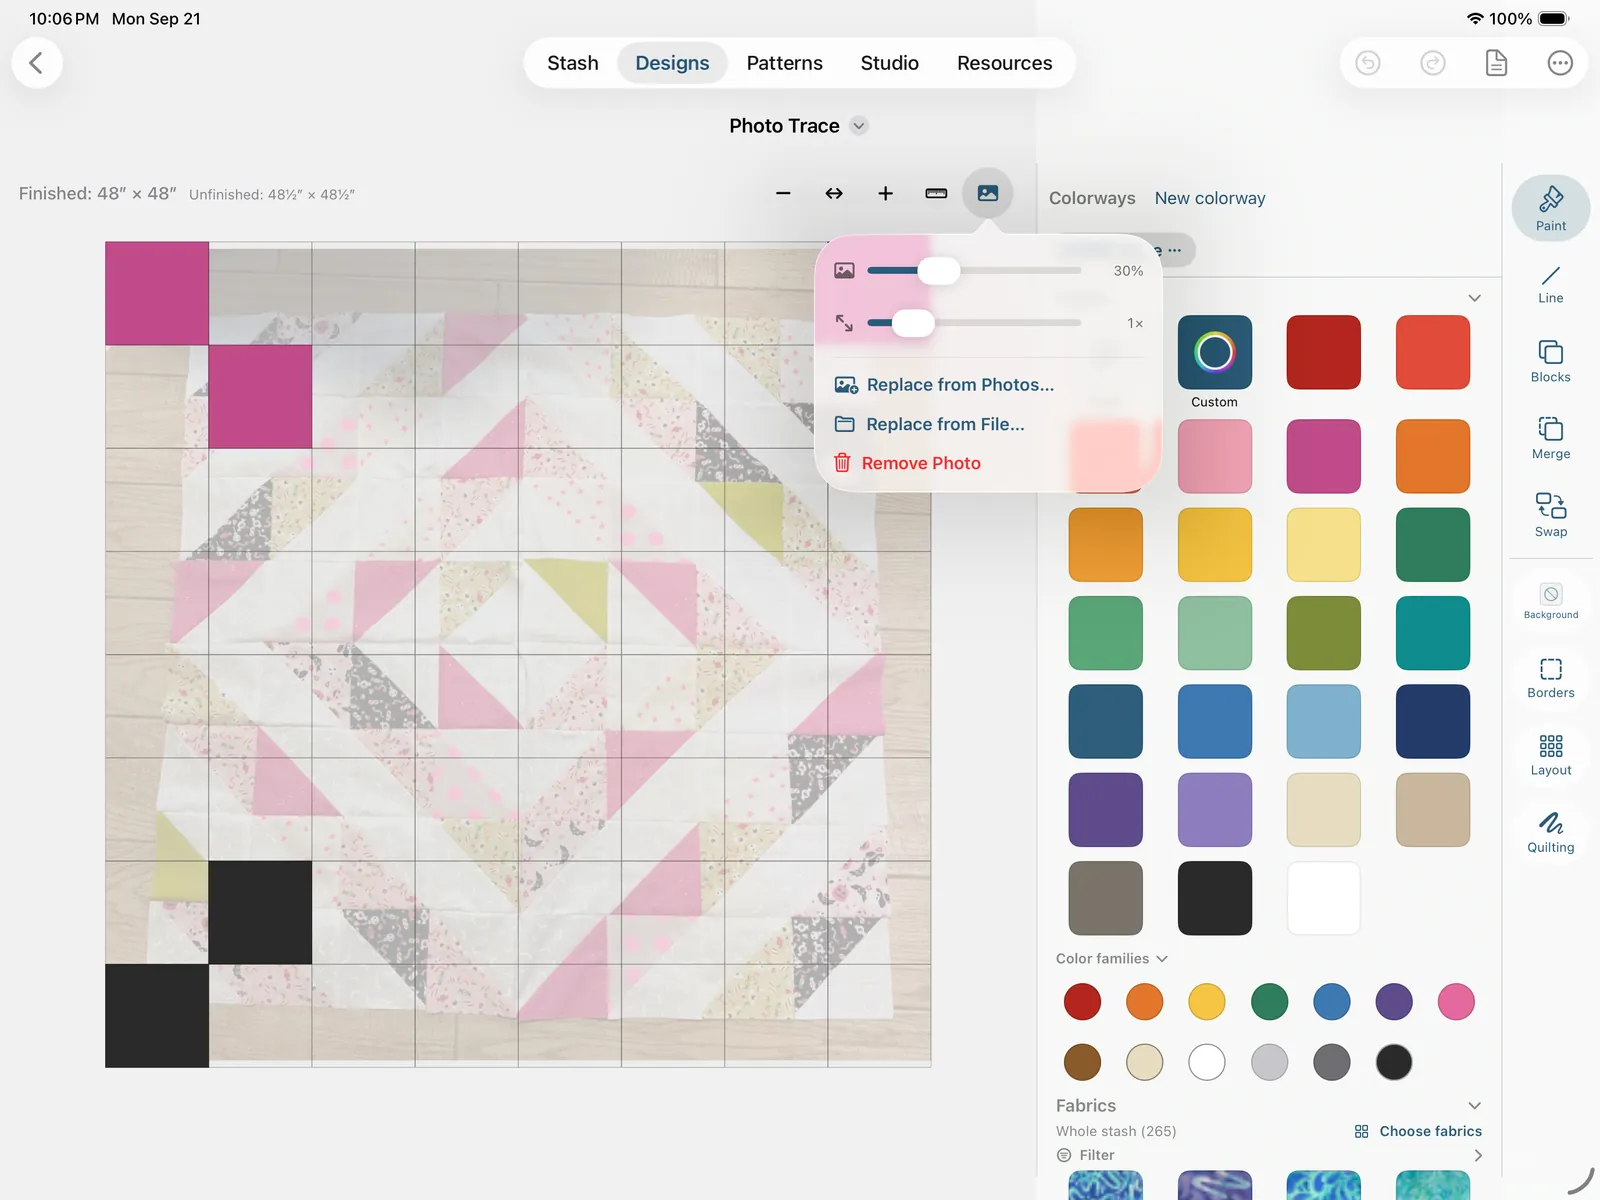
- Opacity fades the photo so your paint reads over it. It starts at 30%.
- Size scales the photo about the board's center, from 0.5× (a small motif in the middle of a big quilt) to 4× (filling a square board from a wide photo). 1× is the fit: the photo fitted to the board's real shape, never stretched.
- Cells you haven't painted go faint while a photo is under them, so the photo shows through where there's nothing yet and your paint covers it where there is.
The photo travels with the board. It zooms, pans and quarter-turns with it, and on a Design Your Own board it stays under the Line, Anchor, Ray and Blocks canvases too, since tracing seams over a photo is half of what the Line tool is for. It's saved with the design and syncs with it, so the photo is waiting when you pick the quilt up on another device.
It is a tracing aid and nothing else. The photo never appears in the design's thumbnail, the pattern, or the PDF; it's only ever drawn under the board you're working on. Block quilts, jelly-roll designs and Design Your Own boards all get it. A bargello doesn't (it has no patches to paint from a photo), and neither does a read-only starter design.
Studio has the same idea for drafting a block from a picture of one; see The Studio tab.
Reading a quilt you haven't colored yet
An uncolored design isn't a blank sheet. Every block in the library knows which of its pieces are the recessive, background-ish parts and which are the feature, so an unpainted quilt is drawn in soft grays that follow that structure: light where the background sits, darker where the feature pieces are. You can see a Nine-Patch is a Nine-Patch across a 12 × 12 quilt, instead of hunting for it in a field of white on white.
It's gray on purpose, not the block's own blue and cream. A colored preview of a quilt you haven't colored would be showing you a decision you didn't make. Desaturating keeps the information, which pieces recede and which lead, and drops the claim. Nothing gets lighter than the plain unpainted gray you already know, and painting a piece replaces its shading entirely.
Checking value with Value View
Quilters talk about value (how light or dark a fabric is) at least as much as about color, because value is what makes a pattern read from across the room: a star whose points and background are the same value melts into the background however pretty the two prints are. Squinting is the traditional test. Value View is the app's version of squinting: ••• → Value View draws the whole canvas in grayscale, real fabric prints included, so you can see whether your lights, mediums and darks are actually doing their jobs. Tap it again to bring the color back.
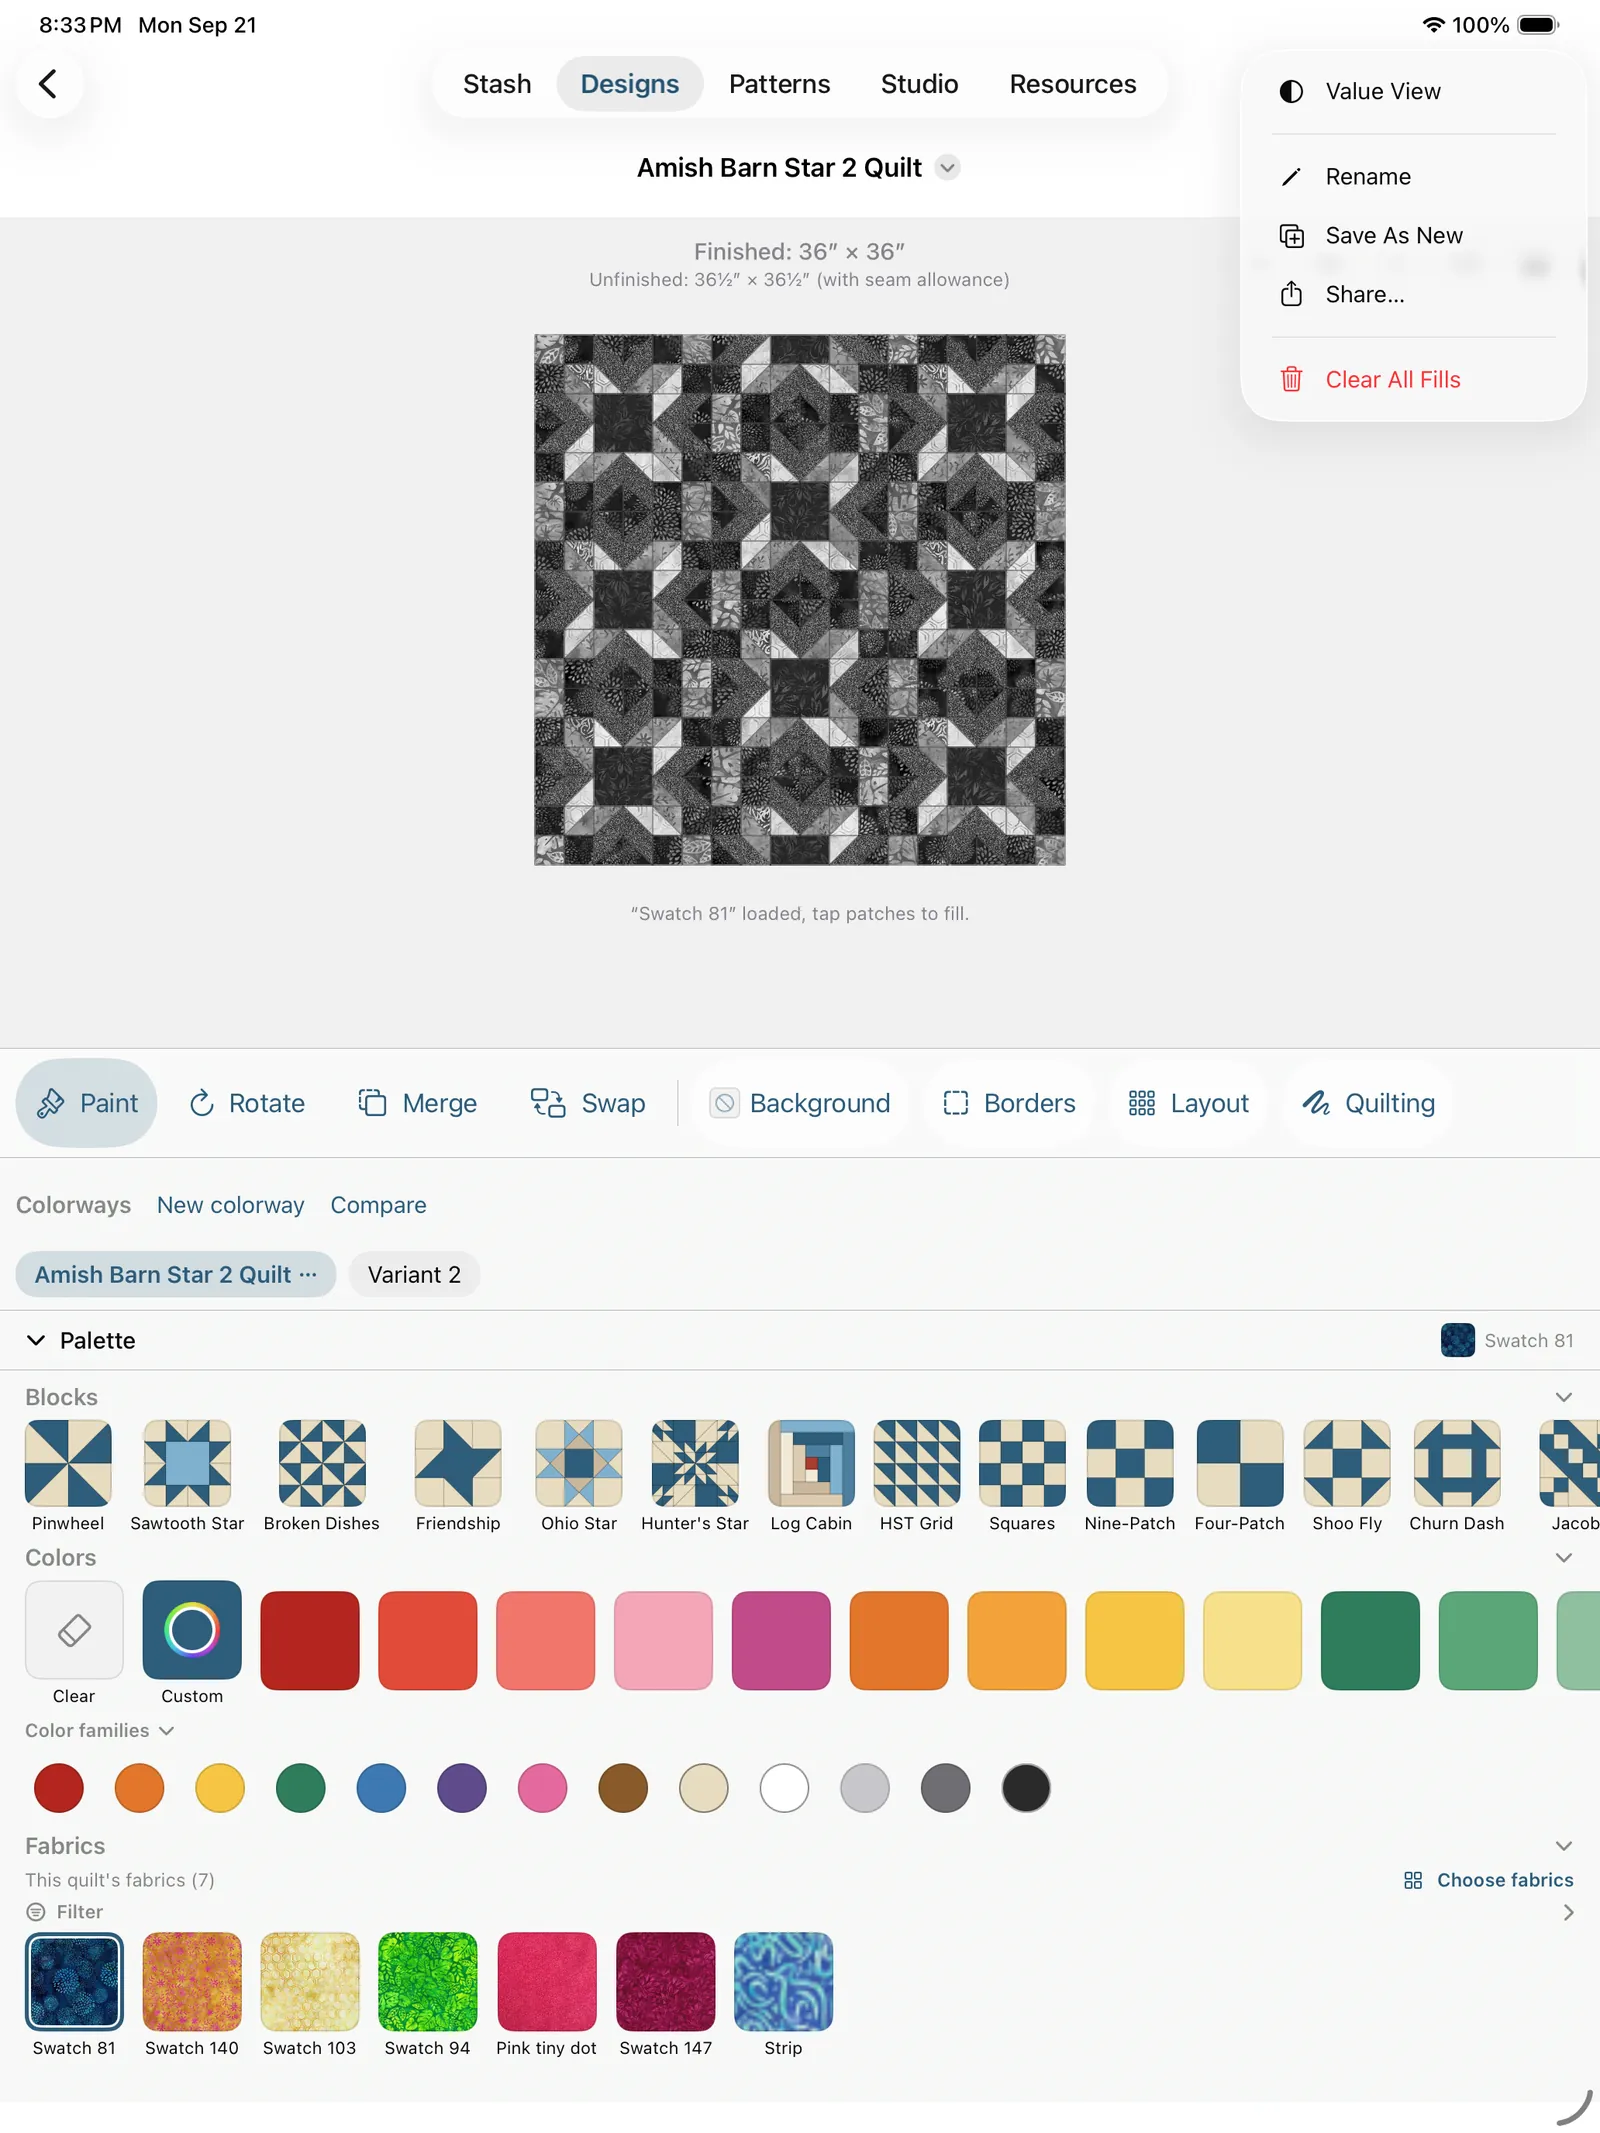
Everything still works while it's on. You can paint, swap, merge and zoom in Value View, and the palette stays in color, so you can see a weak spot and fix it without leaving the view. It's a way of looking rather than a property of the design: it isn't saved, and a quilt reopens in color. It's there on every design type, block quilts, HST grids, jelly-roll designs, bargellos and Design Your Own boards alike.
Previewing the quilting
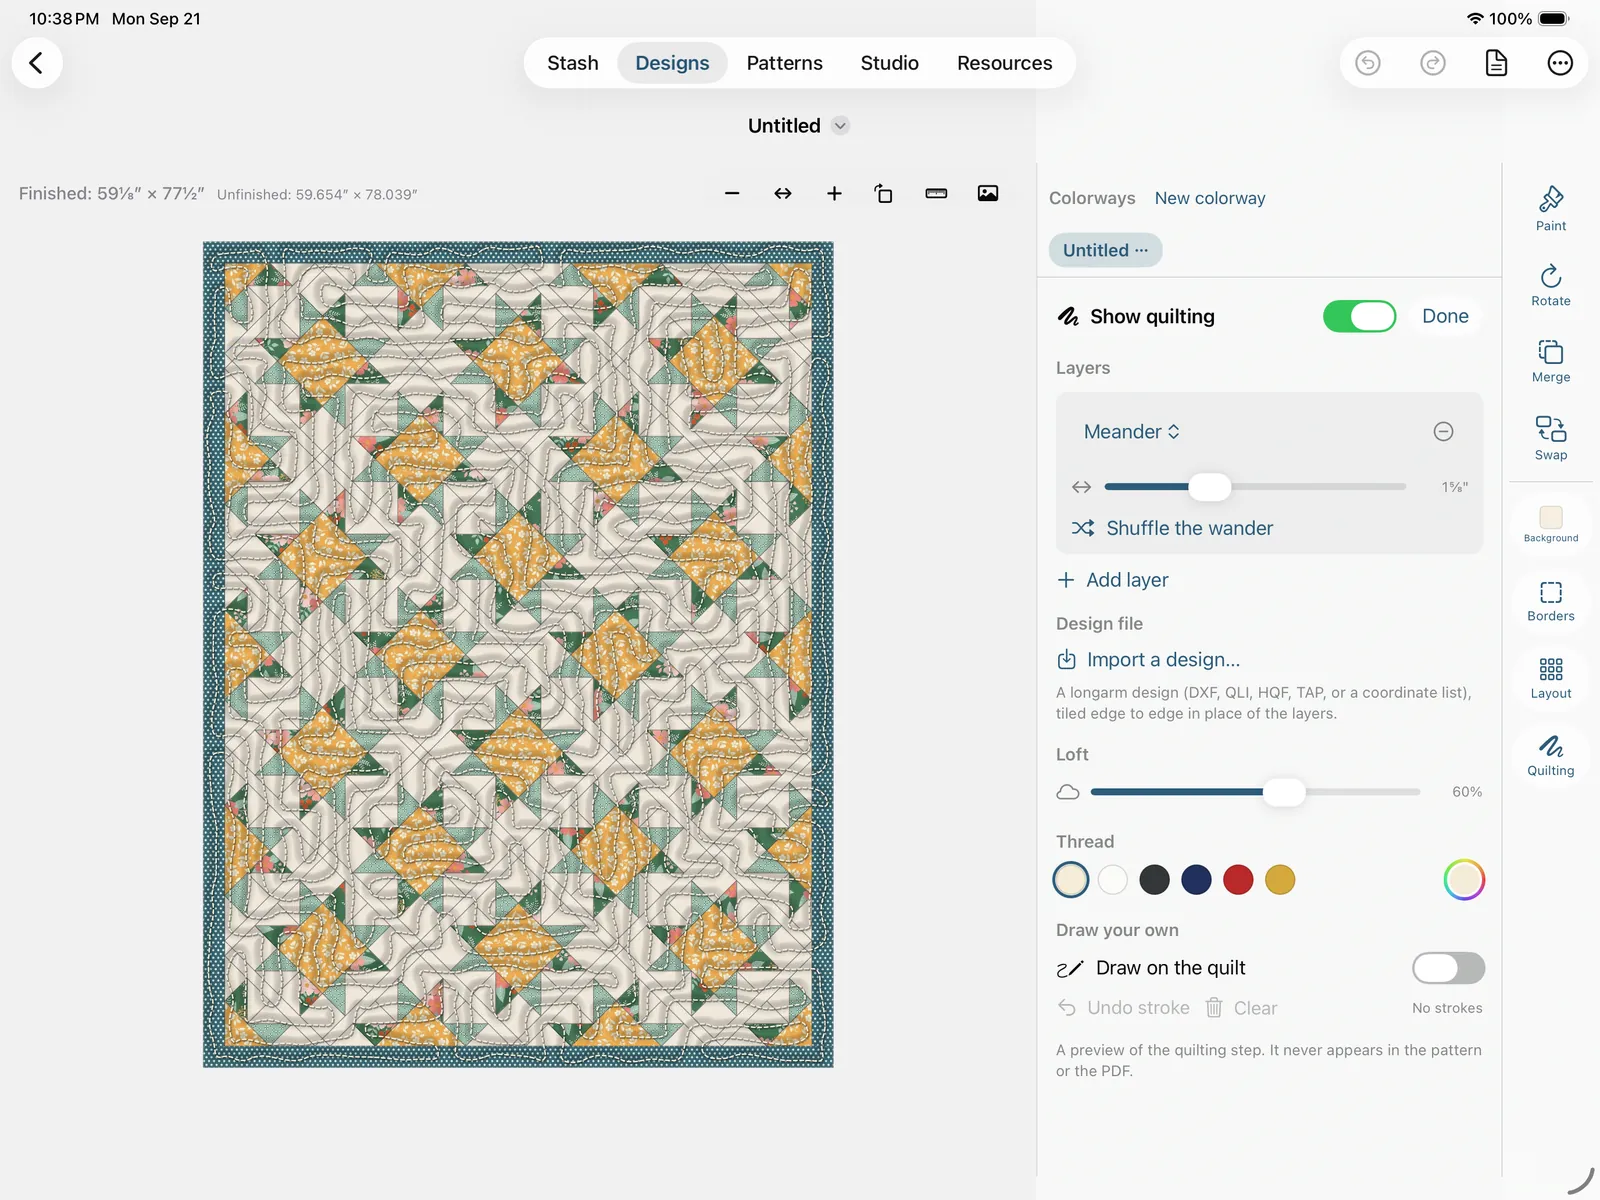
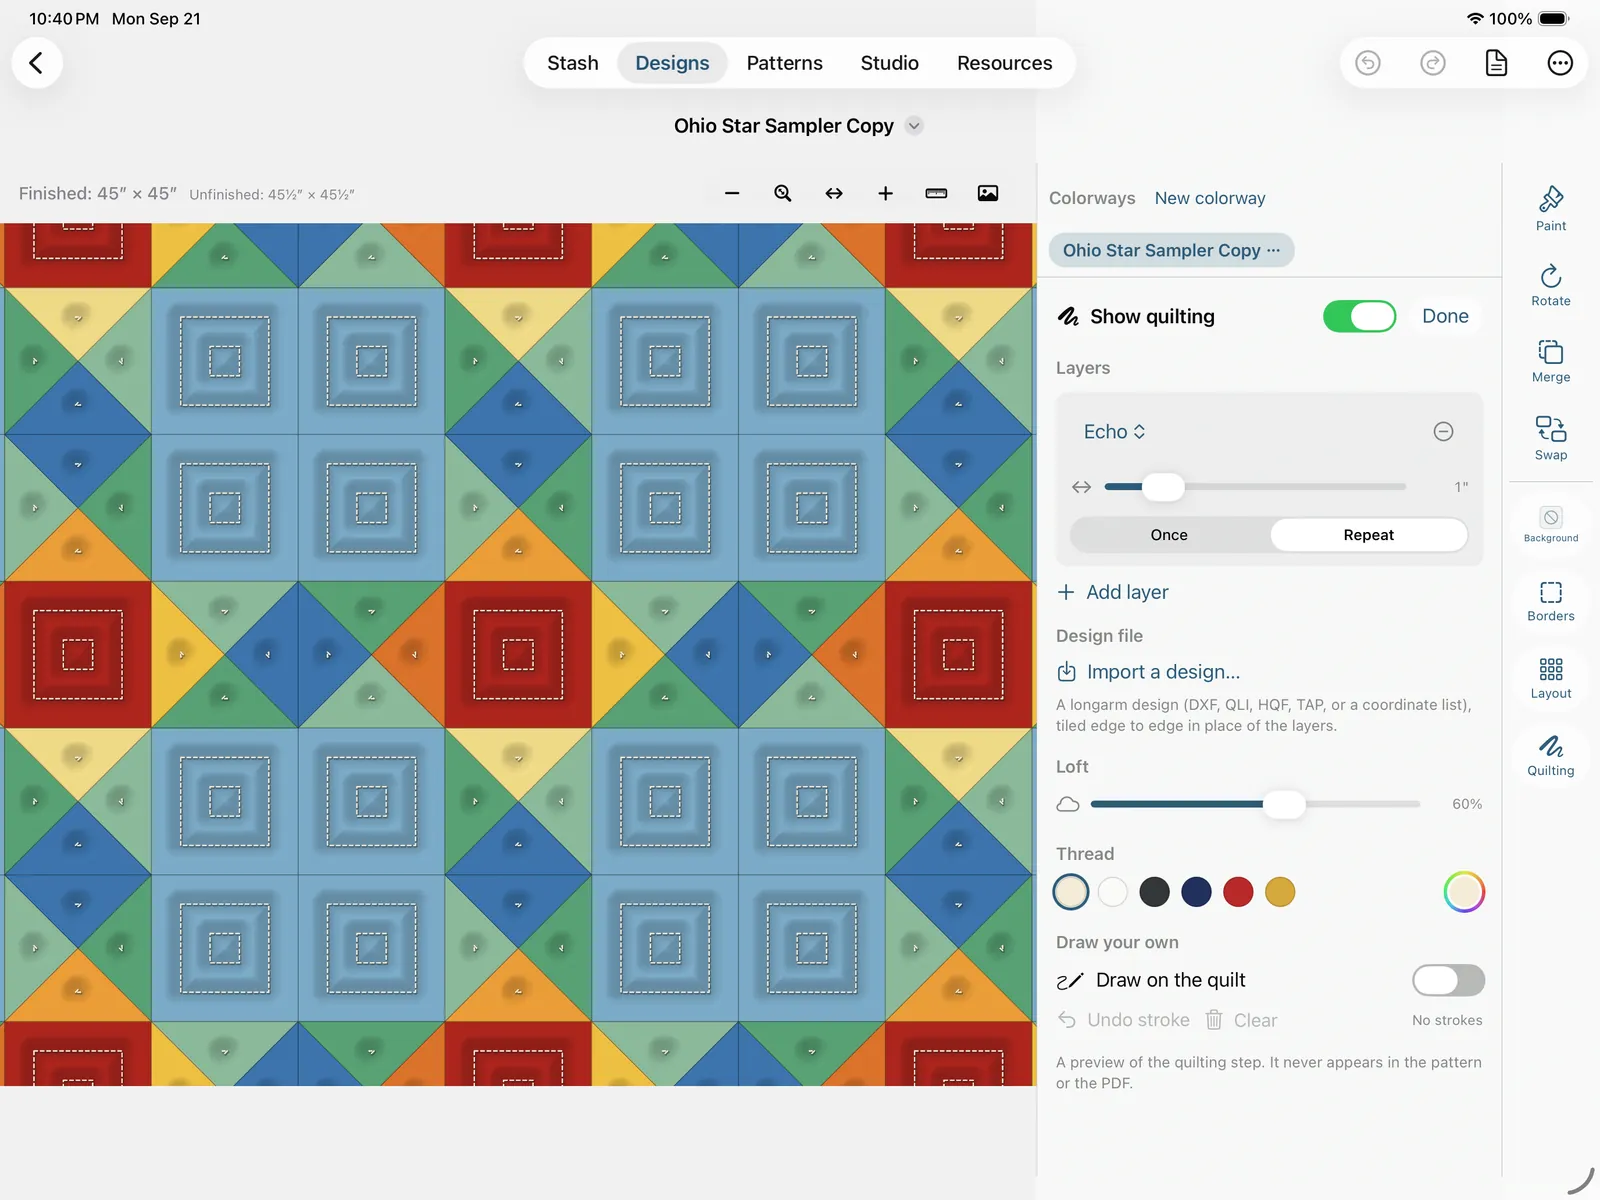
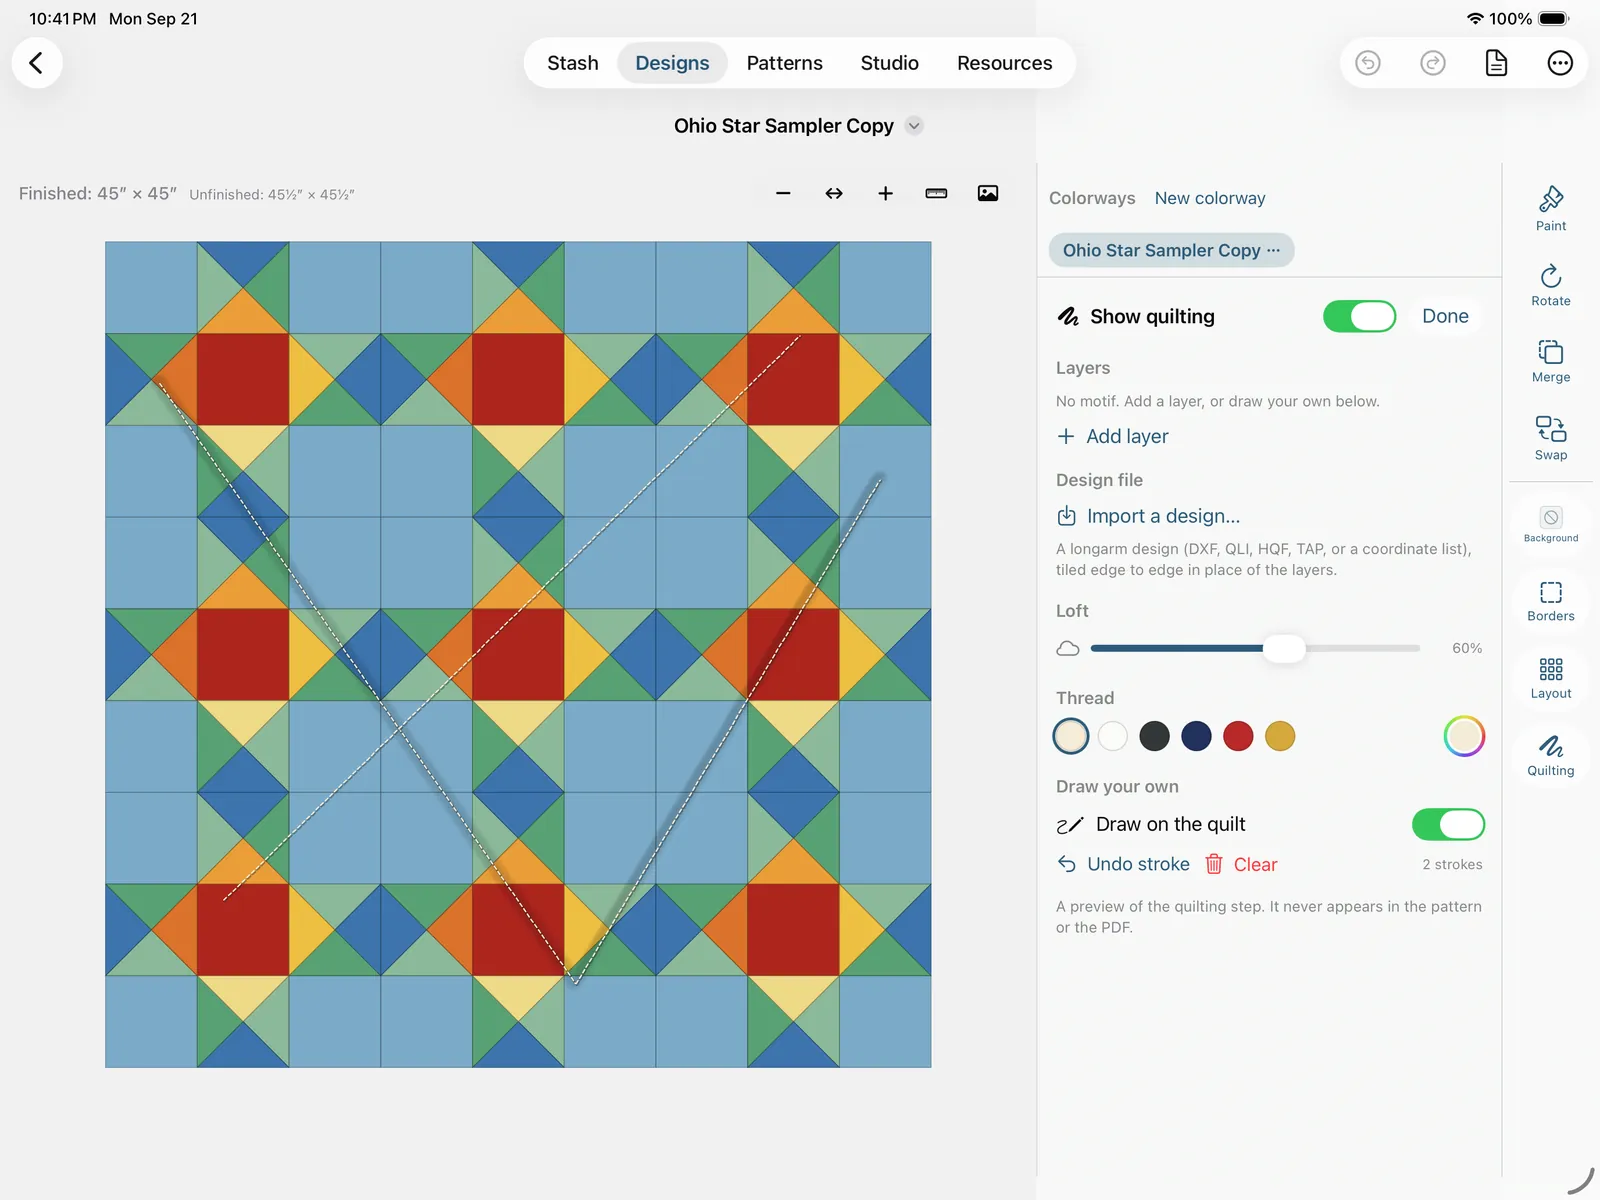
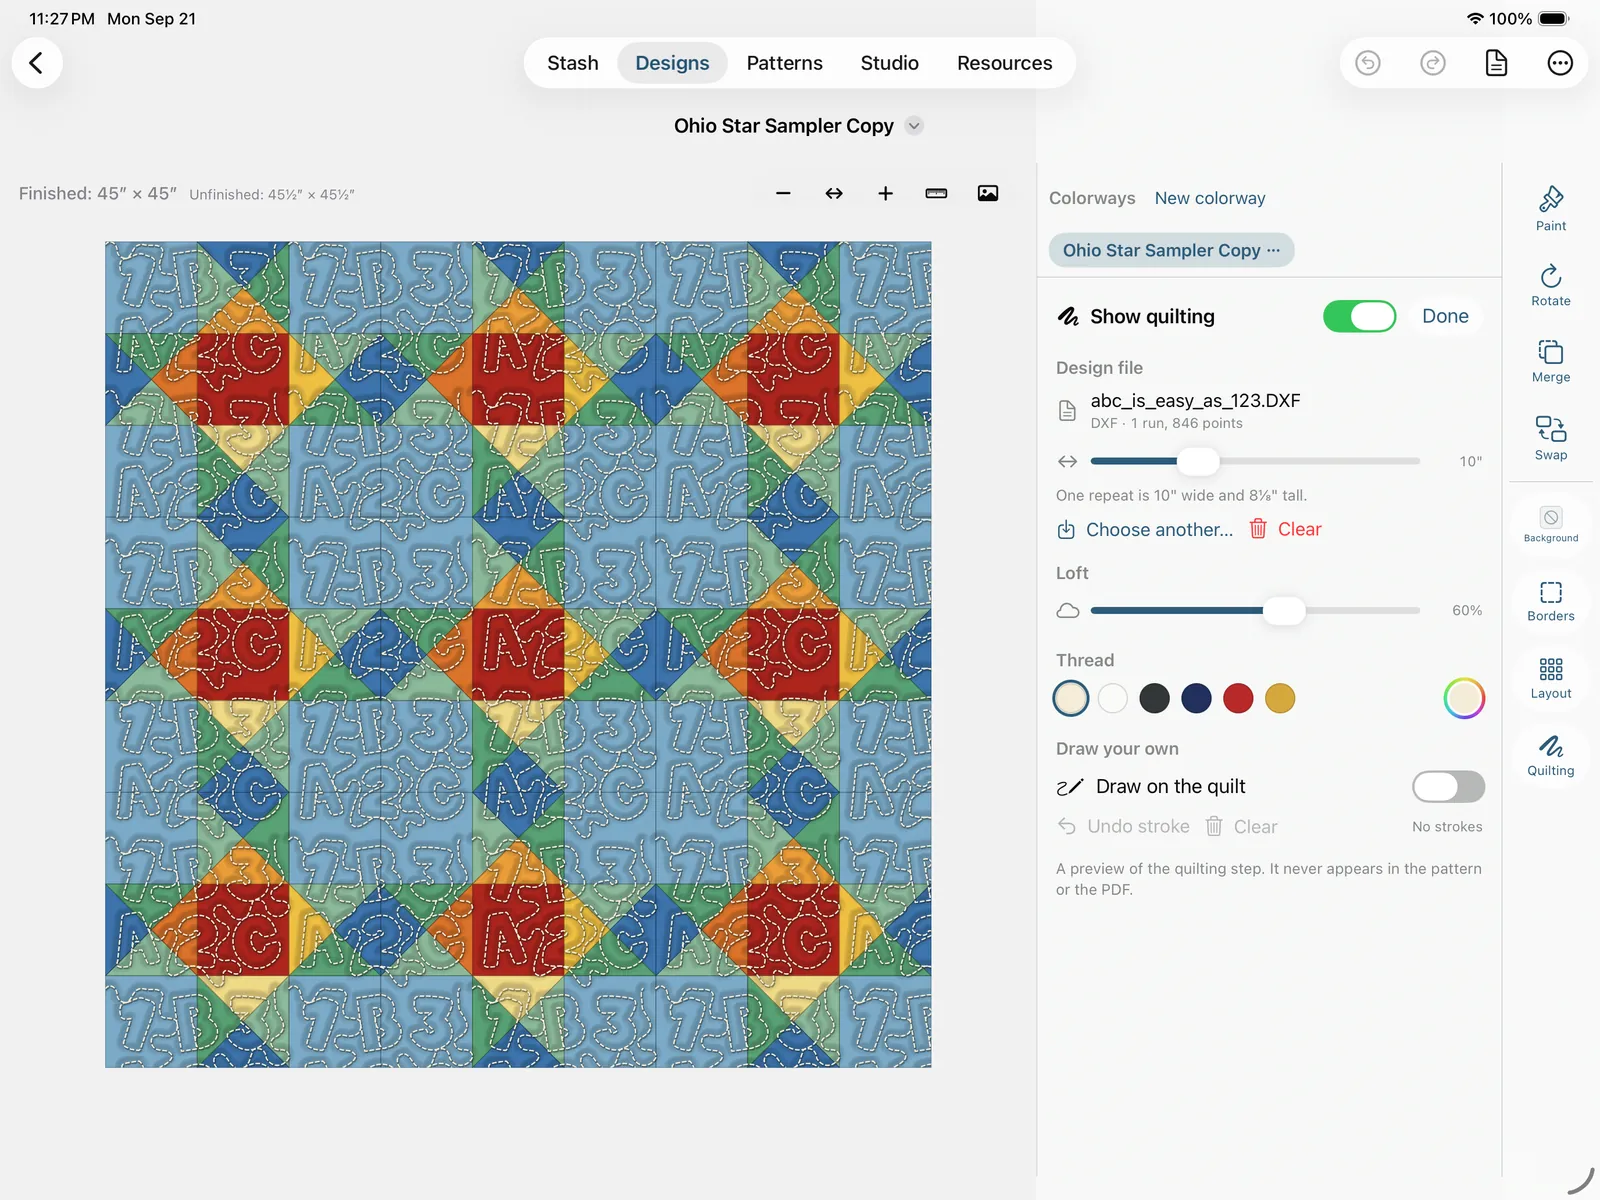
A quilt top is only half the picture: the quilting is what turns flat patchwork into something with texture and shadow, and it's the decision quilters agonize over last and see least of before it's done. Quilting on the tool rail, past the divider after Layout, previews it on your top: the thread lines, and the loft, the way batting puffs up between stitches and sinks into them. While the tool is in hand the palette column becomes the quilting controls, so the whole quilt stays in view, and a tap on the quilt paints nothing. Done (or tapping the tool again) goes back to painting; the preview stays on, so you can keep painting the quilt quilted.
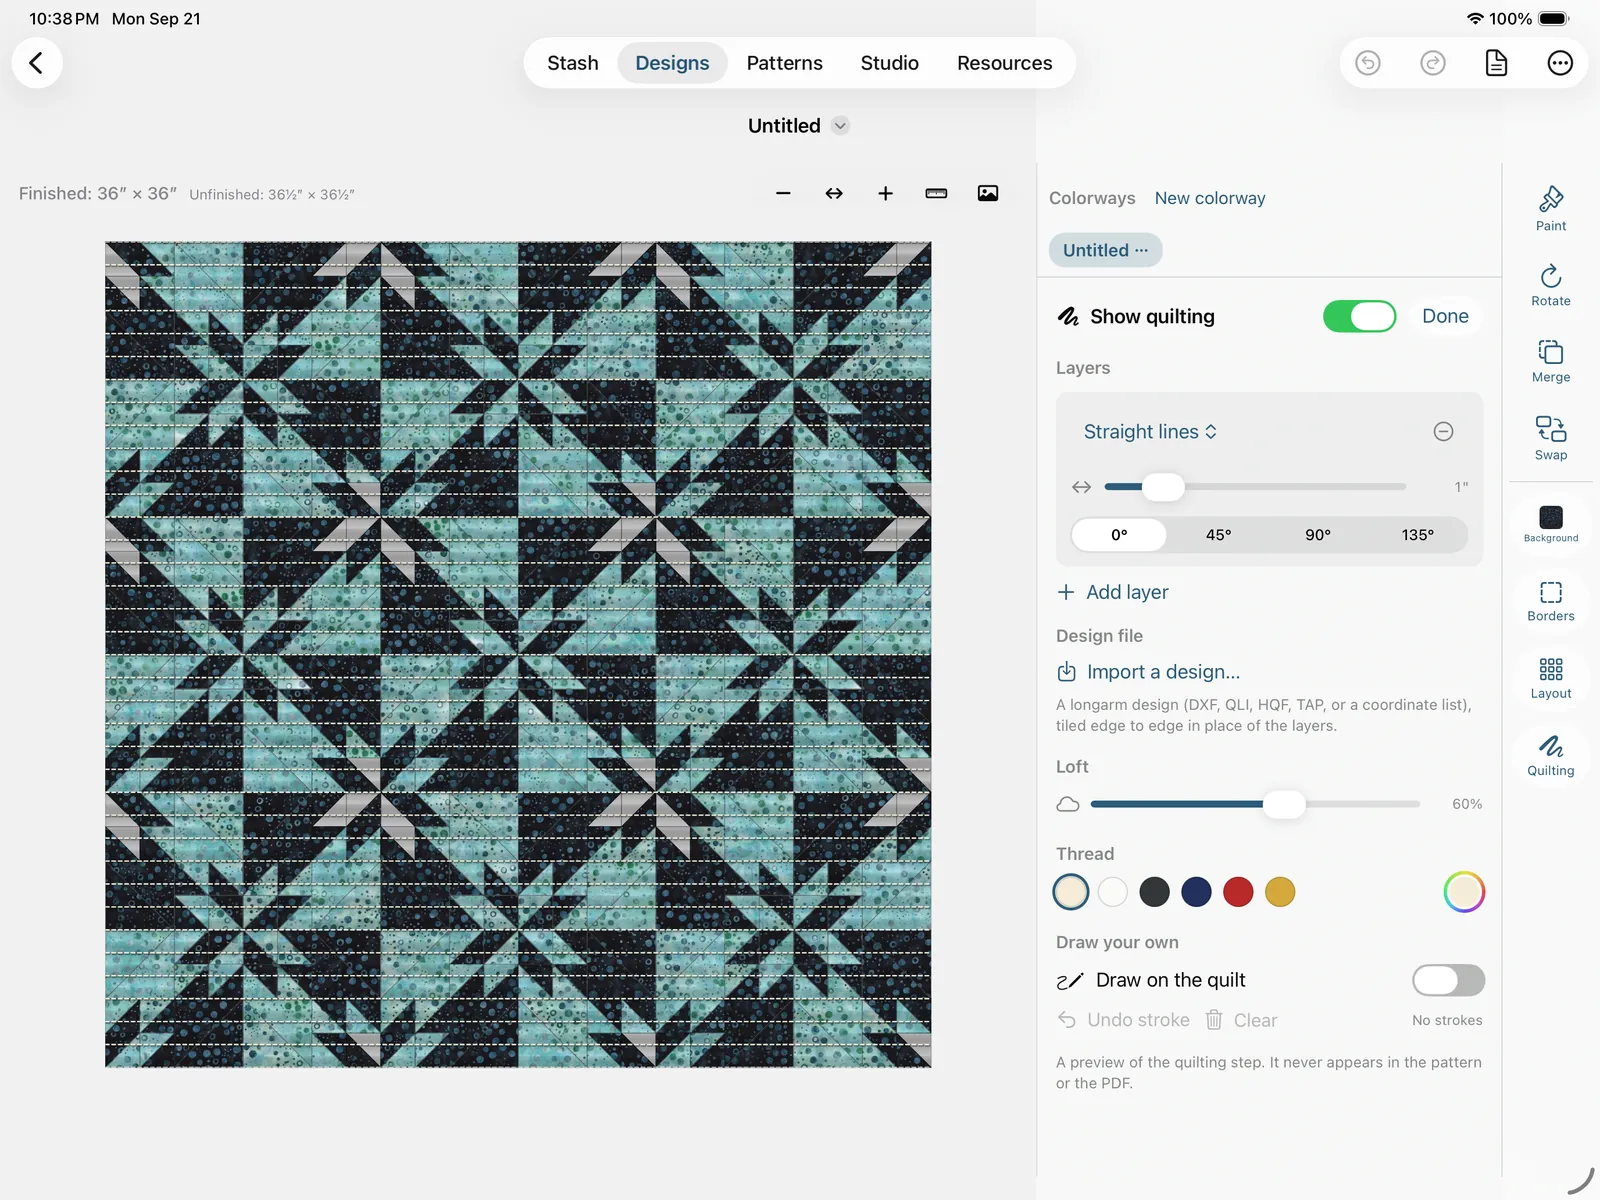
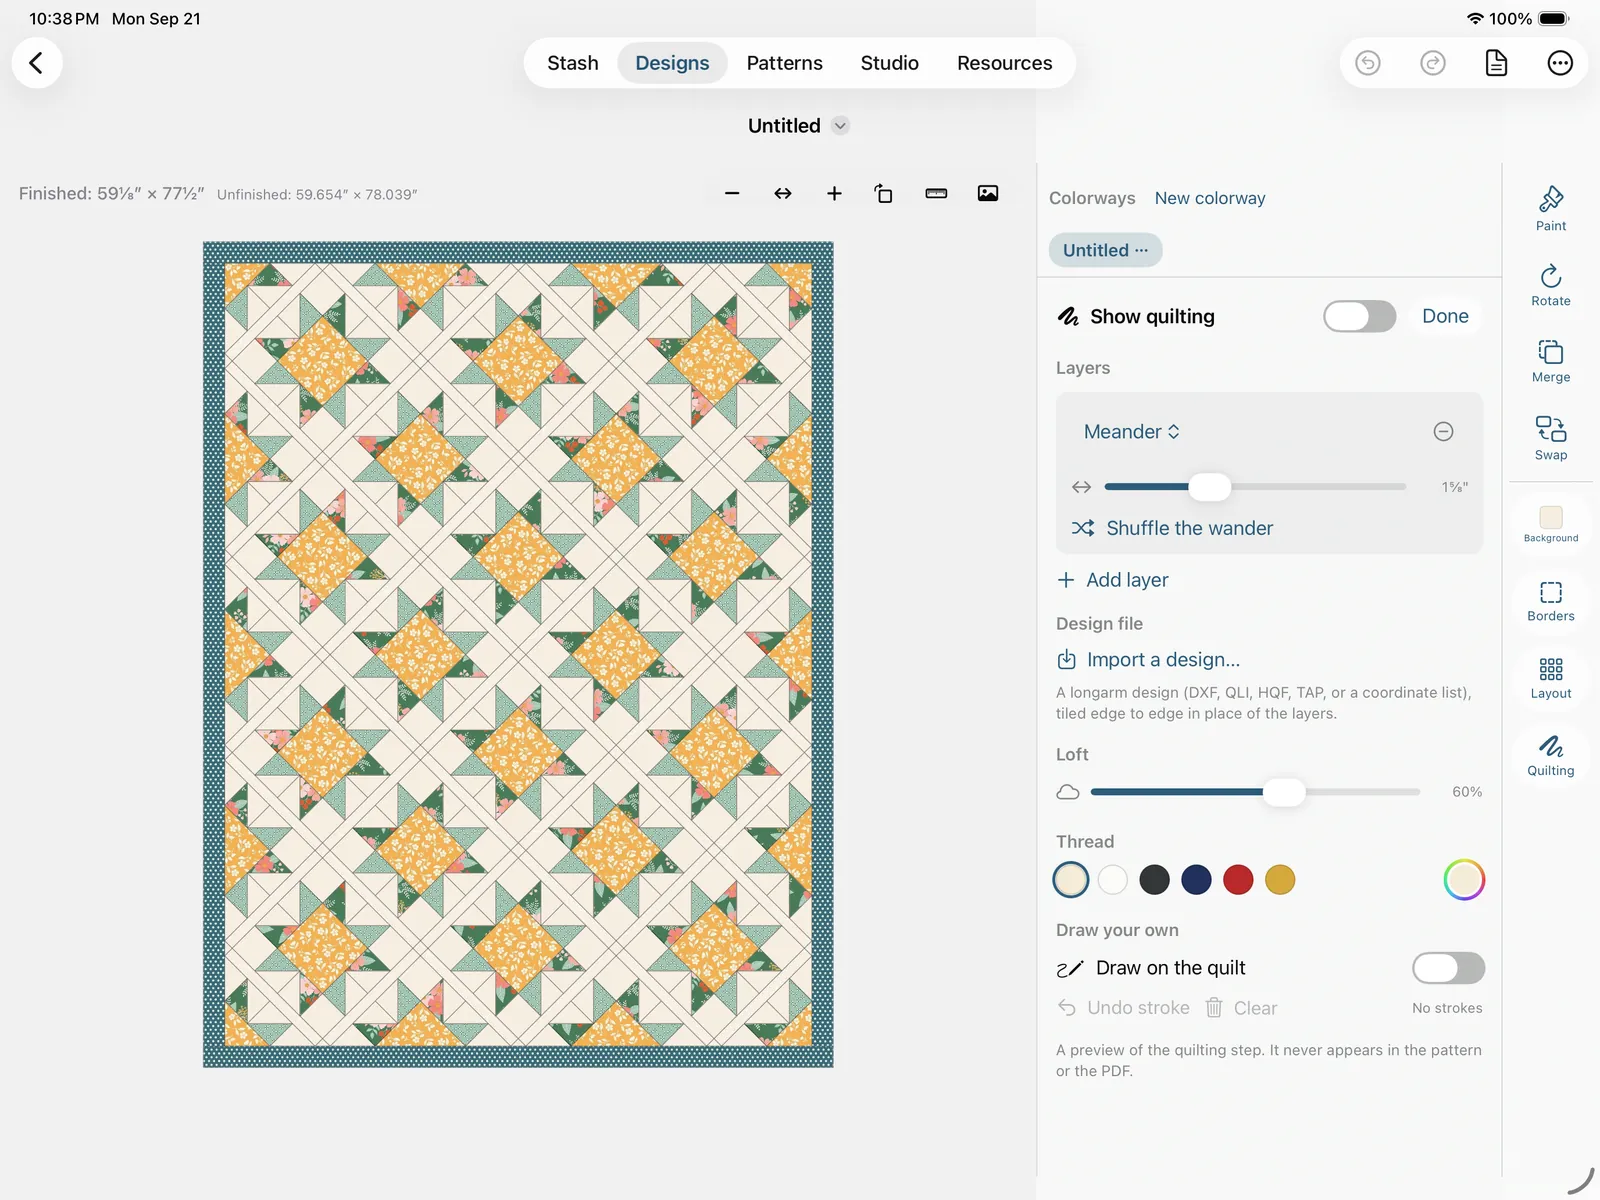
Show quilting is the switch, and it's also the before-and-after: flick it off and on to see what the quilting is doing to your fabric. Under it:
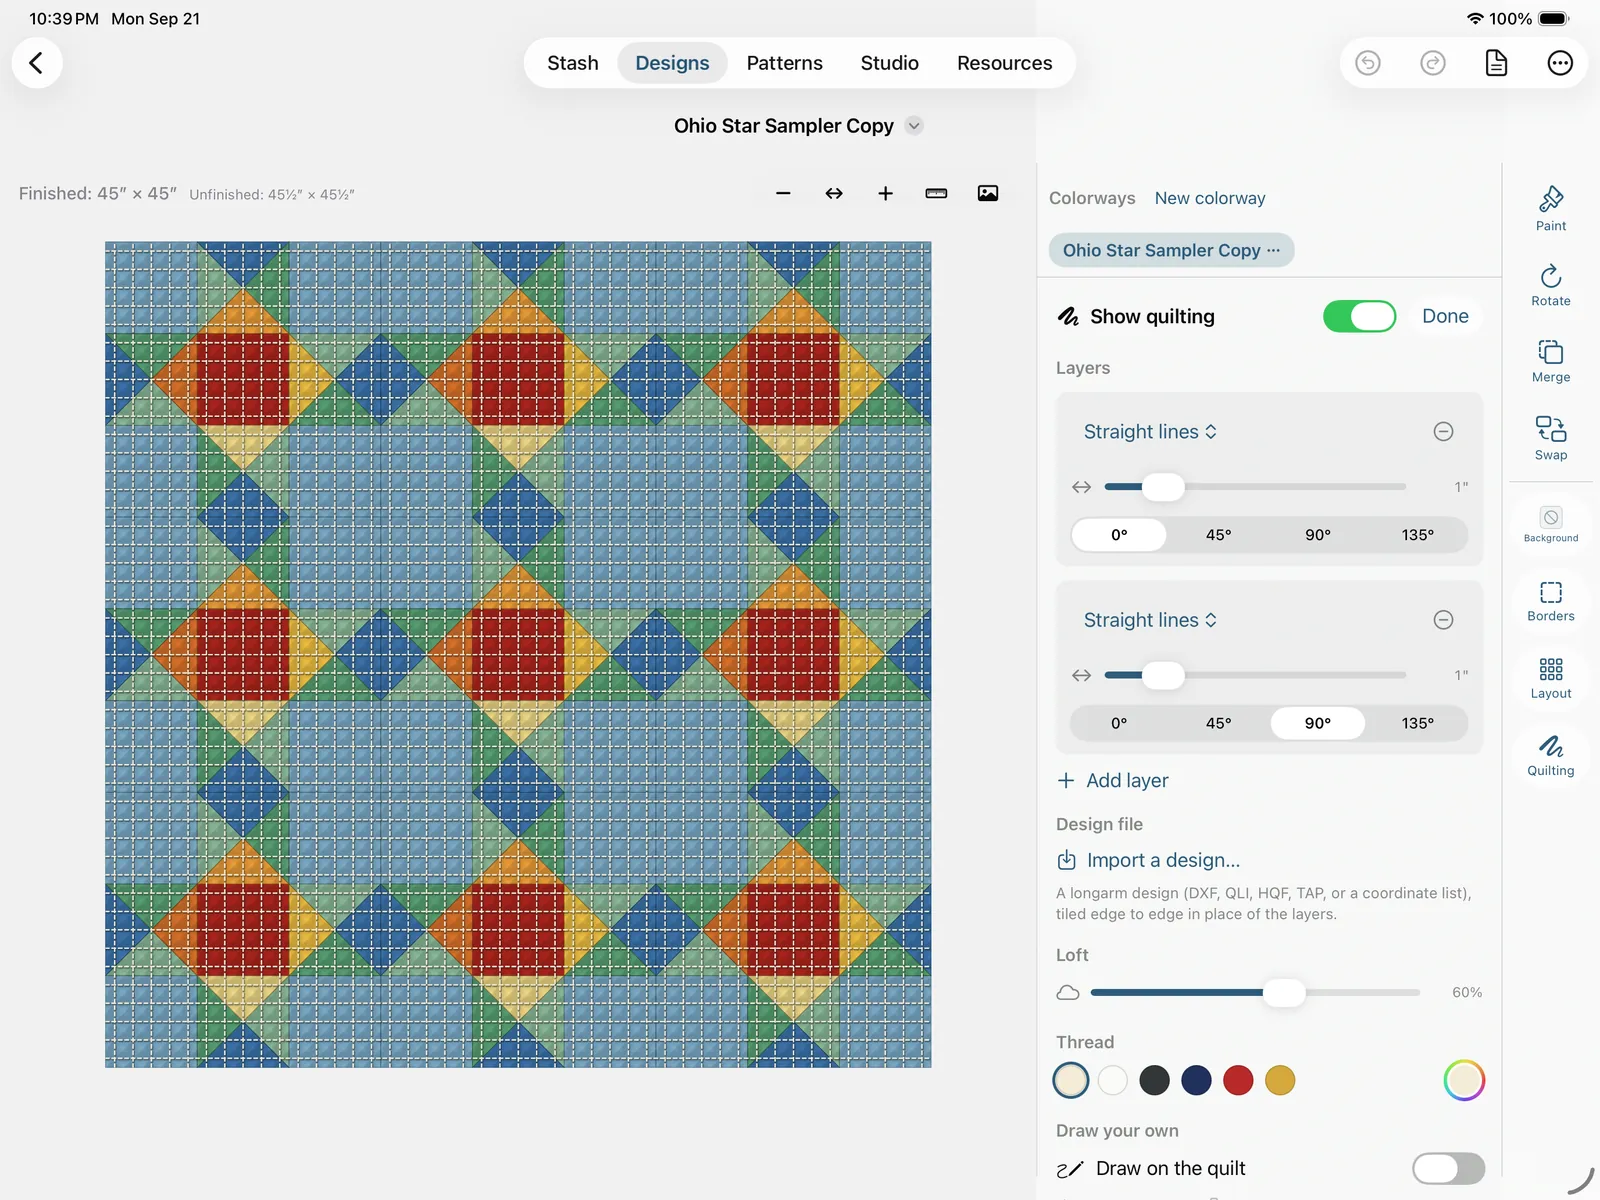
- Layers. A quilting design is one or more motifs stacked. Each layer picks a motif: In the ditch (stitched along every seam, with loft that follows the size of the pieces), Straight lines, Wavy lines, Echo (each piece outlined a spacing in from its seams, then again, or Once), and Meander (the classic wandering line that never crosses itself; Shuffle the wander draws a different one over the same top). Lined motifs take a spacing, in eighths of an inch, and an angle (0°, 45°, 90°, 135°). Add layer stacks another motif over the top and, by default, crosses the last lined one: straight lines at 0° plus straight lines at 90° is a crosshatch, wavy at 45° and 135° is a lattice. Up to four layers; remove one from its row.
- Draw your own. Turn Draw on the quilt on and a drag on the quilt is a quilting stroke instead of a pan or a paint, at any zoom, smoothed as you lift; pinch still zooms. Strokes stack with whatever layers are showing, or stand alone with no layers at all. Undo stroke and Clear live beside the stroke count.
- Design file. If you have the pantograph you mean to run as a file from your longarm's software, Import a design… opens it: DXF, QLI, HQF, TAP, or a plain coordinate list (XY, CSV, TXT). The design is laid edge to edge across the top, row after row, exactly as a pantograph is stitched, and the panel shows the file's name and how many stitch points it holds. Repeat width is how wide one repeat is on the quilt (4″ to 24″, in eighths, 10″ to start); the height follows the design's own proportions and the line under the slider says both. While a file is loaded it takes the place of the layers, since a pantograph is the whole quilting job; your layers aren't gone, they're back the moment you tap Clear. Choose another… swaps files. Drawn strokes still go on top. A file the app can't read (the encrypted 4DQ, and CQP or QDATA for now) is still offered in the picker so you get a plain answer, an alert asking for a DXF, QLI or coordinate-list export instead, rather than a grayed-out file with no explanation.
- Loft. How much the batting puffs. The light comes from the upper left of the screen and turns with the view, so a quarter-turned quilt is lit from the same corner as an upright one.
- Thread. Six spools (white, cream, charcoal, navy, red, gold) and a custom thread color picker for anything else.
It's a preview and only a preview. Nothing here is saved with the design, printed in the pattern or drawn in the PDF or the thumbnail; reopen the quilt and it's flat again, and the pattern still ends at the finished top. What it's for is the decision: whether an all-over meander flattens your piecing, whether echo quilting makes the star pop, whether the ditch is enough. The block editor and the Design Your Own board both have it; the Line and radial tool canvases don't, since there's no fabric under them to loft.
The core move: load the brush, then paint
Everything works the same way:
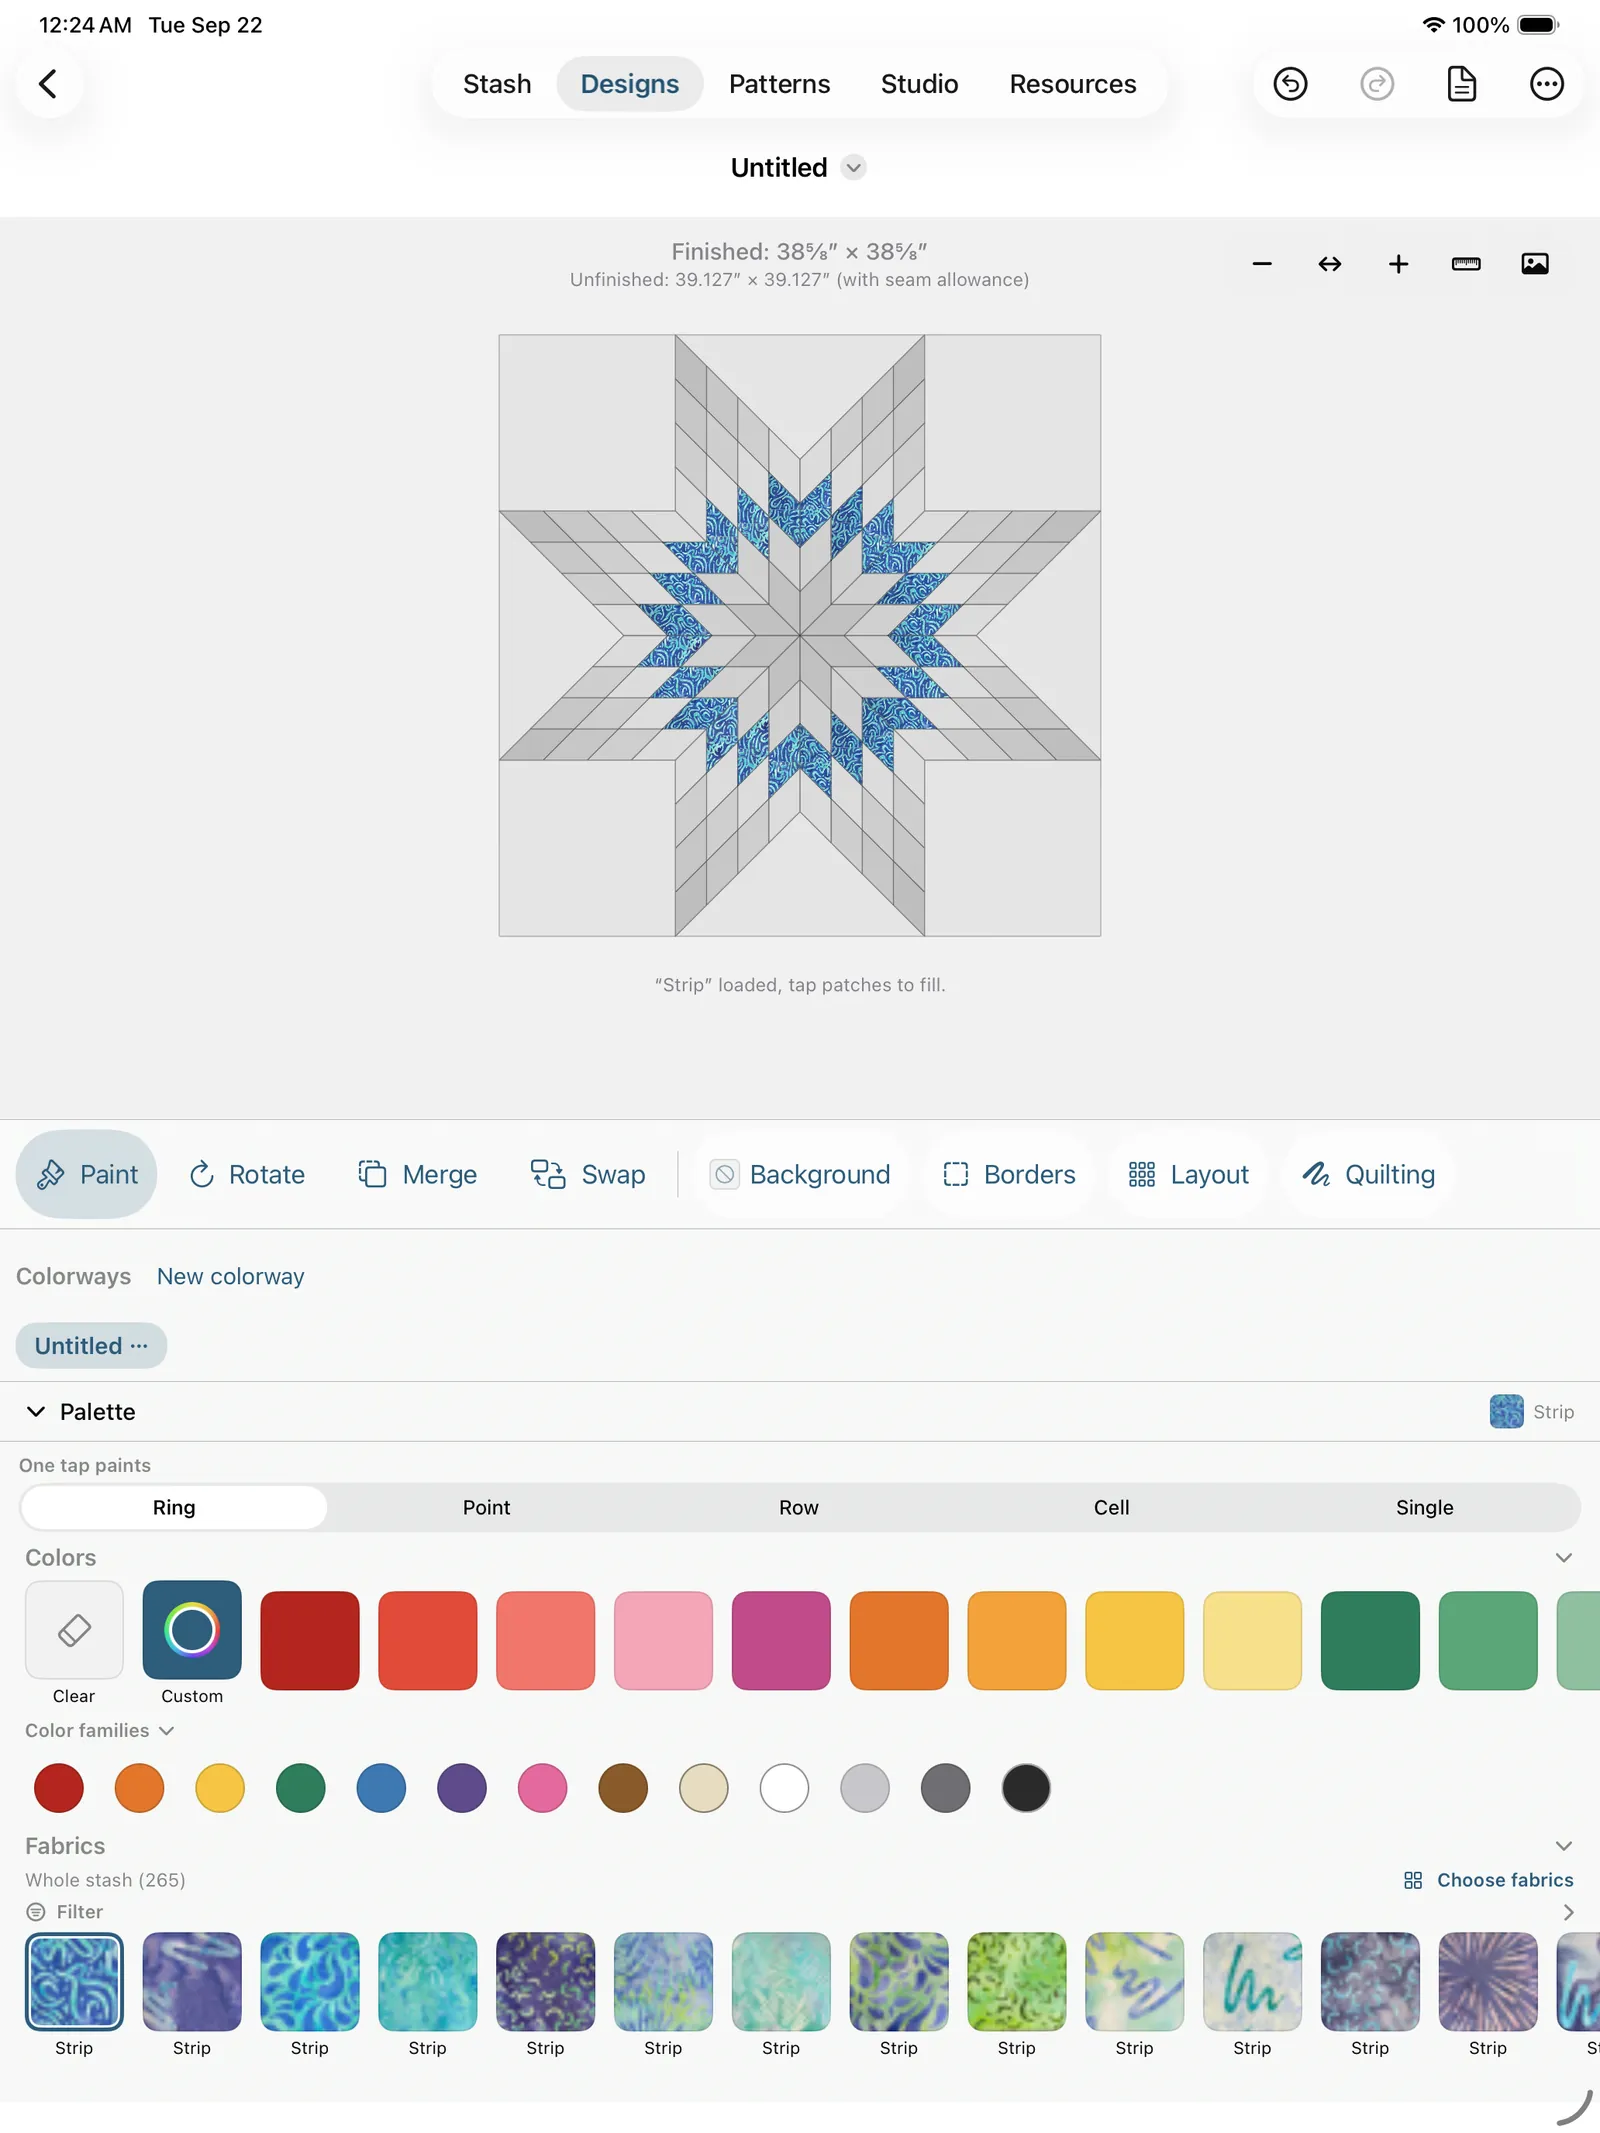
- Tap a color or fabric swatch in the palette to load it onto your brush. A highlighted ring shows what's loaded, a hint line under the canvas tells you what will happen, and the swatch on the Palette handle keeps showing it even with the tray shut.
- Tap a patch to fill it, or drag across the quilt and the brush paints every patch your finger crosses, which is the fast way to fill a whole run in one sweep.
The drag is smart about zoom. At fit zoom (the whole quilt on screen) there's nothing to pan, so dragging paints. Once you've zoomed in, dragging pans the canvas instead, and tapping still paints, so you can get precise on small patches without the brush smearing everything on the way past.
To swap a fabric, just load a different one and paint over what's there. To erase, load the Clear (eraser) chip and tap patches to empty them.
Blocks that have rings, like the stars, get a scope control. A Lone Star is a hundred and twenty-eight diamonds, and nobody wants to tap a hundred and twenty-eight times to lay one color round a ring. So when the block you're painting says it has repeating groups, a One tap paints control appears at the top of the palette: Ring · Point · Row · Cell · Single. On Ring, one tap fills every diamond the same distance out from the center; on Point, the whole eight-diamond point you touched; on Row, the whole strip-set row; on Cell, that one small diamond in all eight points at once, which is how you color a Lone Star freely and still have every point come out the same (and still cut it as strip sets); on Single, just the patch under your finger, which is how every other block in the app has always painted. It starts on Ring, and one Undo takes back the whole ring, not one diamond of it. The background is grouped too, so a tap on one corner square fills all four. It only ever reaches inside the block you touched: in a quilt of LeMoynes, a ring tap paints that star and leaves its neighbors alone.
Every patch shows a different part of the print. Fill fifty cells with one fabric and you don't get fifty stamps of the same square inch, each patch samples its own slightly different window of the photo, the way fifty pieces cut from real yardage would each land somewhere different in the print. It's what stops a repeated fabric reading flat and unlike cloth. The scale never changes and the print is never turned, only slid. If you'd rather every piece showed the exact middle of its swatch, turn Vary fabric placement off in Settings (see Fabric preview).
The palette
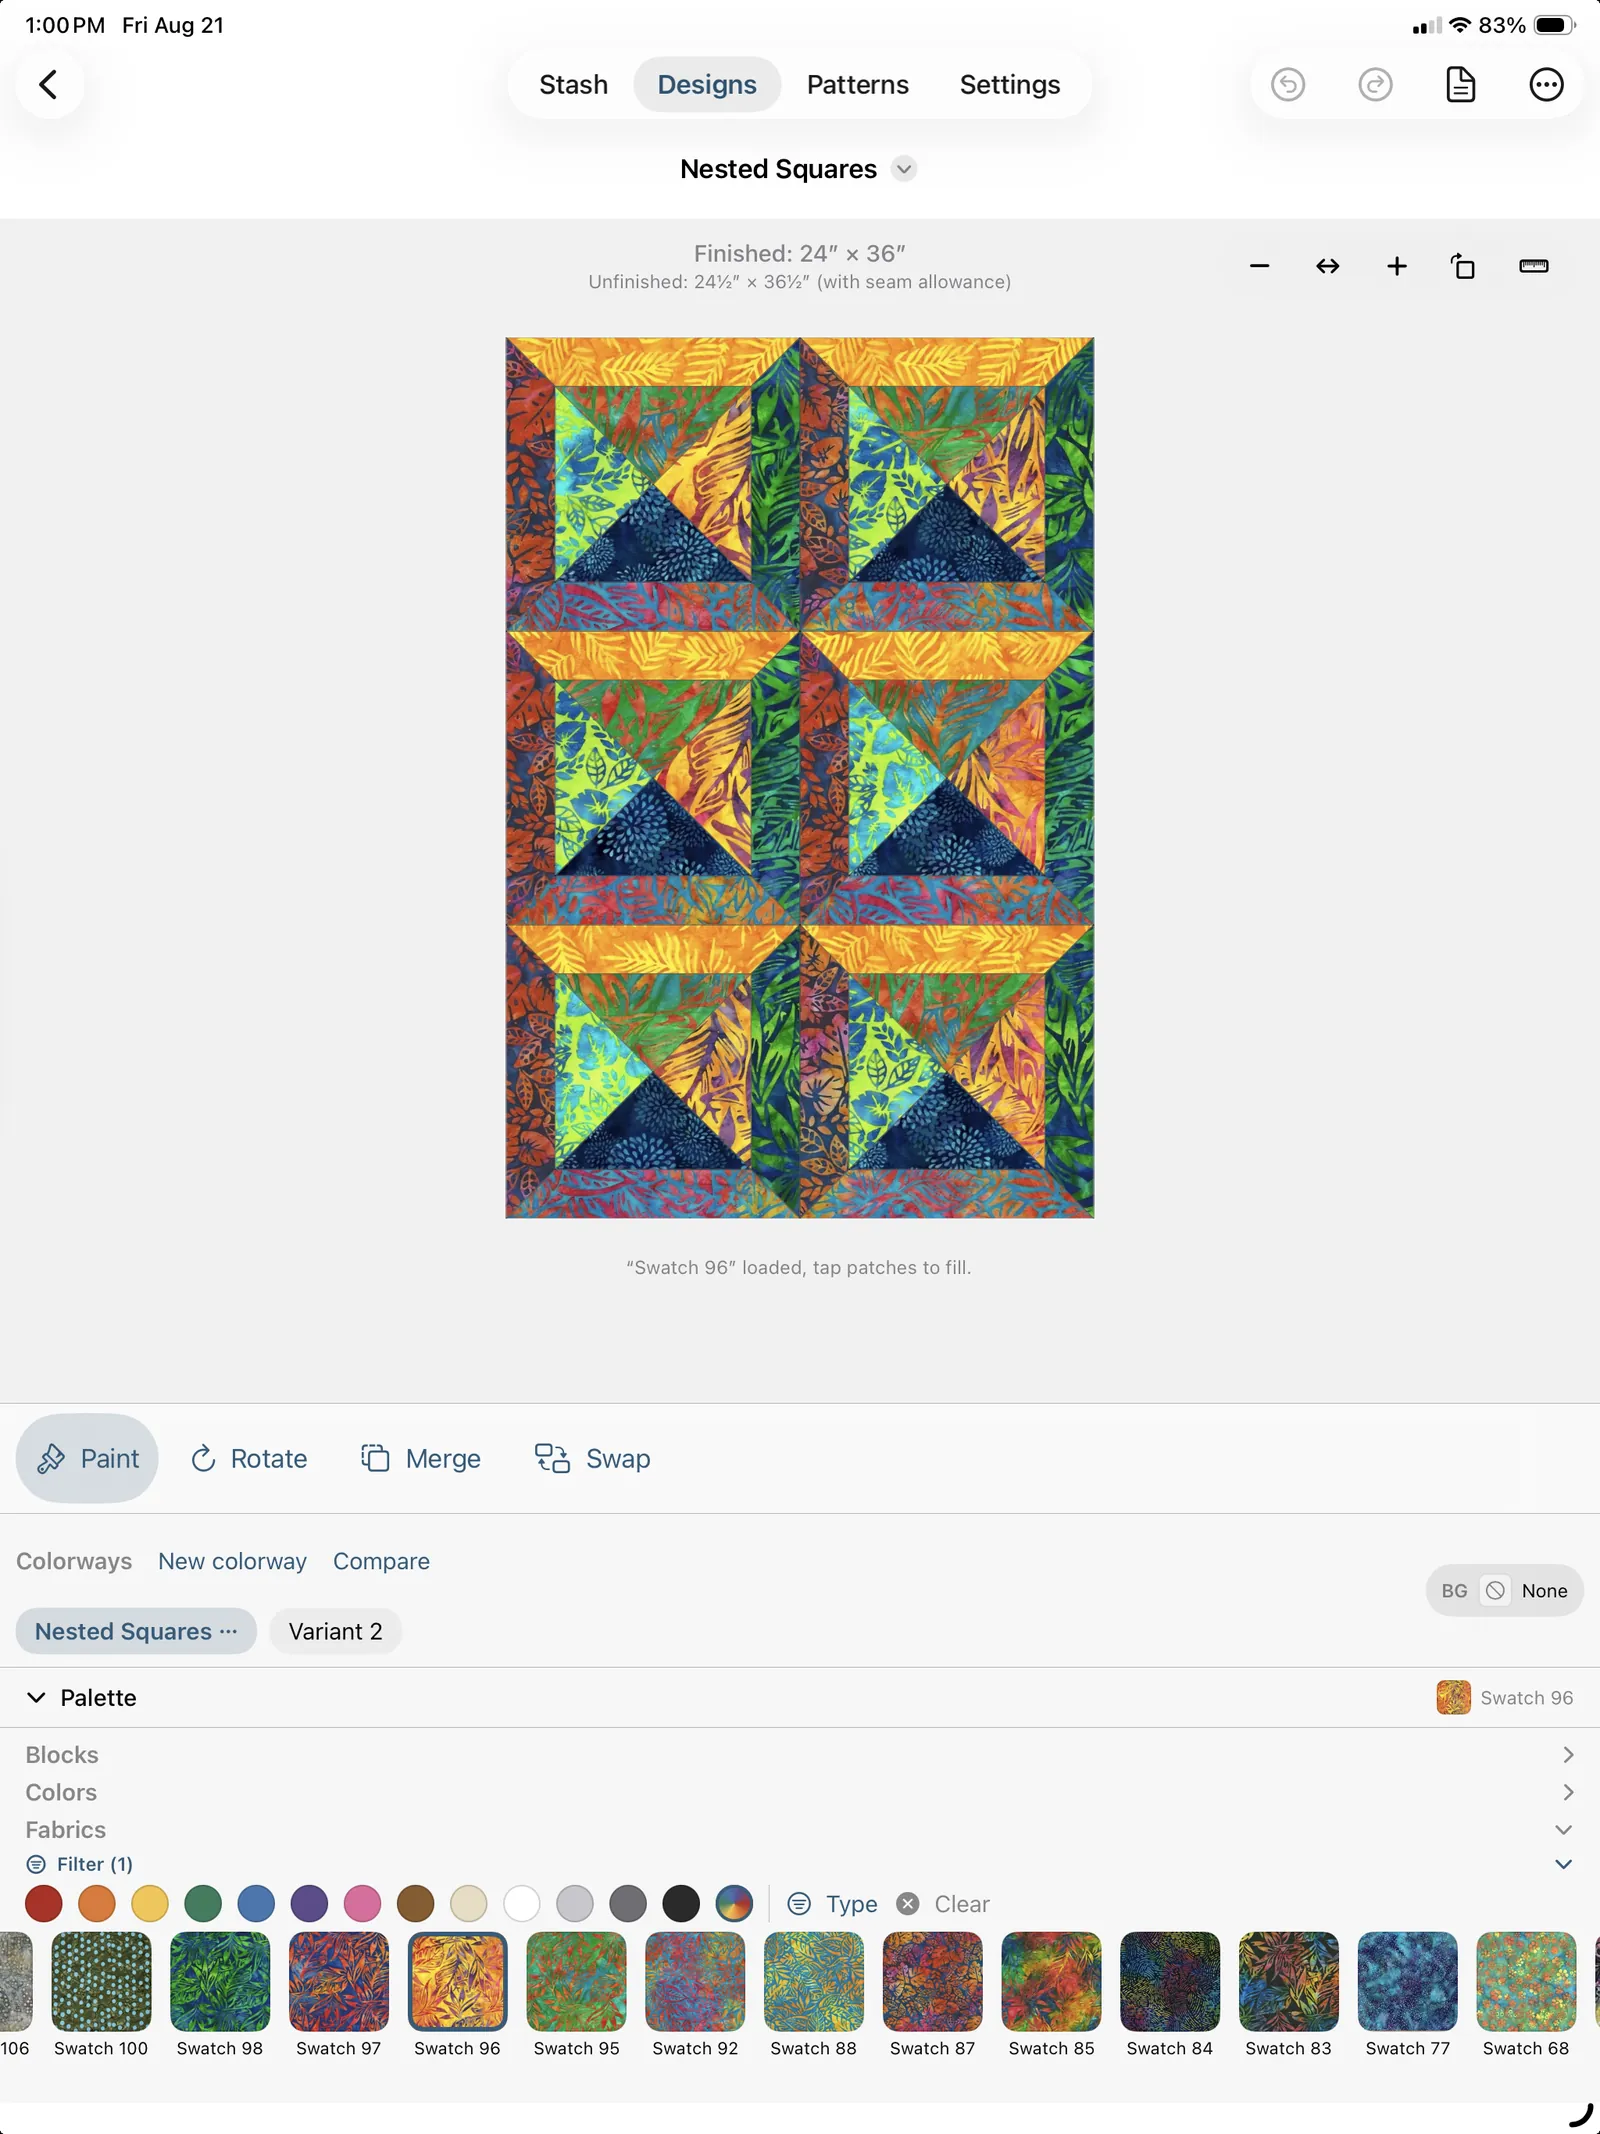
The palette is split into collapsible sections: Blocks (quilt designs only), Colors, and Fabrics (or Strips for jelly-roll designs). Tap a section's header chevron to collapse it and give the canvas more room; the app remembers which sections you've collapsed.
Tapping a chip in the palette loads your brush. It never paints. That's the whole rule of this shelf, and it has exactly one exception, and that exception announces itself in accent color across the whole tray before it will take a single tap: while you're setting the background, a chip sets the quilt's ground instead. Nothing else in the palette ever writes to the quilt.
The chips lay themselves out to suit the space. Under the quilt the palette is wide and short, so each section is a row you flick sideways. Beside the quilt it's a tall narrow column, so the chips wrap into a grid and you scroll down through them: down is the axis that column has. A sideways row in it showed about five fabrics with the rest of your stash off the right edge, and on a Mac they were unreachable outright, since a mouse wheel doesn't turn sideways.
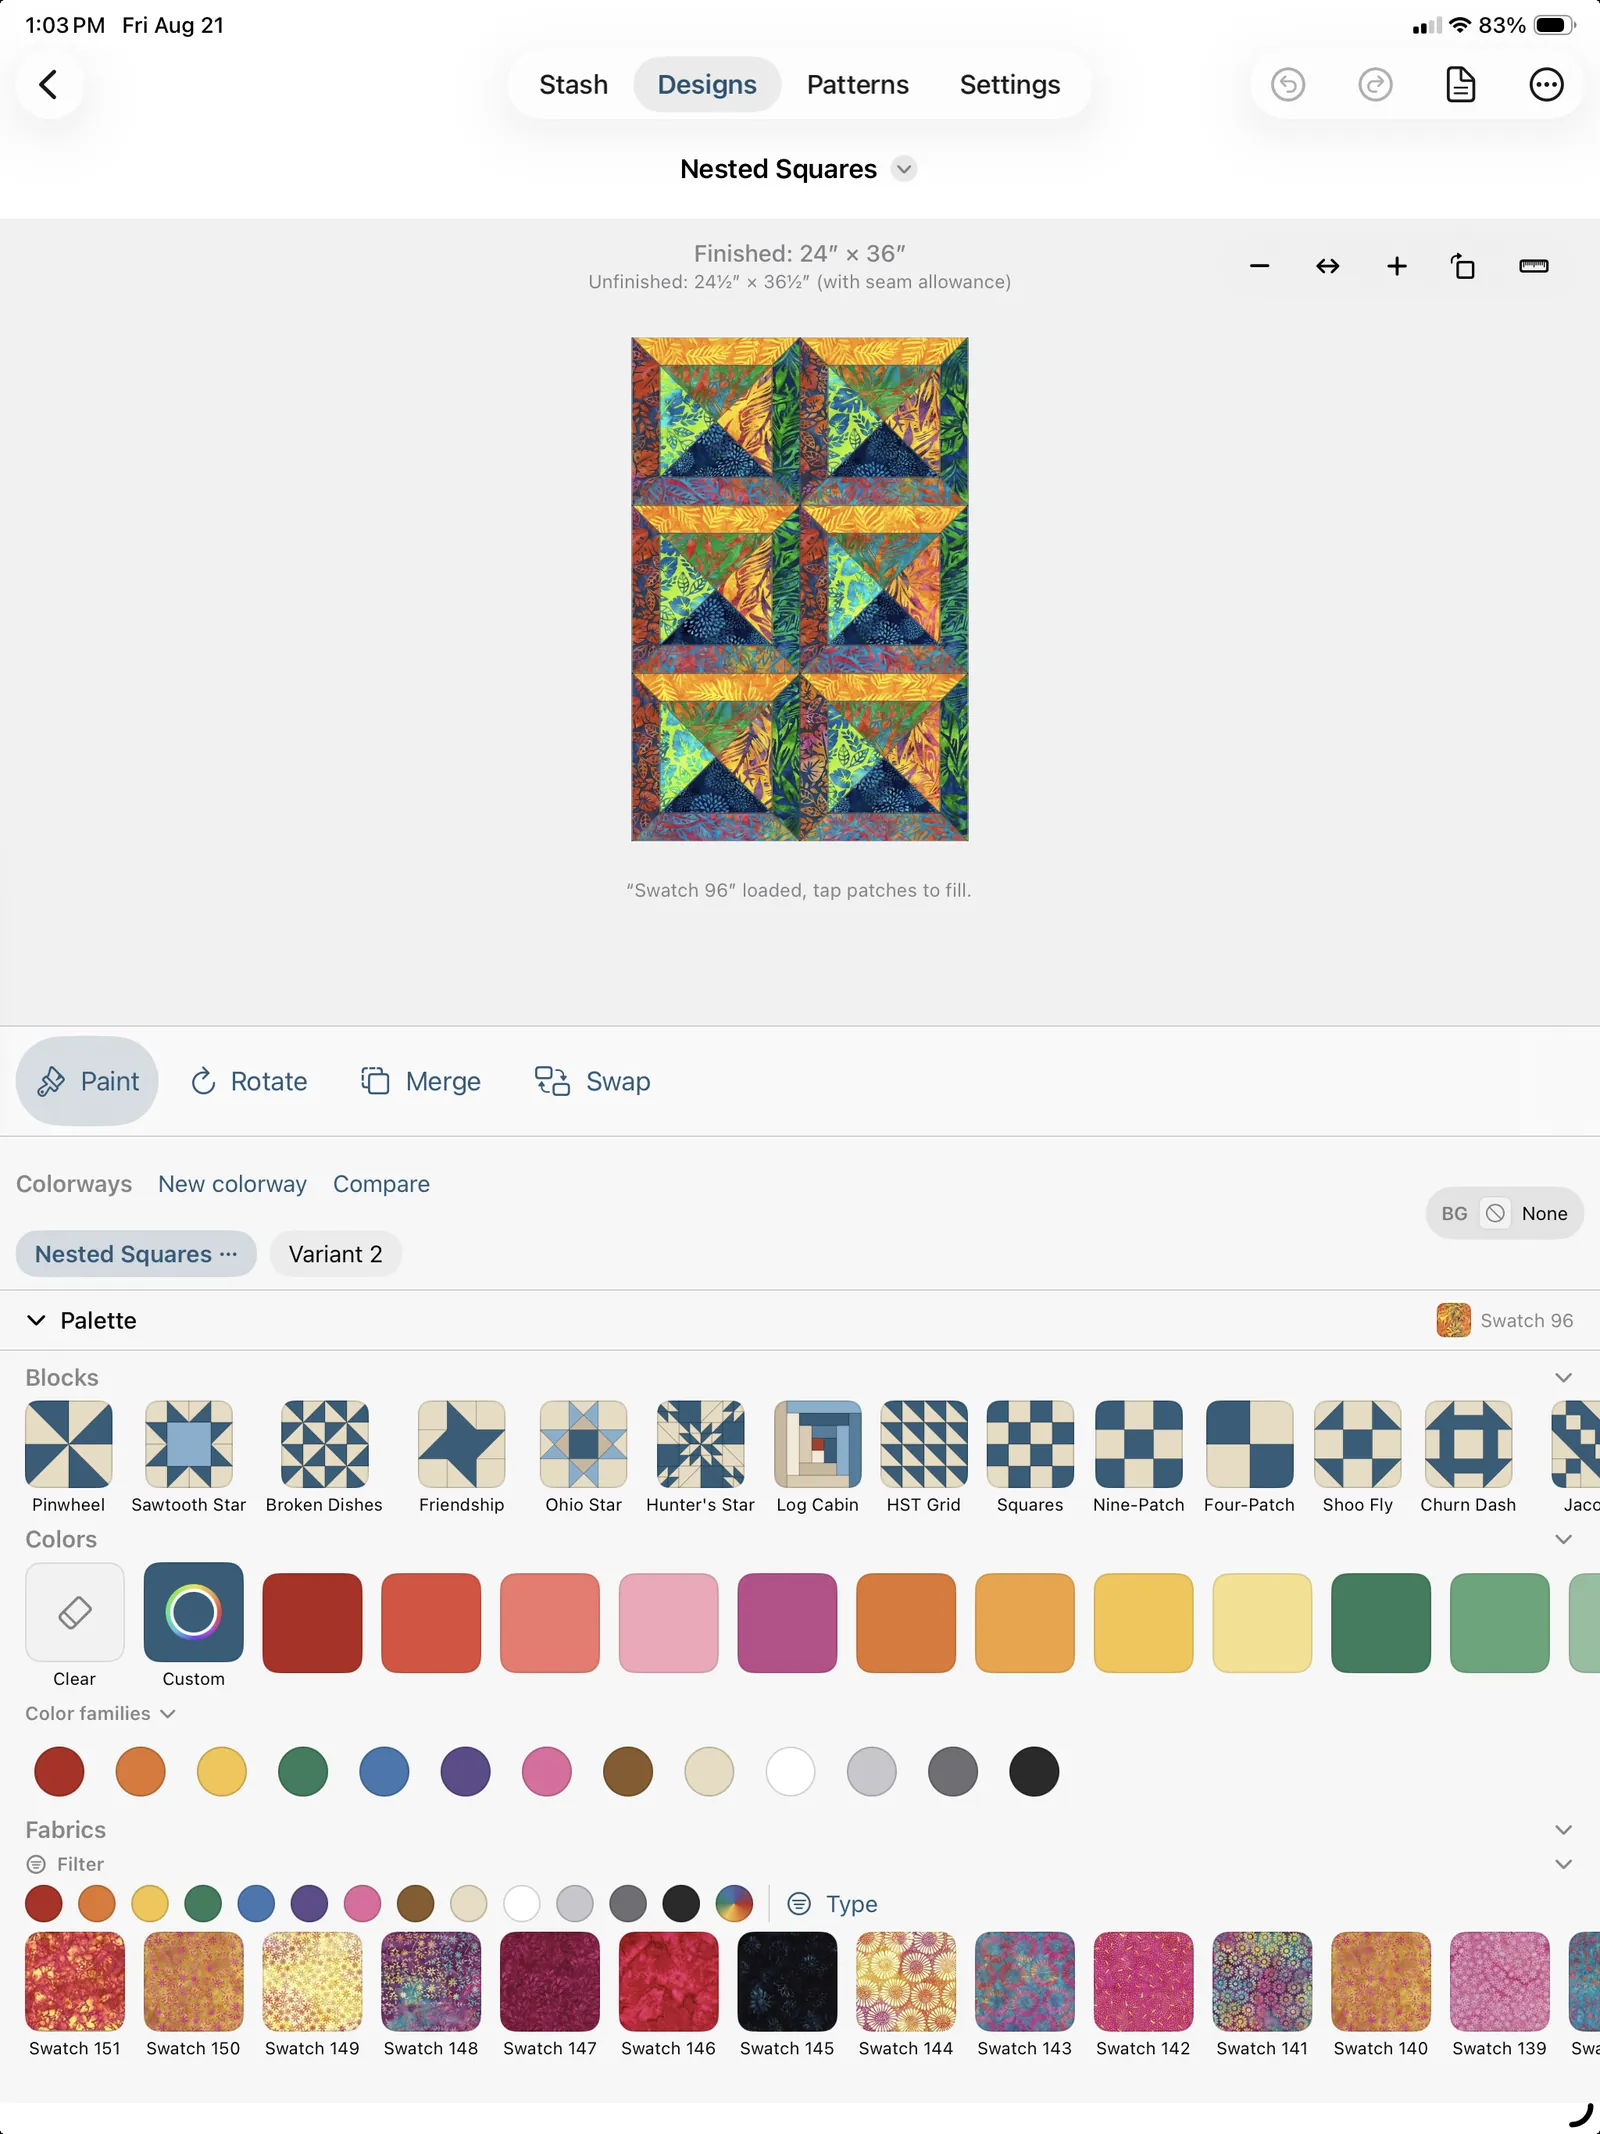
In the Colors section, from left to right: the Clear eraser, a Custom color picker (tap to mix any color), and a row of preset solid colors.
Color families
Under the solids sits Color families: a row of thirteen color dots, the same ones your stash sorts fabric by. Tap a dot and it opens a small color explorer for that family, and it covers the three things a quilter actually sorts color by:
- A Hue strip, dragged sideways, walks continuously around the color wheel. This is how you reach the colors that fall between two dots: drag Blue toward Green and you pass through every teal on the way.
- A Tone strip runs from Vivid to Dusty. Drag toward dusty and you're in low-volume, grayed, blender territory, which the twenty-five preset solids can't offer at all.
- A value ladder of nine chips underneath, from a pale tint down to a deep shade, which regenerates live as you move either strip. Tap a chip and it loads onto your brush like any other color.
The caption over the ladder names where you've landed, not the dot you came in through, so dragging blue across into green says "Green tints and shades." The dots stay put as quick jumps.
The five neutrals (white, cream, light gray, dark gray, black) skip the hue strip, because there's no hue in them to walk; they keep the ladder. Multi gets no dot at all, since the only ramp a multicolor print could offer is an invented rainbow.
It's the control that was missing between "one of these twenty-five solids" and "dial the exact hex yourself": the answer to show me pinks. Tap the open dot again (or Close) to shut it, and the section's own chevron hides the dots entirely if you'd rather have the room back. Nothing here is saved, it's a browse; closing it throws the whole thing away, and the Custom picker is still where you go to dial an exact hue.
The Fabrics section shows your full Stash for block designs, or just this roll's strips for jelly-roll designs. If it's empty, the app points you back to the Stash to add fabric.
You can narrow that to just this quilt's fabrics. A quilt usually pulls from a handful of your stash, not all of it, so the top of the Fabrics section carries a chooser row, Whole stash (N) with a Choose fabrics button. Tap it and "Fabrics for this quilt" opens your stash with a checkmark on each; tick the ones this quilt uses and the palette shows only those, the label switching to This quilt's fabrics (N). It's per design, not per colorway, so every colorway paints from the same shortlist. A fabric you've already painted with but didn't tick still shows, under an In use heading, so nothing you're using can vanish on you. The picker's Options menu has shortcuts, Add all shown, Reset to fabrics in use, and Clear (show whole stash), and an empty list simply means the whole stash, which is where every quilt starts.
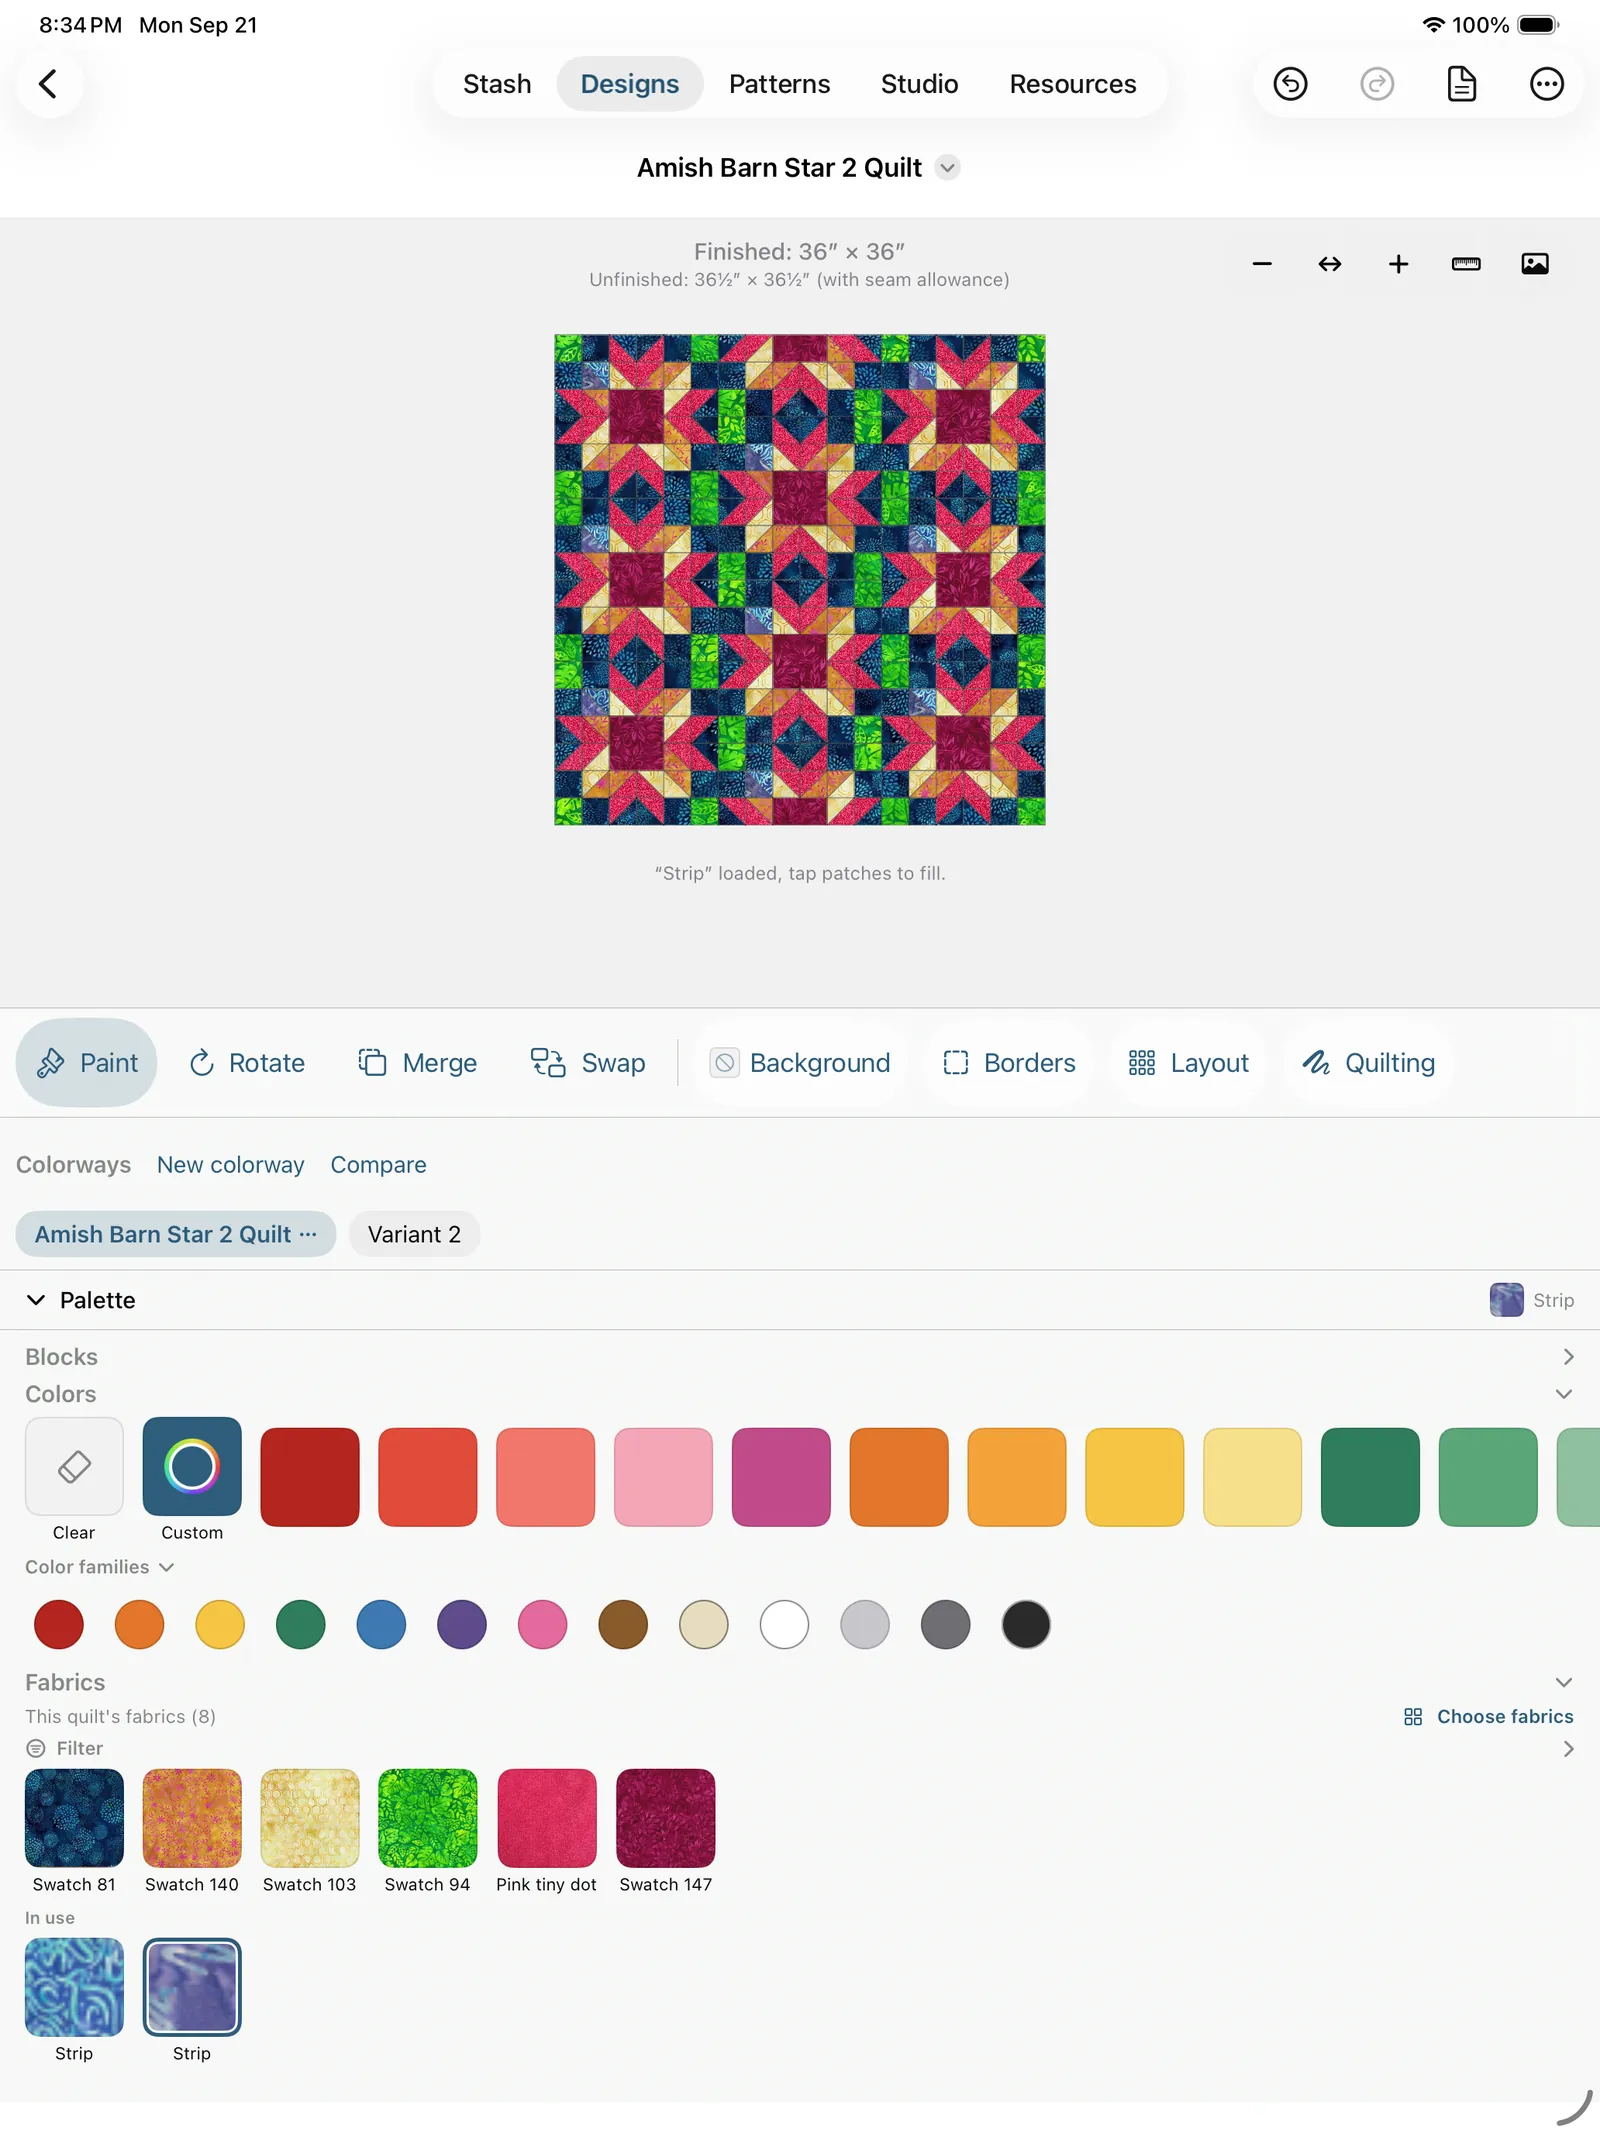
When your stash is large, the Fabrics section has its own Filter line (tap to expand it). It works exactly like the stash filter, color dots, a Type menu, and the Tags button for designer, manufacturer, line and tags, but only narrows what shows in the palette, so you can paint from just your blues, or just one designer's line, without scrolling past everything. The count on Filter shows how many filters are active; tap Clear (or the "No fabrics match" line) to reset. Jelly-roll strips aren't filtered.
The Background button
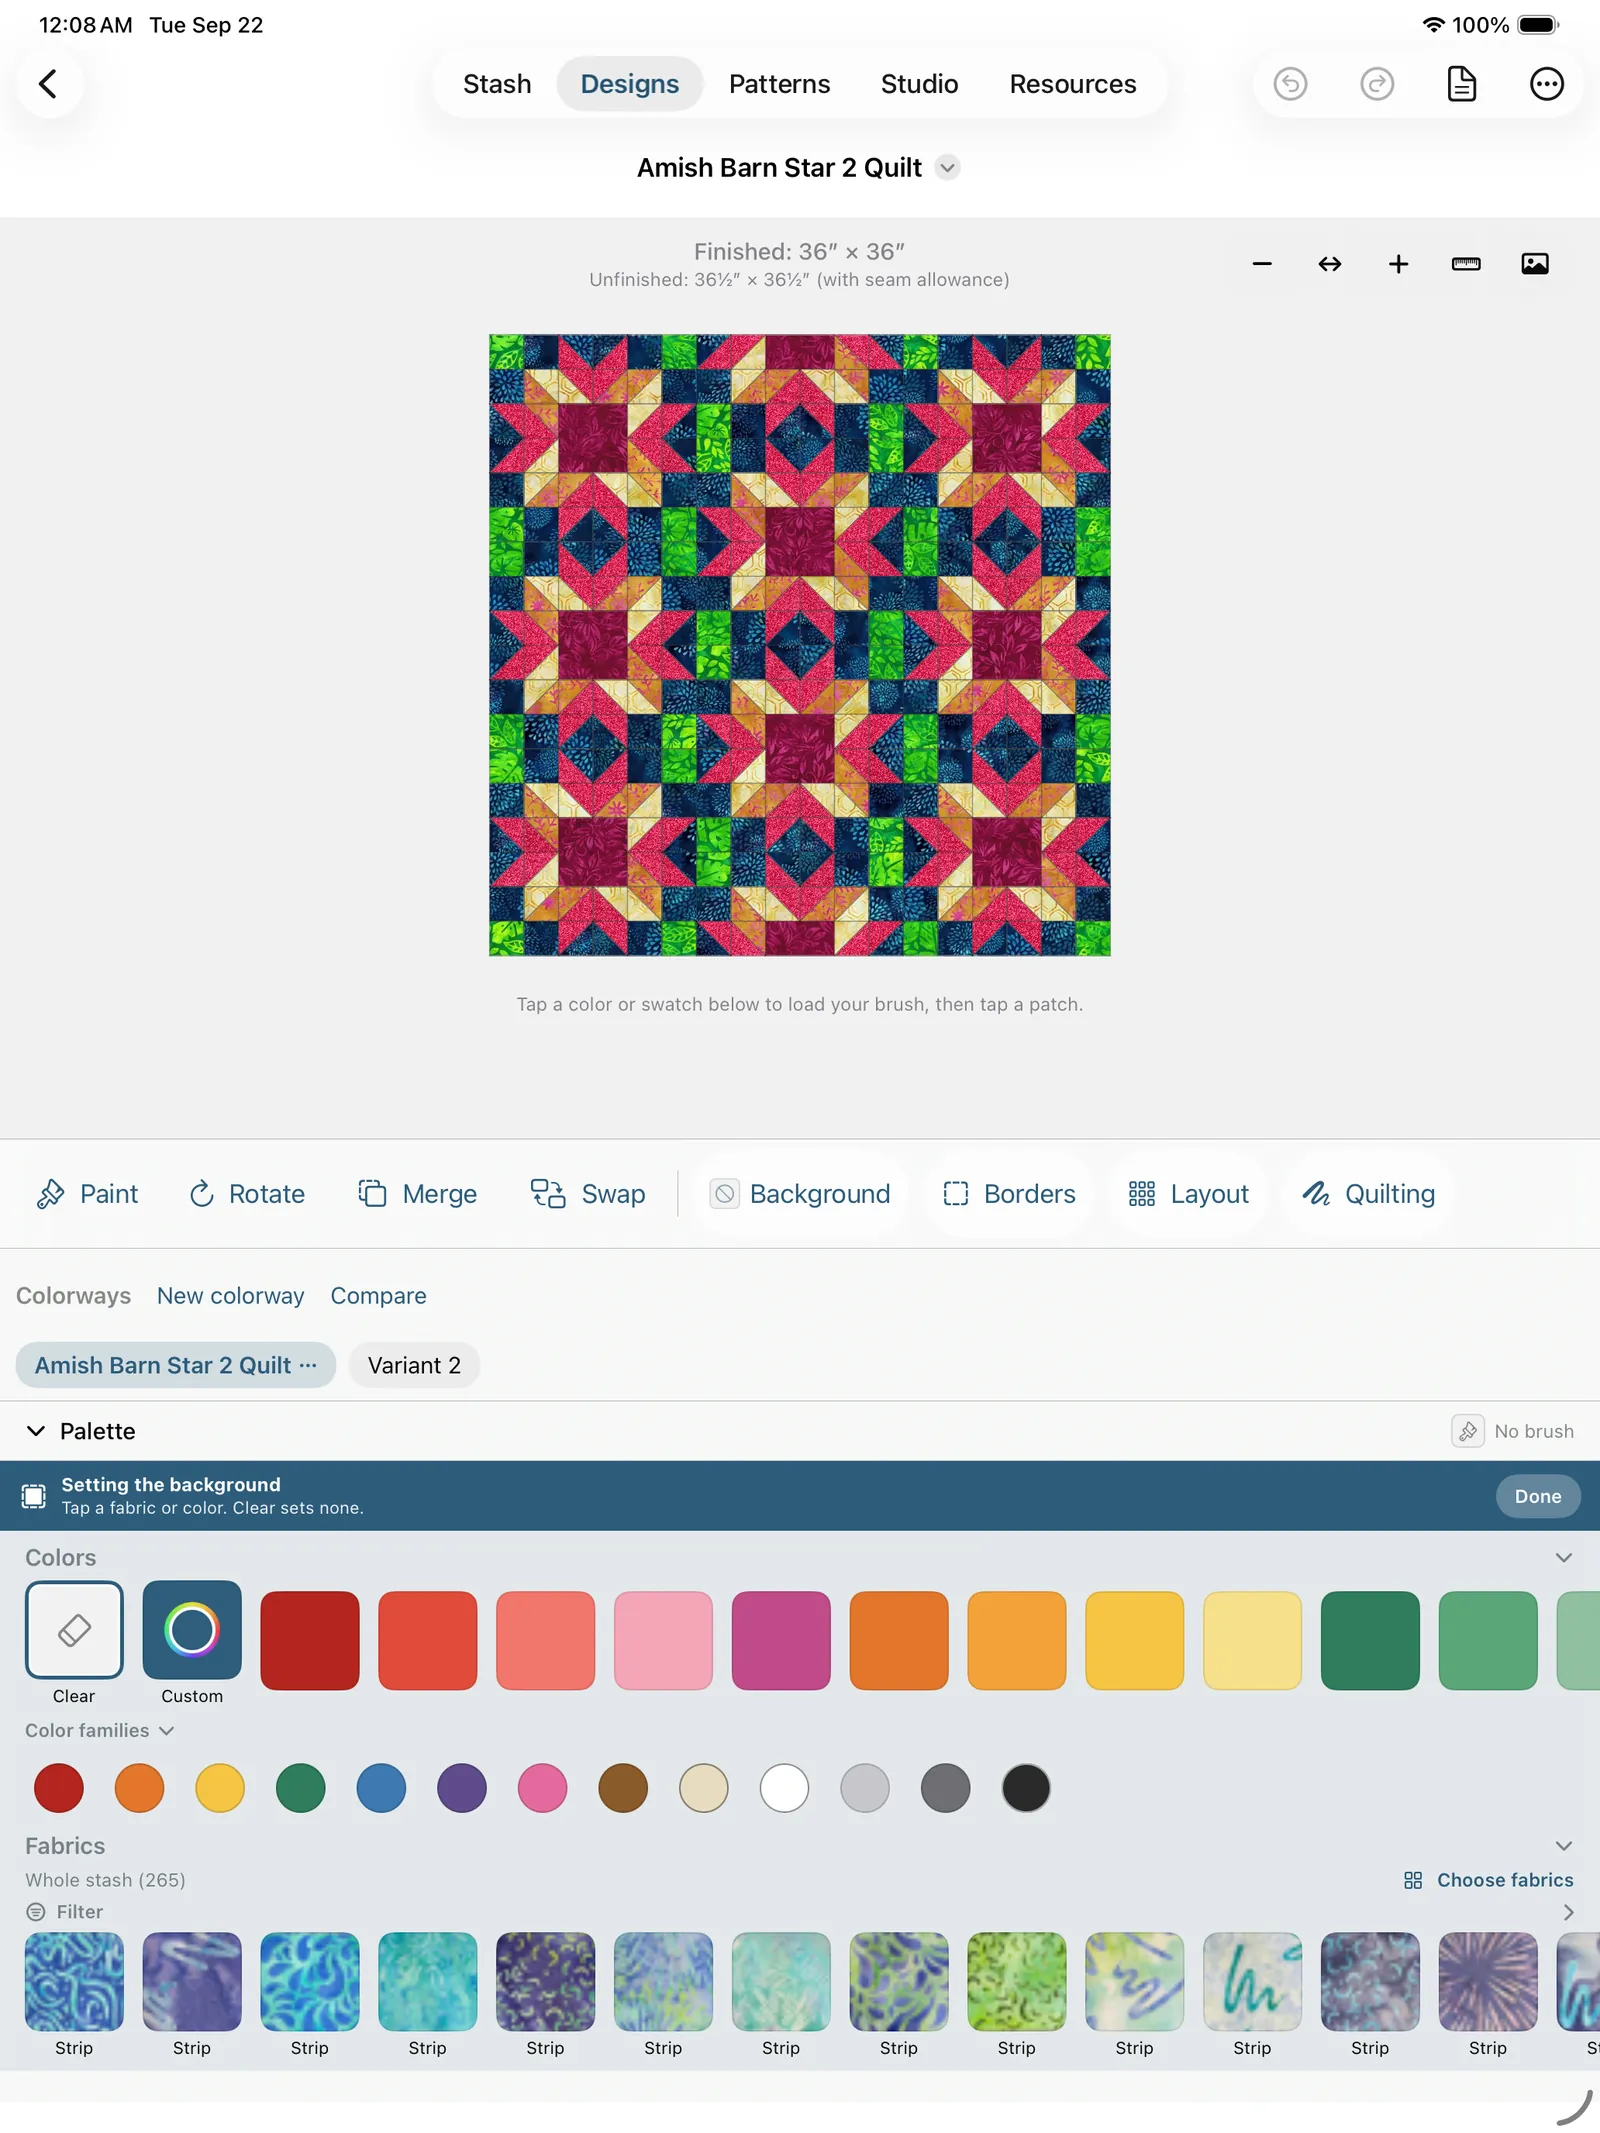
A quilt's background, the light recessive areas like the field behind a star or the background triangle of every HST cell, is set from the Background button on the tool rail, past the divider that separates the paint tools from the design's document buttons. The button wears the ground you've got, a little swatch of the current fabric or a None marker.
Tapping it doesn't open anything; it changes what the palette does. A band drops across the top of the tray in accent color reading "Setting the background," the palette tints to match, and while it's up a tap on any color or fabric chip sets the quilt's ground, live, with the quilt still in full view above it. The chip your ground is currently sitting on wears the selection ring, so you can see where you are without remembering. Clear sets no background at all. The Blocks section takes itself away while the mode is up, because a quilt's ground can't be a block. Taps on the quilt do nothing: the canvas isn't what you're choosing.
It holds until you tap Done, deliberately. Choosing a ground is something you do by eye, and two or three times in a row, so it doesn't drop you back into Paint after one pick the way the other tools do.
It's a design-wide setting, not a brush: change it and every background piece you haven't painted individually updates at once, while patches you have painted keep their own fill.
It used to be a sheet, and the sheet is gone. That sheet showed your whole stash with a filter and a color well, which is exactly what the palette already does, and it did it while covering the design you were choosing a ground to sit under. On a Mac it was worse than redundant: the color well killed two-finger scrolling for the whole sheet, from every position it was tried. Reusing the tray that works beat repairing the one that didn't, and nothing about your quilts changed.
The palette's one law survives it, loudly. A palette tap loads your brush and never paints, which is why the background can't simply be a fourth row of chips the way it once was: with a tool in hand (Swap especially, where a palette tap means "the replacement fabric") a tap meant for the tool quietly repainted the ground, and nothing looked wrong. This mode breaks that law on purpose, for one job, after a deliberate tap, and says so in accent color across the whole tray until you leave it. That's the difference between an exception and an accident.
Jelly-roll designs have no Background button, because every patch of one is a strip and there are no background pieces for a ground to fill.
The top bar and the More menu
The bar above the quilt holds only what you do to the document, and it's deliberately short: Undo, Redo, Pattern, •••. Anything longer and iPadOS builds an overflow of its own and buries this menu inside it, which is how Rename used to end up three taps down.
- Undo and Redo: the curved-arrow buttons. Undo reverses your last change (painting, resizing, clearing, and so on); Redo puts it back. Each is grayed out when there's nothing to undo or redo. On a keyboard they're ⌘Z and ⌘⇧Z.
- Pattern: works out the cut list and sew order in one tap, and adds this quilt to the Patterns tab. See Making a pattern.
- ••• is one flat menu, no submenus, grouped by what the item touches:
- Value View, at the top: draws the canvas in grayscale so you can judge your lights and darks, with a checkmark while it's on. See Checking value with Value View.
- Make Pattern, on a phone only. The bar there has no room for a fourth button, so Pattern folds into the menu and the bar keeps Undo, Redo and •••; the two highest-frequency controls stay out where a phone with no keyboard can reach them.
- Board (Design Your Own boards): Grid or Radial, as two rows with a checkmark against the current one.
- Borders, on a bargello only: a bargello shows no tool rail, so this menu is its one way to a border. Every other design reaches Borders from the rail instead (see below).
- Shuffle (jelly-roll designs): scrappy-fill every patch from your roll.
- Rename: type a new name and tap Save.
- Save As New: copy this quilt into an independent design of its own, without leaving the editor. Same thing as Save As New from the Designs list, in the place you usually think of it, halfway through changing something you don't want to lose.
- Share…: pack this quilt into a
.tidestitchfile for another quilter. See Sharing a design with another quilter. - Clear All Fills: removes every color and fabric in the design (the block shapes stay). It asks for confirmation first, and you can undo it.
Background, Borders and Layout aren't in this menu, they're on the tool rail, past the divider, as one-tap document buttons. They used to live here (and Background briefly rode the end of the colorway strip); putting the whole-design controls on the rail made each one tap instead of two and cleared the ••• menu down to the things you reach rarely. The one exception is a bargello, which has no rail at all: its Borders stay in the menu above, and it has no Layout, because its shape is the wave rather than a grid.
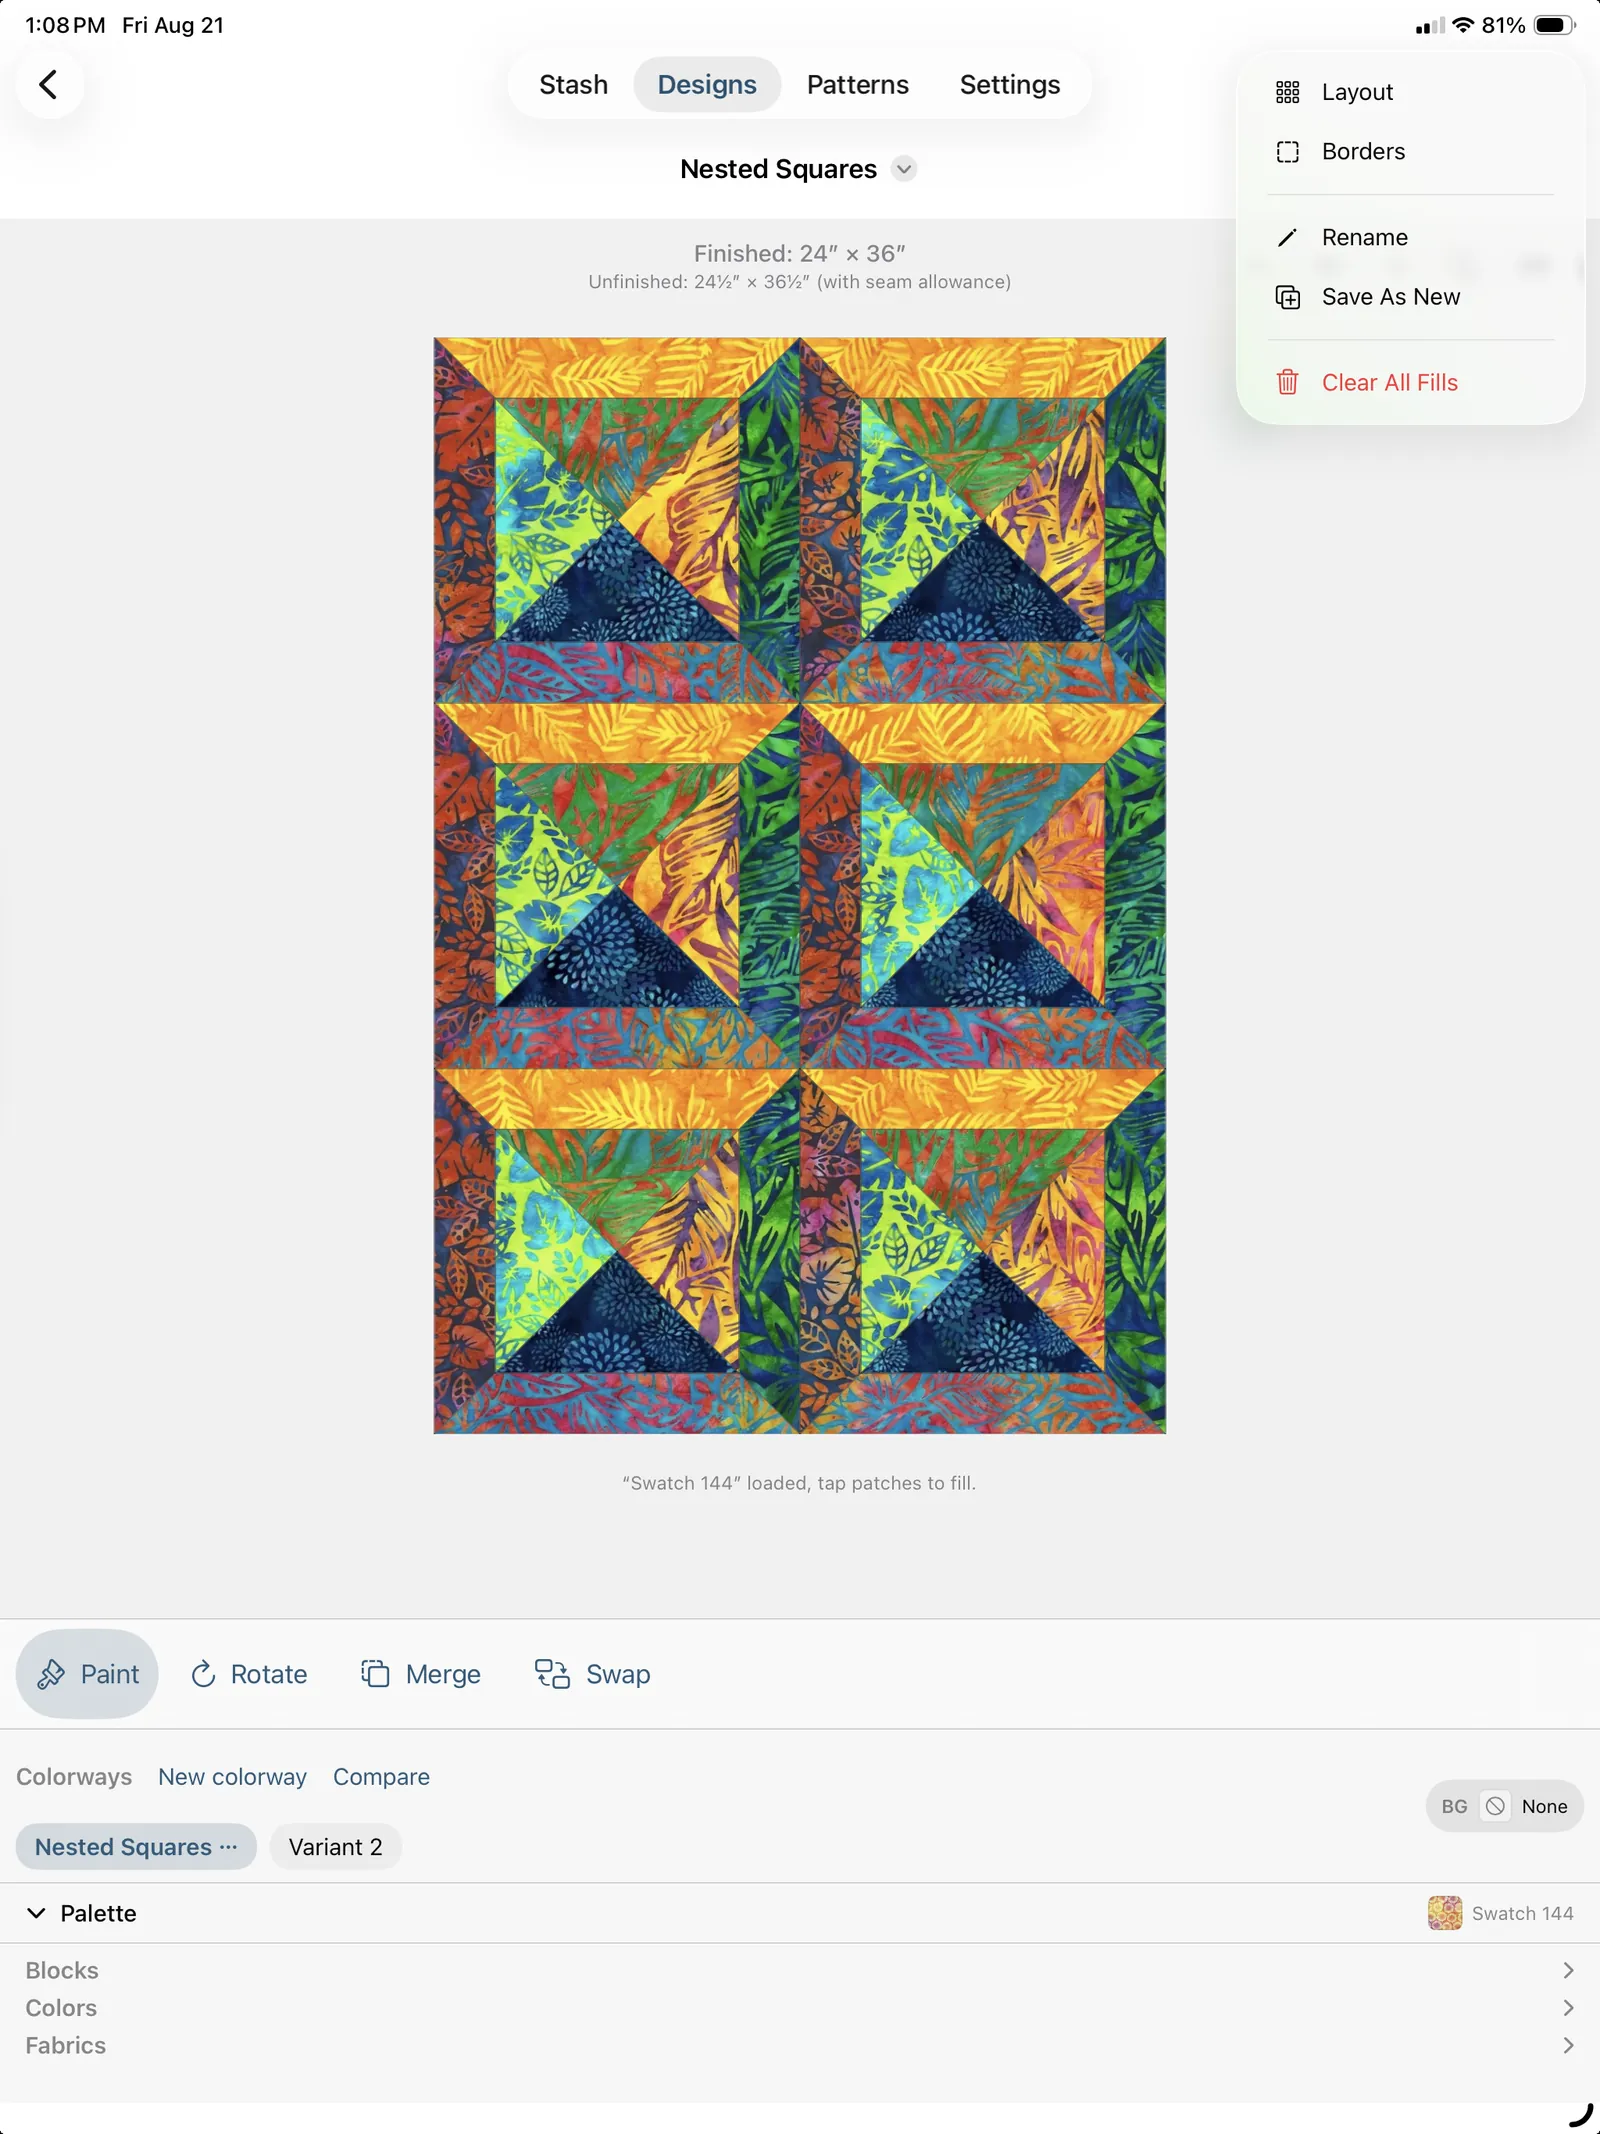
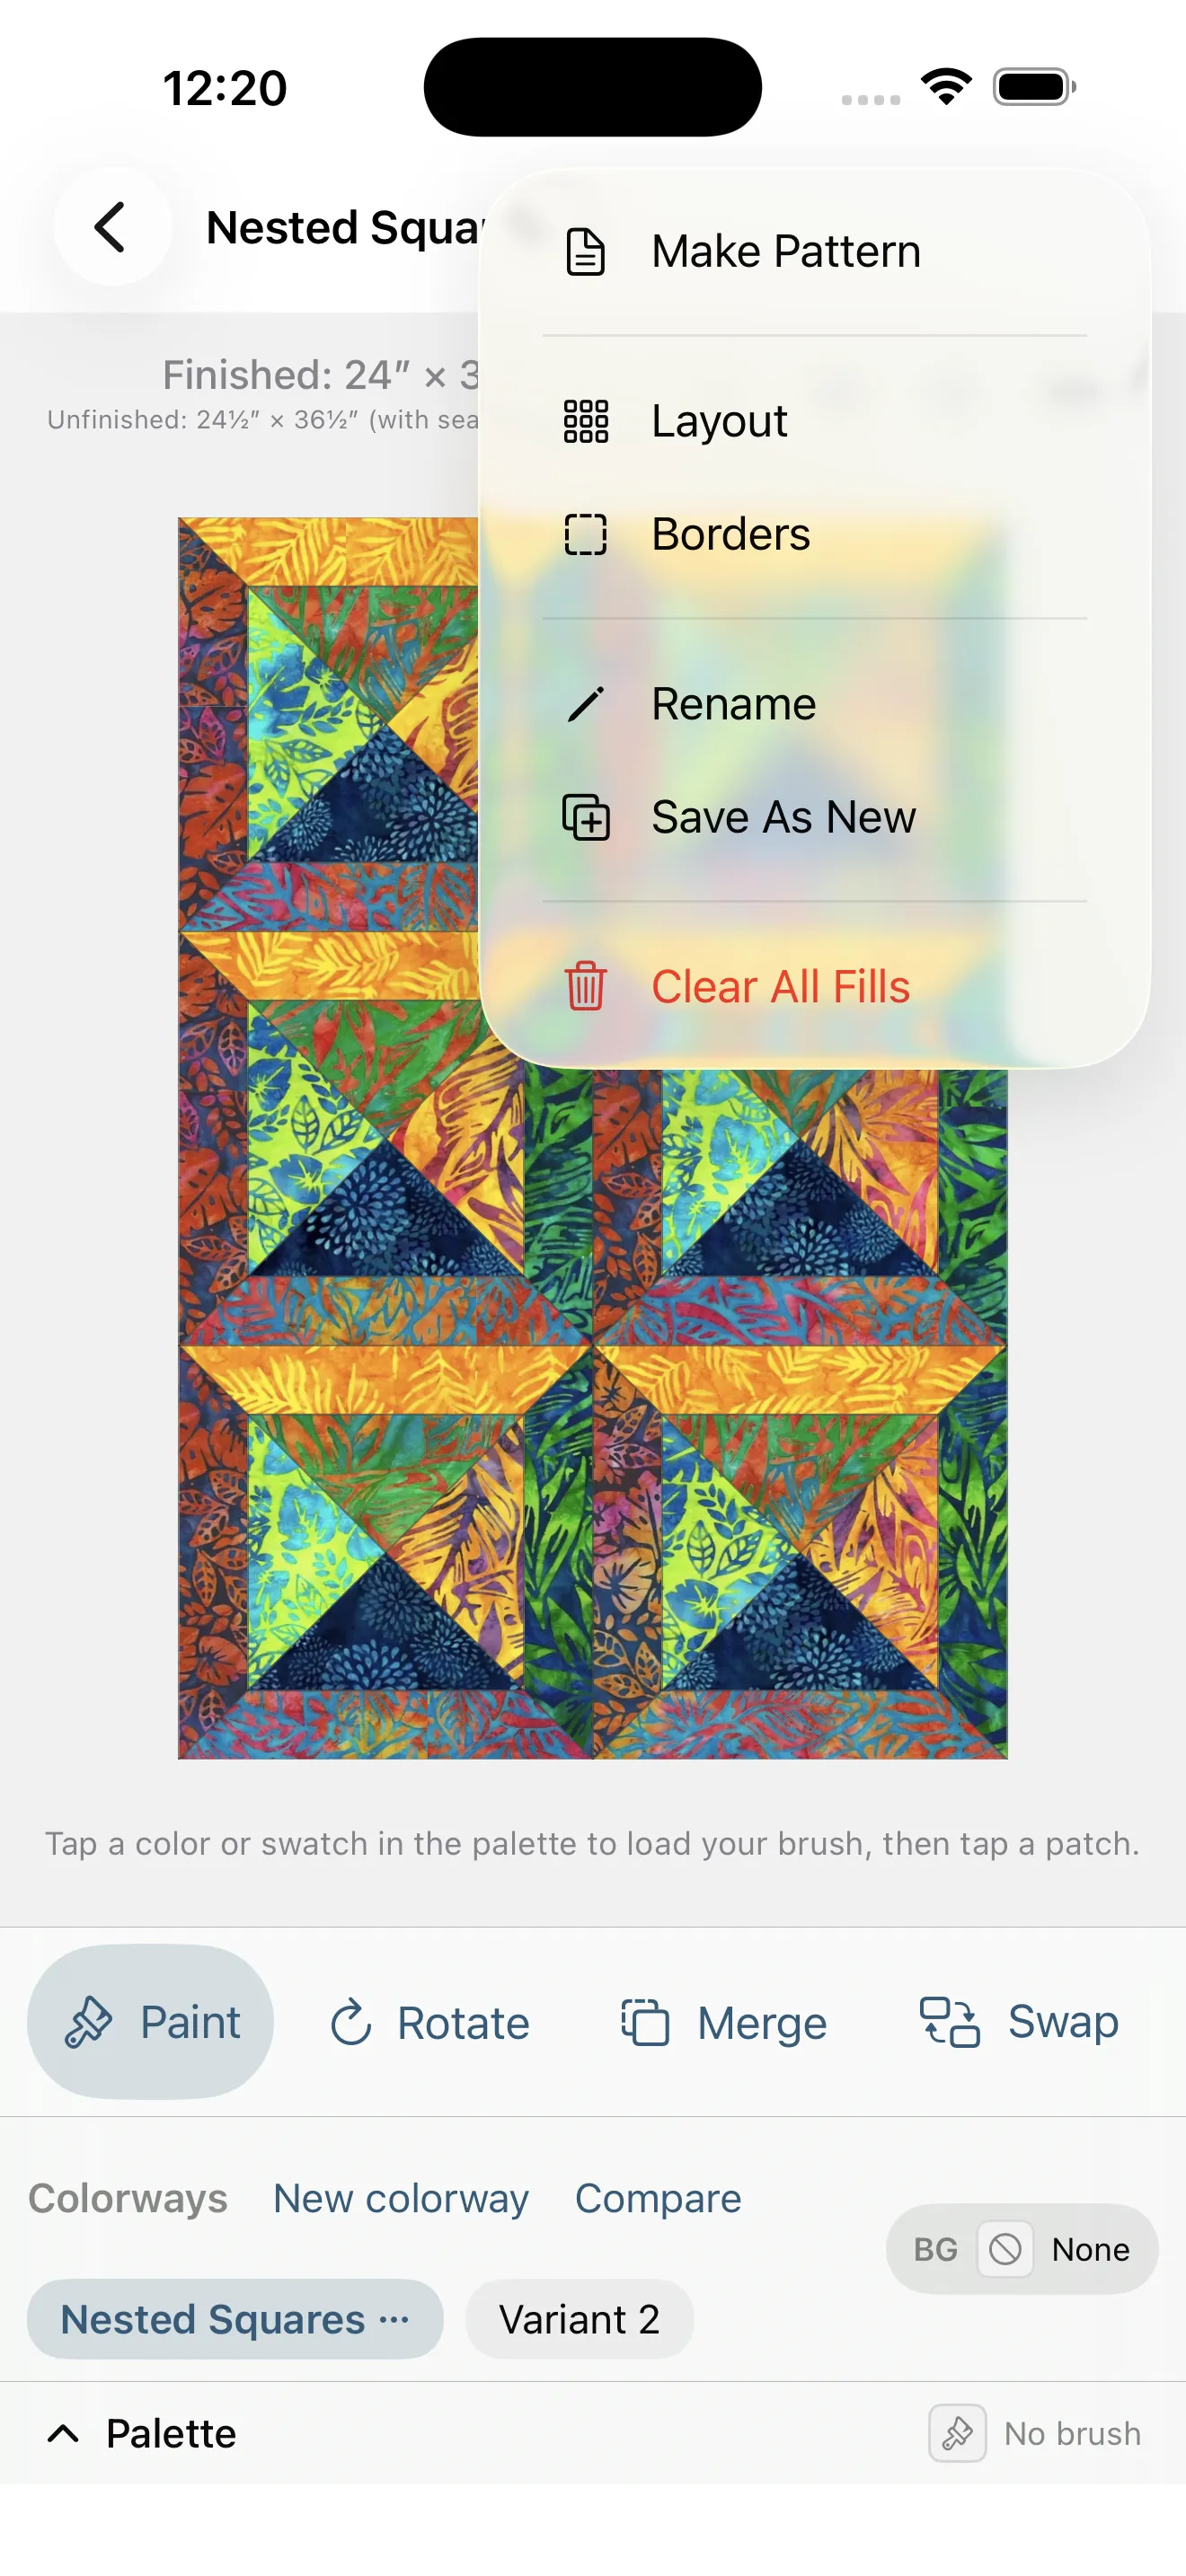
Both editors have the same bar and the same menu, so what you learn on a block quilt is what you use on a board.
Building bigger quilts (block designs)
A single block is just the start. Most block designs can be tiled into a full quilt grid. (Jelly-roll designs get a Layout button too, holding whatever their pattern actually lets you choose: how wide a Race finishes, or how many blocks across and down for the grid patterns. See Jelly-roll design tools. The HST Grid and Squares have one as well, but it reopens their own unit-grid controls, across/down and unit size, rather than the rows × columns quilt grid below.)
Layout
Tap Layout on the tool rail to open the grid controls:
- Rows and Columns steppers (1–12 each) set the quilt's size in blocks.
- Block size stepper (4″–40″, stretching further when the block was drafted larger) sets the finished size of each block. Its arrows step through the sizes your blocks actually cut at rather than every half inch; see Why the size slider skips numbers. A rectangular block drawn in Studio reads as both its sides here, 16″ × 17″, and the finished-quilt readout multiplies them out as such.
- A live readout shows the block count and the finished quilt dimensions (width × height).
- Fill new blocks from top-left (on by default): new cells mirror the top-left block and its fabrics, so growing the grid never leaves empty squares. It's a live mirror, not a one-time copy: paint any patch of a mirrored block and that block becomes its own, while the rest keep mirroring. Turn it off to leave new blocks blank and fill them yourself.
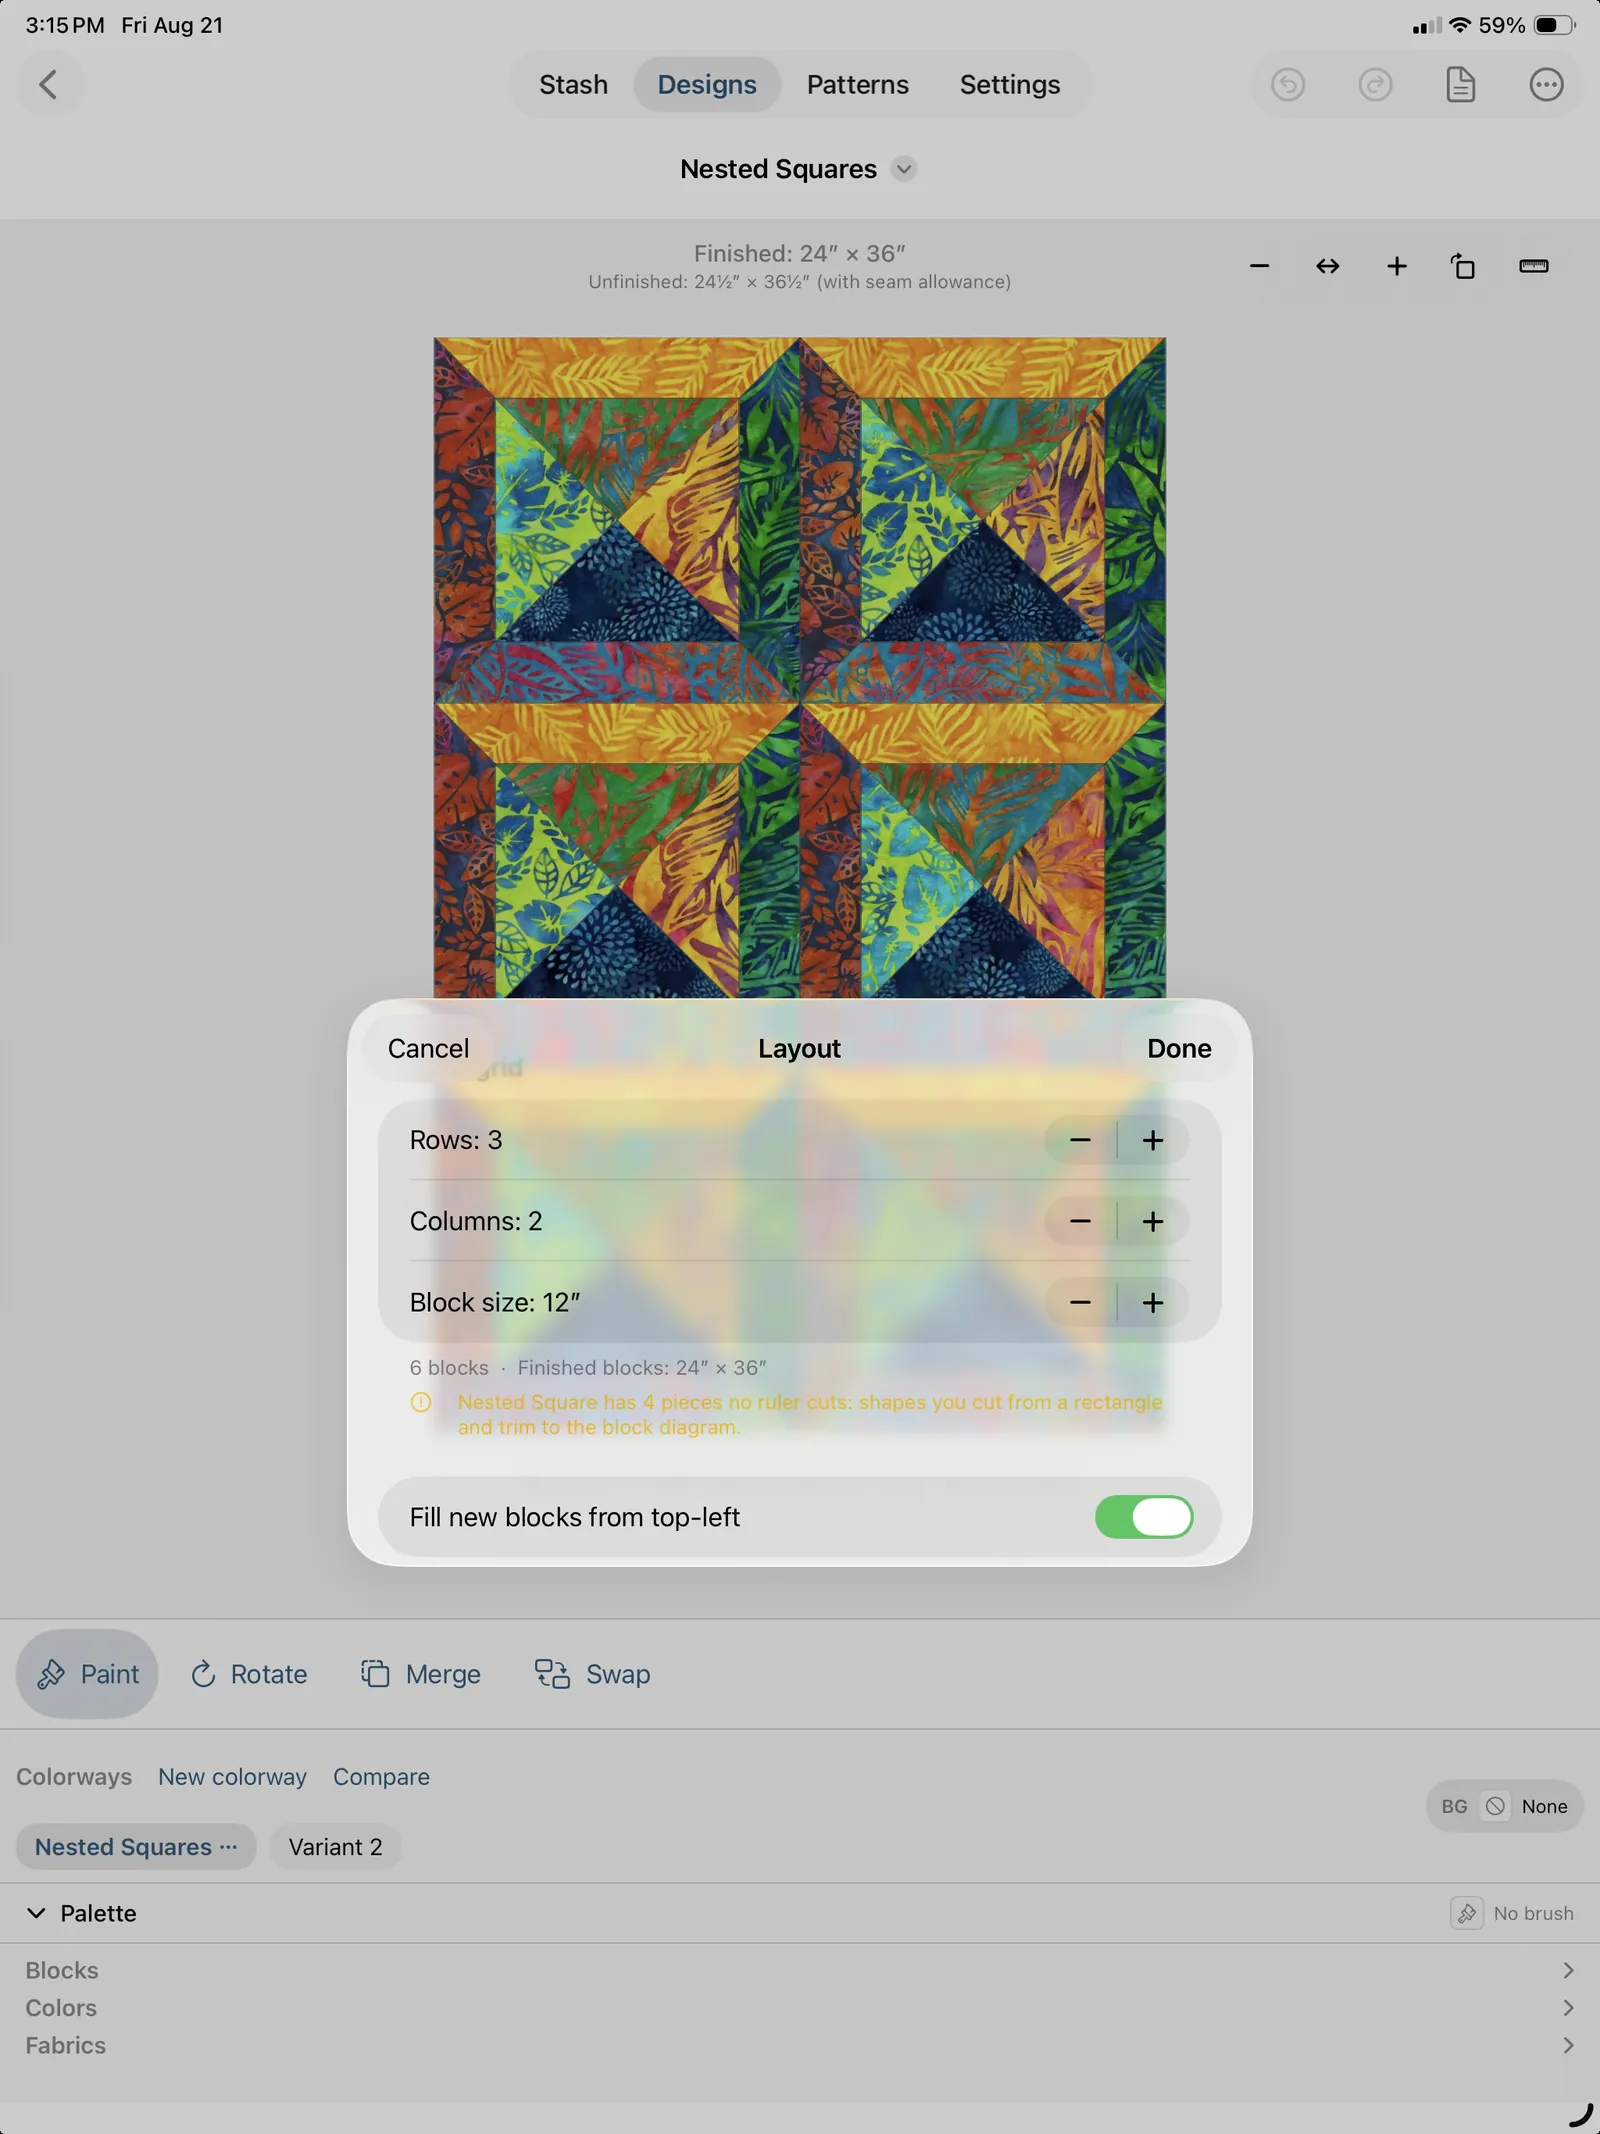
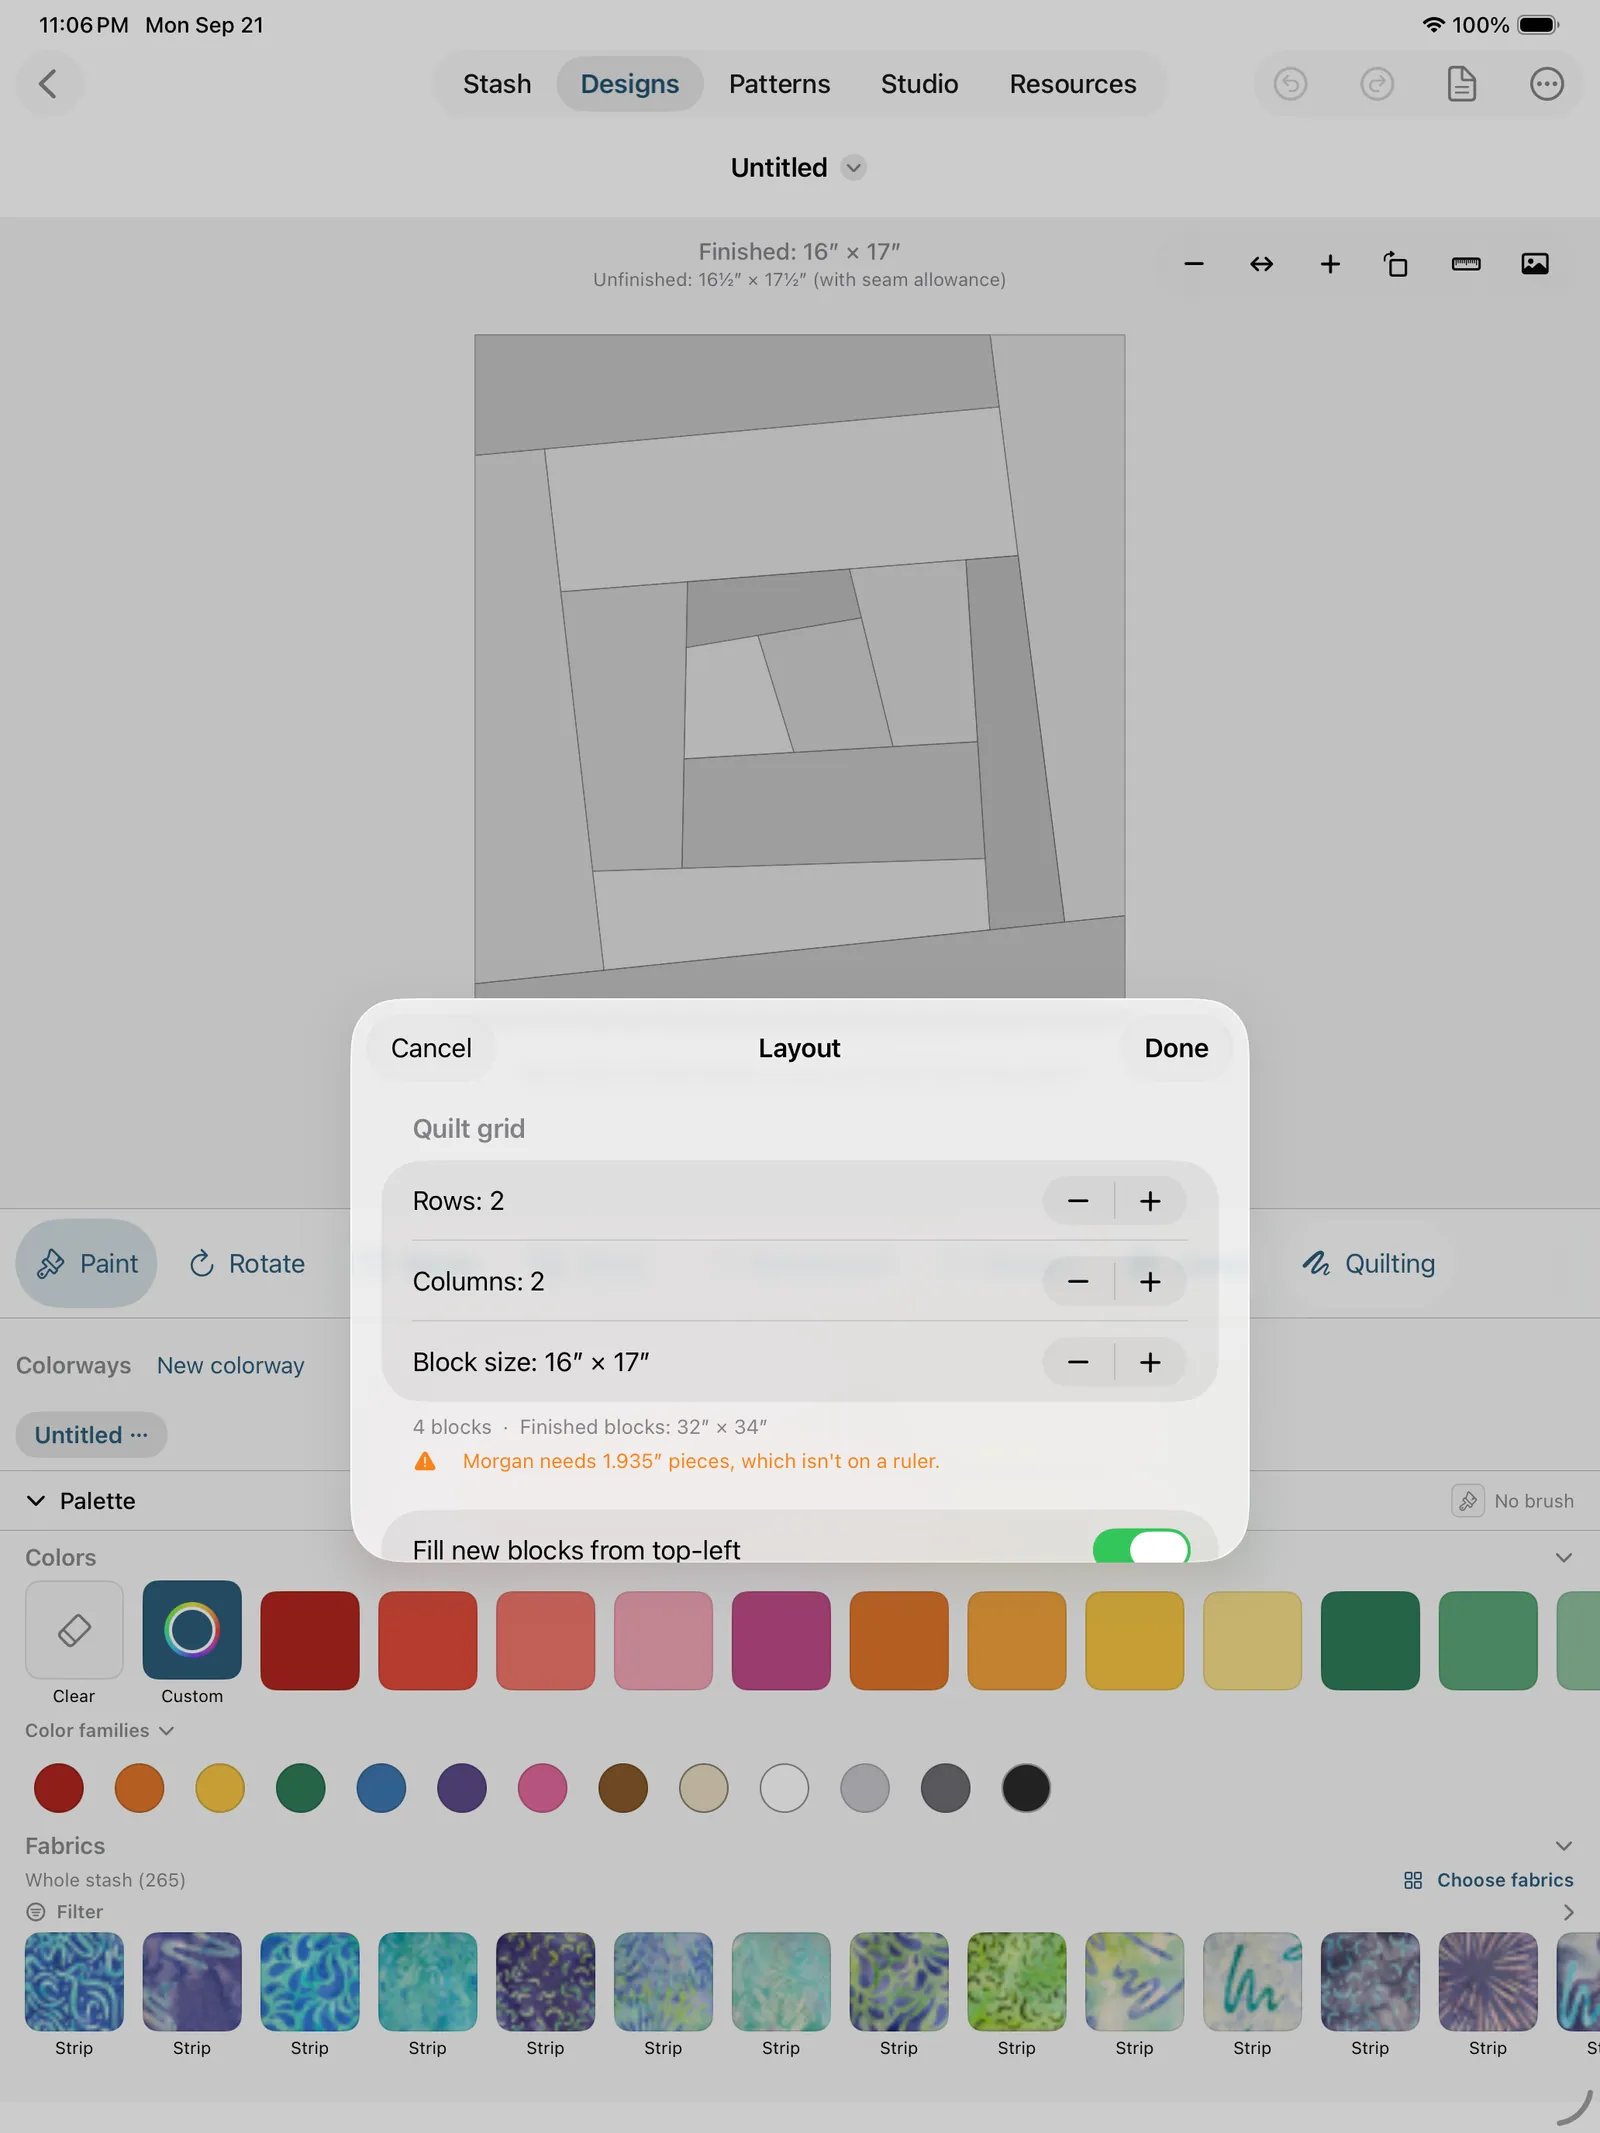
To turn one finished block into a whole quilt top, keep Fill new blocks from top-left on and bump the Rows and Columns; every new cell picks up your block automatically. From there you can vary individual cells (see below) or paint each block differently for a gradient effect. Everything you do in the Layout sheet (resizing the grid, changing block size, adding sashing) collapses into a single undo step, so one tap of Undo takes you back to where you started instead of unwinding row by row.
Setting: straight, on point, or brick
Once a layout has more than one block, the Layout sheet adds a Setting picker:
- Straight (the default) sets the blocks square to the quilt's edges. Every quilt made before this option existed is a straight set, and nothing about them changes.
- On point turns every block 45°, so the quilt is a field of diamonds. The blocks are sewn together in diagonal rows rather than rows across, and setting triangles fill the notches along the edges to square the top back up.
- Brick keeps every block square to the quilt's edges, like a straight set, but pushes every other line along so the blocks stagger like brickwork. See A brick (half-drop) set below.
Two things about on point surprise people, so the sheet says both out loud:
The same grid finishes about 1.41× bigger. A block's diagonal is longer than its side, and on point it's the diagonal that spans the quilt. A 4 × 4 of 12″ blocks finishes 48″ square set straight and about 67⅞″ square set on point, from exactly the same blocks.
There are far more blocks than the grid says. Turning the blocks 45° opens a hole between every four of them, and leaves a notch all the way round the outside, and in the default setting every one of those is your block again. So a 4 × 3 on point is 32 blocks to piece: the 12 you asked for, 6 more sitting between them, 10 half blocks along the edges, and 4 quarter blocks at the corners.
That is the number you shop from, so the footer spells out all four parts rather than quoting a total you'd have to take on trust. Choosing plain alternate squares or plain setting triangles moves work out of that count and into plain fabric, and the footer follows along.
Two pickers control what fills those spaces, and both default to Same as main block, because setting a quilt on point should give you your quilt on point, not your quilt with holes punched through it:
- Blocks between fills the slots between the grid. Plain square gives you the classic pieced-and-plain diagonal set; you can also pick any other block.
- Edges fills the setting triangles around the outside. Same as main block carries your pattern right off the edge of the quilt, where the quilt's edge cuts each block in half. Plain triangles gives the traditional plain border of triangles instead, and a Setting triangle fabric chip appears to color them. That chip sets every triangle at once; a tap on the canvas paints only the triangle you tapped, so you can shade the edge of a quilt, or put a different fabric in the four corners from the sides. A triangle you've painted keeps its fabric until you erase it.
That choice changes the pattern as well as the picture. Plain setting triangles are cut from squares to a published chart, with the straight grain landing on the quilt's outer edge. Pieced ones are whole blocks clipped at 45°, so the outer edge comes out on the bias, and the pattern tells you to staystitch it or add the border before trimming. Either way the setting triangles are cut oversize on purpose and squared up with the finished quilt rather than trimmed to a listed size, and the pattern's Sew section says so.
On point can be sashed, and it's the setting with the most cornerstones. Set a width in the Layout sheet's Sashing section as you would anywhere else. The strips run on the diagonal, along the blocks' own edges, and a cornerstone sits at every point where four diamonds would otherwise meet. On a 3 × 2 that's 24 strips and 17 cornerstones, against 7 strips and 2 cornerstones for the same blocks set straight. Turning the quilt 45° opens a hole between every four blocks and a notch all the way round the outside, and each of those is another place two pieces meet.
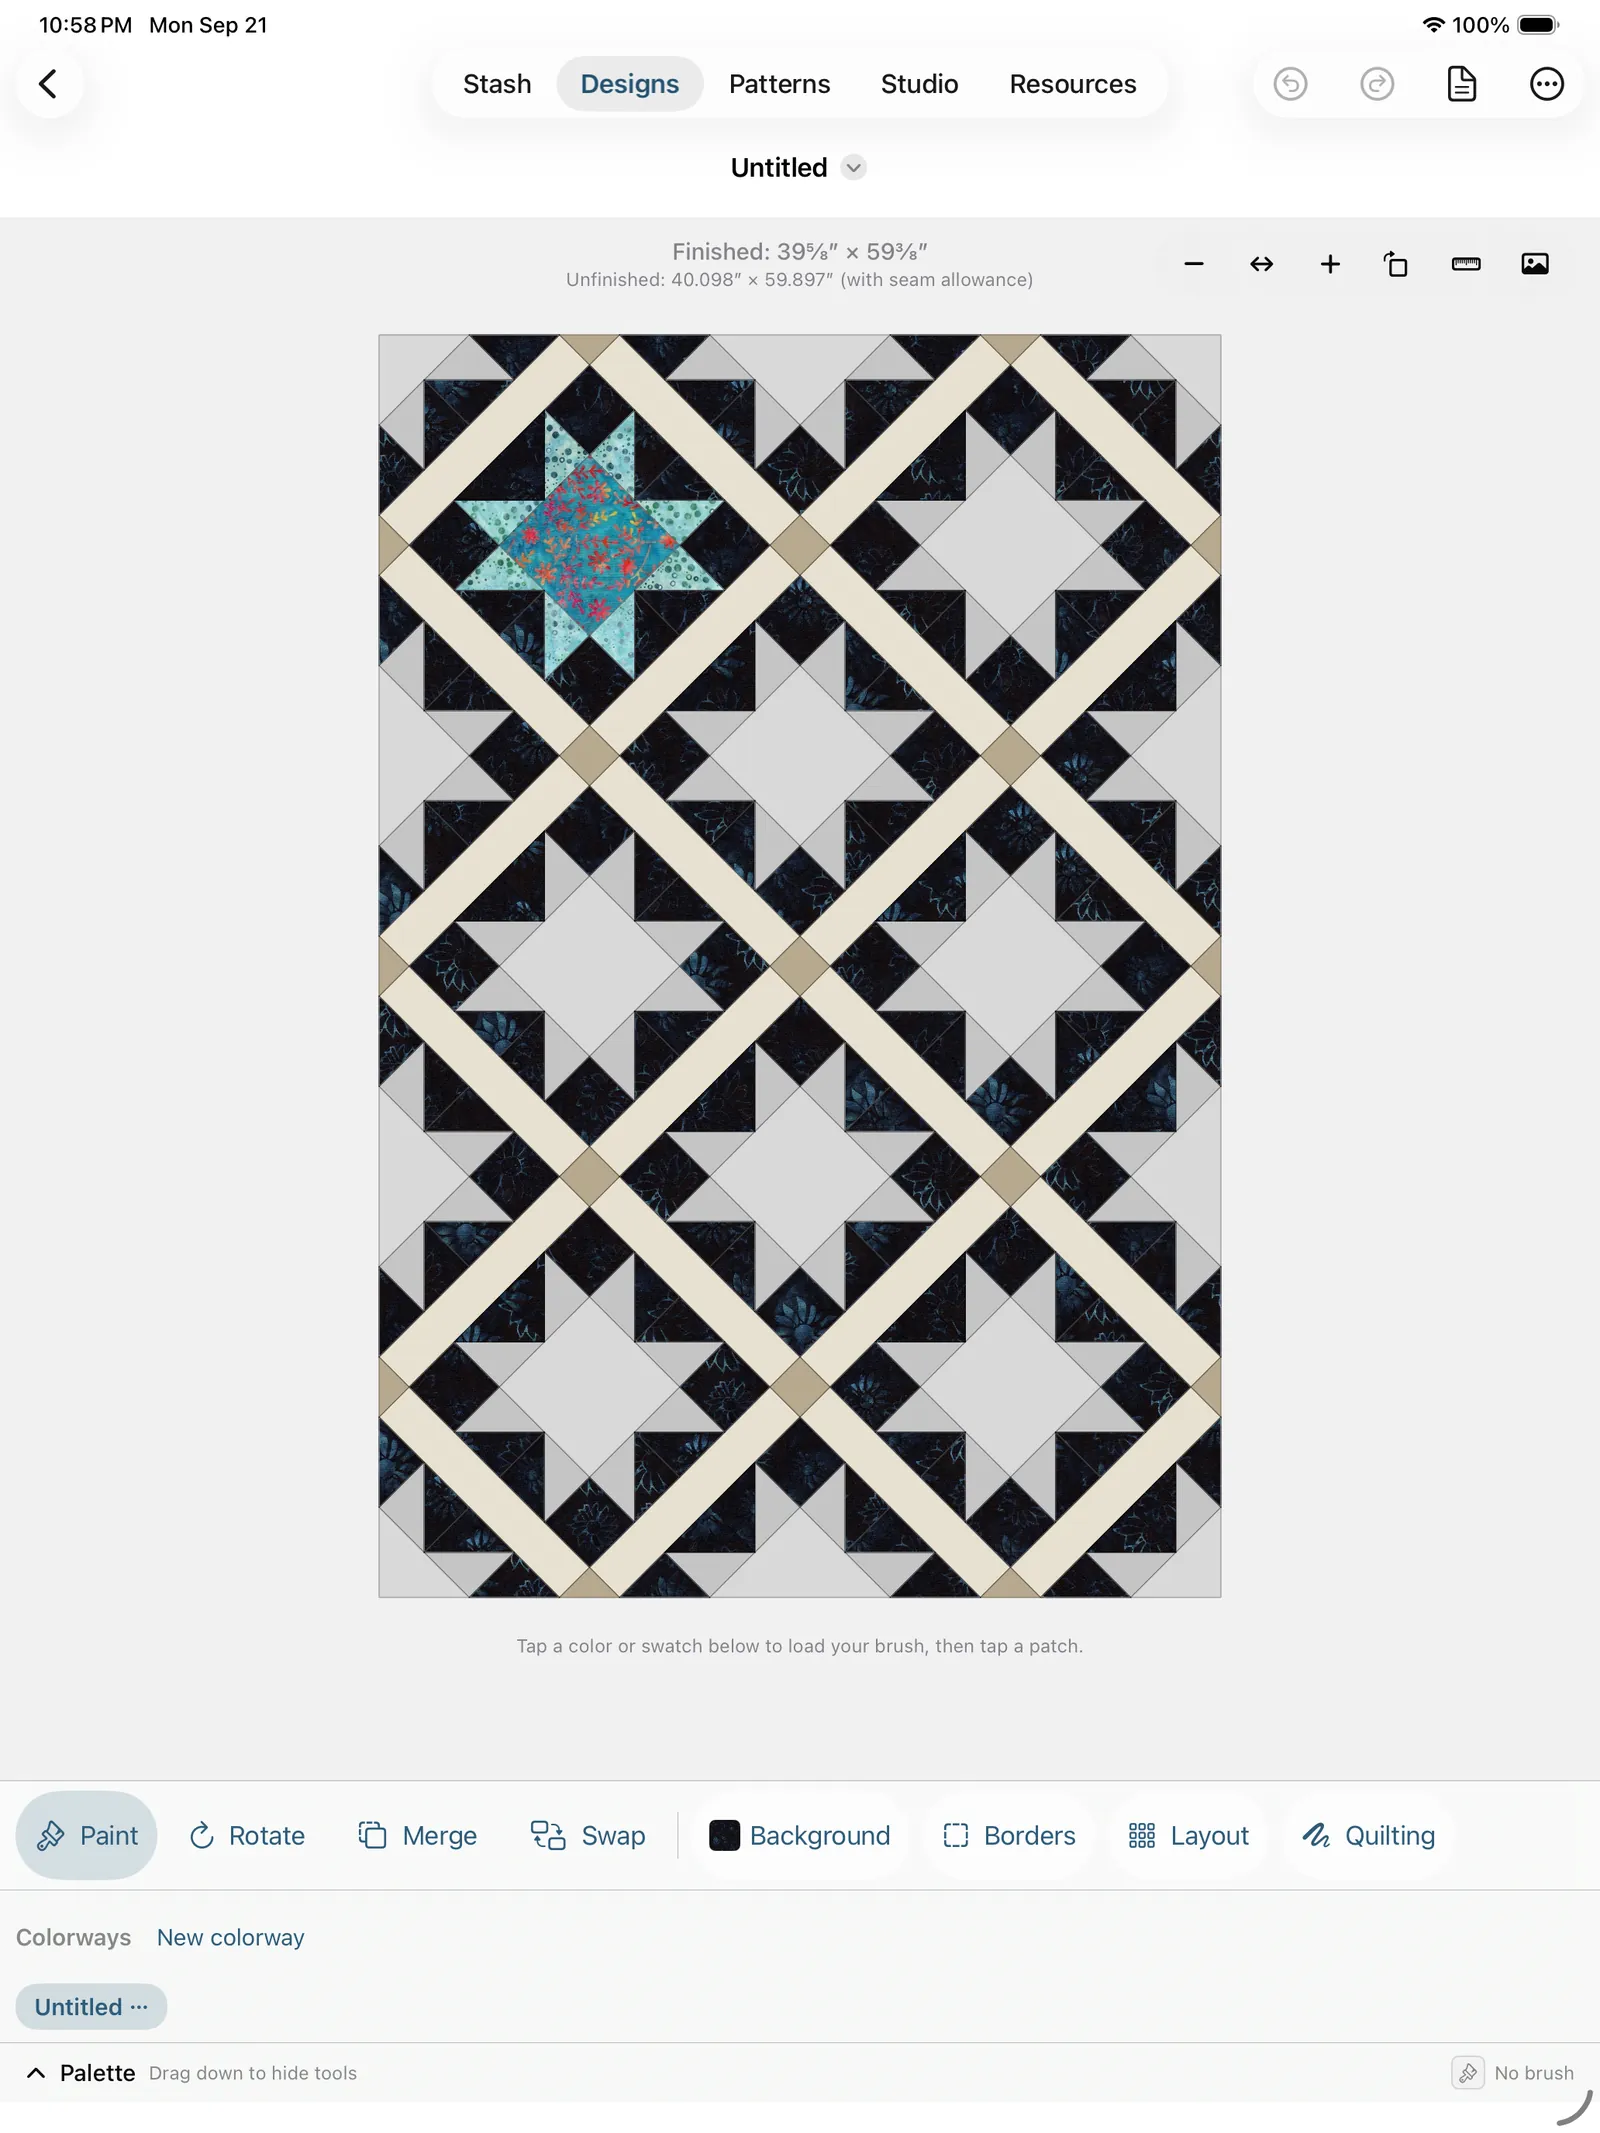
The lattice runs off the edge, and the binding cuts it. Rather than stop the sashing at the outer blocks, the strips carry on into the edge ring, so along each side the binding crosses a setting triangle, then half a cornerstone, then the next setting triangle. It reads as a lattice cropped out of something larger, which is the look this setting is for. The alternative would lose almost every cornerstone (a setting triangle on any side of a position kills it), leaving one marooned in the middle.
No strip is ever cut short. Every sashing strip is a full block-length rectangle, because a strip ends exactly where the trim line falls. Only the cornerstones around the outside get cut, and like the setting triangles beside them they're cut whole and squared up with the quilt rather than cut to their finished shape.
The quilt finishes bigger than the sashing width suggests. A 2″ sashing on 12″ blocks pushes the diamonds apart along the diagonal, so each gap adds 2 × √2 ≈ 2⅞″ to the width and the height. A 3 × 2 of 12″ blocks goes from 50⅞″ × 33⅞″ unsashed to 59⅜″ × 39⅝″. The Layout sheet's Sashing footer quotes the real number; don't work it out from the straight-set arithmetic.
You can switch back to Straight at any time, but if you've painted or changed any of the blocks between the grid, those slots don't exist in a straight set. The app tells you how many you're about to lose before it does it.
A brick (half-drop) set
Set to Brick and the blocks stay square, they just stop lining up: every other line slides along by a fraction of a block, the way bricks in a wall do. It's the friendliest of the three settings to sew, because nothing is turned and nothing is triangular.
Two controls appear with it:
- Stagger: Columns (every other column drops down) or Rows (every other row shifts sideways).
- Drop: how far, as a fraction of a block. Half is the classic brick and what most people mean; Third and Quarter are the same idea with a shallower step, which reads as a lean rather than a stagger. It's a short list on purpose, because a drop only sits well where a block's own seams can land, and an arbitrary fraction turns every capping block into a shape nobody can rotary cut.
Three things worth knowing:
The quilt finishes exactly the size a straight set would. The piece missing from one end of a staggered line is the piece hanging off the other, so a brick set costs you nothing in size. That's the opposite of on point, which grows the same grid by about 1.41×.
The staggered lines are capped by part blocks. Sliding a line along leaves a gap at one end and an overhang at the other, and the overhang is trimmed back to keep the quilt a clean rectangle. So the ends of every staggered line are part blocks, and the footer counts them out loud: how many blocks to piece, how many are whole, and how many are parts. The pattern bills them honestly too, so a 4 × 3 half drop asks for 12 blocks' worth of fabric rather than 13.
It sews in strips, not rows. Because the stagger is absorbed inside the staggered lines, every line still runs edge to edge, so the quilt comes apart into full-length strips joined by straight, full-length seams. No Y-seams, no partial seams, no diagonal rows, and no bias edge to staystitch: a brick quilt's outer edge is cut straight across. The pattern's Sew steps say so and give the real strip counts.
A brick set can be sashed, and it has no cornerstones. Set a width in the Layout sheet's Sashing section exactly as you would on a straight set. What you get is a short strip between each pair of blocks inside a column, and one long strip running the whole height of the quilt between neighboring columns, so the quilt still comes apart into full-length column strips joined by straight seams.
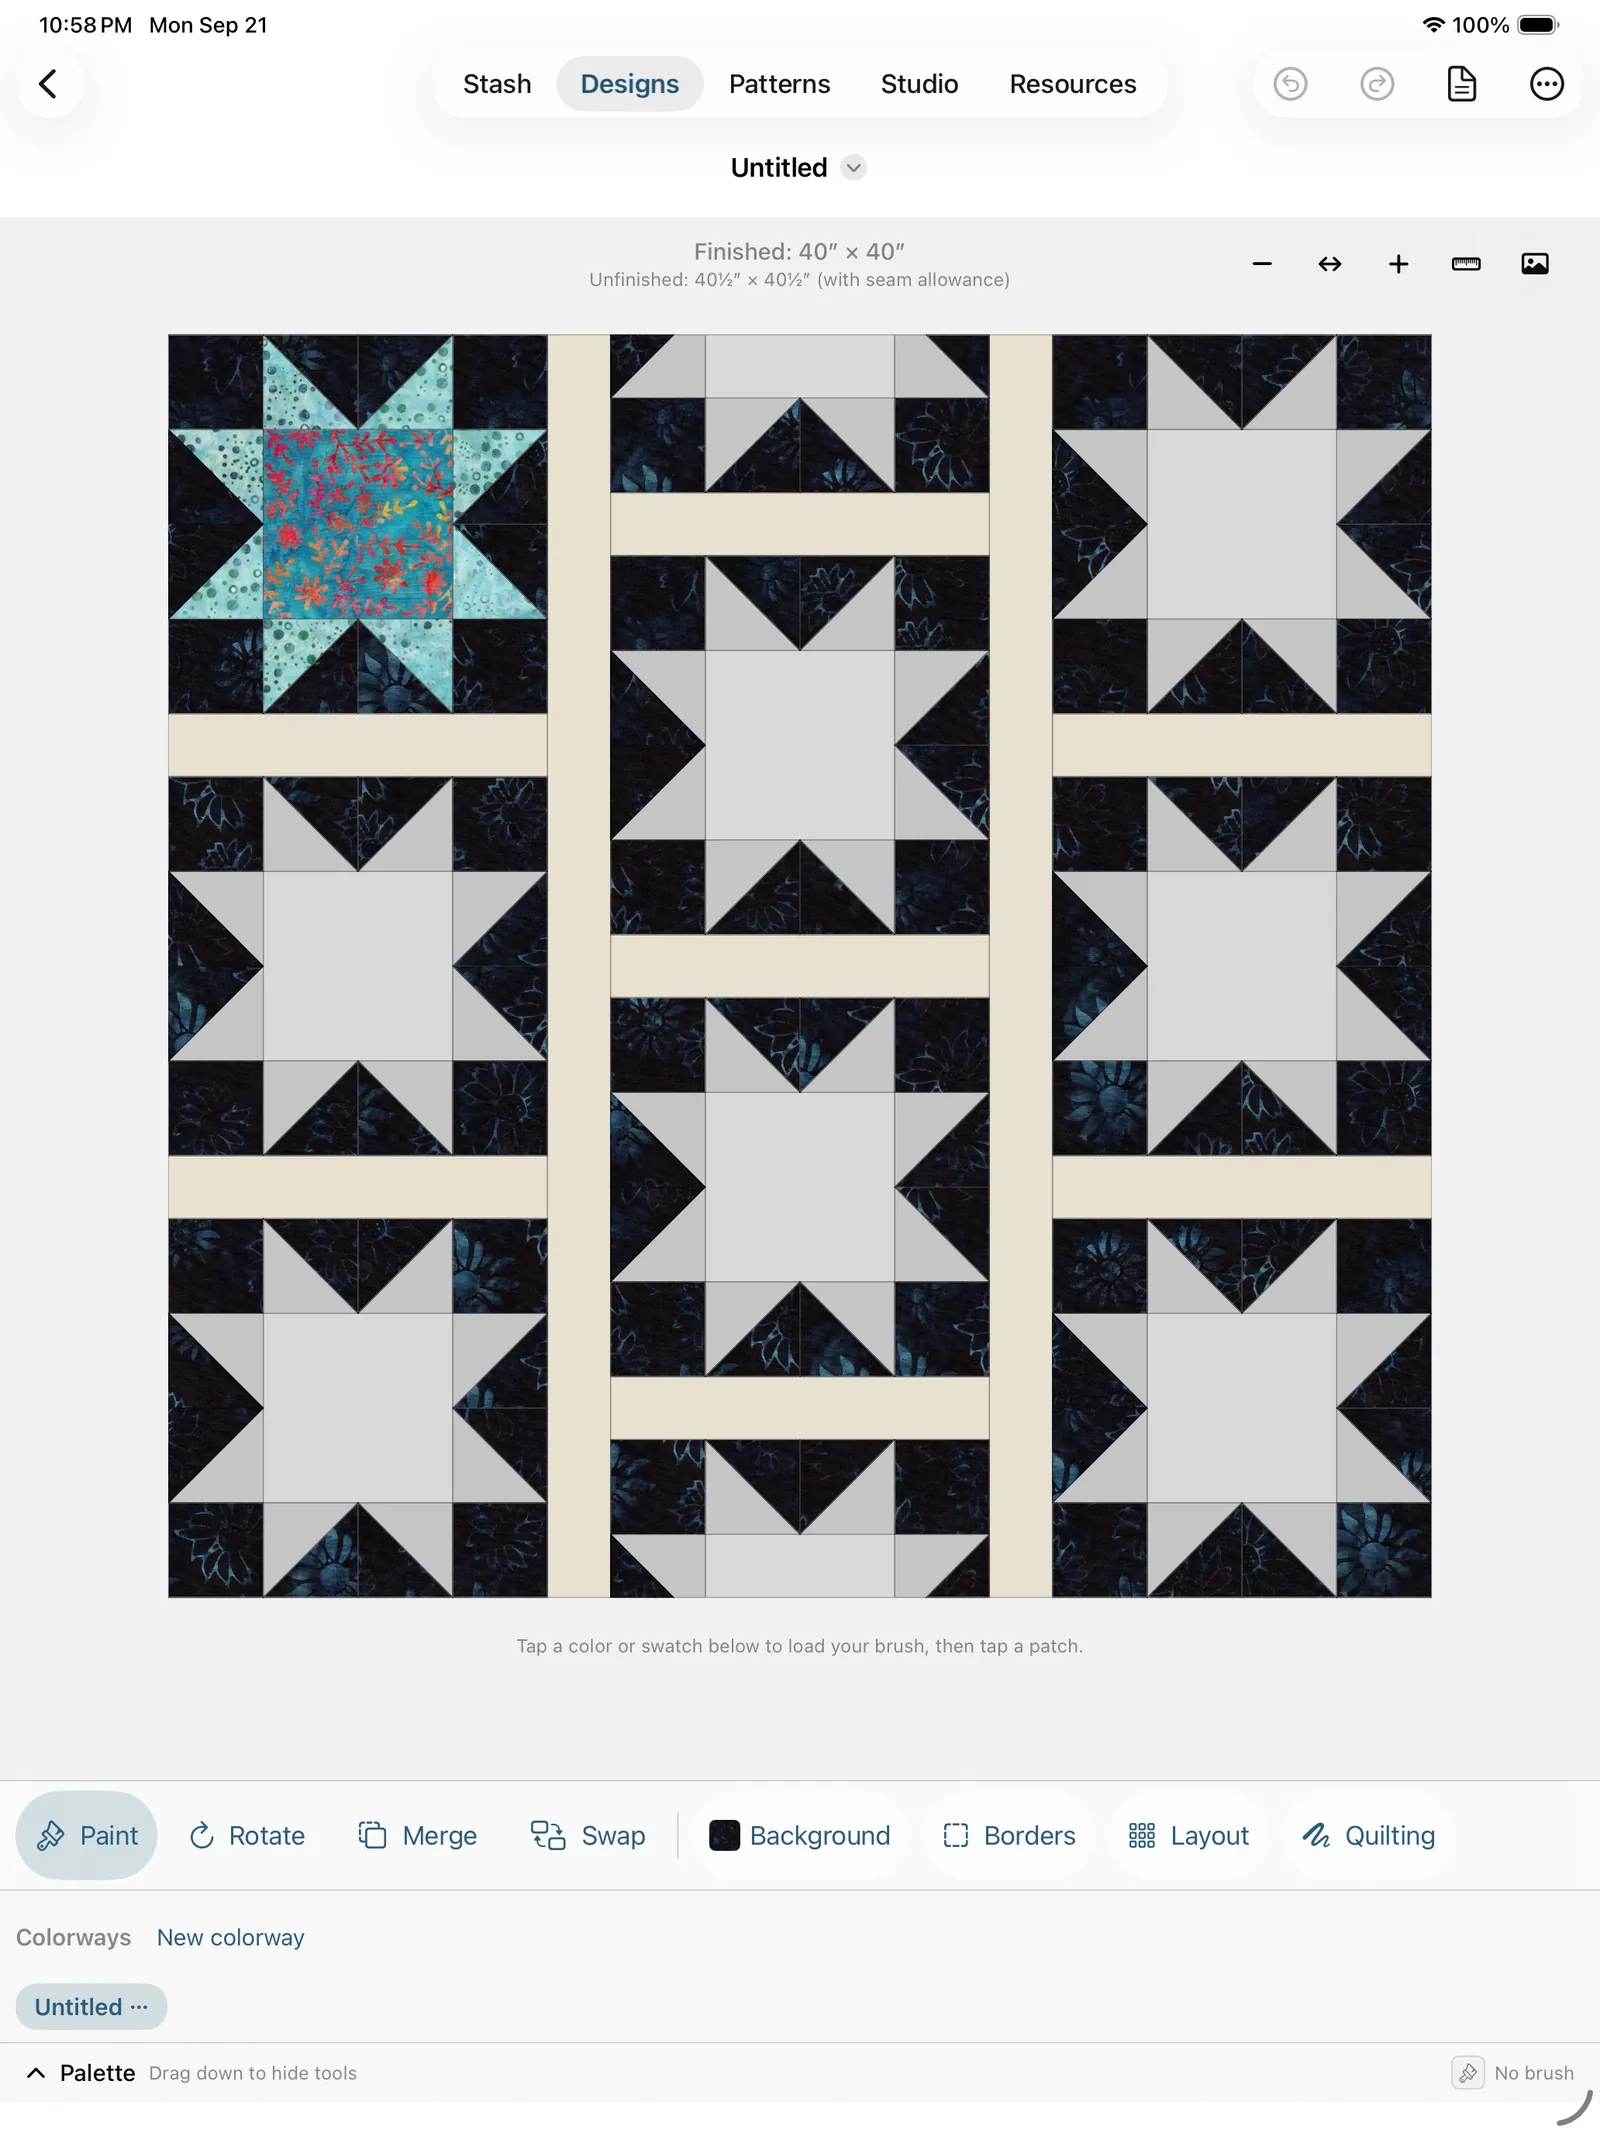
There are no cornerstones, and the Layout sheet doesn't offer the toggle. A cornerstone is the square where two strips cross, and in a brick set nothing crosses: the columns beside each other are offset by the drop, so one column's short strips are never level with the next column's. A square placed at a "crossing" would land halfway down a neighboring block.
One thing shifts once a brick set is sashed: the drop is measured against a block plus its sashing, not against the block alone. A half drop on 12″ blocks with 2″ sashing moves a column 7″, not 6″. That's what keeps the two part blocks capping a dropped column the same size as each other (5″ and 5″ here); measured against the block they'd come out 4″ and 6″ and the stagger would read as a mistake. Unsashed, the two rules are the same number, so nothing about a quilt you've already made changes.
You can move between all three settings later. Converting routes through the straight layout in both directions, so going from on point to brick (or back) doesn't quietly lose work, and you're told before anything is dropped.
Sashing and cornerstones
Once a layout has more than one block, the Layout sheet adds a Sashing section, strips of fabric that sit between the blocks to set them apart (like a 2″ frame around every block):
- Sashing stepper: the strip width, from None up to 12″ in quarter-inch steps. Leave it at None for no sashing.
- Strip fabric: the fabric or color for the sashing strips.
- Cornerstones toggle: turn it on to drop a small square wherever the strips cross; a Cornerstone fabric chip appears to fill those squares.
- The footer shows the finished top size before borders, and reminds you that you can tap any strip or cornerstone on the canvas to recolor it individually, just like a patch. The Strip fabric and Cornerstone fabric chips here set every strip at once; a tap on the canvas paints only the strip you tapped, on top of that, and a strip you've painted keeps its fabric until you erase it (the same way the design's background fill leaves painted patches alone). (With cornerstones off, a sashing row is one full-width strip you cut and sew in one piece, so tapping any part of it paints the whole row: what you can paint separately is what the pattern cuts separately.)
Sashing only shows for multi-block grids (a single block has nothing to sash between).
Mixing block types in one quilt
For quilt layouts, a Blocks row appears in the palette. Tap a block chip to load it, then tap a cell to turn that cell into that block. This is how you make a sampler, a quilt where every cell is a different block, and it works with any mix you like: one different block in the corner, or twenty different blocks and no two the same.
Making a sampler
- Start a new design as usual: tap + → New design, pick a block, and set its finished size. Whatever you pick here becomes the default block for every cell, so choose the one you want most of, or the one you want to build the rest around.
- Open Layout (the Layout button on the tool rail) and make it a quilt:
- Set Rows and Columns to the grid you want. A 3 × 4 gives you twelve cells to fill.
- Set the Block size. Every cell is this size, so a sampler wants a size that suits all the blocks you plan to use, not just the first one.
- Set a Sashing width. Sashing is worth it on a sampler: strips between the blocks give the eye somewhere to rest, and a dozen different blocks butted straight up against each other tends to read as noise. Add Cornerstones too if you want the joins marked.
- Place the blocks. Back on the canvas, the palette now has a Blocks row. Tap a block chip to load it onto your brush, then tap the cell you want it in. Every block available in the picker is here, the built-ins and the ones from the block pack alike.
- Leave the rest alone. Cells you never tap keep the block you started with, so you only tap the ones you want to change.
- Then color it. Load a fabric or color and paint the pieces as usual.
Place the block first, then paint it. Changing a cell's block clears anything you painted into that cell, because the new block has entirely different pieces to fill. Paint a cell and then swap its block and you have thrown that painting away, which is annoying rather than dangerous (Undo brings it back), but it is worth doing in the right order.
A swapped-in block doesn't land blank, though. With Fill new blocks from top-left on, it takes its colors from your top-left block by role: whatever you chose for the background positions goes to the new block's background positions, and so on, rather than being copied piece by piece in order. Piece-by-piece is exact while every cell holds the same block and nonsense the moment one doesn't, since piece 3 of a Double X has nothing to do with piece 3 of a Bear Paw. So a block you drop into a sampler arrives already sitting in your palette, and a design-wide Background fabric reaches it too.
Rotate cells for variety. The Rotate tool works per cell, so the same block turned different ways in different cells reads as more variety than it costs you. A sampler often only needs two or three blocks and a bit of turning.
The pattern keeps up. The Cut list walks every cell, so a quilt with eight different blocks in it gets cut instructions for all eight, grouped by fabric like everything else. The Block sew order and its line drawing describe the design's starting block, one block rather than all of them, so on a sampler treat that section as the walkthrough for your main block and use the Cut list as the full inventory.
Borders
Tap Borders on the tool rail to frame your design. Borders work on every design type: single blocks, full quilts, HST grids, jelly-roll patterns, and Design Your Own boards, and the button sits in the same place in every editor that has a rail. (A bargello has no rail, so there you reach Borders from the ••• menu instead.) You can stack several, and they nest outward from the center field.
Managing borders
The Borders sheet lists your borders innermost-first:
- Add: tap +. A new border starts as a 2″ solid denim frame so you can see it right away.
- Reorder: tap Edit, then drag. Border 1 is the innermost (it touches the center); higher numbers sit further out.
- Remove: swipe a row left, or use Edit.
Tap a border to open its settings.
A single border's settings
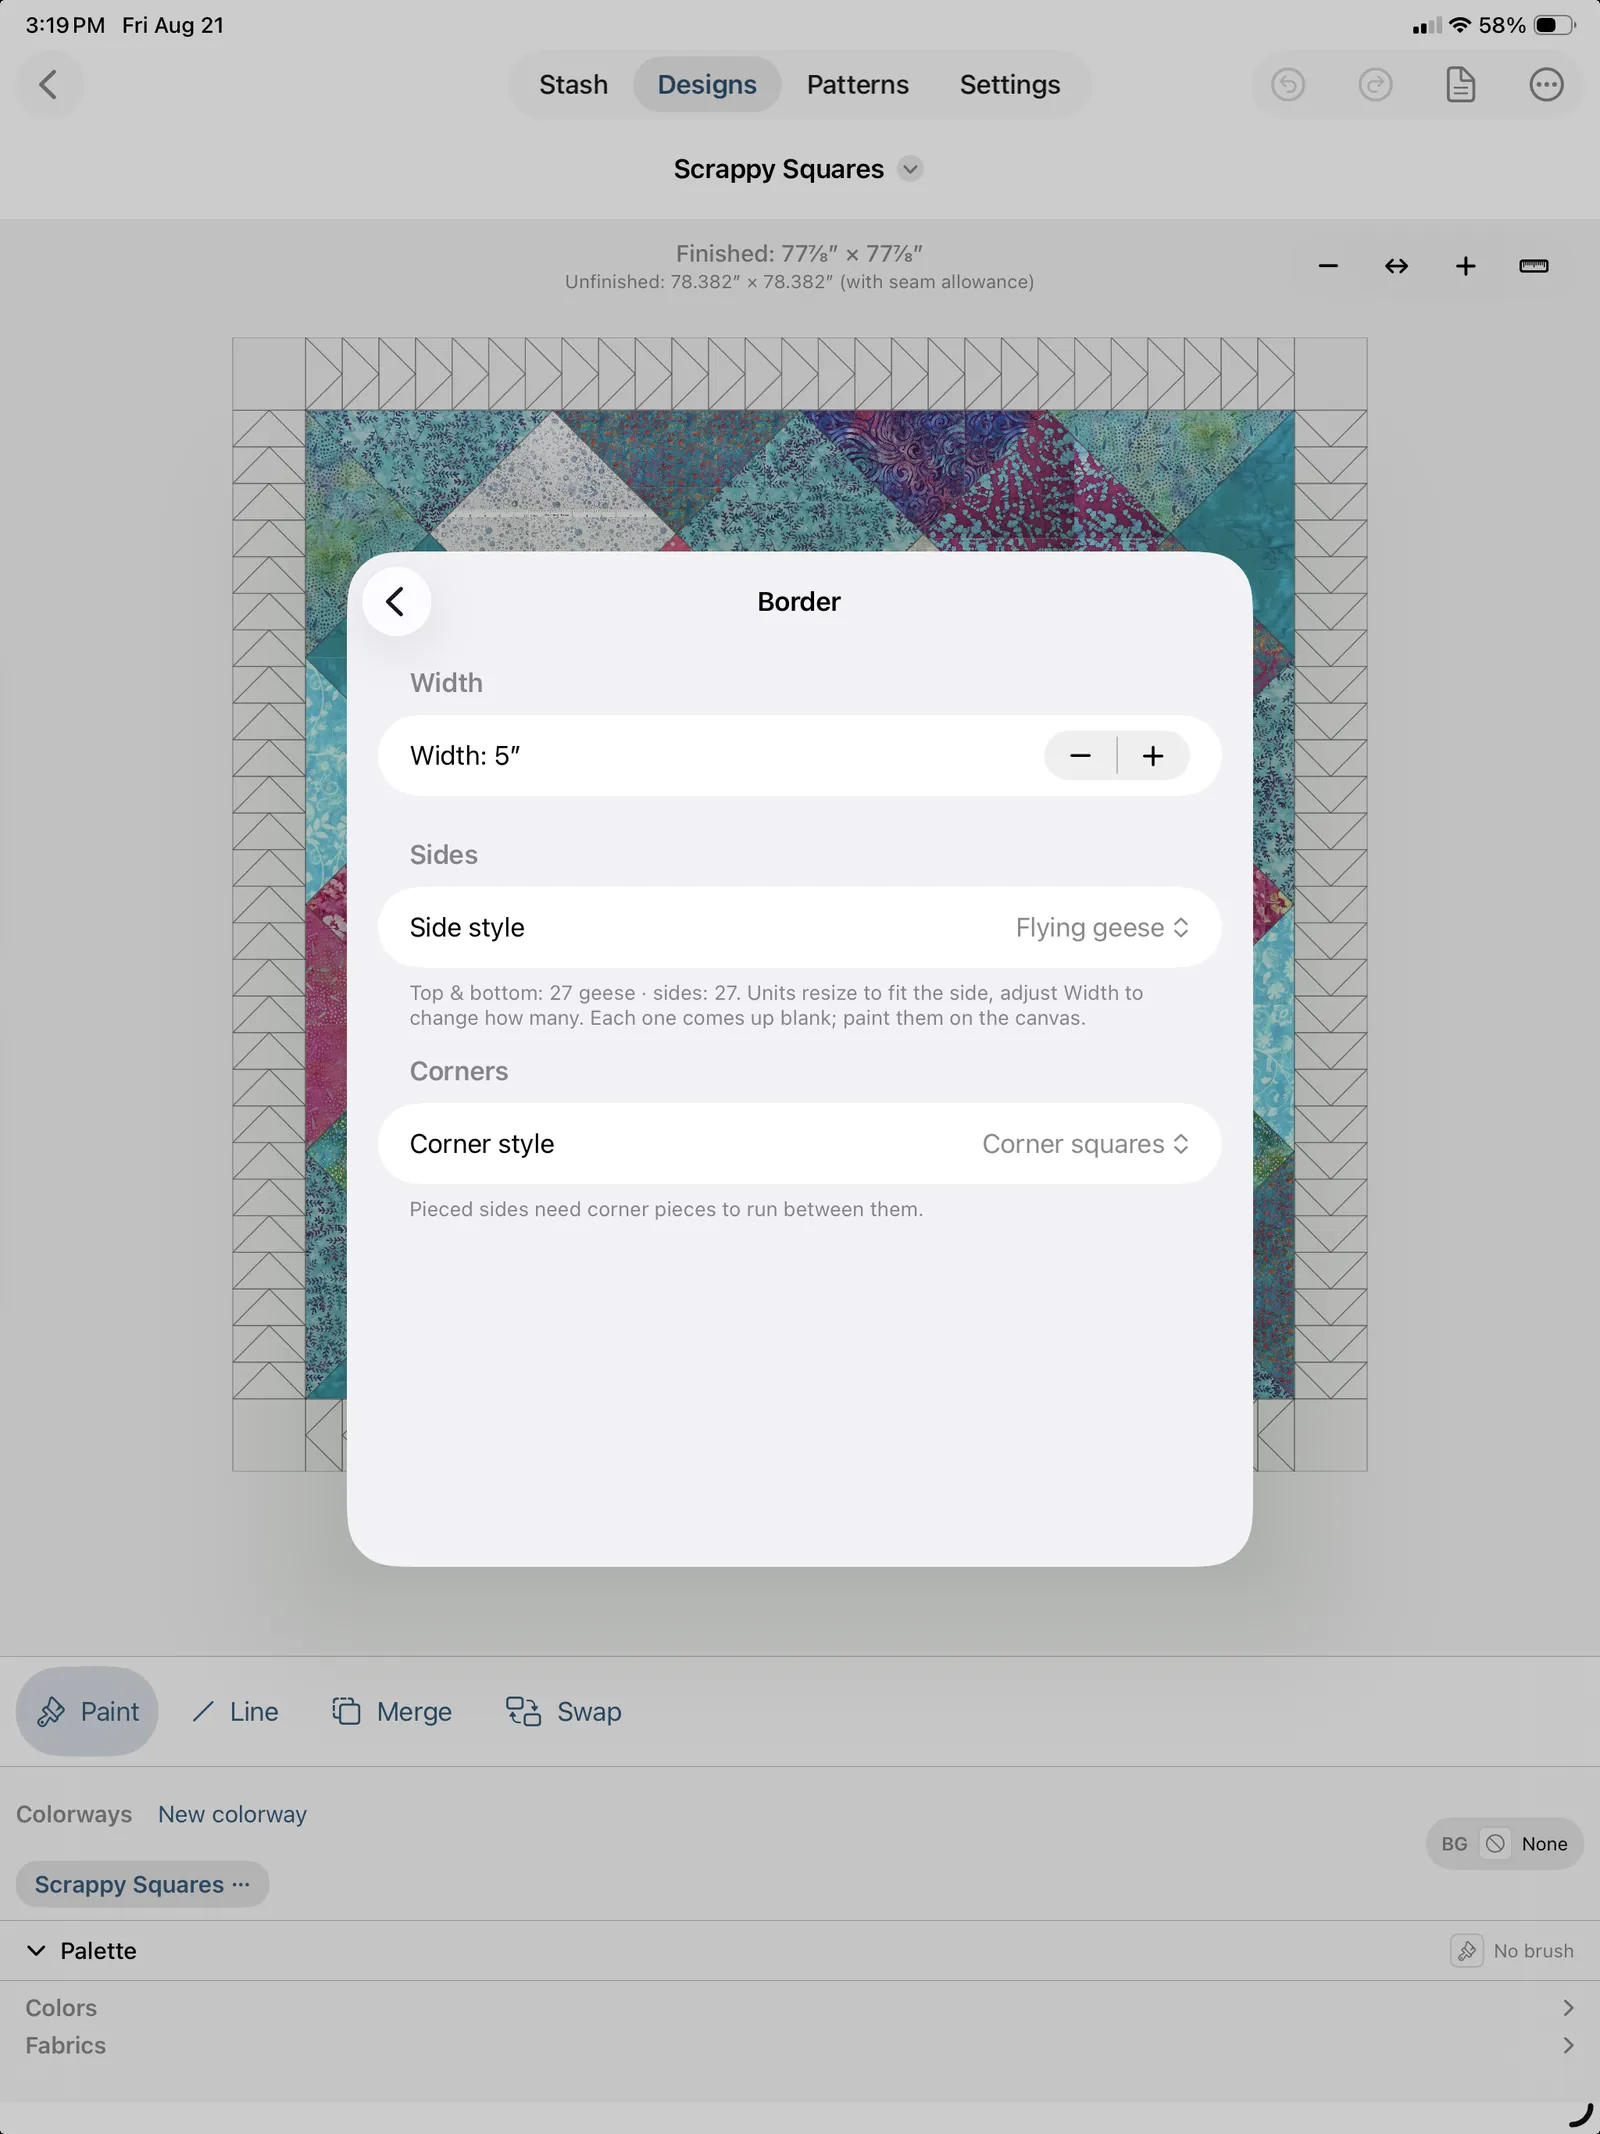
- Width: 0.25″ to 12″, in quarter-inch steps.
- Side style: how the four sides are built:
- Solid: plain strips in one fabric or color (set by the Fill below).
- Flying geese: a row of "geese" (triangle units) marching around the frame.
- Sawtooth: a row of half-square-triangle "teeth" around the frame.
- Corner style: how the four corners are treated:
- Butted: sides run straight past each other (the simplest frame).
- Mitered: the corners meet on a 45° diagonal.
- Corner squares: a plain square ("cornerstone") sits in each corner, with the sides running between them.
- Corner blocks: a full quilt block sits in each corner; pick which block from the list that appears.
- Fill (labeled Side fill when the border has corner pieces): for solid sides, load the border's color or fabric here. It sets all four sides at once, and that fill belongs to the colorway you're on, so you can frame a navy version in gold and a batik version in cream without either touching the other. A tap on the canvas paints one side: a border's four sides are four separate cuts, so you can run a different print along the top of a quilt, or frame it in two fabrics. A side you've painted keeps its own fabric until you erase it, at which point it goes back to wearing this fill.
For the pieced styles (Flying geese / Sawtooth), the units resize to fit each side; change the Width to change how many fit. A live readout shows the count, e.g. "Top & bottom: 8 geese · sides: 6." Pieced units come up blank and are painted on the canvas (see below), so there's no side-fill chip for them.
Pieced sides have to run between corner pieces, so choosing Flying geese or Sawtooth offers only Corner squares and Corner blocks, and bumps butted/mitered corners up to squares automatically.
Painting pieced sides, corner squares, and corner blocks: these all come up blank. Paint them right on the canvas with your brush, exactly like the rest of the quilt: load a color or fabric and tap the pieces. (A solid border's side strips use the Fill instead.)
Rotating blocks
Most block designs get a Rotate tool on the tool rail. (It used to have two homes at once, a toolbar button and a chip in the Colors palette row; the palette is what a tap paints with, and rotation paints nothing.) Three design types don't, because they'd have nothing to gain from it: jelly-roll designs (their strips have a fixed orientation), Design Your Own boards (no single block to spin; their own tools handle geometry), and the Squares one-patch (identical squares look the same turned). It's context-aware:
- On a regular pieced block (Pinwheel, Log Cabin, Sawtooth Star, and so on), load Rotate and tap a block to turn the whole block 90° clockwise. Its fabrics ride along with the spin. Tap again to keep turning; four taps bring it back to where it started. In a tiled quilt, each cell rotates on its own, so you can spin individual blocks for pinwheel and windmill effects across the top.
- On an HST Grid (or any design using half-square triangles), Rotate instead spins the individual HST unit you tap, 90° at a time through all four orientations. That's how you build custom triangle layouts (pinwheels, zigzags, diamonds, and so on).
Rotate is tap-only (no dragging), so you can't accidentally spin a whole row.
Merging patches (cut as one piece)
Sometimes a run of same-fabric patches should really be one piece of cloth, not a grid of little pieces sewn back together. A quilt's plain background is the classic case: if the whole lower-left of a block is one fabric, you'd cut it as a single large triangle, not piece it from a dozen half-square triangles. The Merge tool does exactly that.
Merge is on the tool rail for every design except jelly rolls. Tap it and the canvas switches to selection mode:
- Tap the patches you want to join. They have to be the same fabric or color and actually touch each other. A running count shows how many you've picked; tap a selected patch again to drop it.
- Tap Merge. The selected area becomes one shape: its internal seams disappear on the canvas, and in the pattern it's cut as a single piece.
- If your selection isn't all the same fabric, or the pieces don't all connect, the app tells you and leaves them as they were, so you can't merge something you couldn't actually cut.
To split a merged area back into its patches, open the Merge tool, tap the merged shape, and choose Unmerge. Tap Done to leave the tool.
A merged region is drawn in the one fabric it's cut from. One piece of cloth can't be two colors, so if you merge patches you'd painted differently, the canvas settles on a single fabric for the whole region: the first painted piece in reading order, which is the same one the cut list bills. The two can't disagree, because they run the same pass over the same shape. The seam you no longer have doesn't show either, all the way across.
Merging changes the pattern, not just the picture: a merged region shows up in the cut list as one big square, rectangle, or triangle, and the assembly steps join it on as a late seam (see Making a pattern).
On a Lone Star, Merge joins a run of diamonds. Pick two or more whole diamonds side by side in one row of one point, in one fabric, and the run is cut as a single long parallelogram off the same strip the diamonds come from, subcut at 45° at the run's length. Anything else on a star (a column, an L, two rows, a framed or split diamond, two fabrics) is refused with a line saying why. It's a Studio tool on a star; see Framing, splitting and merging the diamonds.
Design Your Own (freeform boards)
A Design Your Own board is a blank quilt top you rough out yourself with constrained drawing tools, instead of starting from a fixed block. It has two modes, Grid and Radial, chosen from ••• → Board as two rows with a checkmark against the current one. The two modes don't mix: switching with anything on the board asks first, then clears it so you can start the new layout fresh. That's why the switch lives in a menu rather than sitting on screen as a one-tap control, since it wipes the board's geometry, its merges, and every colorway's paint.
Everything you draw is stored as a recipe (the grid size, your cell cuts, the compass anchor and its rays), not as baked-in shapes, so a board reopens exactly as you left it and always renders crisp. You fill regions the same way as any design: load a color or fabric, tap to paint.
A board carries the same three shelves and the same top bar as the block editor: a tool rail (its paint tools, then Background, Borders and Layout past the divider), the colorway strip, the palette, and Undo / Redo / Pattern / ••• above. Its ••• menu is the block editor's, item for item, plus the Board mode picker. Borders behave exactly as they do on a block quilt (see Borders), including painting the pieces on the canvas.
Grid mode
The board is your finished top divided into the grid you chose. Its tools are on the rail: Paint, Line, Blocks, Merge, and Swap.
Line opens an edit view of the grid where you cut cells into regions. Your existing fills stay visible, faded, so you keep your bearings, and cutting a painted cell keeps the paint on both new pieces. Pinch to zoom and drag to pan to work precisely on a fine grid, and the zoom cluster sits above the canvas here as it does everywhere else, ruler included, so you can check a cut against a real ruler while you're placing it. A reference photo stays under the grid here too, which is the whole point of tracing. A Cut picker names the four kinds of cut in words, a hint under the canvas spells out what the active one does, and a tap makes the cut:
- Diagonal, tap a cell near the corner-to-corner line you want; the nearer diagonal is drawn, splitting the cell into two triangles. Tap the same diagonal again to clear it.
- Across, tap a cell to cut it straight across into top and bottom pieces. The cut lands on the nearest ¼″ mark, so pieces come out as real measurements (never a 1.11″ rectangle), and a small label shows each piece's size in inches. Add as many cuts as you like, two make three bands. Drag a cut to slide it to a new size, or tap it to remove it.
- Up-down, the same, cutting a cell into left and right pieces.
- X, tap a cell to draw both diagonals at once, splitting it into four triangles that meet in the middle. Each quarter takes its own fabric, so one cell can hold an hourglass, a pinwheel-ish four-color point, or anything in between. Tap the cell again to clear it.
(The first three were bare icons until recently: an arrow pointing left-and-right reads as "move it sideways" or "make it wider" about as easily as "cut across", and a picker you have to try every segment of to understand isn't a picker.)
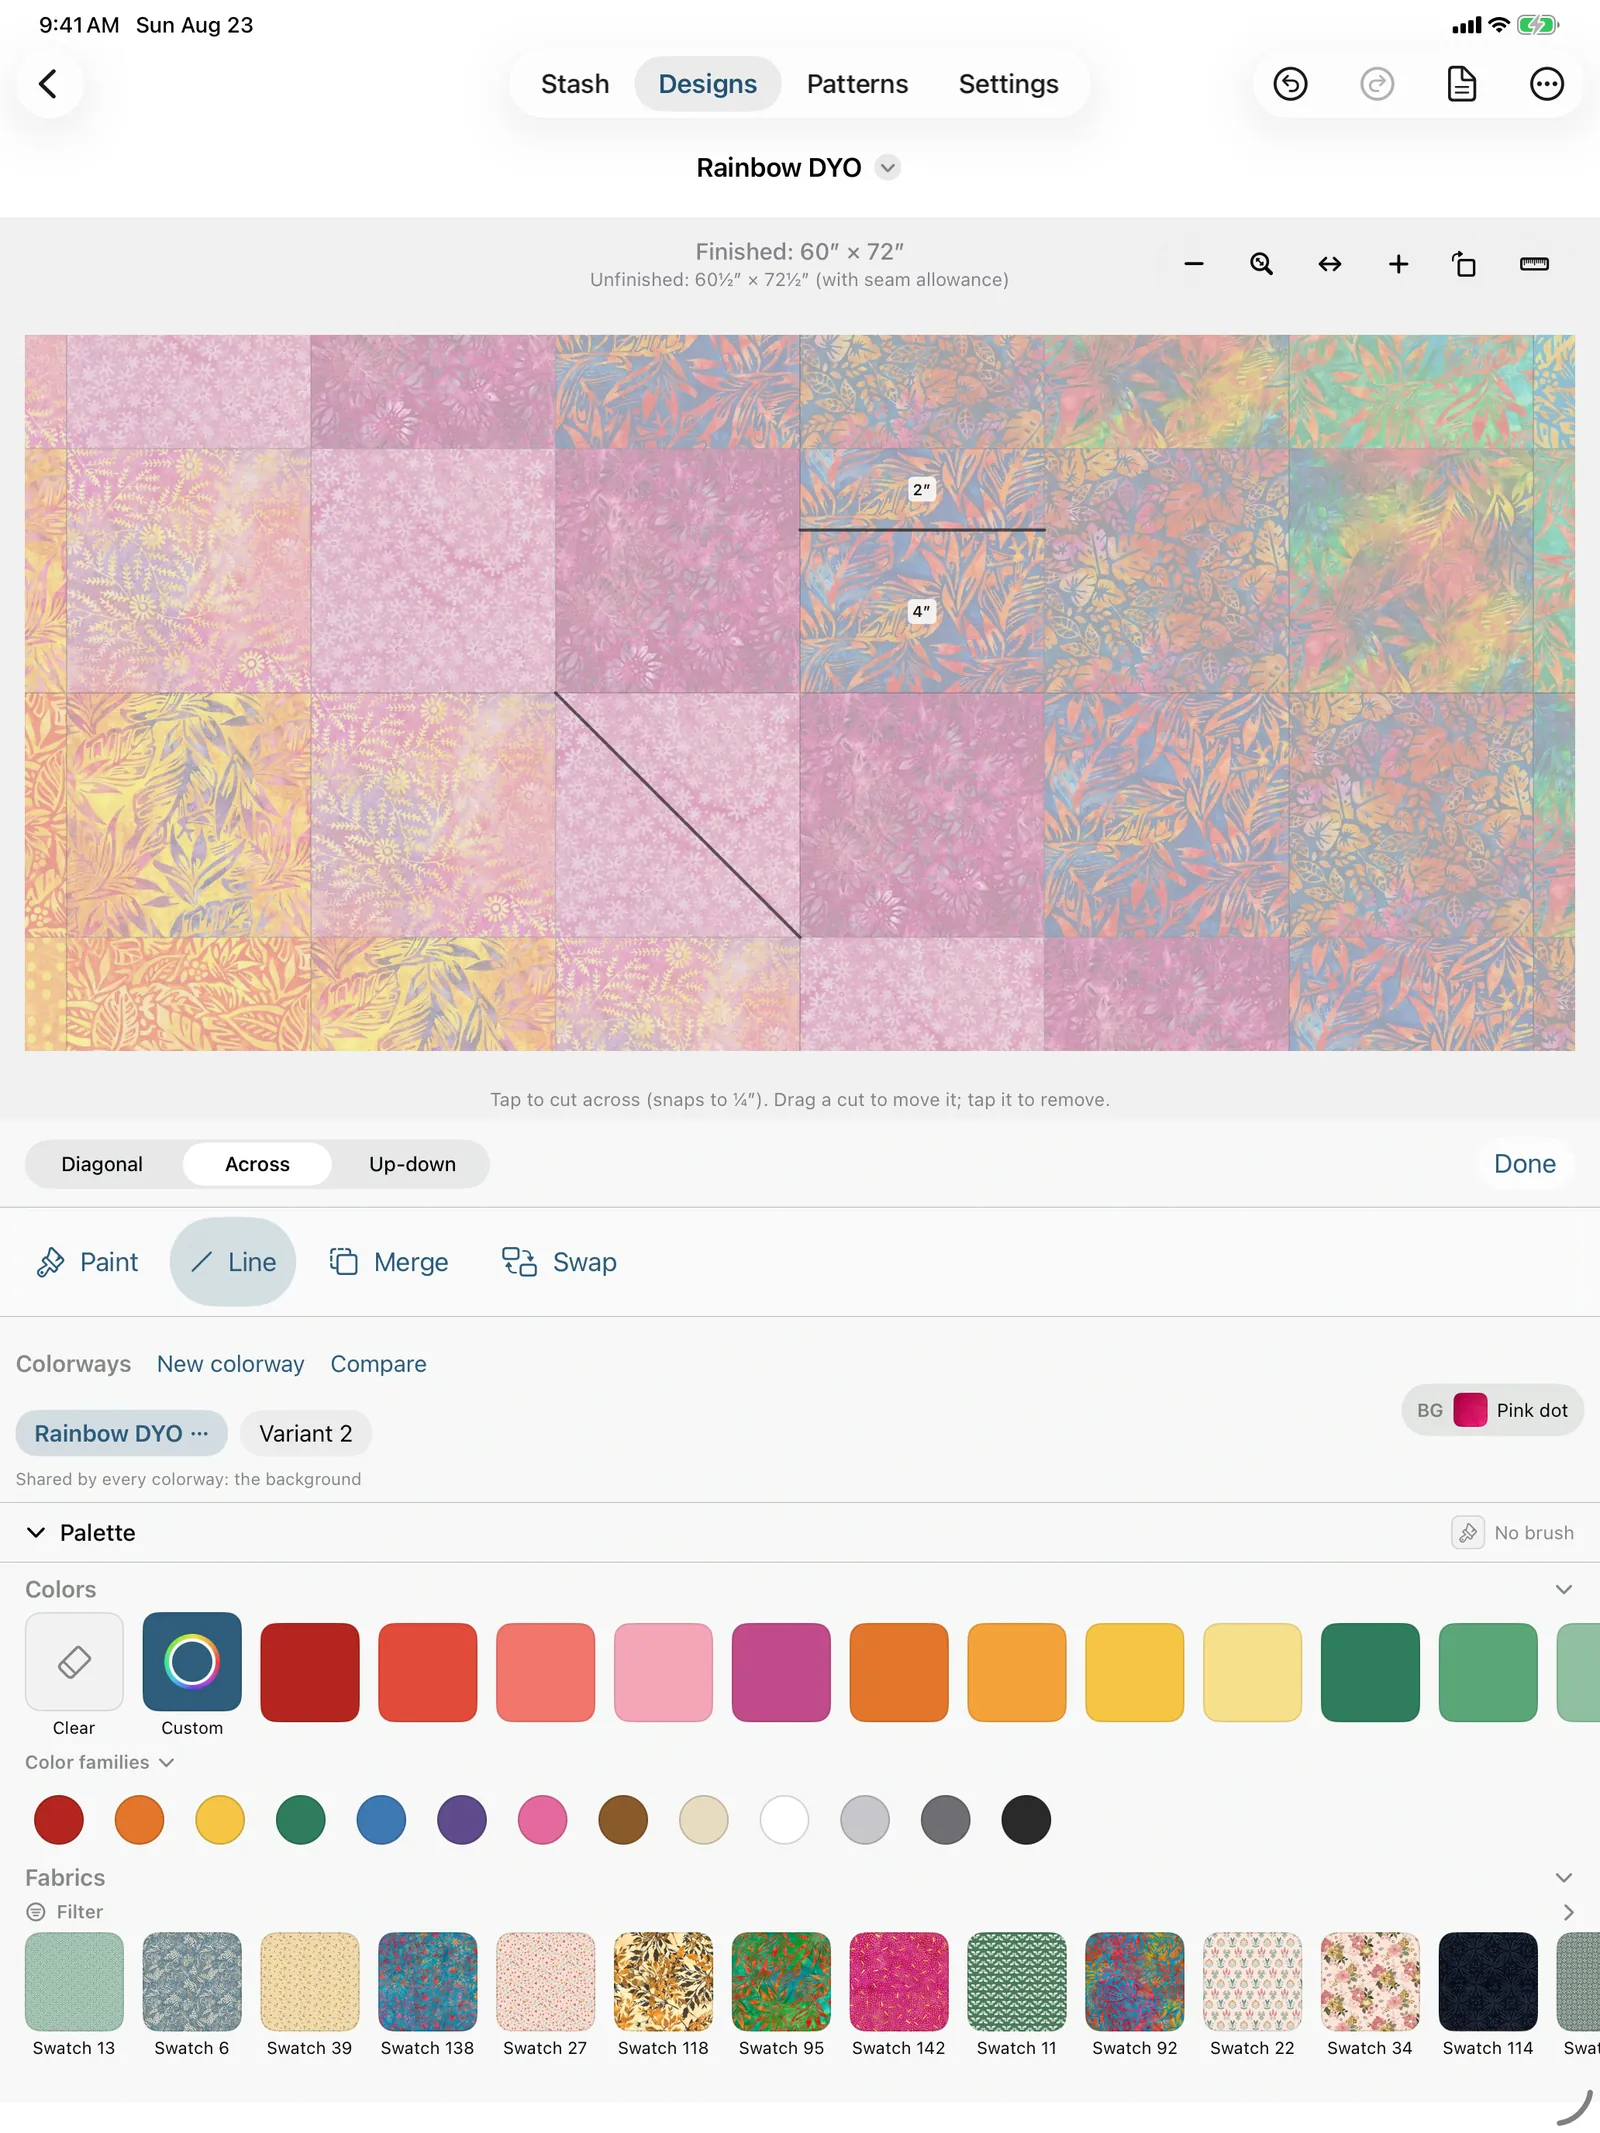
The four cuts are mutually exclusive in a cell, adding one replaces whatever was there. A Sizes toggle in the same control row hides the inch chips when they're sitting exactly where the next cut goes (a dense board, or a phone); the cut you're dragging keeps its readout regardless, and a fresh editor shows them all again. Tap Done on the control bar, or tap Line on the rail again, to go back to painting.
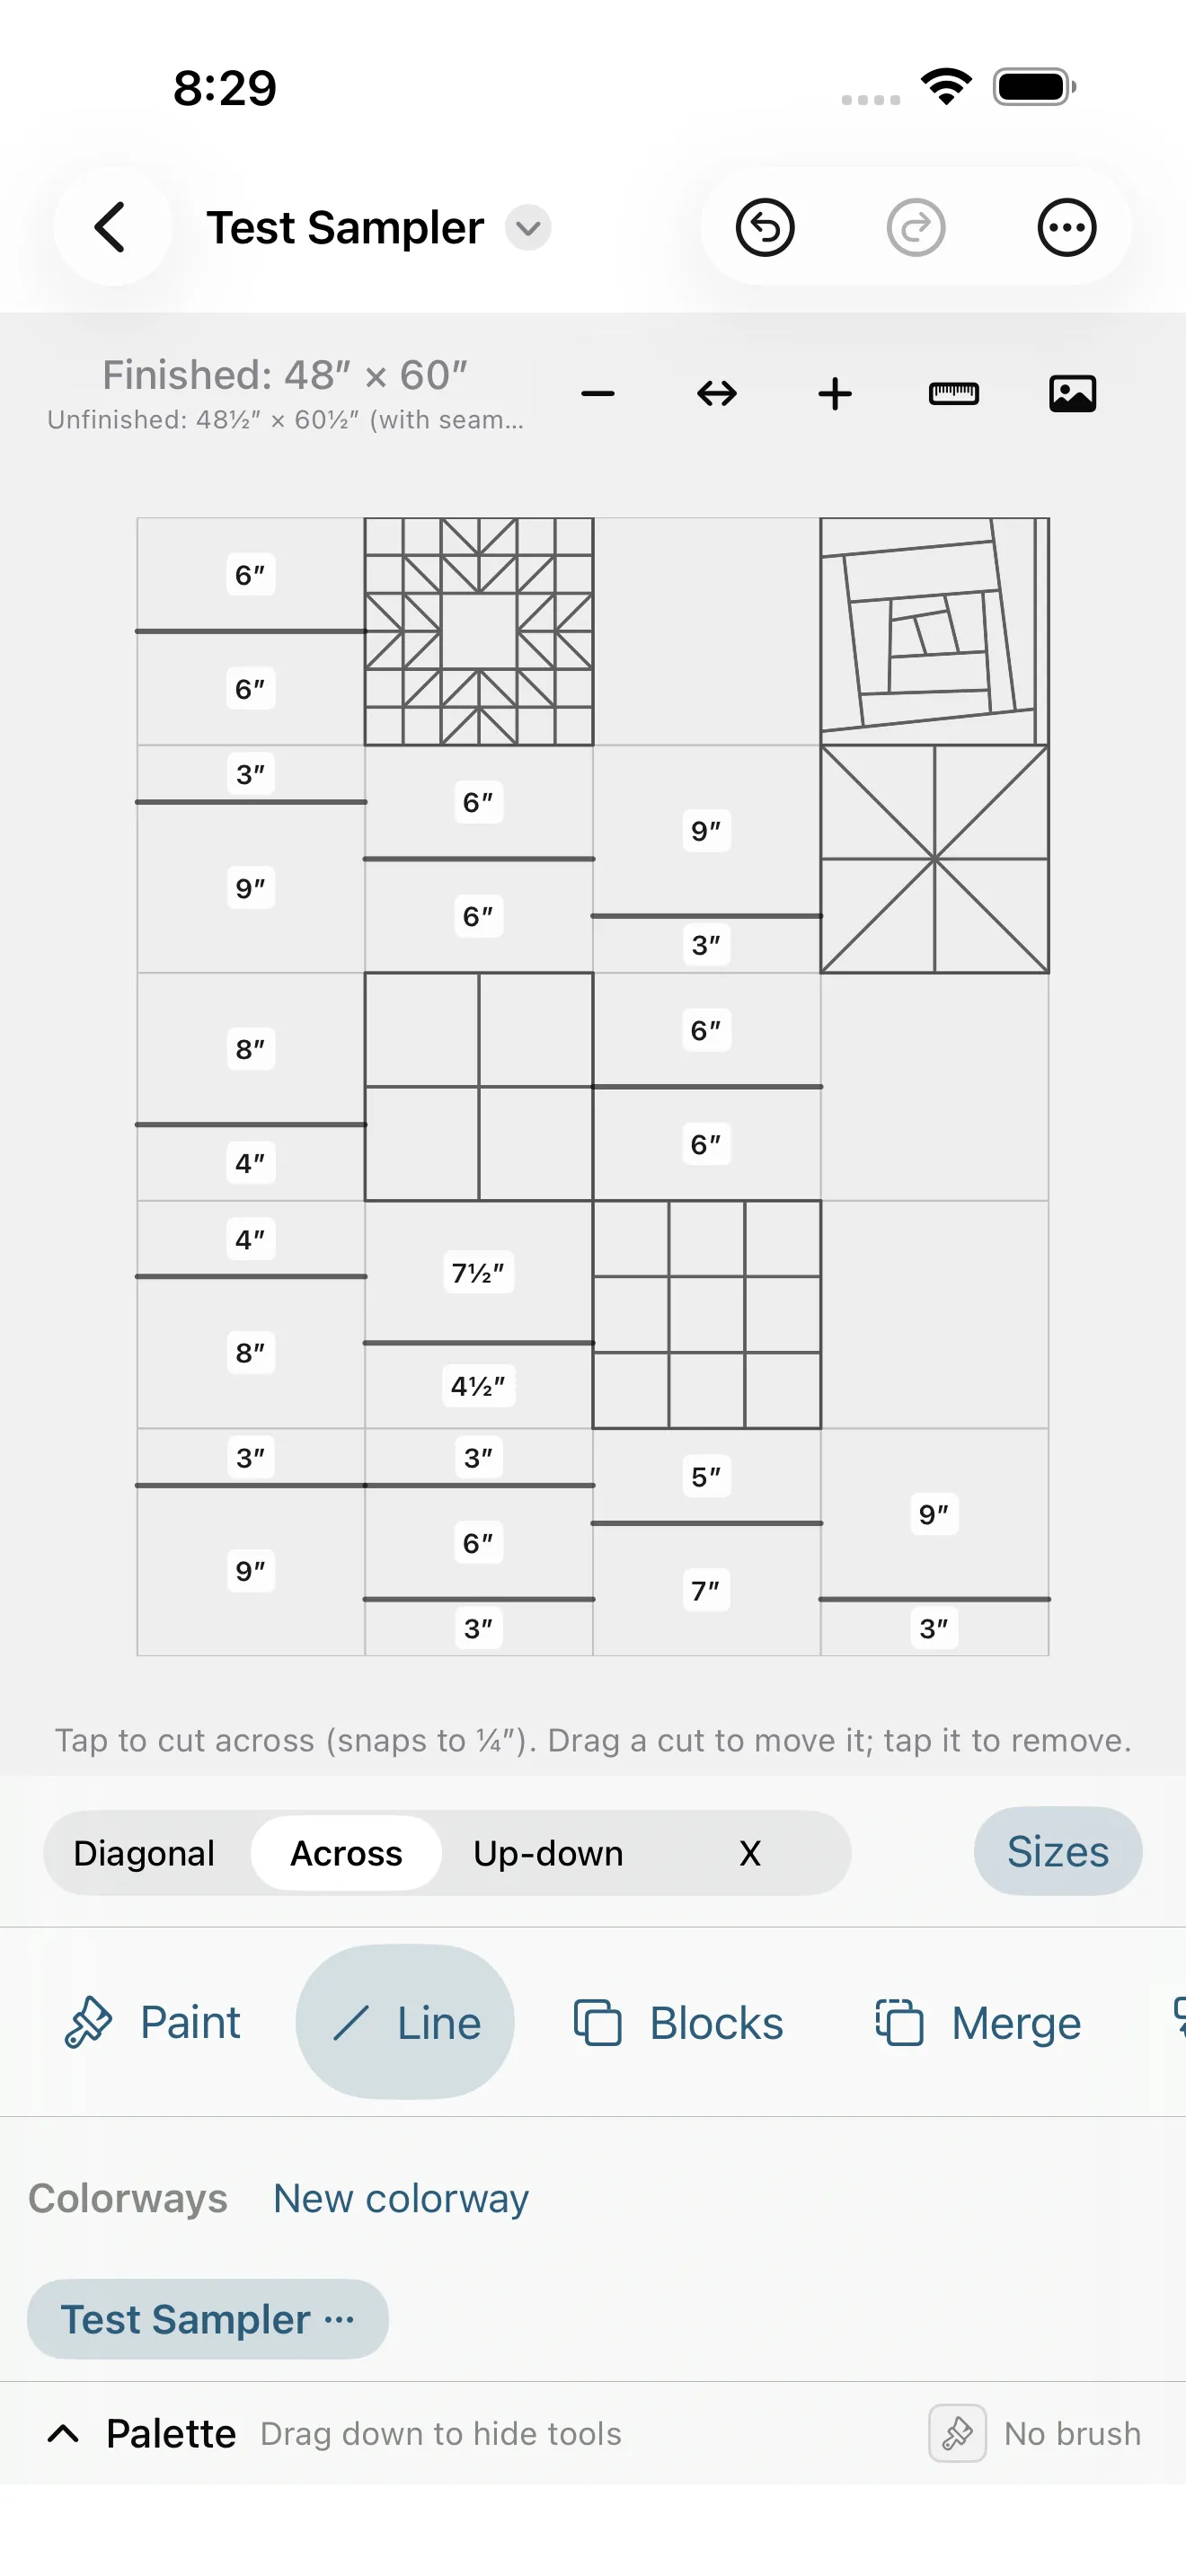
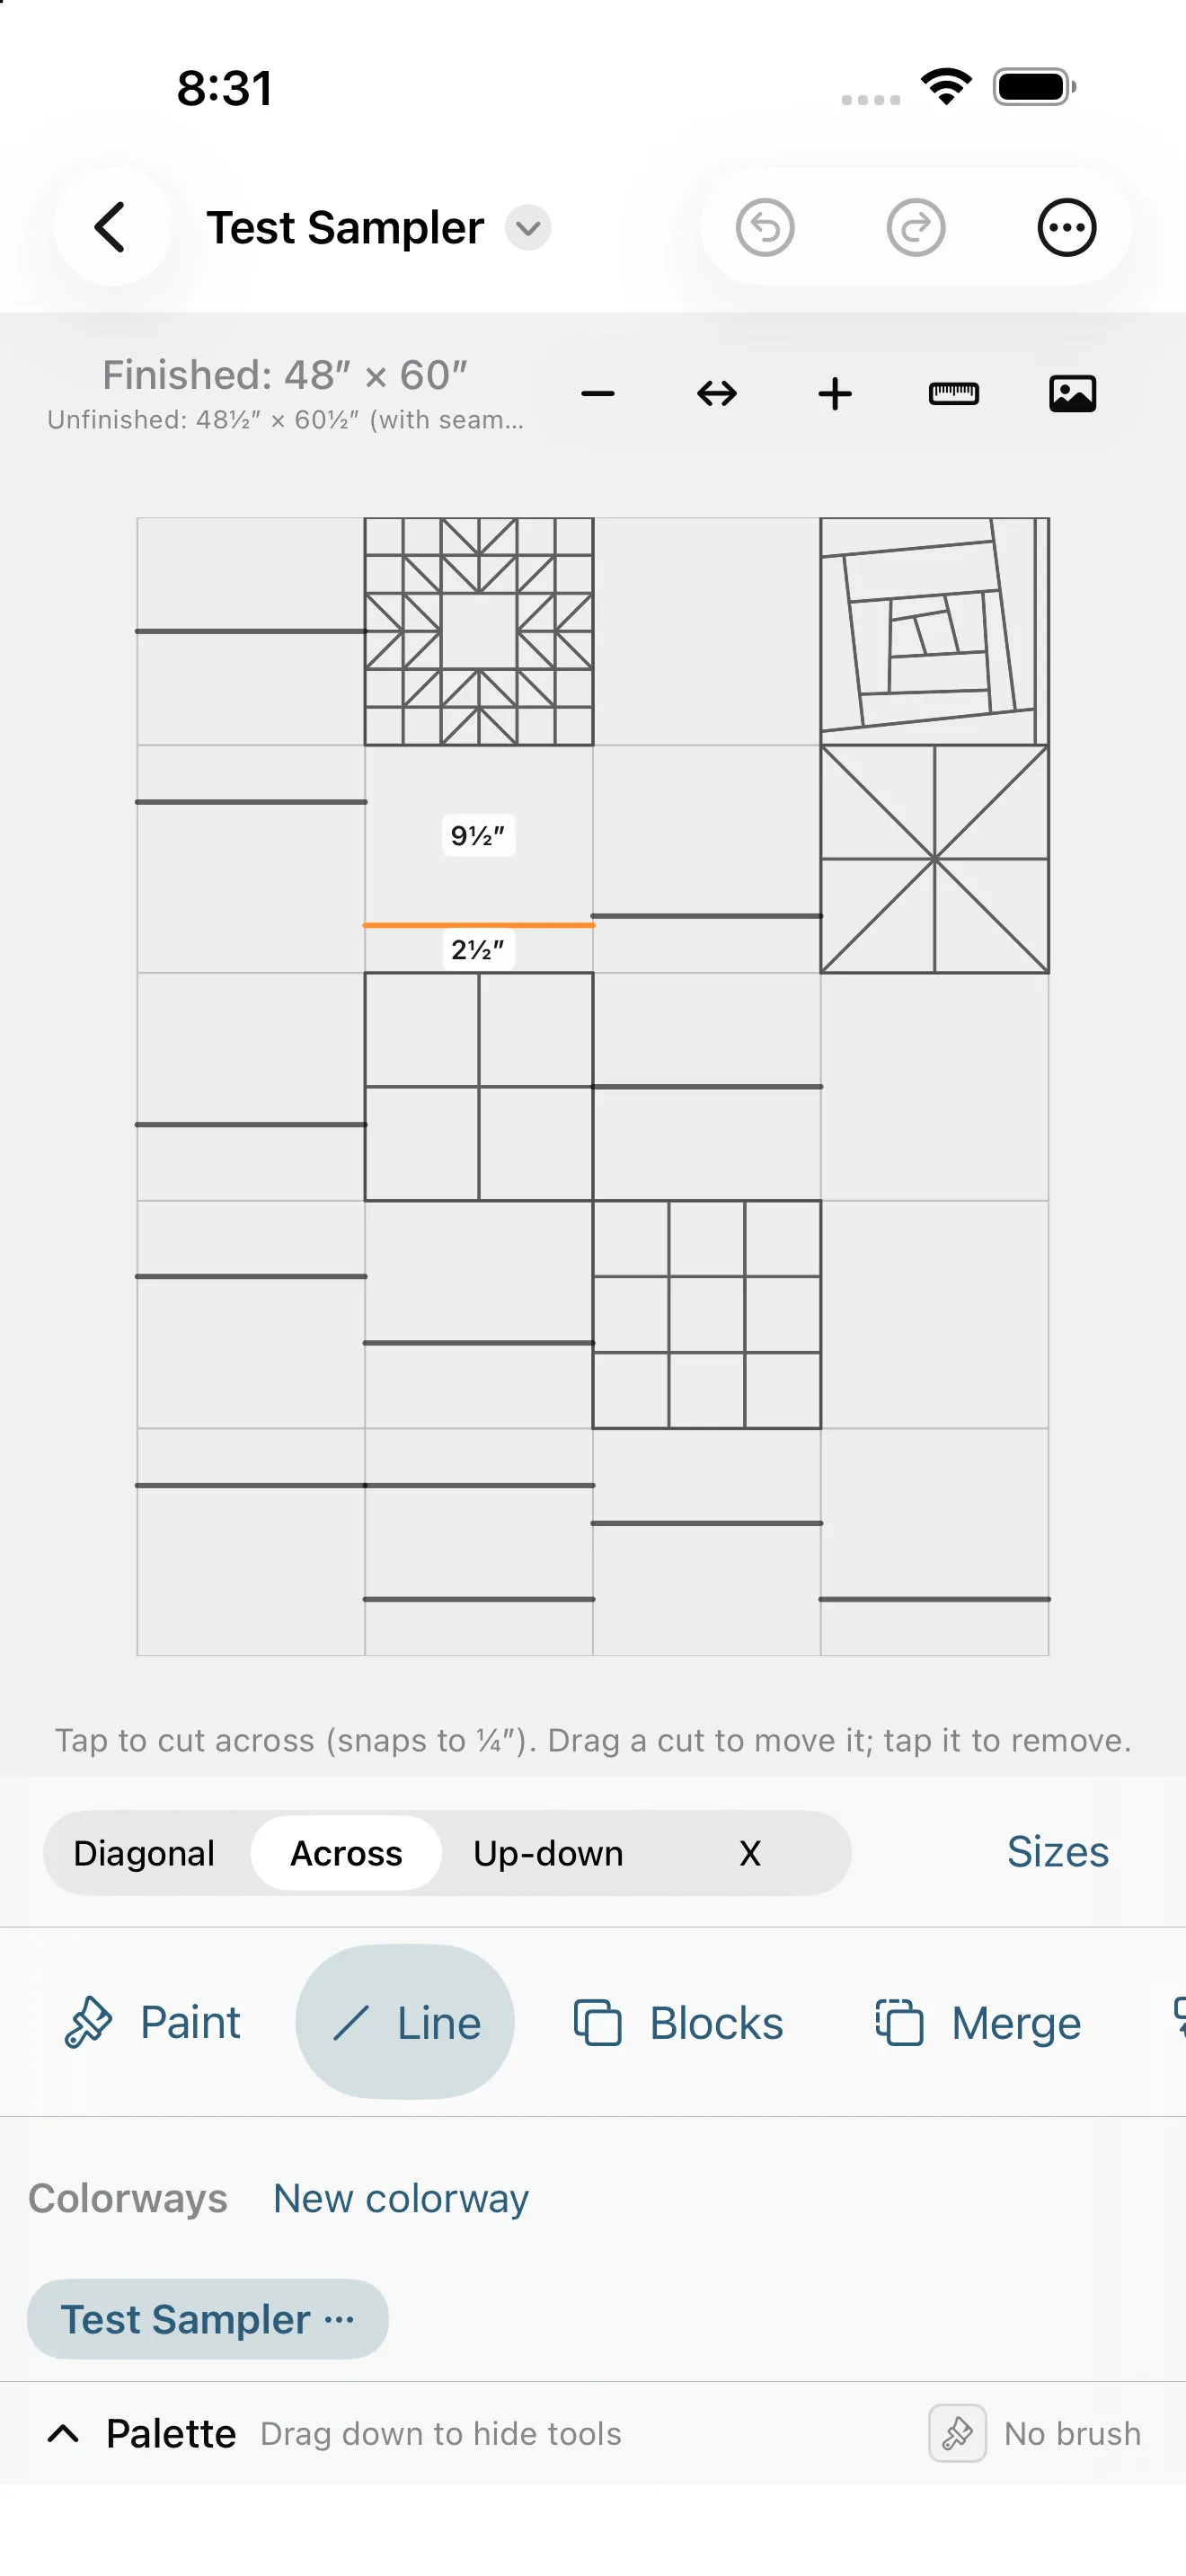
Four quarters meeting in the middle of a square is the classic quarter-square triangle, so that's how the pattern bills an X: one unit, and a square of each fabric subcut on both diagonals, sized by however many of the four triangles that fabric owns. Two fabrics facing each other is the hourglass everyone knows; four different ones works exactly the same way and just buys four squares instead of two. Paint all four the same and the cut list quietly drops back to a plain square, because there's no reason to sew a seam you can't see.
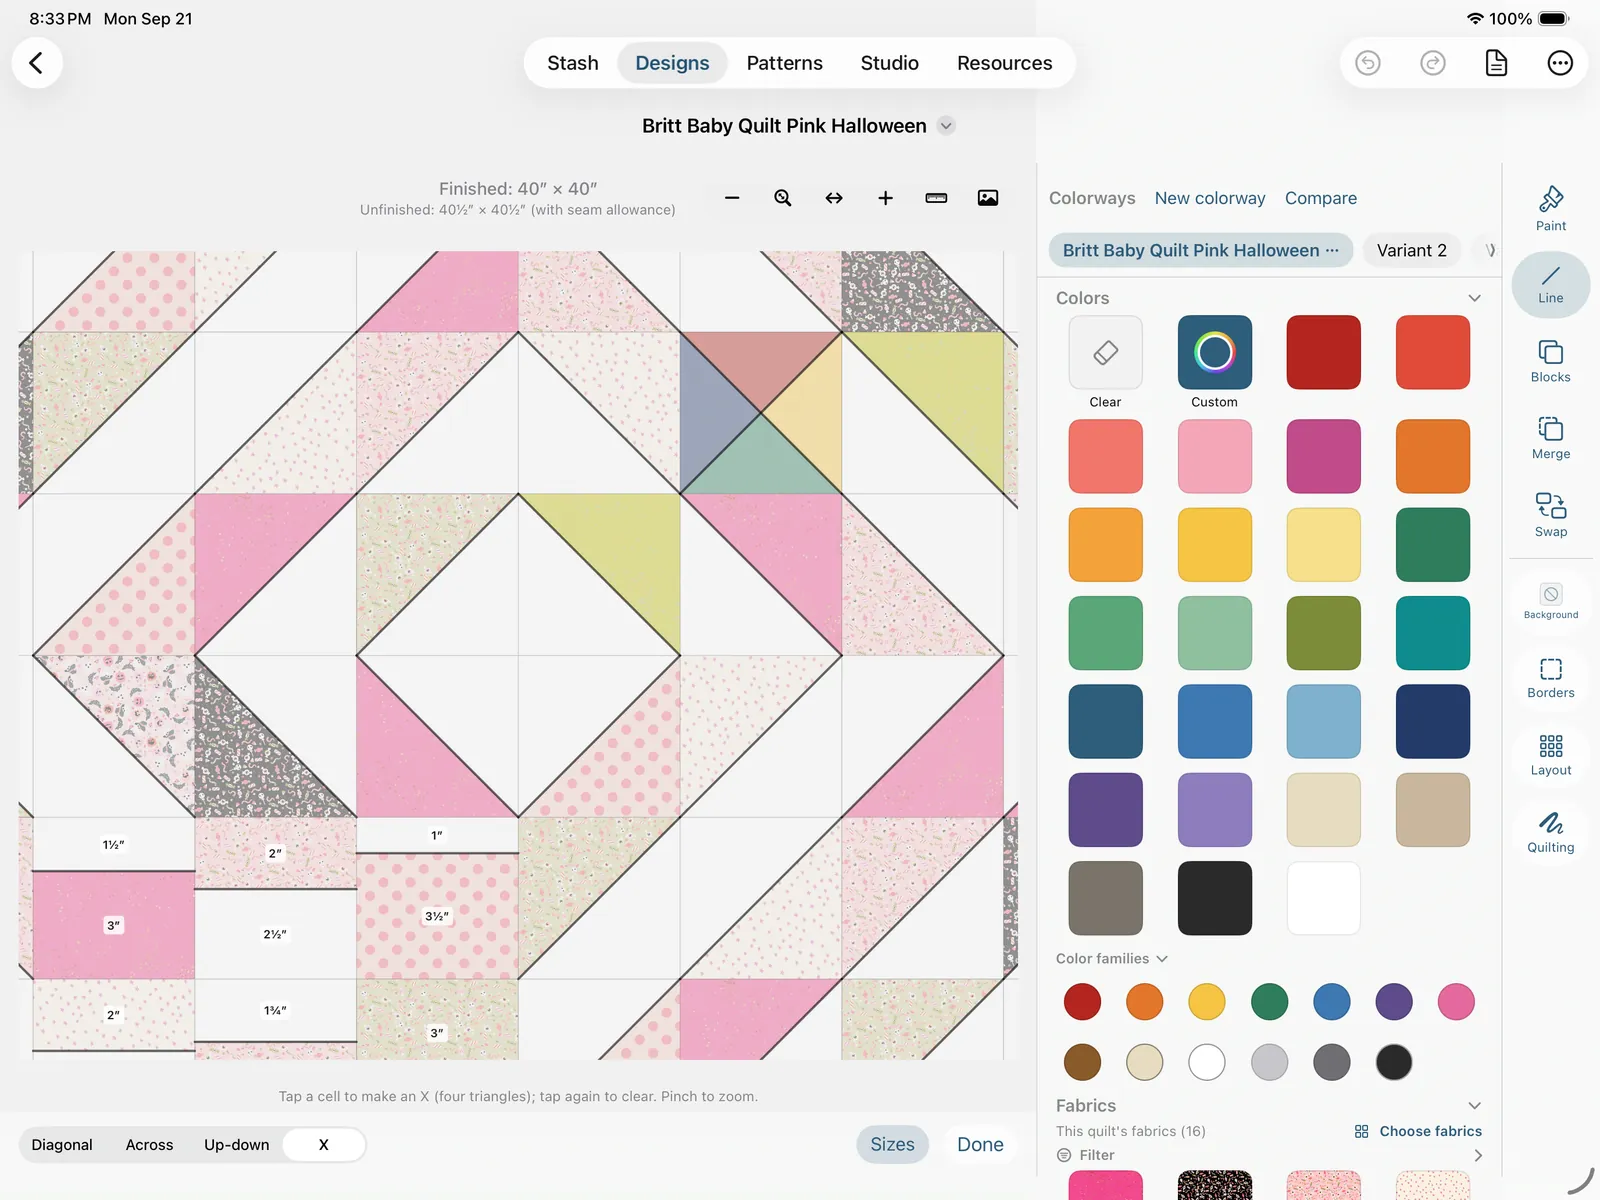
Merge works like the design editor's merge tool (see Merging patches above): tap touching regions, then Merge to cut them as one piece, or Unmerge to split them back. On a freeform board there's one rule, the pieces you pick have to form a single rectangle, triangle, or diamond (any parallelogram counts). An L-shape or other blob is refused with a nudge. One honesty note for the pattern: a rectangle, a diamond (a square on point), a right triangle, and a slanted parallelogram whose sides run with the grid are each really cut as one piece. A parallelogram sitting at no useful angle to the grid, or a non-right triangle, is still a perfectly legal merge, but it isn't something a rotary cutter can make in one pass, so the cut list supplies its parts and the assembly tells you to sew them together where the board shows one shape. Either way the seams inside vanish in the finished quilt, since both sides are the same fabric.
Blocks is one placement tool with two things it can place: a block from the library, or a rectangle of the board you've copied. Either way the move is the same: something is loaded, every tap stamps it down where you tap, it stays loaded so you can march it across a row, and each stamp is one undo step. A footprint preview shows green where it'll land and red where it won't, and a stamp overwrites whatever was under it. It's a Grid-mode tool.
Placing a library block (the Sampler). Load Blocks and the palette grows a Blocks to place section at the top, above the colors and fabrics: a search field, then your own Studio blocks under My Blocks and the whole Catalog as thumbnail chips. It's there whenever the Blocks tool is in hand and gone the moment you pick another tool, because under Blocks a tap on the board stamps rather than paints. Tap a chip and it's loaded; tap a cell and the block is composed into that cell, seams and all, so a Sawtooth Star next to a Churn Dash next to a Bear Paw is three taps. A stepper sets how many cells a block spans (1 × 1 by default, so on a 12″-cell Sampler board every block is 12″; set 2 × 2 on a 6″ board for the same thing), and Rotate turns the loaded block a quarter at a time. A placed block paints like any block: its light and dark pieces show in gray until you color them, its background pieces take the board's Background, and the pattern bills its units by name (the HST squares, the geese, the diamonds) rather than as bounding boxes. A block can't be cropped at the edge, so a spot where it won't fit shows red. Stamping over any part of a placed block replaces the whole block; the Line tool won't cut a cell a block sits in, so to get plain cells back, select them and tap Clear (or stamp something else there).
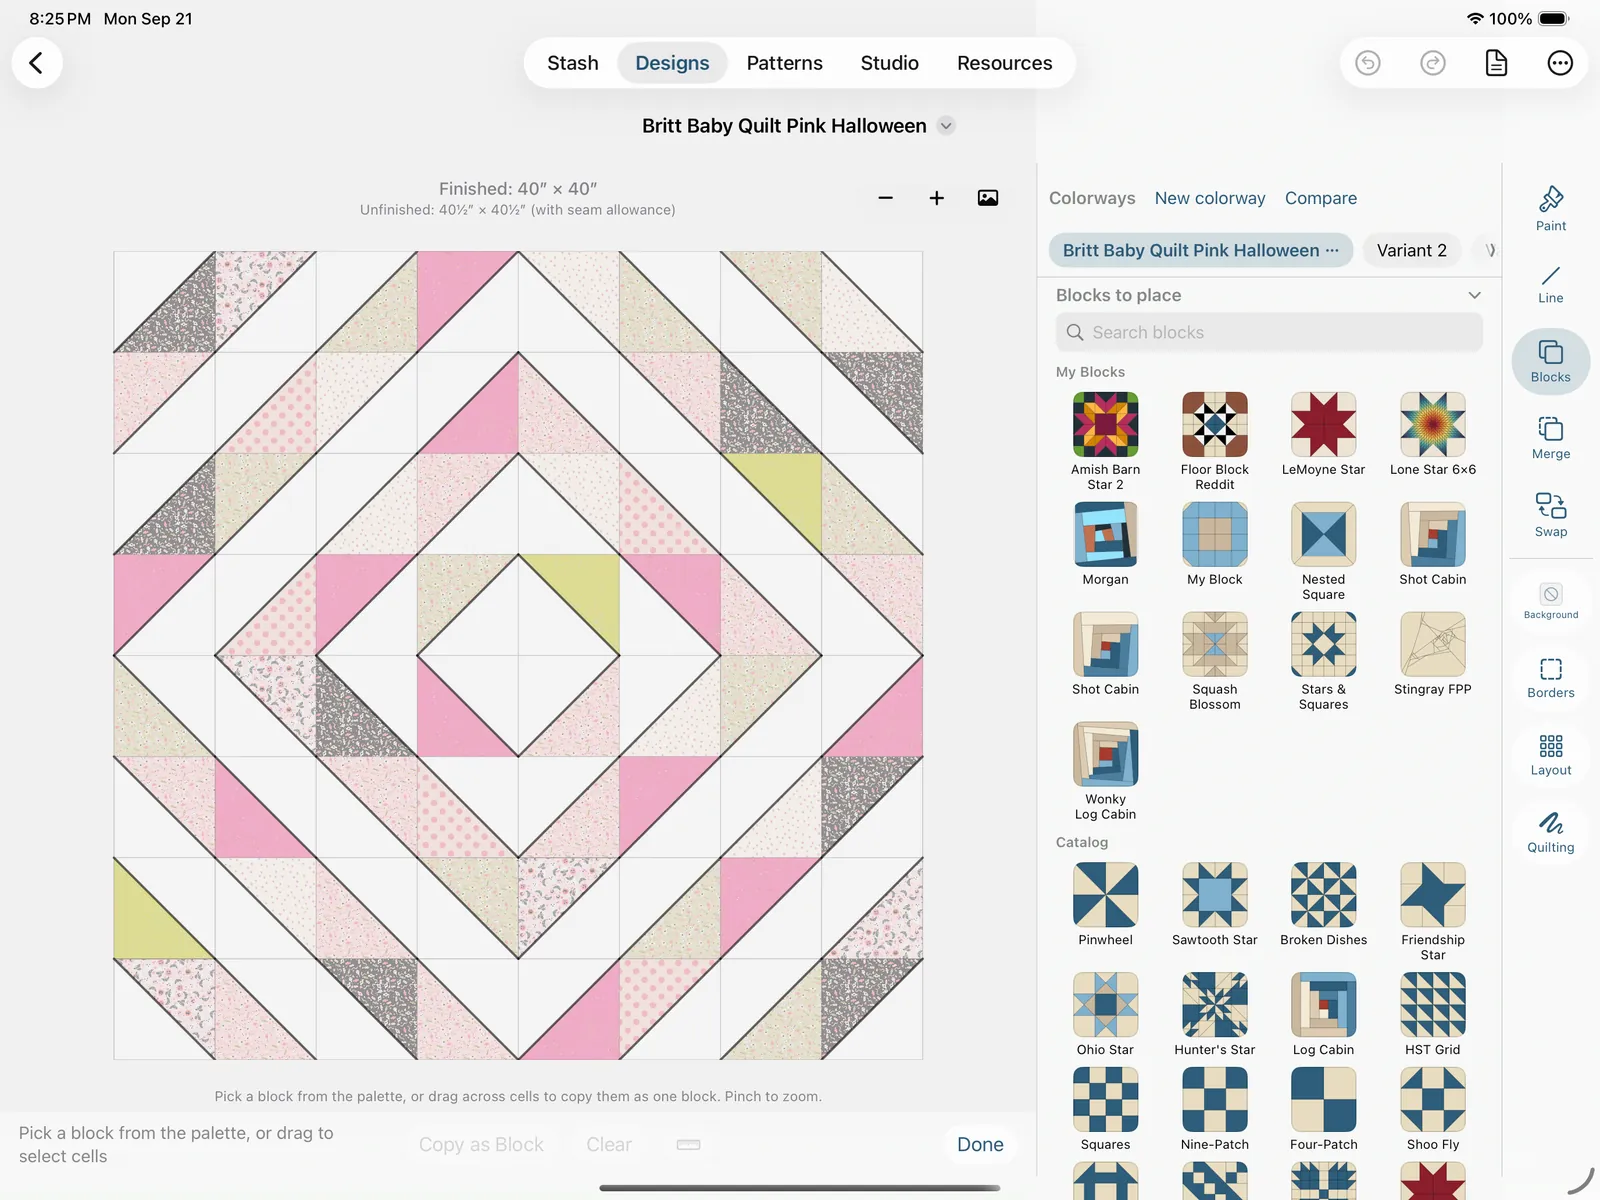
Different-size blocks and spacers (the variable-size sampler). Blocks don't have to match the cells. Drag across the cells you want the block to fill, then tap a chip under Blocks to place: the block you pick takes that spot's shape and lands in it straight away (a 4 × 4 spot on a 3″ board is a 12″ block; a 3 × 3 spot beside it is 9″; the spot can be a rectangle). To make a block smaller than its spot, use the ruler slider that appears beside the loaded block: it sets the block's finished size in ⅛″ steps, and the board fits spacers around it on its own so the spot still squares up. Where the block sits in its spot is yours to choose. Two pickers on the stamping rail, left / center / right and top / middle / bottom, move the block within the spot and the spacers re-measure around it; each picker only appears when its axis actually has slack (a block that fills its width has no left or right to choose), and centered spacers are exact halves, so nothing is left over as a sliver. A rectangular block lands at its own shape rather than being squashed to its cell. The readout names every spacer and its side: "10″ in a 12″ spot, 1″ spacer left and 1″ spacer above and 1″ spacer below and 1″ spacer right". Those spacers are real pieces, they take paint like any other, and the cut list bills the block at its own 10″ and the spacers as plain strips. Make the block bigger than its spot (by shrinking the span under it) and the readout turns red and the stamp refuses to land until it fits. Tap the ruler button in the Blocks panel for the Fit report: one line per placed block, how it sits in its spot, and whether the whole board comes apart in straight sections. If a Board Size change leaves a block's spacers not adding up, the report says what's unfilled and Re-fit re-measures them (every block keeps its own size). When the placed blocks do come apart in straight sections, the pattern's Sew it together step names them: "Make section A: join the 6″ Nine-Patch and the 6″ Nine-Patch top to bottom… Join the 12″ Ohio Star, a 3″ × 12″ spacer, section A… left to right to finish the top." When they don't (a seam stops at a block on every line), it says so and lists the board row by row instead.
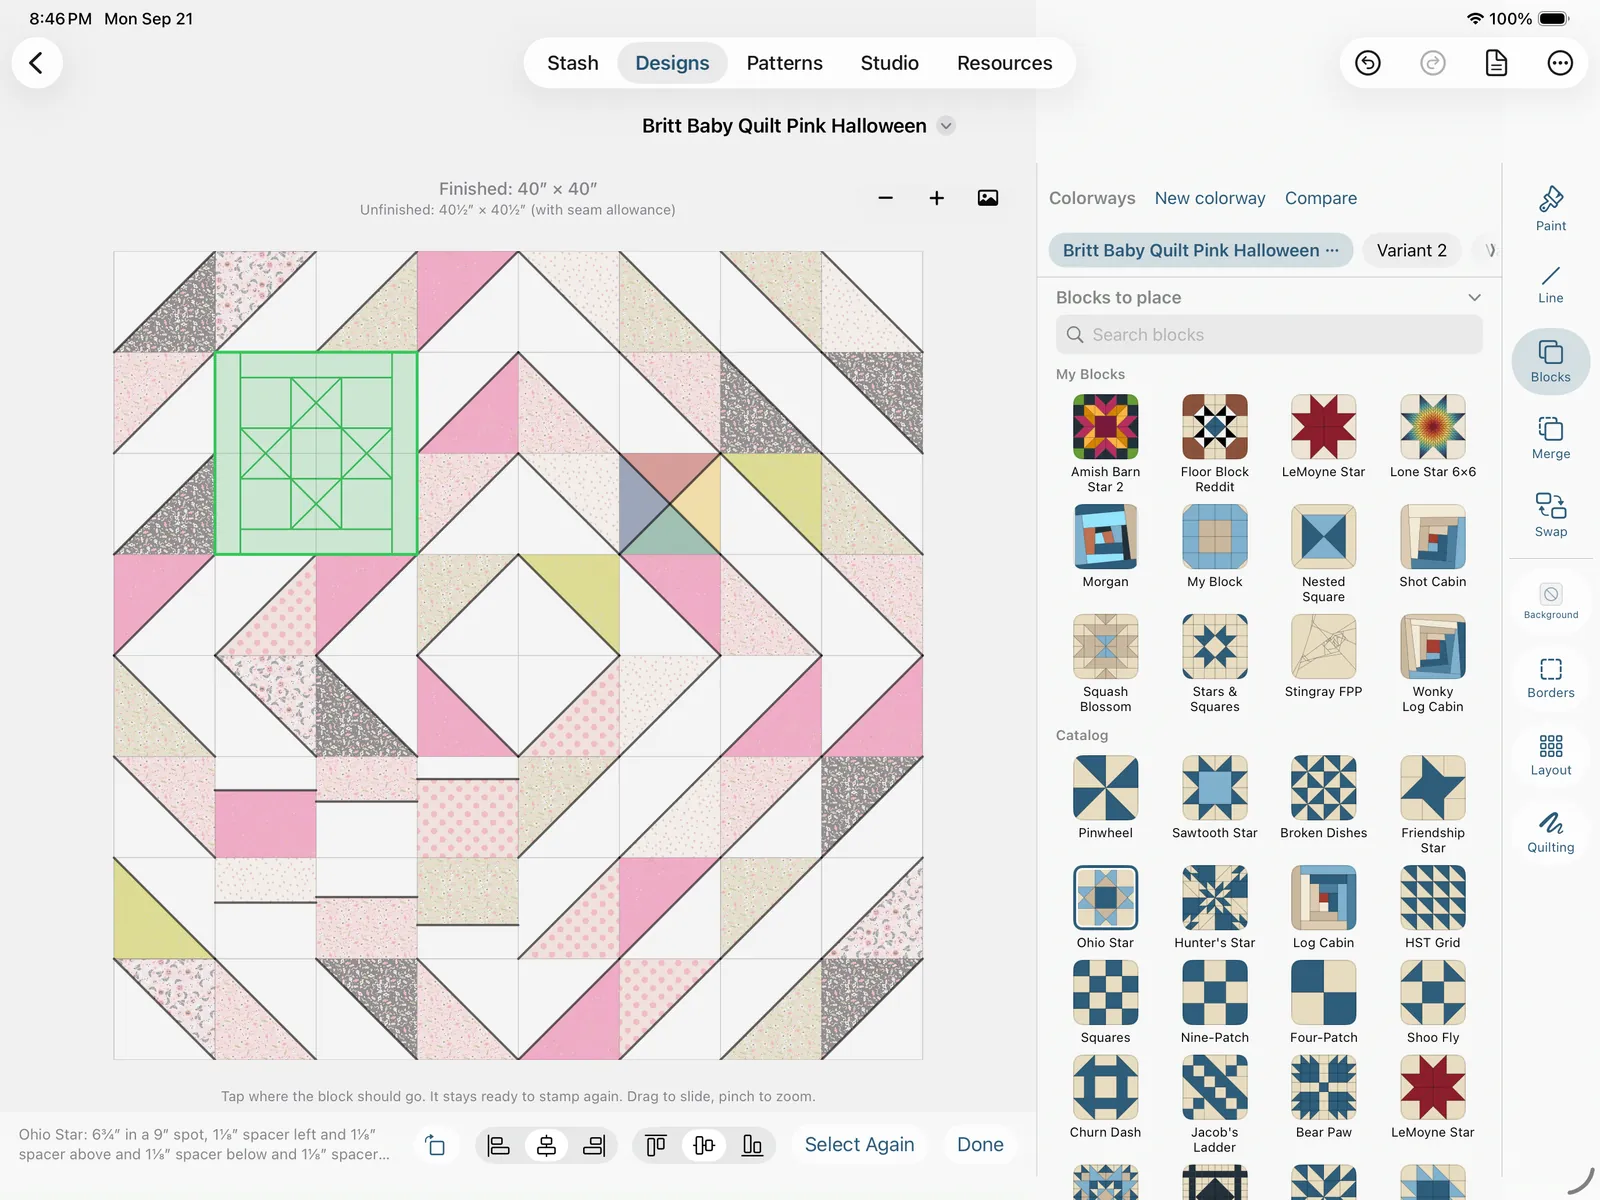
Copying part of the board. Drag across the cells you want (the panel counts them, "3 × 3 cells"), and tap Copy as Block. The copy carries the cells' cuts, merges, current-colorway fabrics, and any placed blocks that sat wholly inside it; a merge or a block that runs past the edge of the selection is left out with a quiet note. Crop to fit (on by default) lets a copied rectangle that overhangs the board's edge fill just the cells that fit rather than being refused; turn it off if you'd rather the whole thing land or nothing.
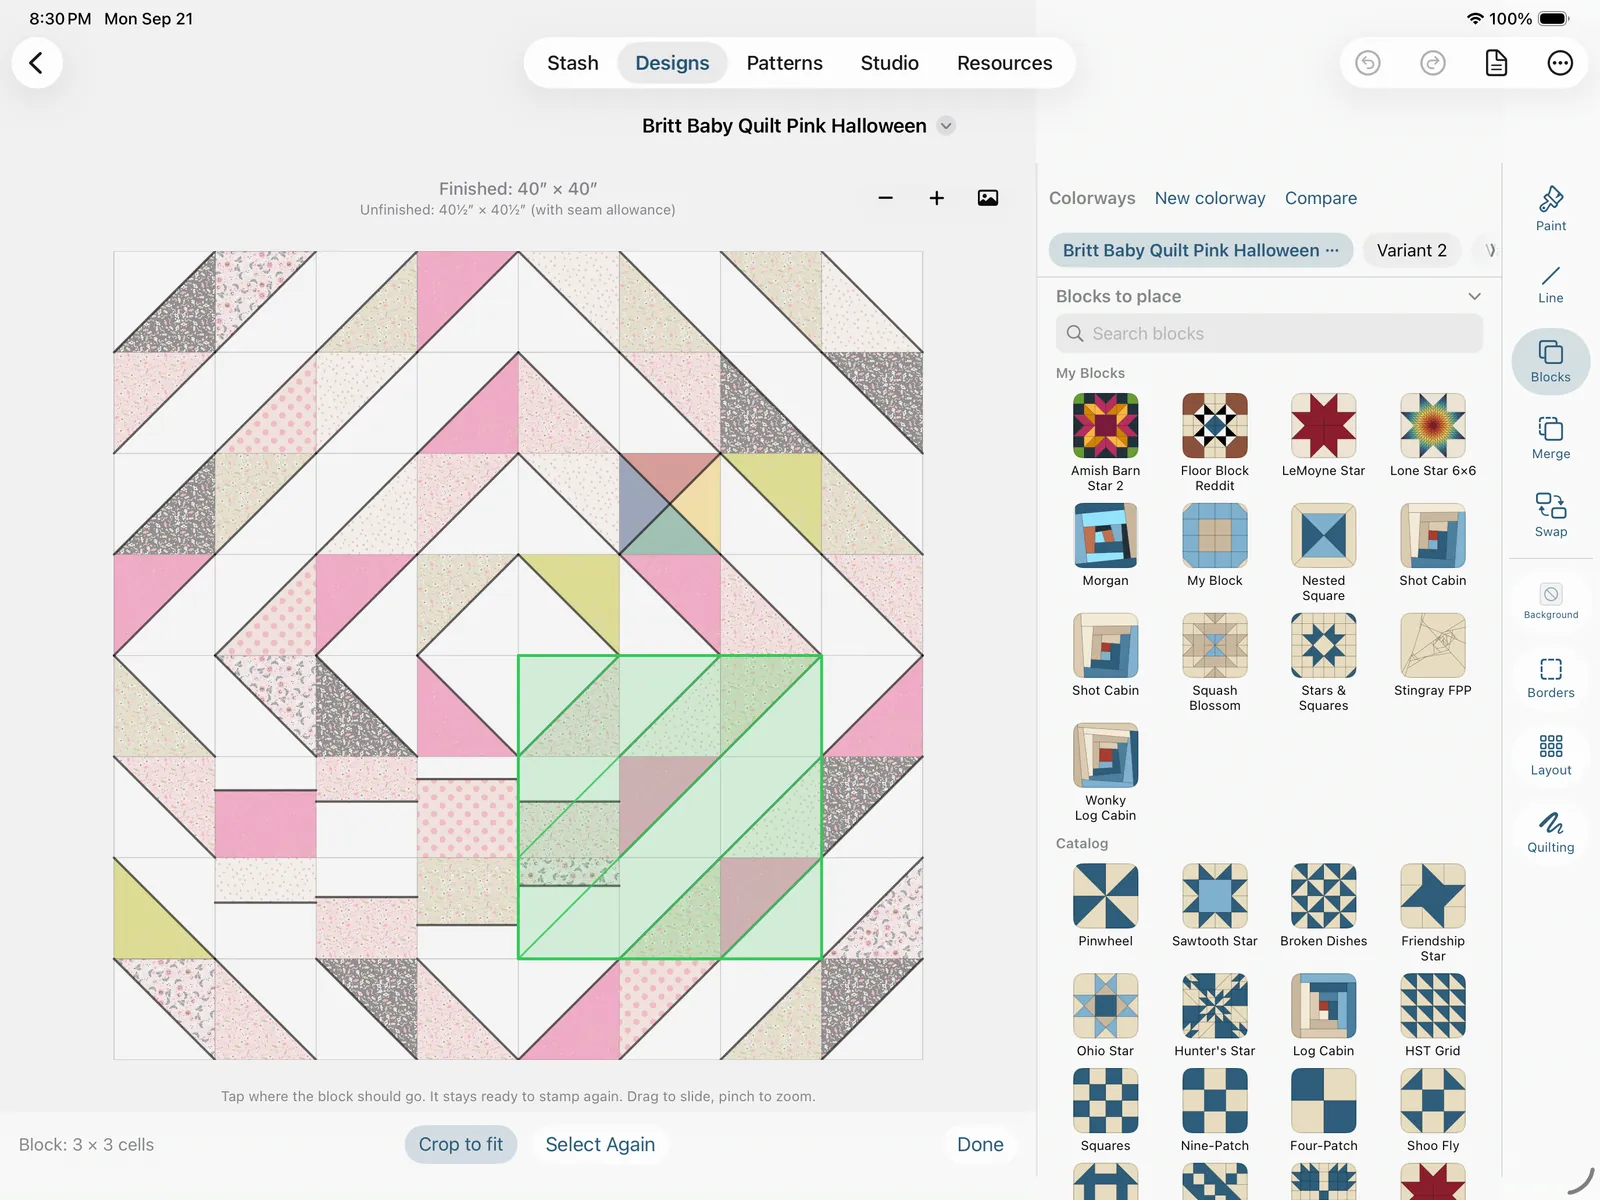
To color the board, leave the tools off, load a color or fabric, and tap regions, whole cells, triangles, straight-cut bands, or merged pieces.
Radial mode
Radial mode turns the whole board into a single compass: one anchor point with rays fanning out to the edges, and the wedges between rays are your fillable regions. Its rail reads Paint, Anchor, Ray, Merge, Swap.
Anchor, drag to place the compass point. By default it snaps to the nearest grid intersection; flip the Snap toggle on the control bar off to drop it anywhere. Moving the anchor afterward just reshapes the wedges, your fills stay put.
Ray, drag outward from the anchor to add a ray. Rays snap to 7.5° increments by default (so you land clean 15°, 22.5°, 30°, 45°… angles), or turn Snap off for any angle. Tap an existing ray to remove it. You need at least two rays to split the board; with none or one, the whole top is a single region. As you add and remove rays, any wedges you've already colored keep their color, split a filled wedge and both halves stay filled.
The compass zooms too, with the same cluster and the same ruler for actual size. One finger draws here, so panning is two fingers; pinch works as it does anywhere else.
Then, with the tools off, load a color or fabric and tap wedges to fill them. Wedges correctly wrap the board's corners, so a corner wedge fills all the way out.
Merge works in radial mode too: load the Merge tool, tap neighboring wedges (ones that share a ray), and tap Merge to fuse them into a single region, the seam between them disappears and they color as one piece. Unmerge splits them back. Unlike Grid mode, there's no rectangle-or-triangle rule here: any run of touching wedges can merge, since a radial fan is one region you're coloring rather than a shape to rotary-cut. (See Merging patches above.)
Board size and setting
Layout on the tool rail changes the board after you've started, the freeform equivalent of a block quilt's Layout sheet. (It used to be called Board Size. Both editors say Layout now: one word per concept beats a slightly more descriptive second one you have to learn twice.)
- Size by: Cell size or Quilt size, the same choice as setup. Quilt size gives you the presets, width and height steppers, the planned border and the Cells that fit exactly chips; the footer reports the board, any shortfall, and what it comes to with the border. Flipping the mode never changes the board by itself.
- Each cell (square): the cell size, 2″–12″ in half-inch steps. Cells stay square.
- Columns and Rows: 2–48 each (read-only in Quilt size mode). The footer shows what that makes, e.g. "Board: 60″ × 72″, 10 × 12 squares of 6″."
- Nothing changes until you tap Apply. Growing the grid adds blank cells. Shrinking it drops any cuts and fills outside the new bounds, and the sheet warns you before you apply. It's one undo step, so ⌘Z (or the Undo button) puts the whole thing back.
There's also a Setting picker here, and on a board it means something different from a block quilt. A board has no blocks to turn, so On point turns the whole board 45° and squares it back up with four corner triangles, the classic center medallion.
One consequence is worth knowing before you commit: a turned rectangle always squares up to a square. Turn any board exactly 45° and its width and height both become the same sum, so a 60″ × 72″ board set on point finishes just over 93″ square. The sheet shows you the finished size as you choose, so it's never a surprise.
The corners are yours to paint. Squaring the quilt back up doesn't lay four plain triangles over the gaps: your board's own grid carries on past its edge into them, so what fills the corners is more cells, addressed and paintable exactly like the ones you drew, whole in the middle of each corner and cut to triangles where the quilt's edge crosses them. They start out unpainted, so expect a pale ring around your board until you color it.
Which is also why going back to straight drops them. A straight board is just its own grid again, so the corner cells stop existing and any fabric you put in them goes with them: on a 5 × 8 board that's 58 of the quilt's 98 cells. The sheet warns you before you tap Apply, and it's one undo step.
Patterns from a board
The Pattern button (or ••• → Make Pattern on a phone) works on a board, and it's the board's own geometry that gets measured, not a block it doesn't have. What you get depends on the mode:
- Grid mode gets a full cut list. Every region's finished size is read straight off the board, exactly, including cuts you placed at odd positions. Exactly means exactly: a piece that doesn't land on a ⅛″ ruler mark (which can happen after a Layout change, since a resize keeps your cuts' proportions while the inches change) is printed as its true decimal size, and the pattern warns you it's off the ruler, with the fix: resize or redraw to land on the ruler, or cut a hair generous and trim to the listed size. Merged regions are cut as the single piece they are whenever a rotary cutter can make that piece, and that now includes a slanted parallelogram, cut the way Lone Star diamonds are: a strip at the piece's height, subcut at the slant angle, and the make line gives you the strip width, the angle, and the spacing along the strip. The few shapes a cutter genuinely can't make in one pass are listed as their parts, and the assembly says to sew those parts together where the board shows one shape. Set the board on point and the pieces are unchanged, because turning a quilt doesn't resize anything in it. What the turn adds is the corners: the board's grid carries on past its own edge to fill them, so you get whole cells out there as well as the triangles where the quilt's edge cuts across one, and all of it joins the cut list. The Assembly step that tells you to lay the pieces out counts what's really in front of you rather than repeating the two numbers you typed into Layout, which on an on-point board are wildly different figures. A 5 × 8 board is 40 cells and can be 98 pieces once it's turned. One handling note comes with the turn, and it's about the whole top rather than any one piece: a board on point has its entire outer edge on the bias. A block quilt on point doesn't, because its setting triangles are cut specifically to put straight grain on the outside; a board has no setting triangles, so there's nothing doing that job. The pattern tells you to staystitch right round the perimeter before you handle, quilt or bind it. It's worth doing: a staystitched bias edge behaves, and an unstitched one grows and waves.
- Radial mode doesn't get a cut list. Its wedges are arbitrary triangles fanning out from one anchor, and there's no honest rotary-cutting instruction for them, so the pattern drafts the fan instead of inventing sizes. The Sew tab's steps carry everything the drafting needs: the board size, where the anchor sits in inches, and the exact angle of every ray, then walk through cutting the wedges (seam allowance added, merged runs cut as one piece) and sewing the fan around the anchor, closing the ring last. The printed pattern goes further: it draws the fan to a stated scale (say 1″ on the page = 8″ of quilt) with a 1″ check square beside it, and it ends with a full-size template sheet: the whole fan at 1:1, tiled across pages with a taping map, crop marks, and alignment diamonds. Print at 100%, tape the tiles following the map, cut along the seam lines, and every numbered piece is a finished-size template (add seam allowance when cutting fabric). You still get the finished sizes, yardage, and finishing numbers. There's no Cut tab, and the pattern's Overview says why rather than leaving you to wonder.
Either way, a board has no single pieced block, so there's no block diagram, no block sew order, and no difficulty badge. A board's assembly steps are about the board: a grid board's own grid and rows (and on point, why those rows run diagonally), a radial board's fan and ring.
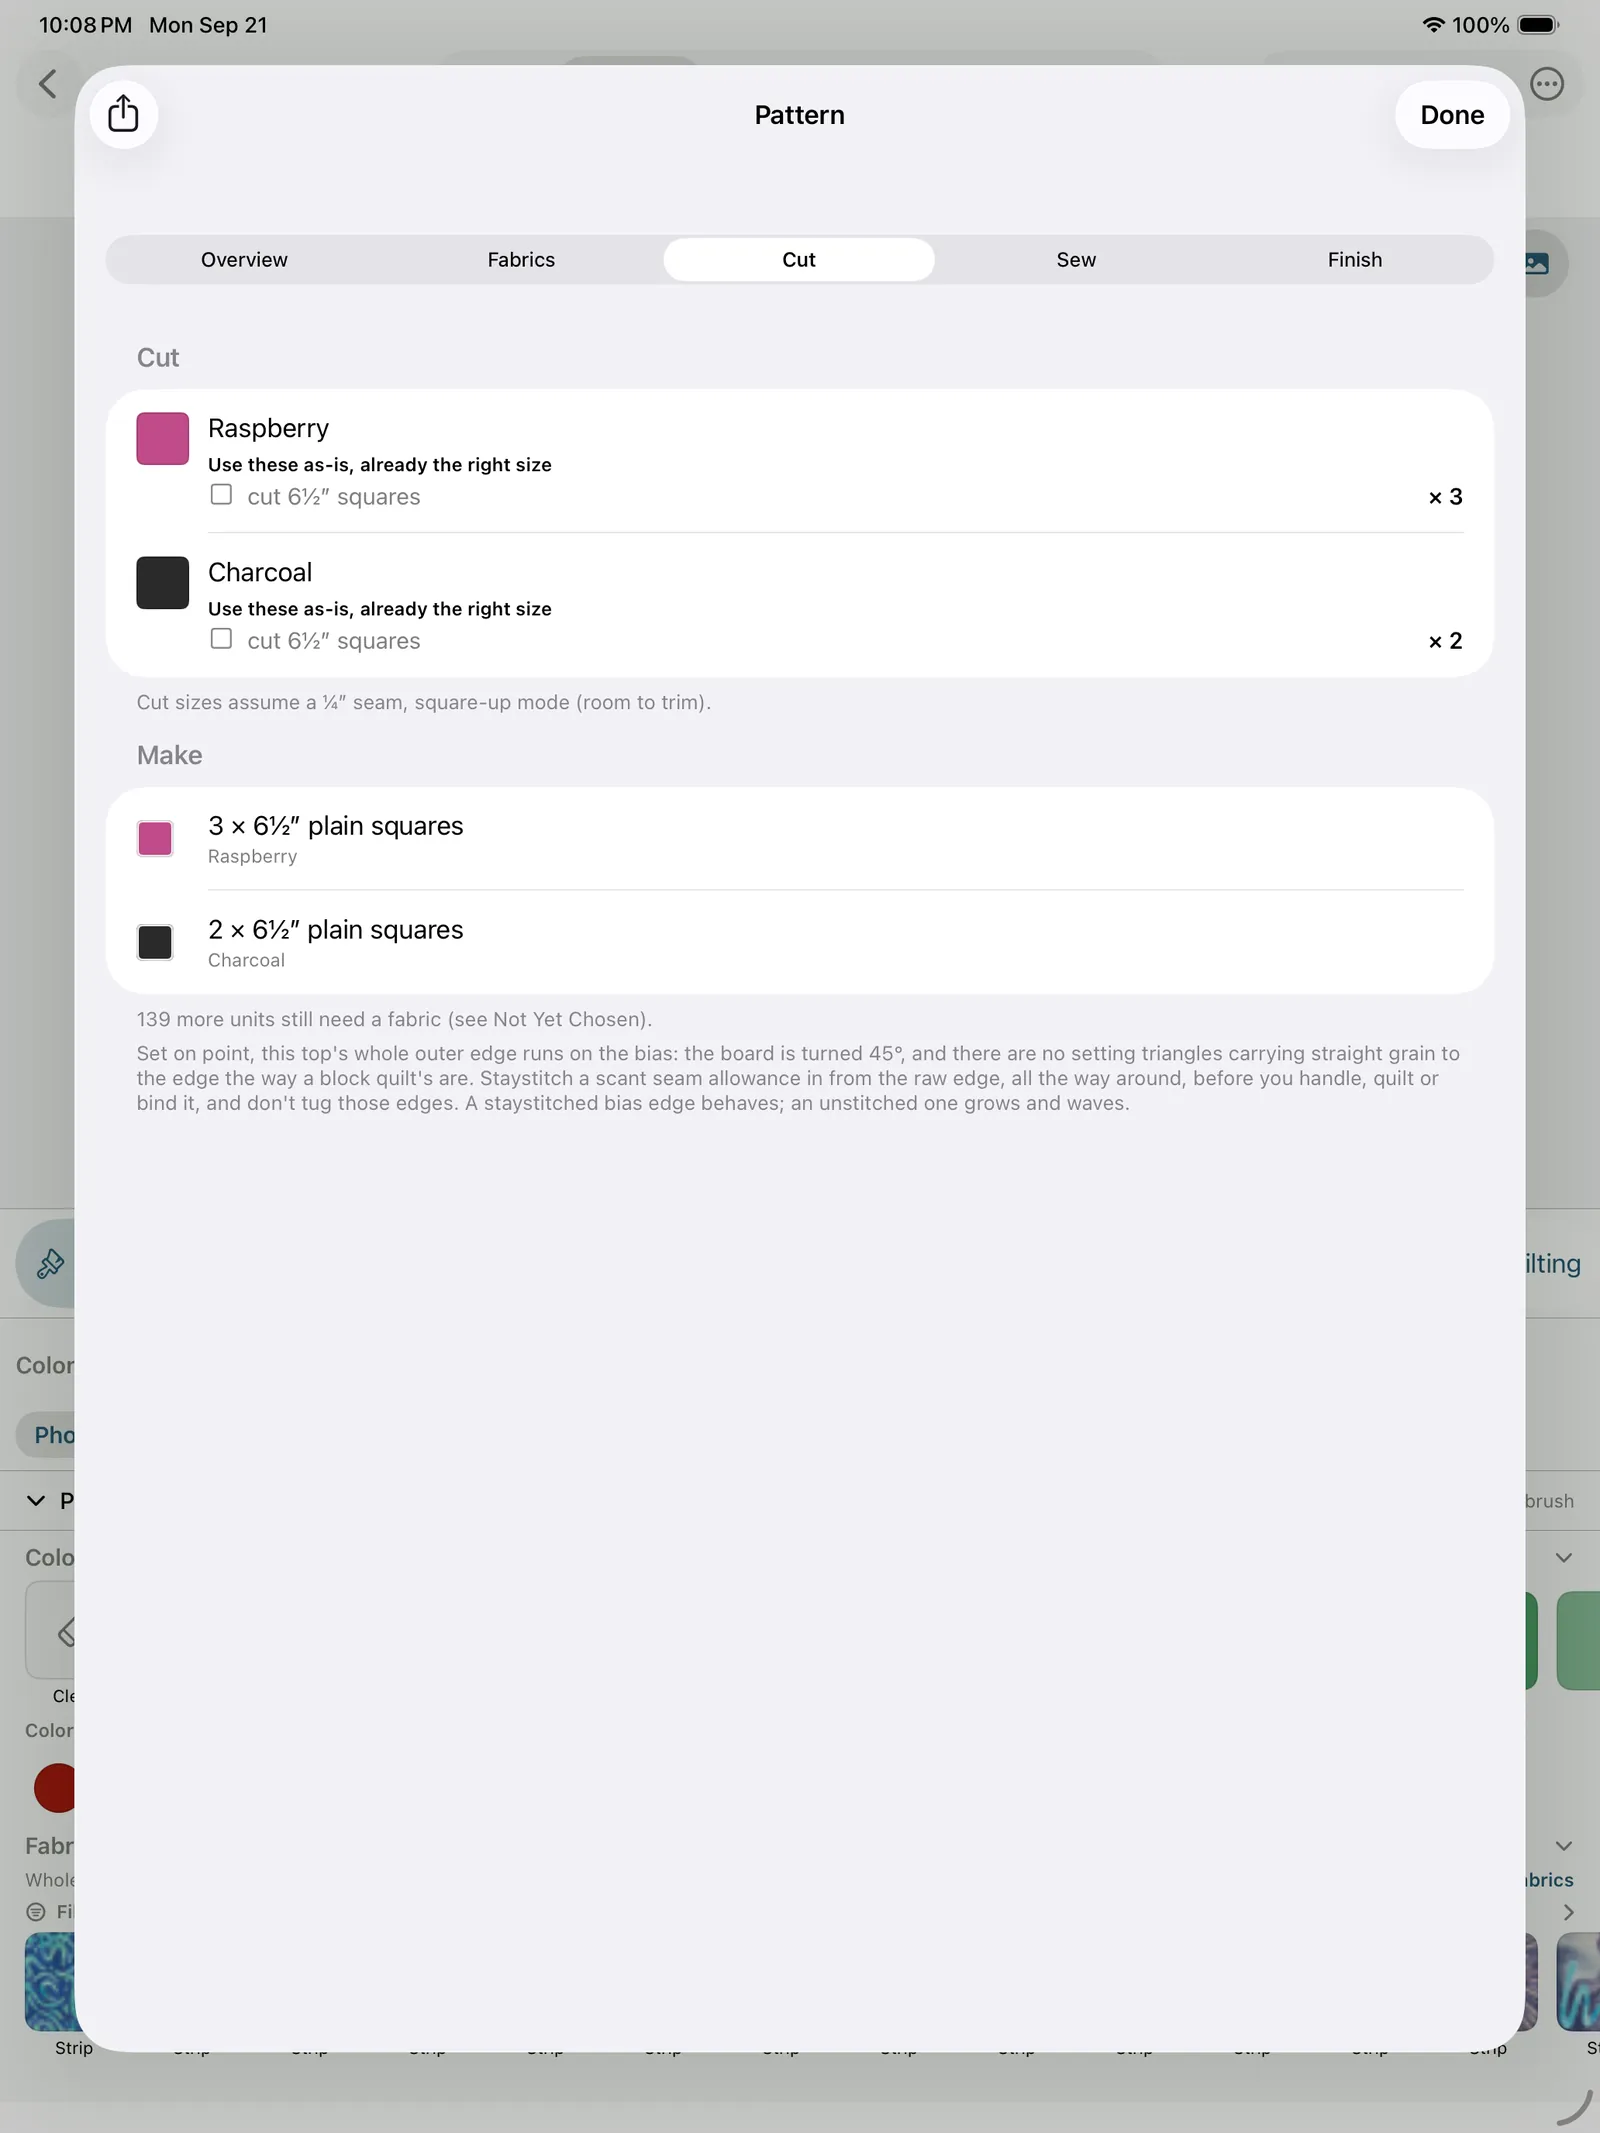
Undoing and finishing
The Undo button (curved arrow) steps back your last action of any kind, a cut, a ray, an anchor move, a merge, a fill, even a mode switch (which clears the board, so Undo brings it right back). A Redo button sits beside it to put an undone action back. On a keyboard they're ⌘Z and ⌘⇧Z. Everything autosaves too; close and reopen and your board, geometry and fills come right back.
The Studio tab (design your own blocks)
Every block in the picker was drawn by somebody. Studio is where you become that somebody: a full block designer, built into TideStitch, that lets you draft a block from scratch, get its exact cut sizes worked out as you go, and then use it in real quilts alongside every built-in. Blocks you make in Studio show up in the block picker like any other, sync to your other devices, and can be sent to another quilter.
Studio needs room, so it lives on iPad and Mac. The canvas and its tools don't fit a phone, so on an iPhone there is no Studio tab at all; the Resources tab carries an About Studio card there instead, so you know it exists and where it runs. On iPad and Mac the Studio tab sits between Patterns and Resources (in the top row on iPad, the sidebar on Mac) whether or not you've bought it: tap it before buying and it tells you what it is and what it costs. It's a separate one-time unlock from the app itself, on its own or bundled with the app as Complete; see What's free, and what the unlock buys. Open it full screen and you get the canvas; open it in Slide Over and it says it needs a bigger window.
Nothing you draw here is metered. Studio buys you the designer; the free-design limit still applies when you turn a block into an actual quilt, exactly as it does for New Design.
How a block is built
A block is drawn on a grid of cells, and the grid is not the same thing as the pieces. A 4 × 4 grid is just how many cells you're drafting on; what the block ends up made of depends on what you do to those cells. Leave one whole and it's a square. Split it corner to corner and it's two triangles. Slice a run of cells into strips and you get long pieces that cross the whole run. The grid is scaffolding; the pieces are what you cut.
Everything is measured live. As you draw, Studio keeps the real finished sizes for every piece, so a block you draft at 12″ tells you the true cut dimensions of each triangle and strip in it, before seam allowance, the moment you make it. And the cut list knows the shapes a rotary cutter actually makes: a square, a rectangle, a half-square and a quarter-square triangle, and a 45° diamond, which it cuts the way a Lone Star is cut, from a strip subcut on the ruler's 45° line. A shape it can't name is billed honestly as a rectangle to trim to the outline.
The tools
Down the side of the canvas is a rail of tools. You pick one, then work on the canvas. They open on Size & grid, because that's the first decision anyone actually makes.
- Size & grid. How big the block finishes in the quilt (before seam allowances), and how many cells across it's drawn on. The size list has the usual suspects, but you can type any size in the field, which is how a 34″ Bear Paw gets drafted. Changing the grid re-measures every cell, and it's undoable like anything else.
- Colors. Tap a color, then tap pieces to paint them. This is how the block looks; it isn't tied to real fabric yet (that happens later, in the design editor, when the block is in a quilt).
- Split a cell. Pick a split (╲, ╱, ✕, a horizontal or a vertical), then tap a cell. Tap a merged shape and it splits at full size: ╲ on a merged 2 × 2 gives one big triangle pair, each half painting on its own.
- Slice into strips. Tap a cell to drop a cut, tap the cut to lift it; drag across several cells to slice a whole run at once. Strips run through the entire selection as single pieces, cut once, instead of one piece per cell with a seam at every boundary. ⇧-tap to build up a run before cutting, the way Merge picks up pieces.
- Cut anywhere. Tap where the cut starts, then where it ends; the line follows the pointer with its angle shown, and slices every piece it crosses. Drag a cut you've already drawn to slide it sideways, keeping its angle. There's an option to finish a cut on the ruler, snapping the far end to the nearest eighth of an inch so you can draft by measurement rather than by bearing.
- Merge pieces. Turn on Merge mode, pick up the little pieces of one bigger patch (tap them, or drag a box around them), then Merge selected so they cut as one piece. Tap a merged shape to break it apart again. This is the same idea as merging patches in the design editor, done here at draft time.
Under the canvas, a coverage chip tells you whether every cell is accounted for, and two little previews show the clean block and it tiled 3 × 3 so you can see the repeat. Overlays live under the eye menu: Rulers down the edges, Piece sizes written on each piece, and on a paper-pieced block Sew order (see Foundation paper piecing). A photo button in the zoom row drops a photo under the grid to trace a block from, with the same popover as the design editor's reference photo (opacity, size, replace, remove, from Photos or from a file); it's display-only, never becomes part of the block, and the size and opacity are remembered with it. Undo and Redo step through everything (⌘Z / ⌘⇧Z), and zoom controls let you get in close to place a fiddly cut.
Saving, editing, and naming
Type a Name into the Block section, then Save to My Blocks. The button reads Update once a block is a saved record, so re-saving edits that block instead of piling up copies. New Block clears the board to start fresh (it keeps your size and grid, since you're probably drawing another one the same way, and asks first if there's unsaved drawing). My Blocks opens your library as a gallery of the blocks themselves, drawn from their own geometry the way the block picker draws them. (It used to be a list of names and dates, and with five blocks all called some flavour of "Wonky Log Cabin" that told you nothing.) A menu at the top switches to the list when the dates and where a block came from are what you want. Tap a block to reopen it and keep working (if there's unsaved drawing on the board, it asks first, the way New Block does); press and hold it (Control-click on Mac) for Send, Export Foundation PDF… on a paper-pieced block, and Delete. Deleting a block you've already used in a design doesn't change those quilts; they just show it as missing, and it comes back if you save it again.
Generating a block
The Generate menu drafts a block from a recipe instead of by hand. The first one is a Wonky Log Cabin: center-out logs trimmed at a slight angle for that improv look, made reproducible by a seed. Slide Center size and Wonk, step the number of Rounds, and Re-roll the seed until you like it; the preview redraws live. Add to My Blocks saves it, and because the recipe is saved with it, reopening a generated block drops you right back into these controls to tweak and re-save. These are foundation-paper-pieced blocks, sewn onto a printed foundation.
Stars is the second one: the eight-point 45° diamond star, a LeMoyne at one diamond per point and a Lone Star at three to eight. Pick the number of diamonds, choose Y-seams or the straight-seam No Y-seams background, and size it, by finished block for a LeMoyne or by strip width for a Lone Star, with the seam allowance from Settings doing the conversion. The preview redraws live and the footer shows the strip width and the 45° subcut spacing you'll actually cut to. A Lone Star also gets the Colors section described under Designing a Lone Star by the diamond, the same one New Design shows. Add to My Blocks saves it and stays put so you can keep tweaking; every save redraws from the settings, and reopening a saved star brings these controls straight back, colored point included. Unlike the log cabin these are ordinary pieced blocks, cut with a rotary cutter and sewn at the machine, so there's no foundation to print. The same star is available on every device from New design → Stars; Studio is where you'll get the live preview and be able to reopen and re-cut one.
Designing a Lone Star by the diamond
A Lone Star's eight points are the same diamond, pieced once and set in eight times, so its coloring is really the coloring of one point. That's what the Colors section is: one point, drawn upright as a diamond of small diamonds, next to the whole star it makes. Whatever you do to the one, the eight follow.
- Tap paints Cell or Ring. On Cell, a tap colors that one small diamond (in all eight points, in the star beside it). On Ring, it colors every small diamond the same distance out from the center. The color comes from the Brush: the star's own ring colors sit there as chips, and the color wheel next to them gives you anything else.
- Fill starts you somewhere better than blank. Ring ramp is the star as it opened, warm at the center and cool at the tips. Glow takes the brush color and walks it light-to-dark by ring, symmetric about the middle ring, so a band of light sits halfway out and the star reads lit from within; Glow, bright center is the same thing turned inside out. Nested star keeps the inner rings light so they read as a small star, wraps a dark band round them, and brightens again toward the tips so a second star reads around the first. A fill replaces the whole point; paint on top of it from there.
- Lean the ramp is the spinning star. Drag it right and the ring bands tilt to follow the rows; drag it left and they follow the other diagonal. In the assembled star the eight points chase each other round the center, one way or the other, which is the chiral look that's so hard to plan on graph paper. Halfway is a diagonal the lattice doesn't otherwise offer.
- Symmetry chooses how the one point becomes eight. Rotational is the classic Lone Star: the same point, turned round the center eight times. Mirror flips every other point over across its long axis, so the star is four of your point and four of its reflection, alternating. On a leaned star that turns the spin into pairs that lean toward each other, a calmer, more symmetrical look; on a star colored by rings, or anything else that's the same on both sides of the point's center line, the two settings look identical, because a reflection of a symmetric point is the point. The one-point canvas always shows your point as painted; the star beside it shows what the setting makes of it.
With Rotational, none of this changes how the star is cut or sewn. Because all eight points are still identical, the pattern still reads each row of the point as a strip set and cuts it eight times, exactly as it does for a plain ring-colored star; the only thing that changes is which fabrics go in which set. Mirror is where the pattern earns its keep: if your point isn't symmetric, the reflected points are a genuinely different diamond (their rows are your point's columns), so the cut list bills two sets of strip sets, A for points 1, 3, 5 and 7 and B for 2, 4, 6 and 8, each cut four times, and the sew order makes four of diamond A and four of its mirror B in a phase apiece before it sets the star in. That costs strips: a 4×4 mirror star off 2½″ strips pulls 32 rather than 16, because each set only needs four segments off the nine it yields. Choose Mirror on a symmetric point and the pattern notices the two diamonds are the same and goes back to one set of sets cut eight times, nothing wasted. Change the number of diamonds per point and the coloring waits for you if you come back to that size; reopen a saved star and the Lean and Symmetry controls come back where you left them. Once the star is in a quilt, the design editor's Cell scope does the same eight-at-once painting with real fabric, and on a mirror star it paints the matching cell of the reflected points, so the mirror survives your fabric choices.
Sashing a Lone Star
Below the size, a Lone Star in Studio gets a Sashing section. Drag Sashing between diamonds to put a gutter of plain fabric between every small diamond, and the whole star opens up: each point stays a point, the diamonds sit apart on a lattice of narrow strips, and the background grows to meet the bigger point. The gutter is drawn in white until you paint it; it takes a fabric like any other patch, and a Ring, Point, Row or Cell tap on one gutter paints every gutter, because they're one fabric in any star you'd actually sew. Sash between points adds the same width down the eight seams where the points meet, so the sashing runs right through to the center instead of stopping at each point's edge. On a small star the width caps itself so the diamonds keep at least half the point: the slider stays where you put it, and the footer says what you actually got and tells you to make the star bigger for wider sashing.
The footer also tells you what the sashing costs, because it's cut and sewn a particular way and the pattern follows it. Inside a point the sashing goes into the strip sets: a 4×4 star's set is seven strips rather than four, fabric, sashing, fabric, sashing, and so on, with the sashing strips cut to your gutter plus two seam allowances (½″ sashing at a ¼″ seam is a 1″ strip, and the pattern never rounds that, since you chose the number). The set is still subcut at the diamond's width, the same 45° cut as before. Between rows of the point, a long sashing strip goes in when the rows are joined, and the cut list bills those as the slanted parallelograms they are. Sash between points is sewn as two half-width bands, one on each inner edge of every point, rather than one strip down each seam: a single strip would need mitering at the center and notching where the background corner pokes in, which is a shape no rotary cutter makes, while a point wearing its two bands is exactly the diamond it was, so the star still goes together with its usual eight seams and the seam between two points runs down the middle of the sashing. The sew order walks through all of it, the strip-set drawings show the sashing strips between the fabric ones, and the point check quotes the sashed point's real size (10″ across for the 4×4 off 2½″ strips with ½″ sashing, 10¼″ with the bands). Set the slider to None and the star is exactly the unsashed one.
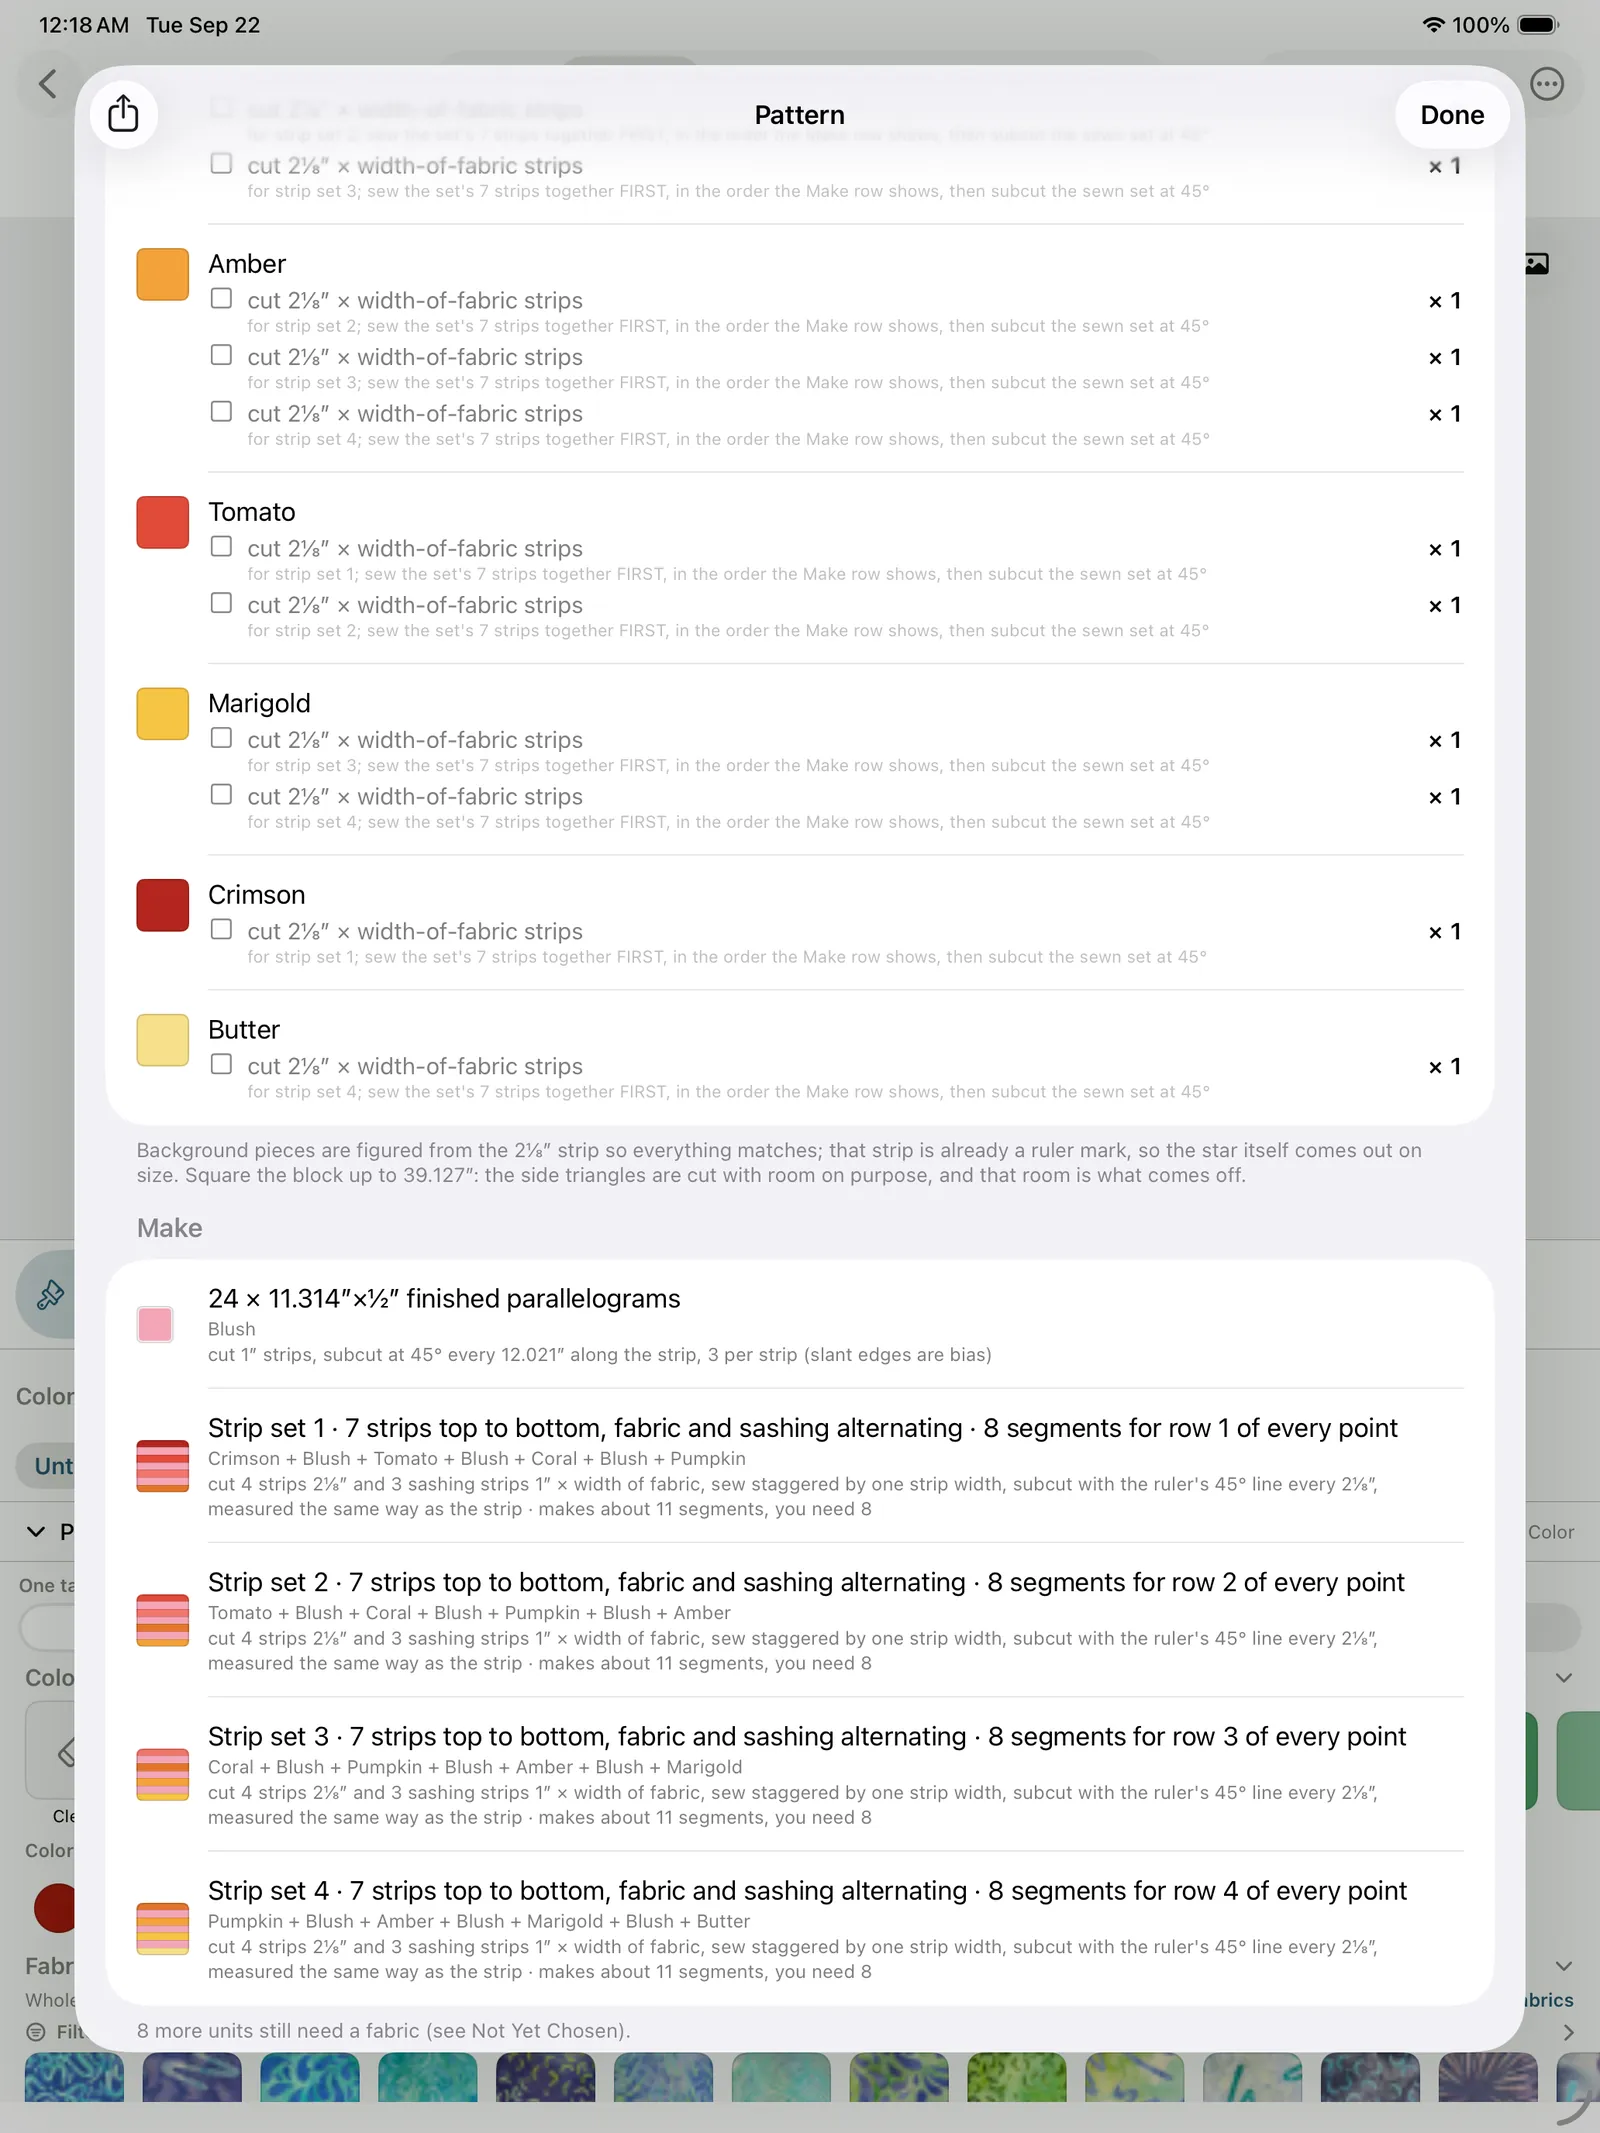
Framing, splitting and merging the diamonds
The preview at the top of the panel is a tool as well as a picture. Tap any small diamond and it cycles through four states: whole, split on the short diagonal (the seam runs corner to corner across the diamond's narrow way, leaving two wide triangles), split on the long diagonal (the seam runs from the center end to the tip, two long thin triangles that radiate from the star's center), then framed (a hollow diamond, a border of the diamond's color round a center that takes the background), then whole again. Every tap is on one diamond in one point; tap the matching diamond in the other seven if you want the star to stay symmetric, or use the bulk buttons below. These three are how you get the radiating-line star (every diamond split on the long diagonal, painted light and dark, so the star reads as sixteen spokes), the charted star (short splits, two colors a diamond), and the hollow star.
- Frames. The section below Sashing. Frame thickness is one slider for every framed diamond, a quarter of the diamond by default. Frame all points frames every diamond at once, splits included (it's the whole star in one look); Clear unframes them all and leaves any splits alone. A framed diamond is pieced like a tiny log cabin, a center diamond and four strips round it, and the footer tells you what to cut: the frame strips and the center strips (the jelly-roll 4×4 at a ¼″ seam wants ¾″ frame strips and 2″ center strips, exactly, and the framed diamond comes out the same size as a plain one). At a seam allowance where that doesn't land on a ruler mark, the footer and the pattern say what to trim the framed diamond to. Paint-wise, a Ring tap colors every frame in the ring and leaves the centers alone; the centers have their own scope, so you can color the hollows in one go too.
- Splits. The next section. Split all on the long diagonal is the radiating-line star in one tap, and it overrides any frames; Clear splits puts the whole diamonds back and leaves frames alone. A Ring tap colors the same half of every split diamond in the ring, so light-and-dark spokes are two ring taps. The two halves of a split diamond are the one thing on a star a rotary cutter can't make from a strip (the corners are 45°, 67½° and 67½° on a short split, 135°, 22½° and 22½° on a long one), so the cut list gives them as templates, sized to match the strip-cut diamonds beside them, and the footer quotes those sizes. The sew order adds a "Join the split diamonds" step before the points are pieced.
- Merging a row of diamonds into one piece is done on the quilt, not here, because it's a fabric decision: once the star is in a design, load the Merge tool, tap two or more diamonds side by side in one row of one point, all painted the same fabric, and tap Merge. The seam between them vanishes and the cut list bills the run as one long parallelogram off the very same strip as the diamonds, subcut at 45° at the run's length (three diamonds in a row on the jelly-roll 4×4 is one 8.485″ × 2″ finished piece). A column, an L, two rows, a framed or split diamond, or two fabrics in one run is refused with a line saying why. Unmerge puts the diamonds back.
Two honest notes from the pattern. Any row with a framed, split or merged diamond in it can't come off a strip set, so the cut list says which rows and cuts those diamonds one at a time; the rest of the star still strip-pieces. And Frame all or Split all on a star that's already in painted quilts re-numbers the block's pieces, so the footer turns orange and warns you before you save that those quilts' colors will re-flow onto different diamonds; nothing is lost, but check the design after. Every one of these tools is Studio only; a star saved by an older build, or a star you never framed or split, is exactly the block it always was.
Foundation paper piecing
Some blocks are sewn onto paper rather than cut to a ruler: you print the block's outline, cut each piece a little big, and sew them onto the printed foundation in numbered order, trimming as you go. The Wonky Log Cabin is one (its logs finish at angles no ruler has a mark for), and any block you draw can be. Under the Method menu in the bar above the canvas, choose Foundation paper pieced. The Paper pieced switch in the Block panel is the same setting, sitting next to the size warnings it turns off (red outlines on the canvas, an orange headline in the panel), because on a paper-pieced block an awkward finished size isn't a fault; the paper takes care of it.
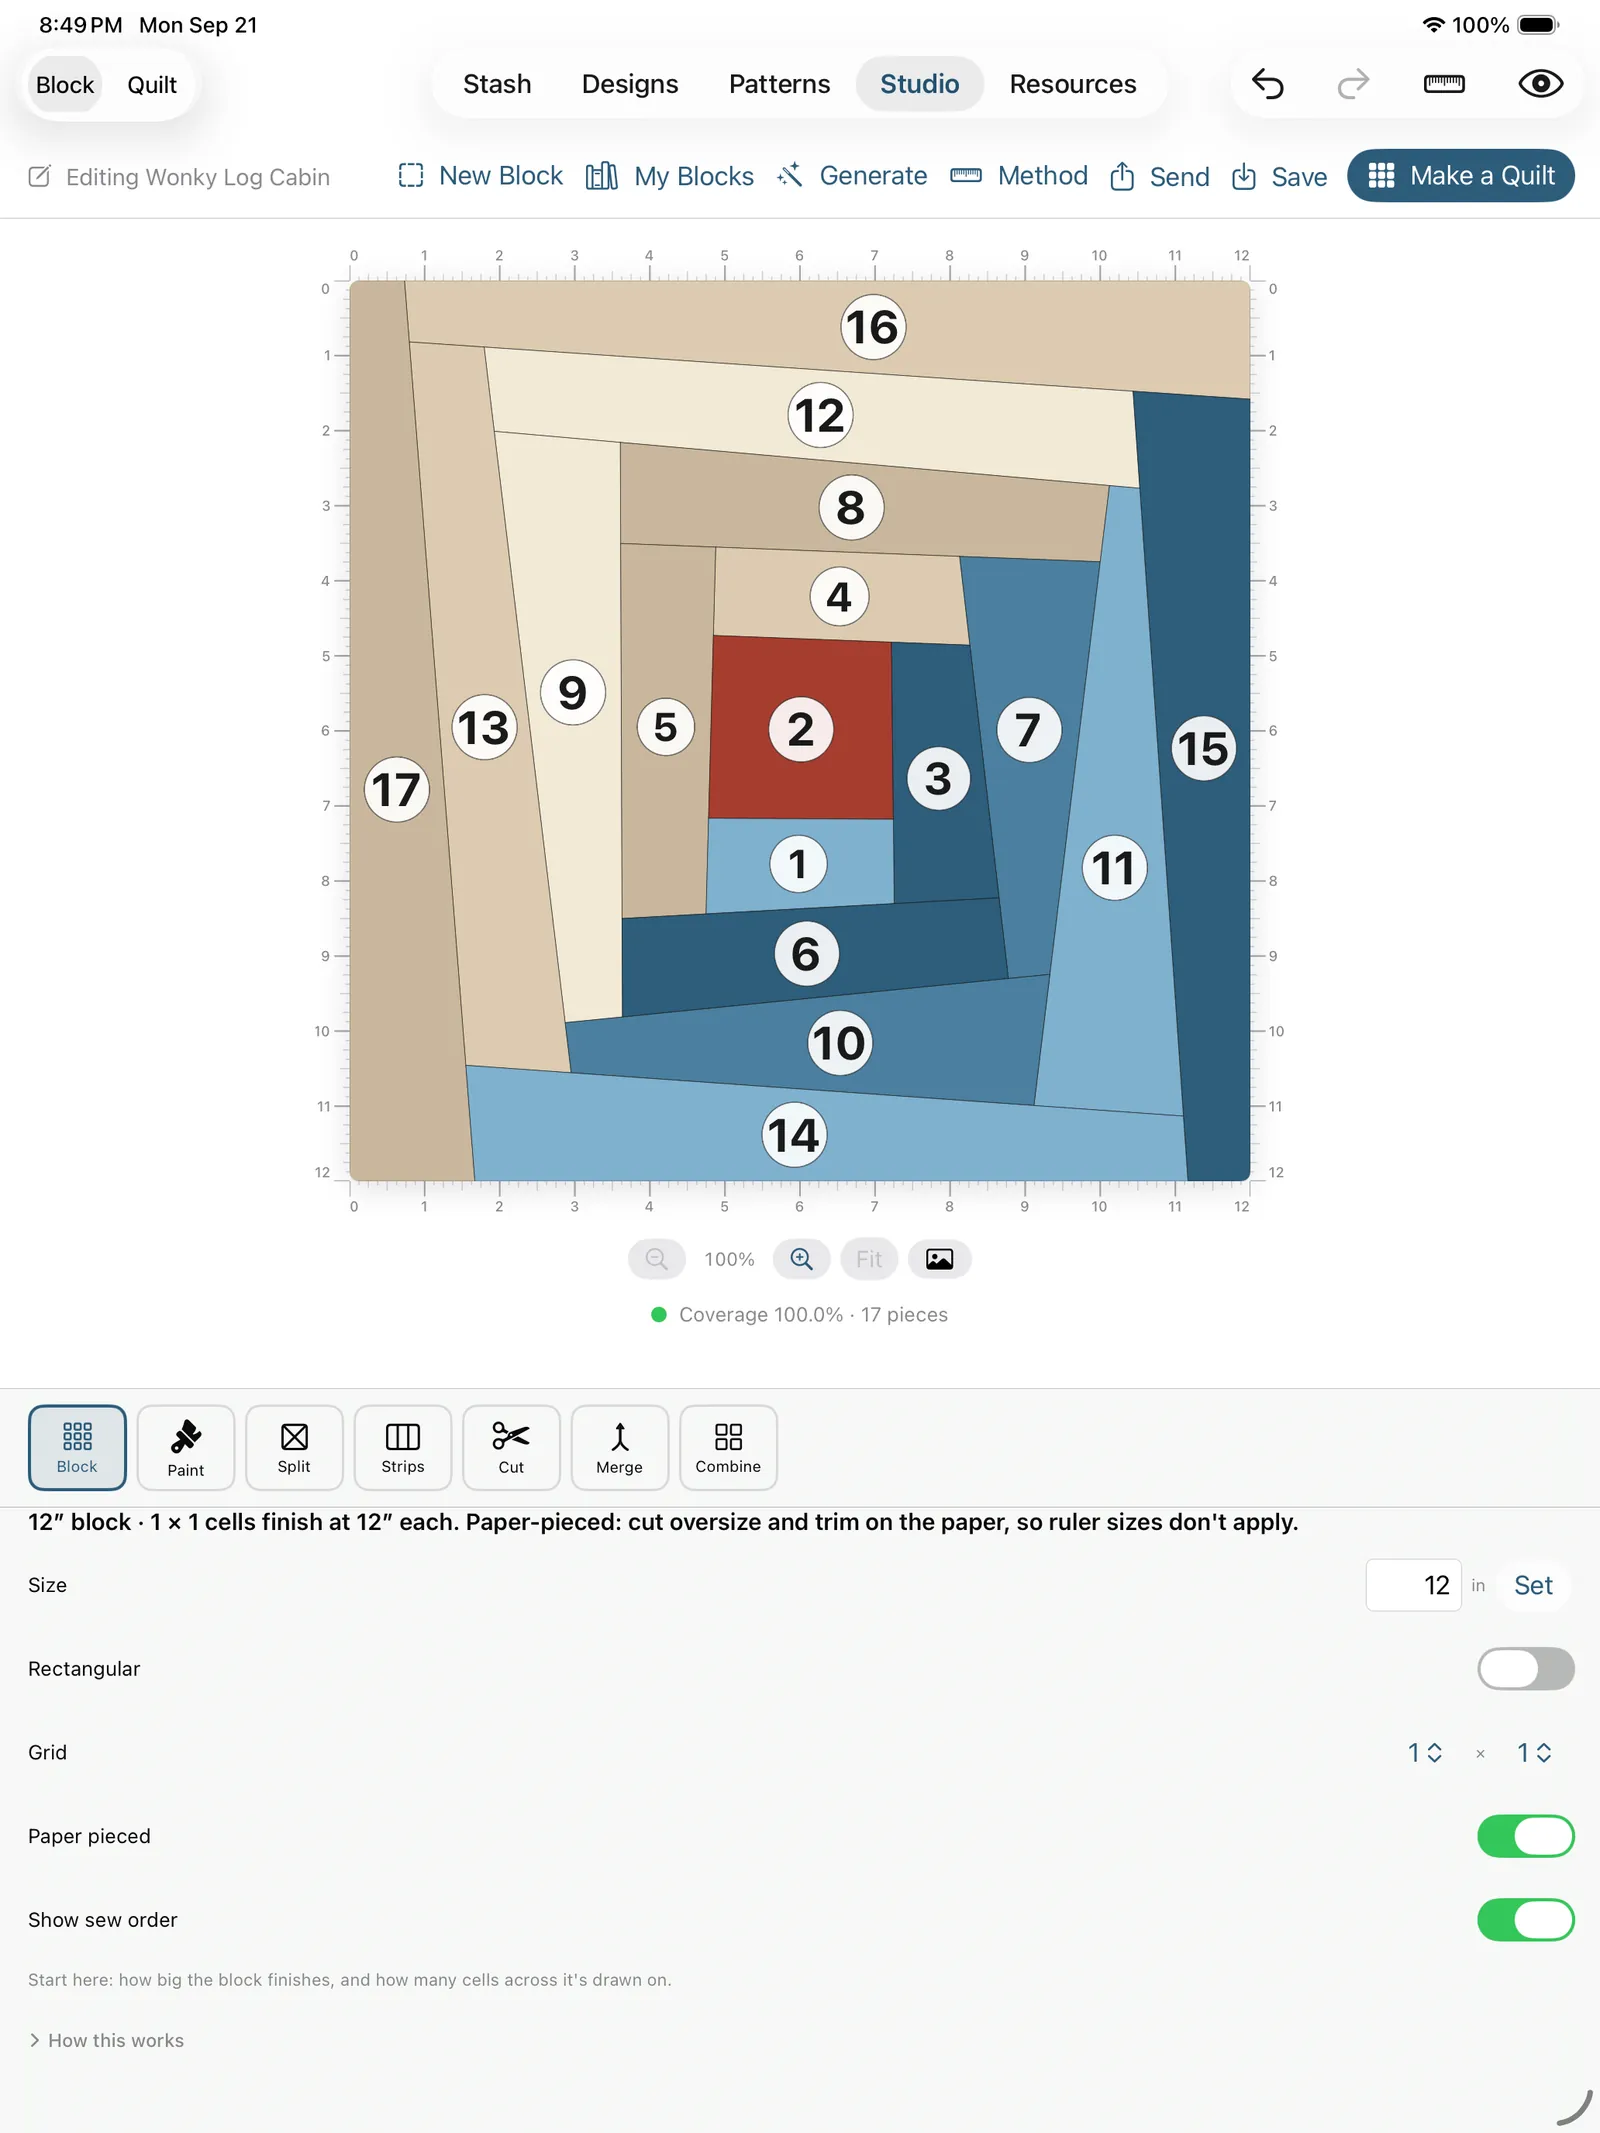
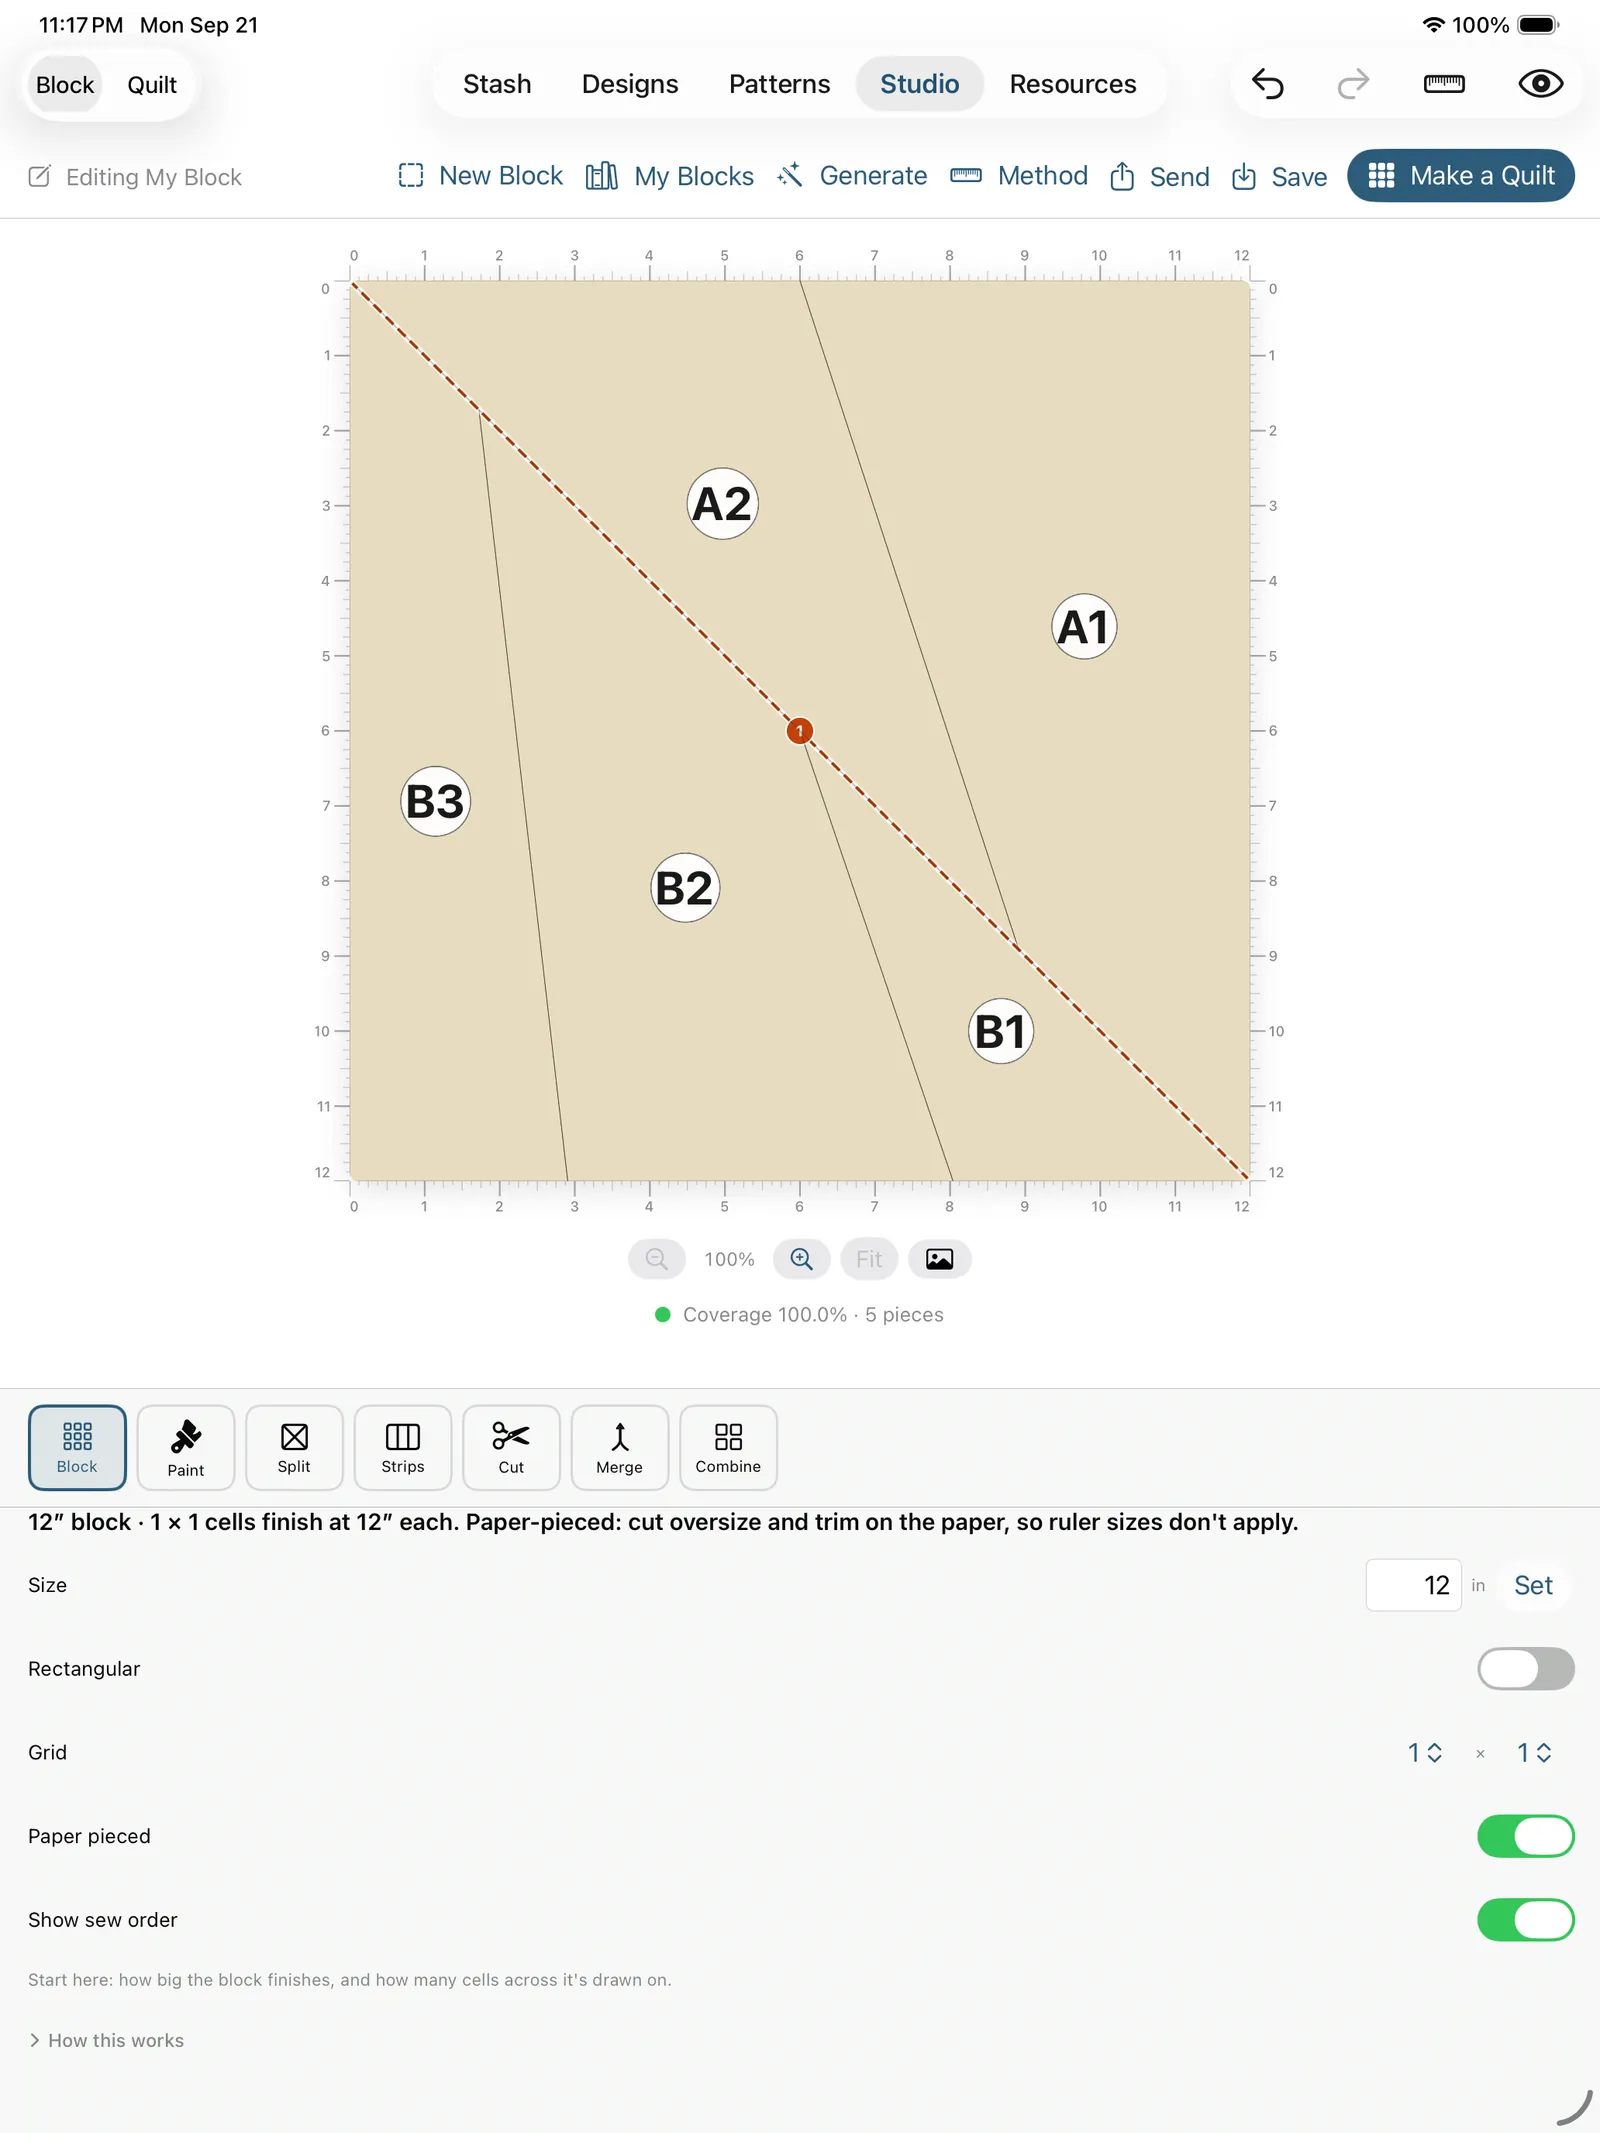
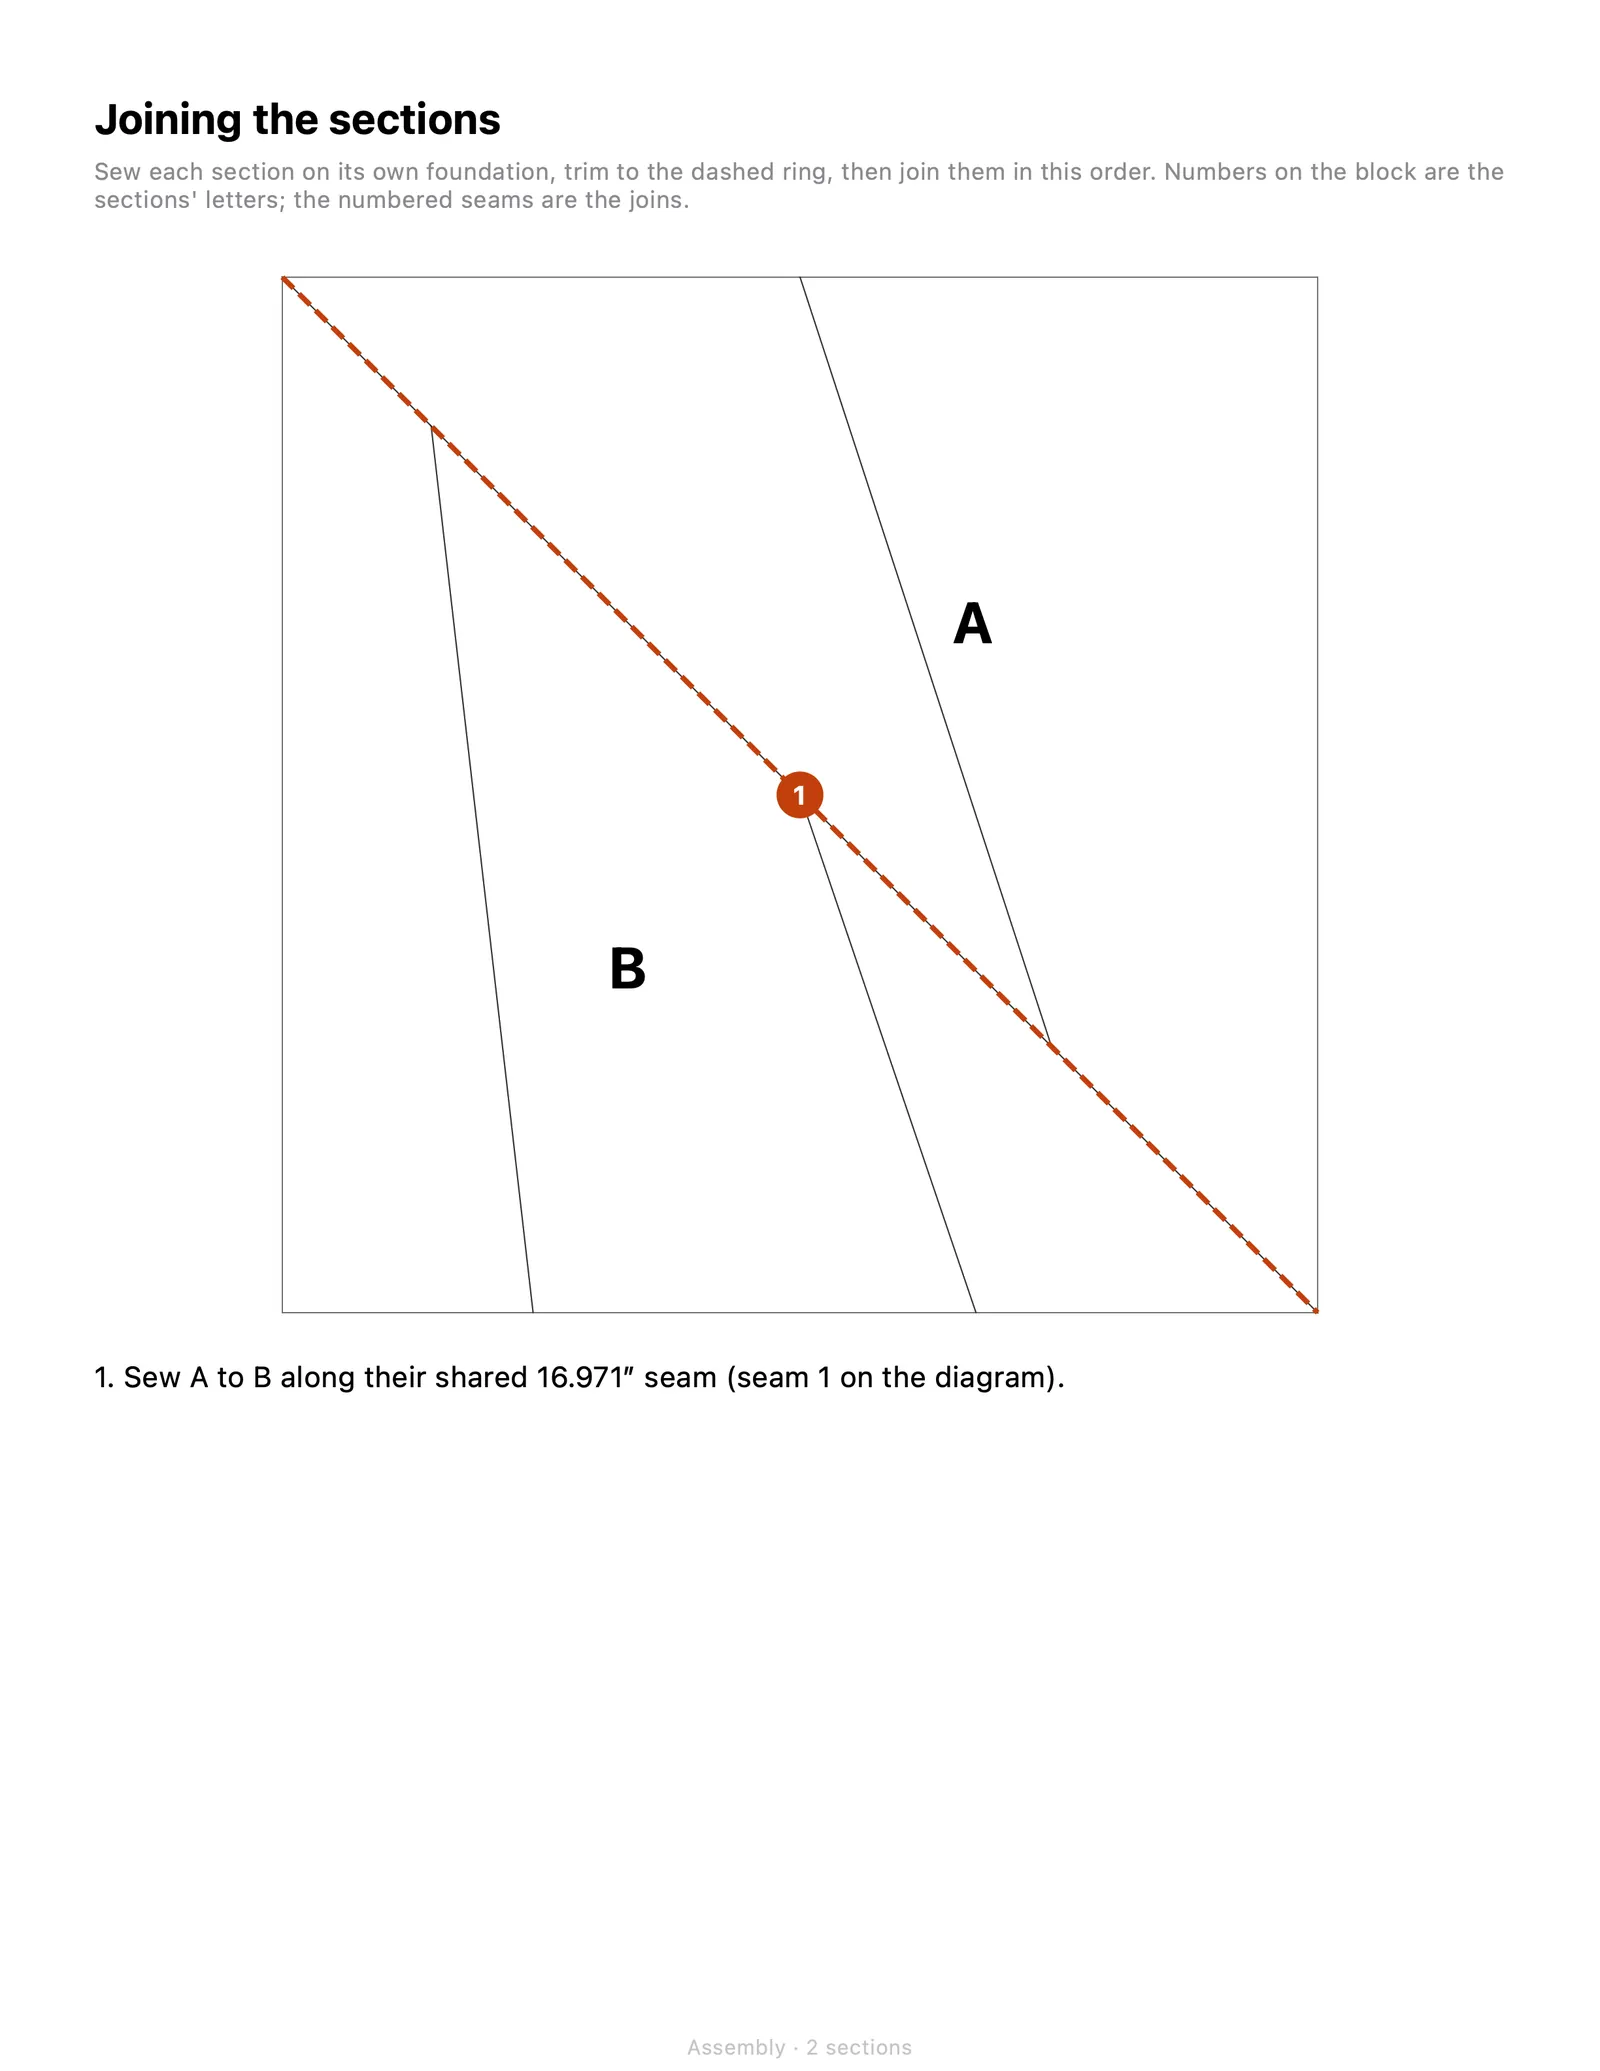
Two things come with the method:
- Export Foundation PDF… appears under Method once the block is paper-pieced (and on the block's menu in My Blocks). It prints the foundation: the pieces mirror-reversed, as you'll sew them from the back, each with its sew number, a dashed trim ring, and a 1″ square on the first page to check your printer's scale against. It saves first, so what prints is what's on the canvas. That prints the block on its own, at the size it was drafted. For a quilt, print from the pattern instead: a paper-pieced quilt's Pattern → Sew section has its own Export foundation PDF button, which sizes the paper to the quilt's blocks. Draft a cabin at 12″, set the quilt to 6″ blocks in Layout, and that button prints 6″ paper whose trim ring matches the 6½″ blocks the Cut list is sized for. Don't scale a printout to change its size: the seam allowance ring shrinks with it.
- Sew order on the canvas. Switch it on from the eye menu, or the Show sew order toggle beside Paper pieced, and every piece wears its number, drawn on the finished side, in the same order the printed foundation carries, because a screen that disagrees with the paper in your hands is worse than no screen. Prop the iPad beside the machine and it's the piecing guide as well as the color guide. A block that needs more than one foundation (a fan of wedges, say) is split into lettered sections, A, B, C, numbered A1, A2, B1 on the canvas with each join seam drawn and numbered, and the export prints one foundation per section plus an assembly page that shows how they go back together. Only a block no straight seam can split (one that needs a partial seam) is refused, and the overlay says why.
Sending a block to someone
Send hands the block on the canvas to another quilter, over Messages, Mail, or AirDrop. It saves first, so what travels is what's on screen, not the last version you remembered to save. You choose whether it's just for them or theirs to pass along (either way they can use it in as many quilts as they like; the choice is only about forwarding). On the far end they add it exactly as described under Add a Block You Were Sent. A block you were sent carries its author's answer and skips the question.
Make a Quilt
Make a Quilt is the shortcut from a finished block to a real design. Studio has a Quilt mode that previews your block laid up into a top, and Make a Quilt builds that quilt for real: it saves the block, lays it out with the rows, columns, sashing and cornerstones you set in Quilt mode, paints it the way you drew it, and drops you into the design editor looking at it. From there it's an ordinary design: recolor it, add borders, make colorways, and make a pattern. This step counts against the free-design limit like any new design; the block itself doesn't.
Colorways (color variations of one design)
A colorway is one color version of a design. Every colorway shares the same layout, the same blocks, cuts, merges and size, and differs only in the fabrics and colors painted into it. So you can put navy-and-cream up against a batik version of the same quilt without rebuilding anything, flip between them, and pick.
Colorways are on every design you paint by hand: block quilts (straight, on point, or brick), HST grids and Squares, jelly-roll designs from the Race to Strip Patchwork, and the Design Your Own boards that had them first. The one design without the strip is a bargello, because a bargello's colors aren't painted at all, they're worked out from the wave you shaped, so recoloring one means reopening Edit Wave.
Two things worth knowing up front:
- Colorways are free. A colorway isn't a separate design, so no matter how many you make they never count against a free-design limit. (The one exception is making a colorway its own design, which really does create a design.)
- Editing the layout changes every colorway at once, because they share it. Cut a cell and all your colorways get that cut, with their paint carried across. That's the point: a colorway is a color experiment, not a layout experiment. If you want a different layout, use Save As New to fork the whole quilt instead.
The colorway strip
The strip sits between the tool rail and the palette, in every editor that has it, because which colorway you're on changes what your next brushstroke means. It's headed Colorways, with New colorway and (once there's a second one) Compare on the heading line, and a chip for each colorway below that. (The quilt's background no longer lives here; it's the Background button on the tool rail.)
- The first chip is the design's original coloring and carries the design's own name.
- Tap a chip to switch to that colorway. The quilt repaints in place; you're still on the same design.
- Tap the chip you're already on and it opens a menu: Rename, Make Its Own Design, Delete. The selected chip is the one that carries the actions, since switching to the colorway you're already in is the one thing it can't usefully do. The first chip offers Rename alone: it's the quilt's original coloring, so deleting it would be deleting the quilt (and renaming it renames the design).
- Press and hold any chip for the same menu without switching to it first, which is what you want when you're deleting a colorway you're not currently painting.
- New colorway duplicates the colorway you're looking at, paint and all, and switches you to the copy. That copy is where you experiment, so your original stays safe.
Both buttons wear words rather than glyphs, and they sit on the heading line rather than after the chips. The chip row scrolls, so anything parked after the chips slides off the screen the moment a design has a long name or a second colorway.
New colorways are named Variant 2, Variant 3 and so on. Rename them early; "Variant 4" stops meaning anything by the time you have six.
One fill is shared by every colorway, and a footnote under the strip says so when your quilt has it: the design-wide background carries one fill for the whole design, so changing it recolors every colorway at once. Everything else varies. Sashing strips, cornerstones, setting triangles and borders are all painted piece by piece on the canvas, and each piece carries its own fill per colorway. The Layout and Borders sheets still set them all at once, and what they set is the fill an unpainted piece wears, which is why a colorway you've never painted the sashing in looks exactly as it always did. The background is the honest exception: it isn't a piece, it's a rule about every piece you haven't painted, so there's nothing for a colorway to hang a different answer on.
Solid borders, sashing and setting triangles used to be on that list and aren't any more. They were the shared fills quilters reliably tried to audition, and recoloring a frame, the sashing or the edge triangles in one colorway repainted them in all of them and in the original, which reads as a bug however honestly a footnote names it. All three are now painted piece by piece and per colorway, whether you set them with the brush on the canvas or from the border's Fill row and the Layout sheet's Strip fabric and Setting triangle fabric chips. Quilts you saved before this render exactly as they always did until you paint them.
The pattern reads the original coloring. A design's pattern (and its card in the Patterns tab) is worked out from the first chip, not from whichever colorway you happen to be looking at. When an alternate colorway wins the audition and you want to make it, promote it with Make Its Own Design (below) and pattern the new design.
Swapping a fabric everywhere in a colorway
When you want to see the whole quilt with a different fabric, don't repaint patch by patch. Swap is on the tool rail, in the block editor and on a Design Your Own board alike.
- Tap Swap. The palette tray opens if you'd shut it, because Swap's second answer is a palette tap.
- Tap any patch wearing the fabric you want to replace. Every patch using that fabric lights up, with a count like "12 patches", so you can see how far the change reaches before you commit. (It's usually more places than you remember.)
- Load the replacement from the palette, any fabric or color.
- Tap Swap on the control bar under the quilt.
That bar tracks the whole thing: the fabric you picked, an arrow, the replacement, and one line saying what's still missing ("Now tap its replacement", or "Load a different one" when the brush is still holding the fabric you're replacing) or how many patches the swap will touch. Done leaves the tool.
The swap applies to the colorway you're looking at and no other, which is what makes it safe to use mid-comparison. Your stash is untouched too: swapping changes which fabric the quilt uses, never the fabric itself.
One thing Swap deliberately doesn't reach is a border's whole-frame fill, the one set from its Fill row. Older quilts and newer ones store that fill differently, so a swap that reached it would recolor some frames and not others. A side, a sashing strip, a cornerstone or a setting triangle you painted on the canvas is reached, and lights up like any other piece. To recolor a frame you set from the sheet, use that Fill row again.
Afterwards the tool stays armed on the new fabric, so if you don't like it you can swap straight on to a third without re-tapping the quilt. Undo reverses a swap in one step.
Comparing colorways
Once a design has more than one colorway, a Compare button appears on the strip's heading line, beside New colorway.
Compare opens with the colorway you were editing plus one more, and the chips along the top choose which two or three to show. It's read-only on purpose: you're deciding here, and nothing should change under you while you decide.
There are three arrangements, and left to itself TideStitch picks whichever one draws the biggest board, from the space it has, how many colorways you picked, and the shape of your quilt:
- Side by side, the boards in a row.
- Stacked, the boards one above the other.
- One at a time at full width, with a switch to flip between them and press and hold the quilt to peek at the other. That's the answer where both splits would be stamps, on a phone in portrait or an iPad in slide-over, and it's genuinely the best of the three there rather than a consolation prize: flipping two identically-framed boards is the most sensitive way to see a color change, because your eye catches it at the moment it happens, where across a gap it has to compare from memory.
Your quilt's own shape has to be part of that, not a detail. In one and the same portrait iPad window, a square quilt comes out bigger stacked and a tall quilt comes out bigger side by side, so a rule that only looked at the window would get one of the two wrong whichever way it picked. (That's exactly what the old rule did. It compared the window's width to its height, which is scale-free, so an iPad in portrait and an iPhone in portrait came out the same, and half a 13″ iPad sat empty under a hint telling you to rotate the tablet. Under rotation lock that isn't a way through at all.)
And it's a default, never a verdict. The arrangement menu in the top bar offers Automatic, Side by side, Stacked and One at a time, and remembers what you chose. How big a board comes out is arithmetic; how you'd rather judge color isn't, so the app measures and then gets out of your way.
Drag the window edge on a Mac and it re-lays out as you go.
Making a colorway its own design
When two of your colorways are both keepers, promote one into a quilt of its own: tap the chip you're on (or press and hold any chip) and choose Make Its Own Design.
The new design appears in the Designs tab with that colorway as its starting colors. The other colorways stay behind with the original, which is left exactly as it was. You stay where you are, so you can carry on comparing.
This is the one place a colorway costs you a design slot, because it genuinely creates a new design. If a free-design limit is in effect and you're at it, you'll see the upgrade prompt instead and nothing is created.
Jelly-roll design tools
Jelly-roll designs get ••• → Shuffle. It scrappy-fills every patch with a random strip from your roll, a fast way to get a lively, scrappy look you can then tweak by hand. It's disabled until you've photographed at least one strip. (It used to be labeled Randomize, while the printed assembly step for the very same act read "Shuffle until no fabric touches itself, or don't; scrappy forgives." One idea, and you meet it twice: the button while you're laying the design out, the sentence while you're sewing it. It's one word now.)
A bargello gets Edit Wave instead, which reopens the wave editor (see Designing a bargello).
How wide a Jelly Roll Race finishes
A Race is made by sewing every strip end to end into one enormous strip, then folding it in half and sewing the halves together, over and over. Each fold halves the length and doubles the width, so a roll can only ever finish at a handful of widths: one per fold. There's no dialling in 55″.
So a Race design has a Layout button holding a Race width picker, and it offers exactly the widths your roll can fold to, nothing else. Each choice reads back what it costs you:
finishes 48″ × 64″ 32 rows · flat top 48″ wide
Two numbers, because they're two different things and confusing them is how a quilt comes out half an inch wrong. The flat top is what you trim the panel to at the machine. The finished size is the quilt once it's bound. Every choice uses all your strips, so what you're really trading is width against length: fold once more and the quilt gets wider and shorter.
Until you pick one, a Race keeps the classic 48″ target, which is what every Race made before this control existed still finishes at. If the roll's strips are too short to fold into a Race at all, the section says so and tells you the two ways out: wider strips, or a narrower seam allowance in Settings.
Change the width and the canvas redraws and the pattern's Sew steps change with it, because both are worked out from the same fold maths rather than described separately.
Sizing the grid patterns
Rail Fence, Strip Twist, and Strip Patchwork build a grid of blocks out of strip sets, and Layout lets you say how big that grid is: blocks across and blocks down, with the footer giving the block count, the finished quilt size, and how many strips of the roll it uses. If a size uses the roll exactly, it says so ("uses all 40 strips of the roll, with none spare"), which is the sentence you want when you're buying a second roll or not.
Shrinking the grid drops the blocks that fall outside it, and the footer warns you how many painted patches that costs before you apply. It's one undo step.
Making a pattern
When a design is ready to sew, TideStitch turns it into a full pattern: what to cut, how much fabric to buy, and how to put it together. Open it with the Pattern button in the top bar, or ••• → Make Pattern, on any design type including a Design Your Own board.
The Patterns tab
The Patterns tab is where your quilts wait for you at the cutting table, reachable from a cold start without opening the editor and hunting through a menu.
- A quilt you're making is already there. Your own designs appear as soon as there's something to cut: a painted patch, a background fill, or a bargello's wave. You don't have to remember to ask. Choosing Pattern or Make Pattern also admits a design, and it's the only way a read-only starter joins, since starters ship fully painted and would otherwise flood the tab with quilts you never chose.
- Sorted by what you touched last: opening a pattern counts as touching it, and so does editing the quilt.
- It shows the quilts, not just their names. Patterns opens as a gallery too, with the same top-right menu to switch to a list. Standing at the cutting table, picking the right quilt out of a row of pictures beats reading names. In list form each row carries the summary: finished size, how many fabrics it needs, and how many patches are still unpainted.
- Tap a row to open the same pattern you'd get from the editor.
- Nothing is stored. A pattern is worked out fresh from its design every time you open it, so it can never go stale: change the quilt and the pattern changes with it.
- Deleting the design removes its pattern along with it.
In the editor, Pattern is a one-tap button in the top bar, in both the block editor and on freeform boards. On a phone the bar has no room for it, so there it's ••• → Make Pattern.
The five parts of a pattern
A printed pattern is a few pages, and on screen that was one long scroll where finding the cut list meant flicking past the yardage every time. So the pattern opens on a row of five segments, named for the jobs rather than for the paperwork:
| Segment | What's in it |
|---|---|
| Overview | A picture of the quilt, the finished and unfinished sizes, your seam allowance, and the Difficulty badge |
| Fabrics | Yardage per fabric, plus anything you haven't painted yet. A jelly-roll design is answered in strips instead |
| Cut | Make and Cut: the units to build, and the rotary-cutting instructions to get there |
| Sew | Assembly and the block sew order: the whole trip to the machine |
| Finish | Binding, backing, and batting |
"Make" and "Cut" are one trip to the cutting table, and "Assembly" and "Block sew order" are one trip to the machine, which is why they share a segment each. A segment with nothing behind it is left out rather than shown empty: a Race, Rail Fence, Strip Twist or Strip Patchwork design, or a radial board, has no cut list, so it has no Cut tab. All of them keep their Sew tab, though, because none needs a cut list to say how the top goes together: a jelly roll's steps come from the roll and its pattern (strip sizes and counts from your roll's own numbers), and a radial board's draft the fan from the board itself (see Patterns from a board). A bargello is the strip design that does get a Cut tab, because a bargello is cut: one row per column, below. Whatever's missing, the pattern's Overview says so in as many words, so an absent tab reads as a decision, not a bug.
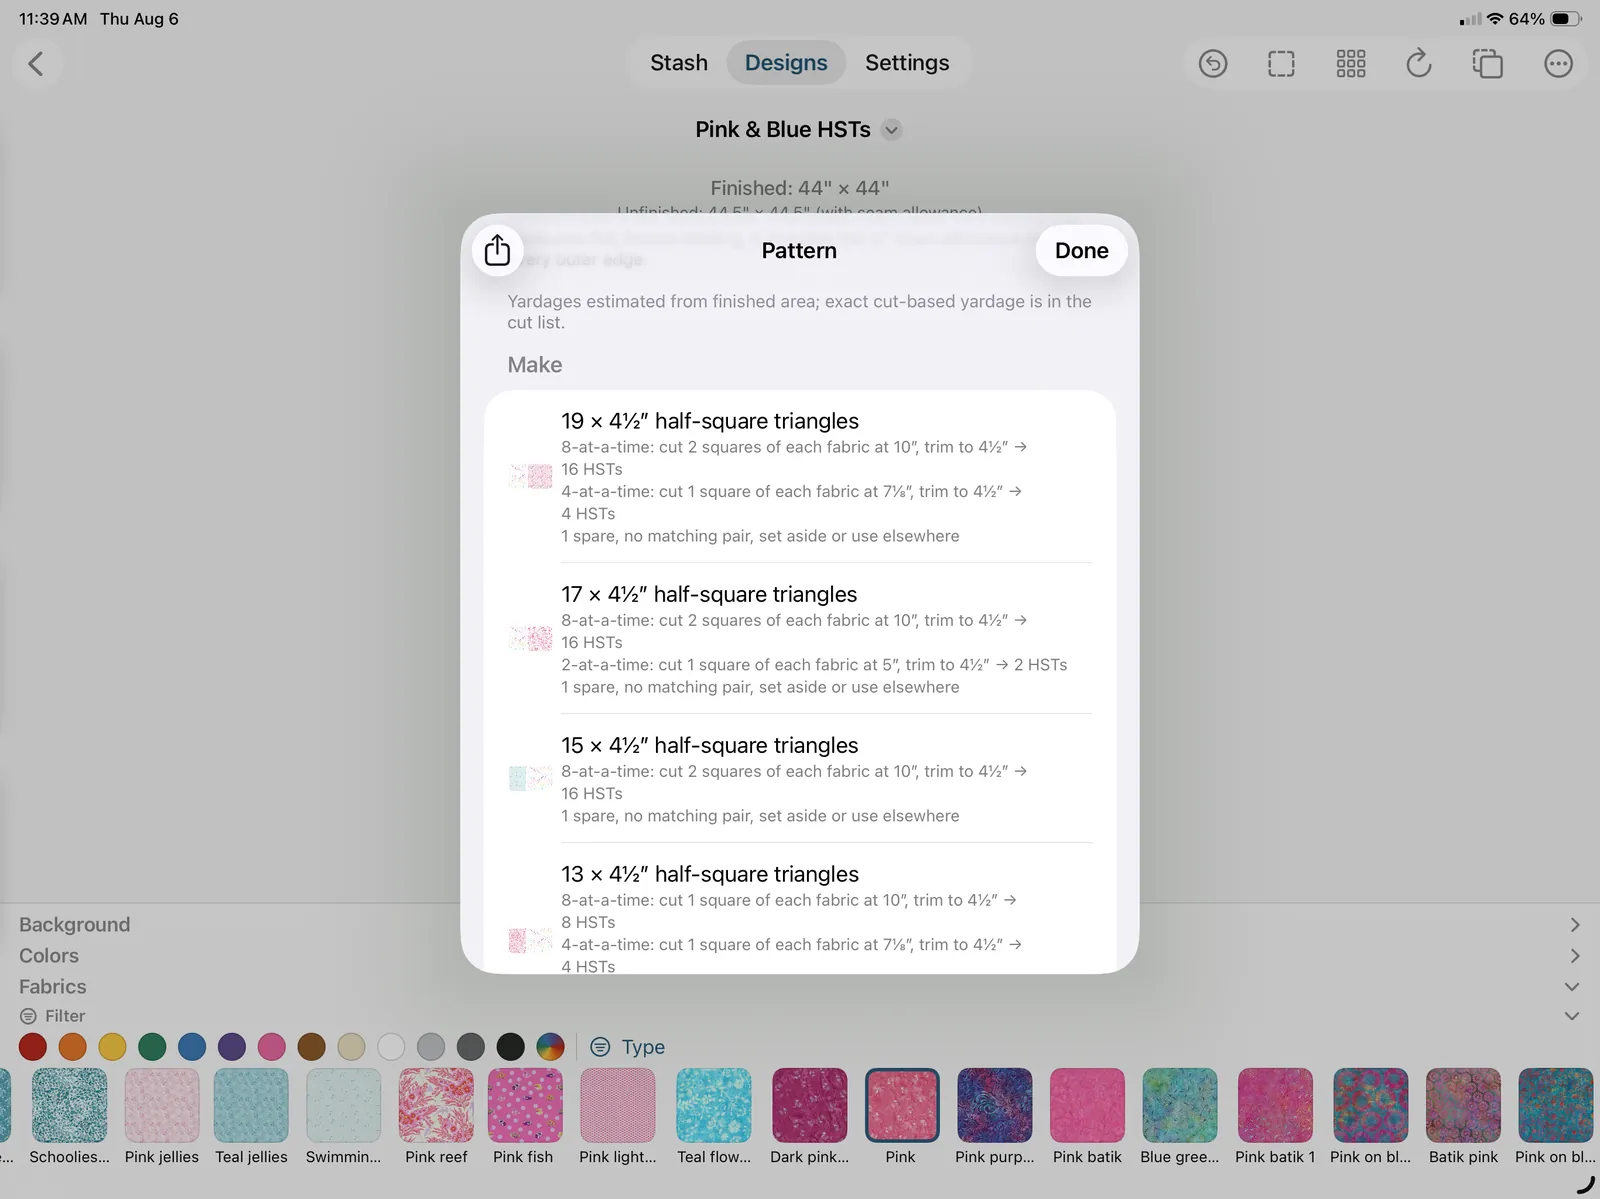
Inside those segments, the pattern's own sections read:
- Pattern (Overview): the finished size, the unfinished (pre-binding) size, and the seam allowance the cut sizes are figured with, plus whether you're cutting square-up or precise. A note reminds you that yardage assumes non-directional fabric: one-way prints, centered motifs, and matched stripes can't always be rotated to nest efficiently, so they may need substantially more. A Difficulty badge (Beginner, Confident, Advanced, or Expert) tells you at a glance how involved the block is to piece.
- Make (Cut): the units to build, grouped and counted, e.g. "6 × 3½″ half-square triangles" and "1 × 12″ finished triangle."
- Cut (Cut): rotary-cutting instructions grouped by fabric, e.g. "cut 4″ squares × 3", each with a line saying what those pieces are for.
- Fabrics Required (Fabrics): a yardage estimate per fabric, plus a Not Yet Chosen line for any patches you haven't given a fabric yet. On a jelly-roll design this section counts strips, not yards; see below.
- Finishing (Finish): binding strips, backing, and batting for the finished top. The batting line says how much to buy and how to cut it: e.g. "off a 90″ roll, one length cut 68″." That matters because batting is bought the cheaper way round the roll. Batting comes in a fixed width and any length you ask for, and its joins are butted and whip-stitched rather than seamed, so nothing is lost to an allowance and a batt has exactly two ways to lie. TideStitch prices both and buys the shorter, which is why a crib now takes 1½ yards where it used to take 2: the quilt's long side lies across the roll's width. Once that's true, the yardage alone no longer tells you which way round it went, so the line spells out the cut. Unroll the yardage and measure the quilt's long side down the roll instead and you'd be a foot and a half short.
- Assembly (Sew): numbered, plain-language steps to piece the top, from cutting through squaring-up and binding.
- Block sew order (Sew): how to construct one block, broken into phases (make the units, sew the rows or sections, join the block) with a numbered step for each and little press/nest/set-in notes attached where they matter. This is the block-level companion to the whole-quilt Assembly steps above it.
The Cut list comes first, and you tick it off as you go. The Cut tab opens on the cut list itself, every fabric with its sizes stacked underneath, and the Make steps (building the half-square units and the like) sit right below it. Each cut line has a checkbox: check it off as you cut, and it stays checked when you close and reopen the pattern, so you can cut a big quilt over several sittings without losing your place. Sizes you cut the same way are gathered into a single line with a count (cut 11″ squares × 5) instead of the same size repeated once for every fabric it pairs with, because which fabric goes with which is the Make steps' job, and those now name the fabrics that pair up rather than only showing their swatches. The printed pattern matches, with an empty box before each cut line to tick by hand.
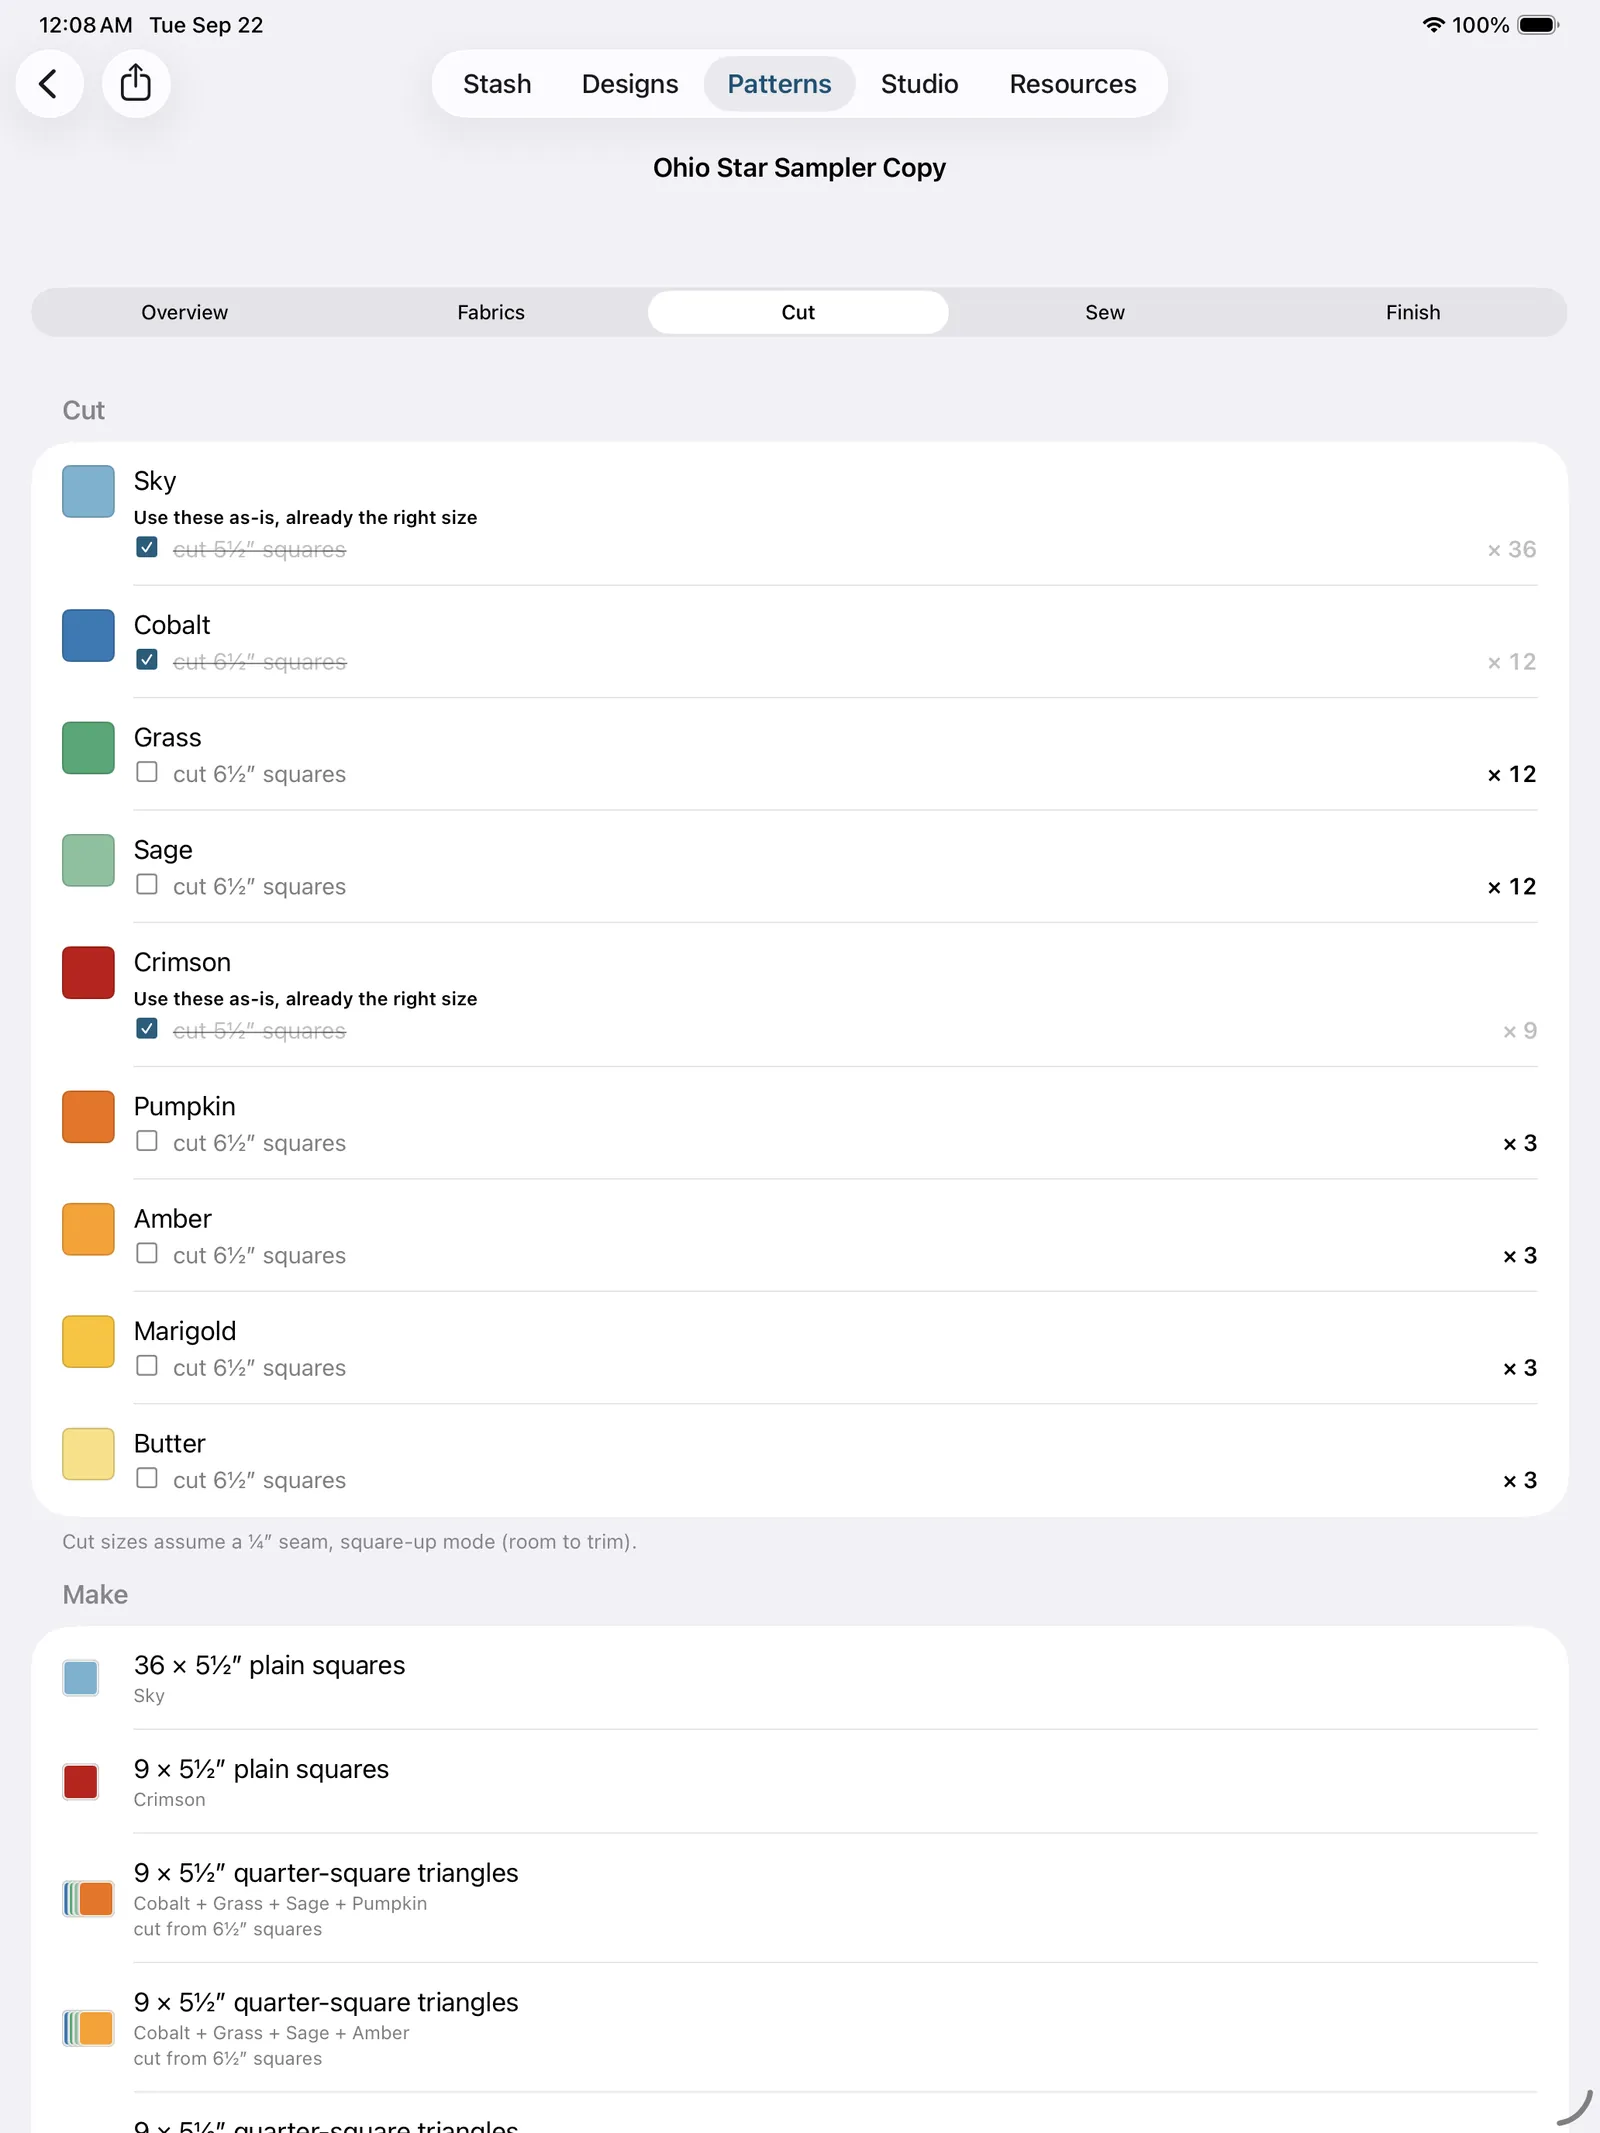
Every cut says what it's for. "Cut 3 squares at 4¼″" looks identical whether those squares are finished pieces or the raw material for a batch of half-square triangles, and quilters have sewn the wrong ones together on exactly that ambiguity. So each cut carries its purpose underneath: use as is, pair with a named fabric for an HST batch (and by which method), subcut on the diagonal, goose points, and so on. Where two fabrics need identical squares for different jobs, they stay as separate lines instead of merging into one count you can't take apart at the table.
A line drawing at the head of the sew order. Before the phases, the block is drawn as seam lines only, no color. It's there to lay your cut pieces on and check the block before you sew a stitch, which the color preview at the top of the pattern is too small and too busy to do. A dashed line in that drawing is not a seam: both sides of it are the same fabric, so the Cut list cuts that shape as one piece (see Merging patches).
A star gets the sequence a star is actually sewn in, with a drawing per step. An eight-point star (a LeMoyne, or a Lone Star) is not sewn in rows, and until now the pattern said it was. Now the Block sew order recognises one and walks you through it: mark the ¼″ dots, sew the diamonds into pairs stopping at the dot, set a side triangle into each pair, join the pairs into halves, close the star through the center, and set the four corner squares in last. Each step carries its own little drawing with the dot and the amber stop bar marked, so you can see where a seam begins and where it has to stop, and the pair step gives you a number to check before you make three more of them: on a 12″ LeMoyne the pair should measure 5½″ across its two outer edges, raw edge to raw edge, before anything is trimmed. If they don't, the 45° angle has crept, and it is very much cheaper to find that out now than at the center where eight seams meet. The PDF adds one thing the screen can't: the small diamond printed at true scale with its dots, so you can lay a cut piece straight on the page. Build a star without Y-seams instead and you get that sequence rather than this one, with no dots to mark and every seam straight.
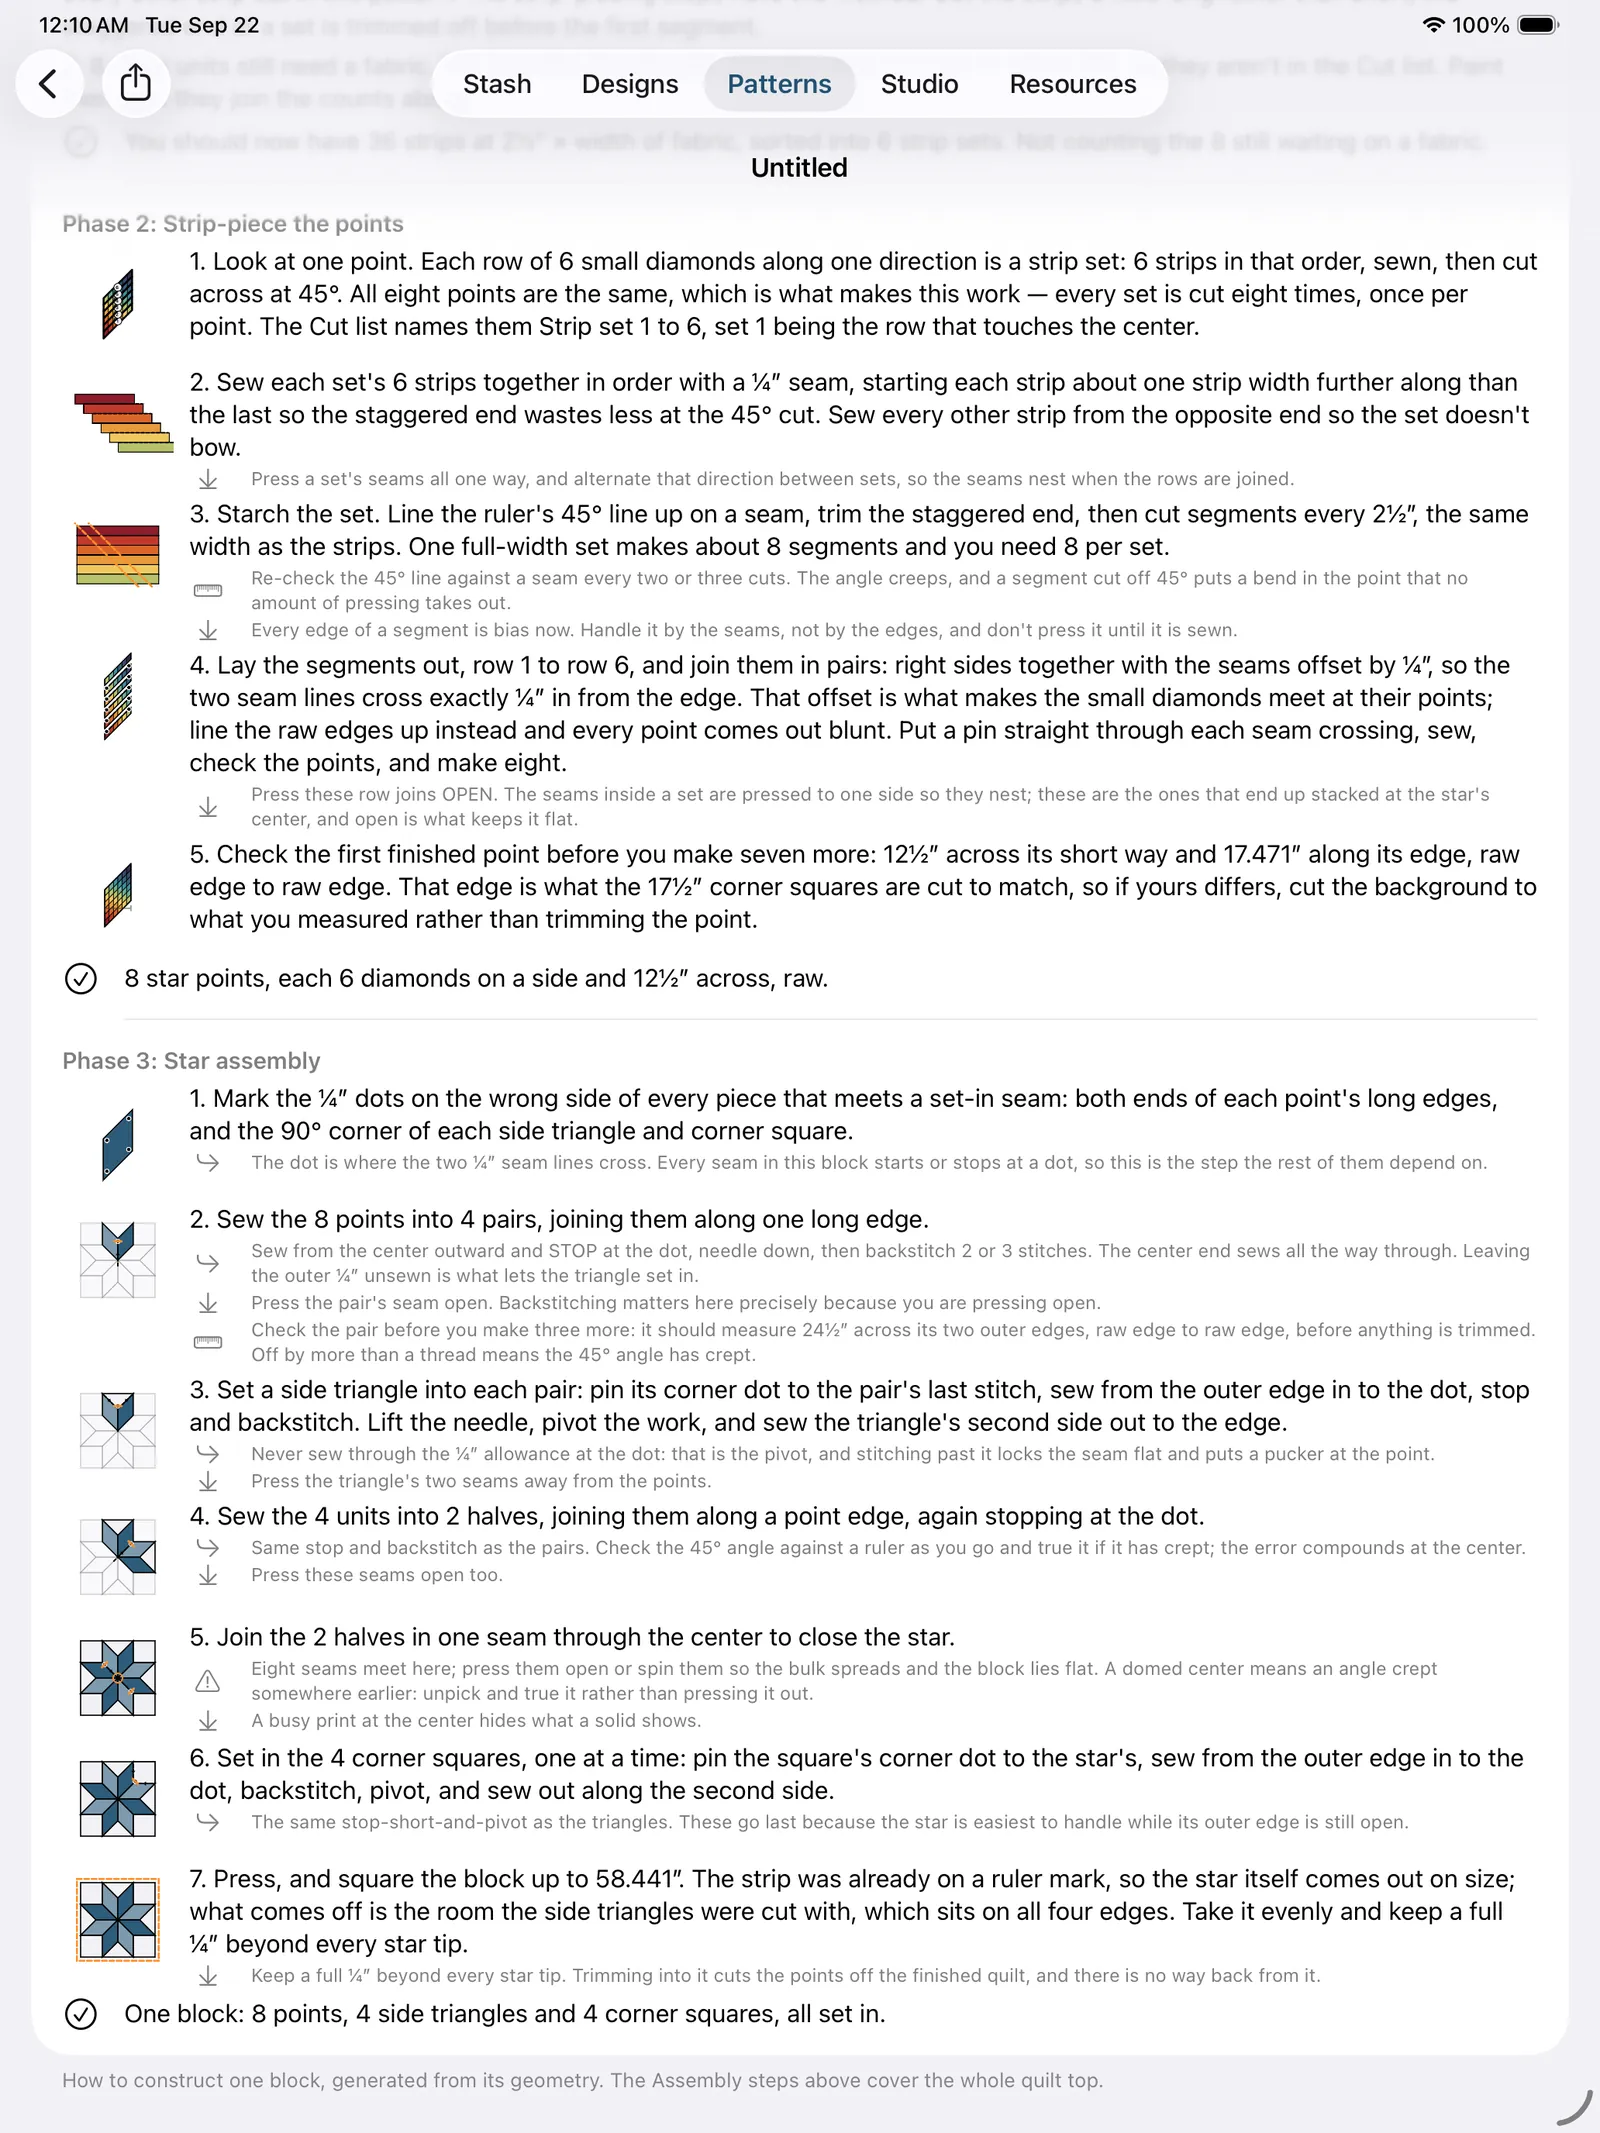
A Lone Star's points come off strip sets, and the pattern reads them off your paint. A 4×4 Lone Star is a hundred and twenty-eight diamonds, and nobody cuts a hundred and twenty-eight diamonds. What you cut is four sets of four strips: inside one point, every row of small diamonds is four strips in that order, sewn together, then cut across with the ruler's 45° line every strip width. All eight points are the same, so each set is cut eight times, and TideStitch works out which fabrics are in which set by looking at what you painted rather than asking you. A 4×4 star off 2½″ jelly-roll strips prints four Strip set rows, each with its fabrics stacked top to bottom in sewing order, sixteen strips in all. The Cut section below bills those strips the way it bills everything else, per fabric, so each ring's line tells you how many width-of-fabric strips to pull off that bolt and which set they are for. The Sew section then has a phase of its own for making them, with a drawing per step: sew the strips staggered by one strip width so the 45° trim wastes less, starch before you subcut and re-check the angle every two or three cuts, and join the rows with the seams offset by a seam allowance; that offset is the whole trick, and lining the raw edges up instead is how points come out blunt. It ends with the number to check before you make seven more: on that 4×4 the first point should measure 8½″ across its short way and 11.814″ along its edge, raw, and that edge is what the 11⅞″ corner squares are cut to match. The star's own pieces come out on size, because the strip was already a ruler mark; what you square the block up to remove is the room the side triangles were cut with. A star colored by the diamond (the Colors section, or the Cell paint scope) keeps them, because every point is still the same. A Mirror star keeps them too, as two families: the pattern sees that every other point is the reflection of the one you painted, prints its sets as A1…A4 and B1…B4, cuts each four times, and gives each diamond its own strip-piecing phase in the Sew section. Paint one point differently and the strip sets go away, on purpose: a set only works if all eight points want the same rows, so the cut list goes back to billing the diamonds one at a time and says in one sentence which point and which row stopped it being a set.
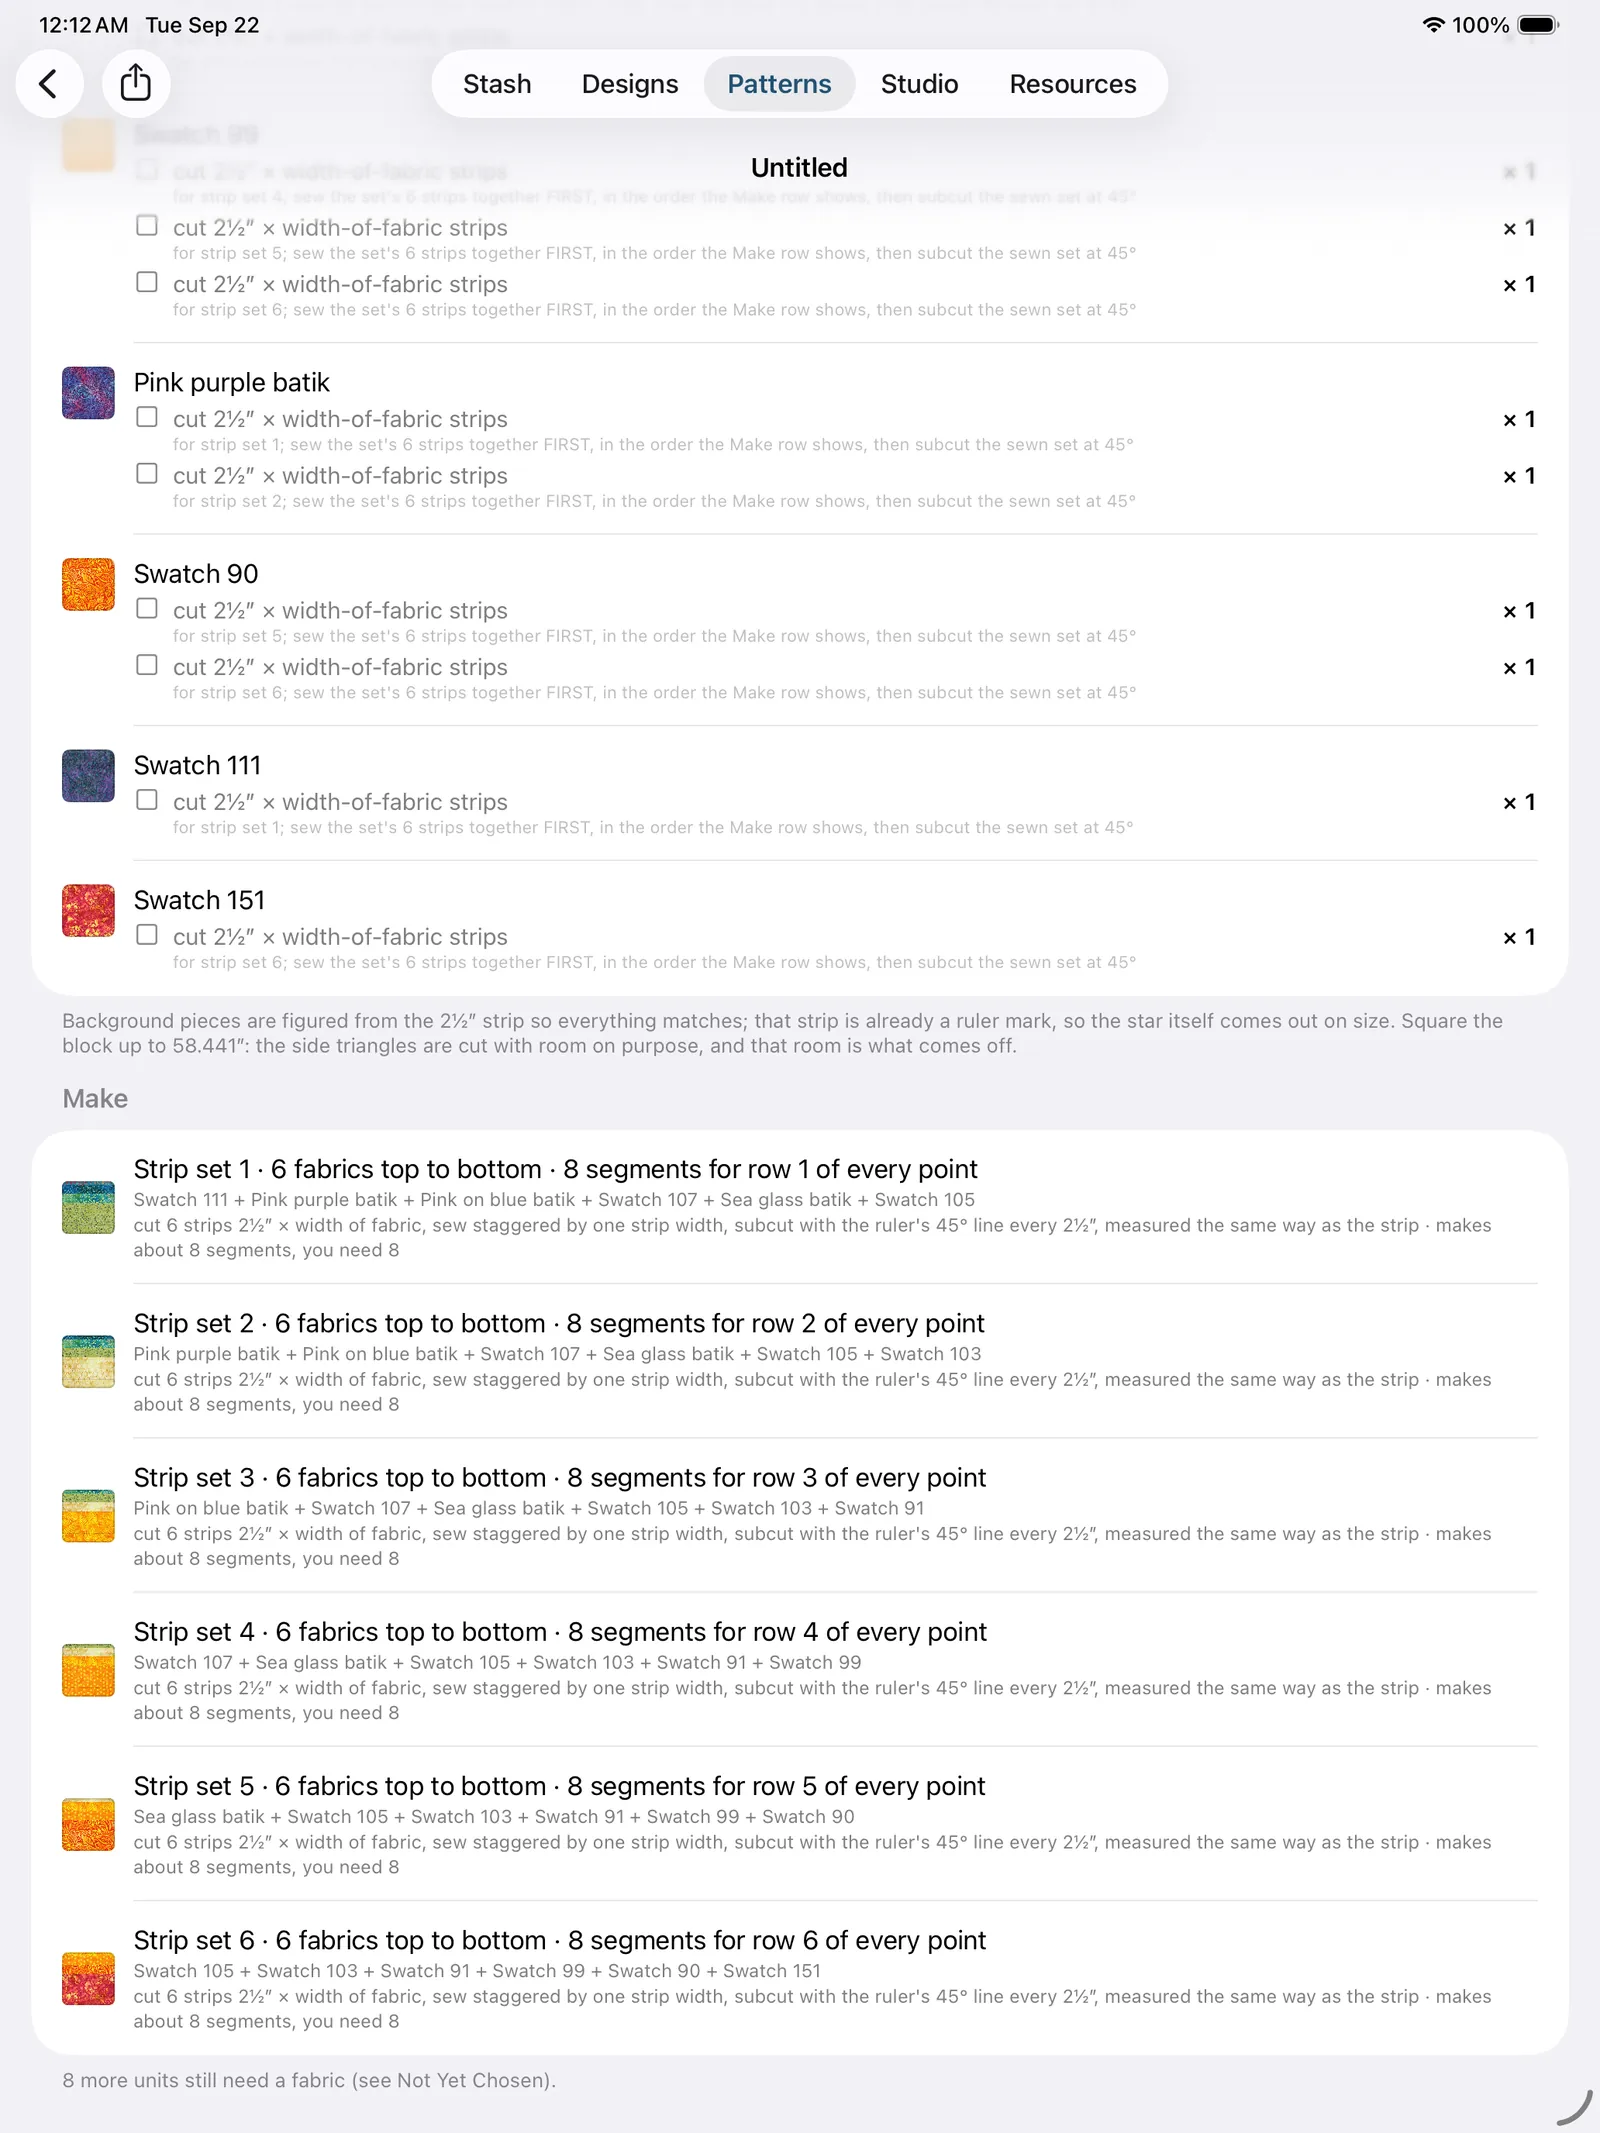
Each phase ends by telling you what you should be holding. After the last step of a phase, a checkmark line counts what should be in front of you before you go on, with sizes: "You should now have 32 half-square triangles trimmed to 1⅝″, and 8 plain pieces. 40 pieces in all." It isn't another step, it's the moment to stop and count, placed where a miscount has just happened and is still cheap to fix. The size is in there on purpose: a count alone catches "I made too many", a count plus a size also catches "these four came up small."
Jelly-roll patterns are sewn, not just drawn. A strip pattern has no cut list, since the strips arrive cut, and for a while that took its Sew section with it. Each pattern now gets its own real construction sequence, worked out from your roll's actual strip width and length rather than an assumed 2½″:
- Bargello: sew the gradient strip-set, close it into a tube, slice the columns at their own widths, open each column at its own seam, and join them in order. The pattern now carries the two lists that used to live only in the editor. Fabrics gets a Strip-Set Order section, one row per band top to bottom with a strip-shaped chip of the fabric, so you can sew the set without reopening the gradient screen. And Cut gets one row per column, left to right: a stacked picture of the opened column (that picture is the instruction), the column number, which strip lands on top and which seam to open to get it there (open the tube seam (between strips 8 and 1) when it's the seam that closed the tube), the cut width, and which tube it comes off when the wave needs more than one. Tap a column's picture to see it large, every band labeled with its strip number and name and the top band badged. The PDF prints both lists.
- Jelly Roll Race: join every strip end to end with diagonal seams, then fold and sew, pass after pass, stopping at the width your design finishes at. It also tells you the honest row count, and says out loud that the canvas drawing is schematic, because a Race's real seam placement can't be drawn in advance.
- Rail Fence, Strip Twist, Strip Patchwork: build the strip sets, press them one way, subcut, and set the blocks or squares out with the turns that make the pattern.
A jelly roll is answered in strips, not yardage. "Buy 2⅜ yards" is the wrong sentence for fabric you already own pre-cut, so a jelly-roll pattern's Fabrics section counts strips instead: "Uses 15 of your 40 strips (25 spare)," or a warning when the roll comes up short. It's the exact count from the strip-set construction in the Assembly steps, never an area estimate, and it's the same number the canvas readout and the Layout footer show, all three are figured from one place so they can't disagree. A multi-tube bargello adds the line the total alone would hide: how many strips of each print it takes, since every tube needs the full sequence again. Backing, batting and binding aren't cut from the roll, so they're still given in yards, and any strip patches you haven't painted yet come out of the strips already counted, not extra fabric.
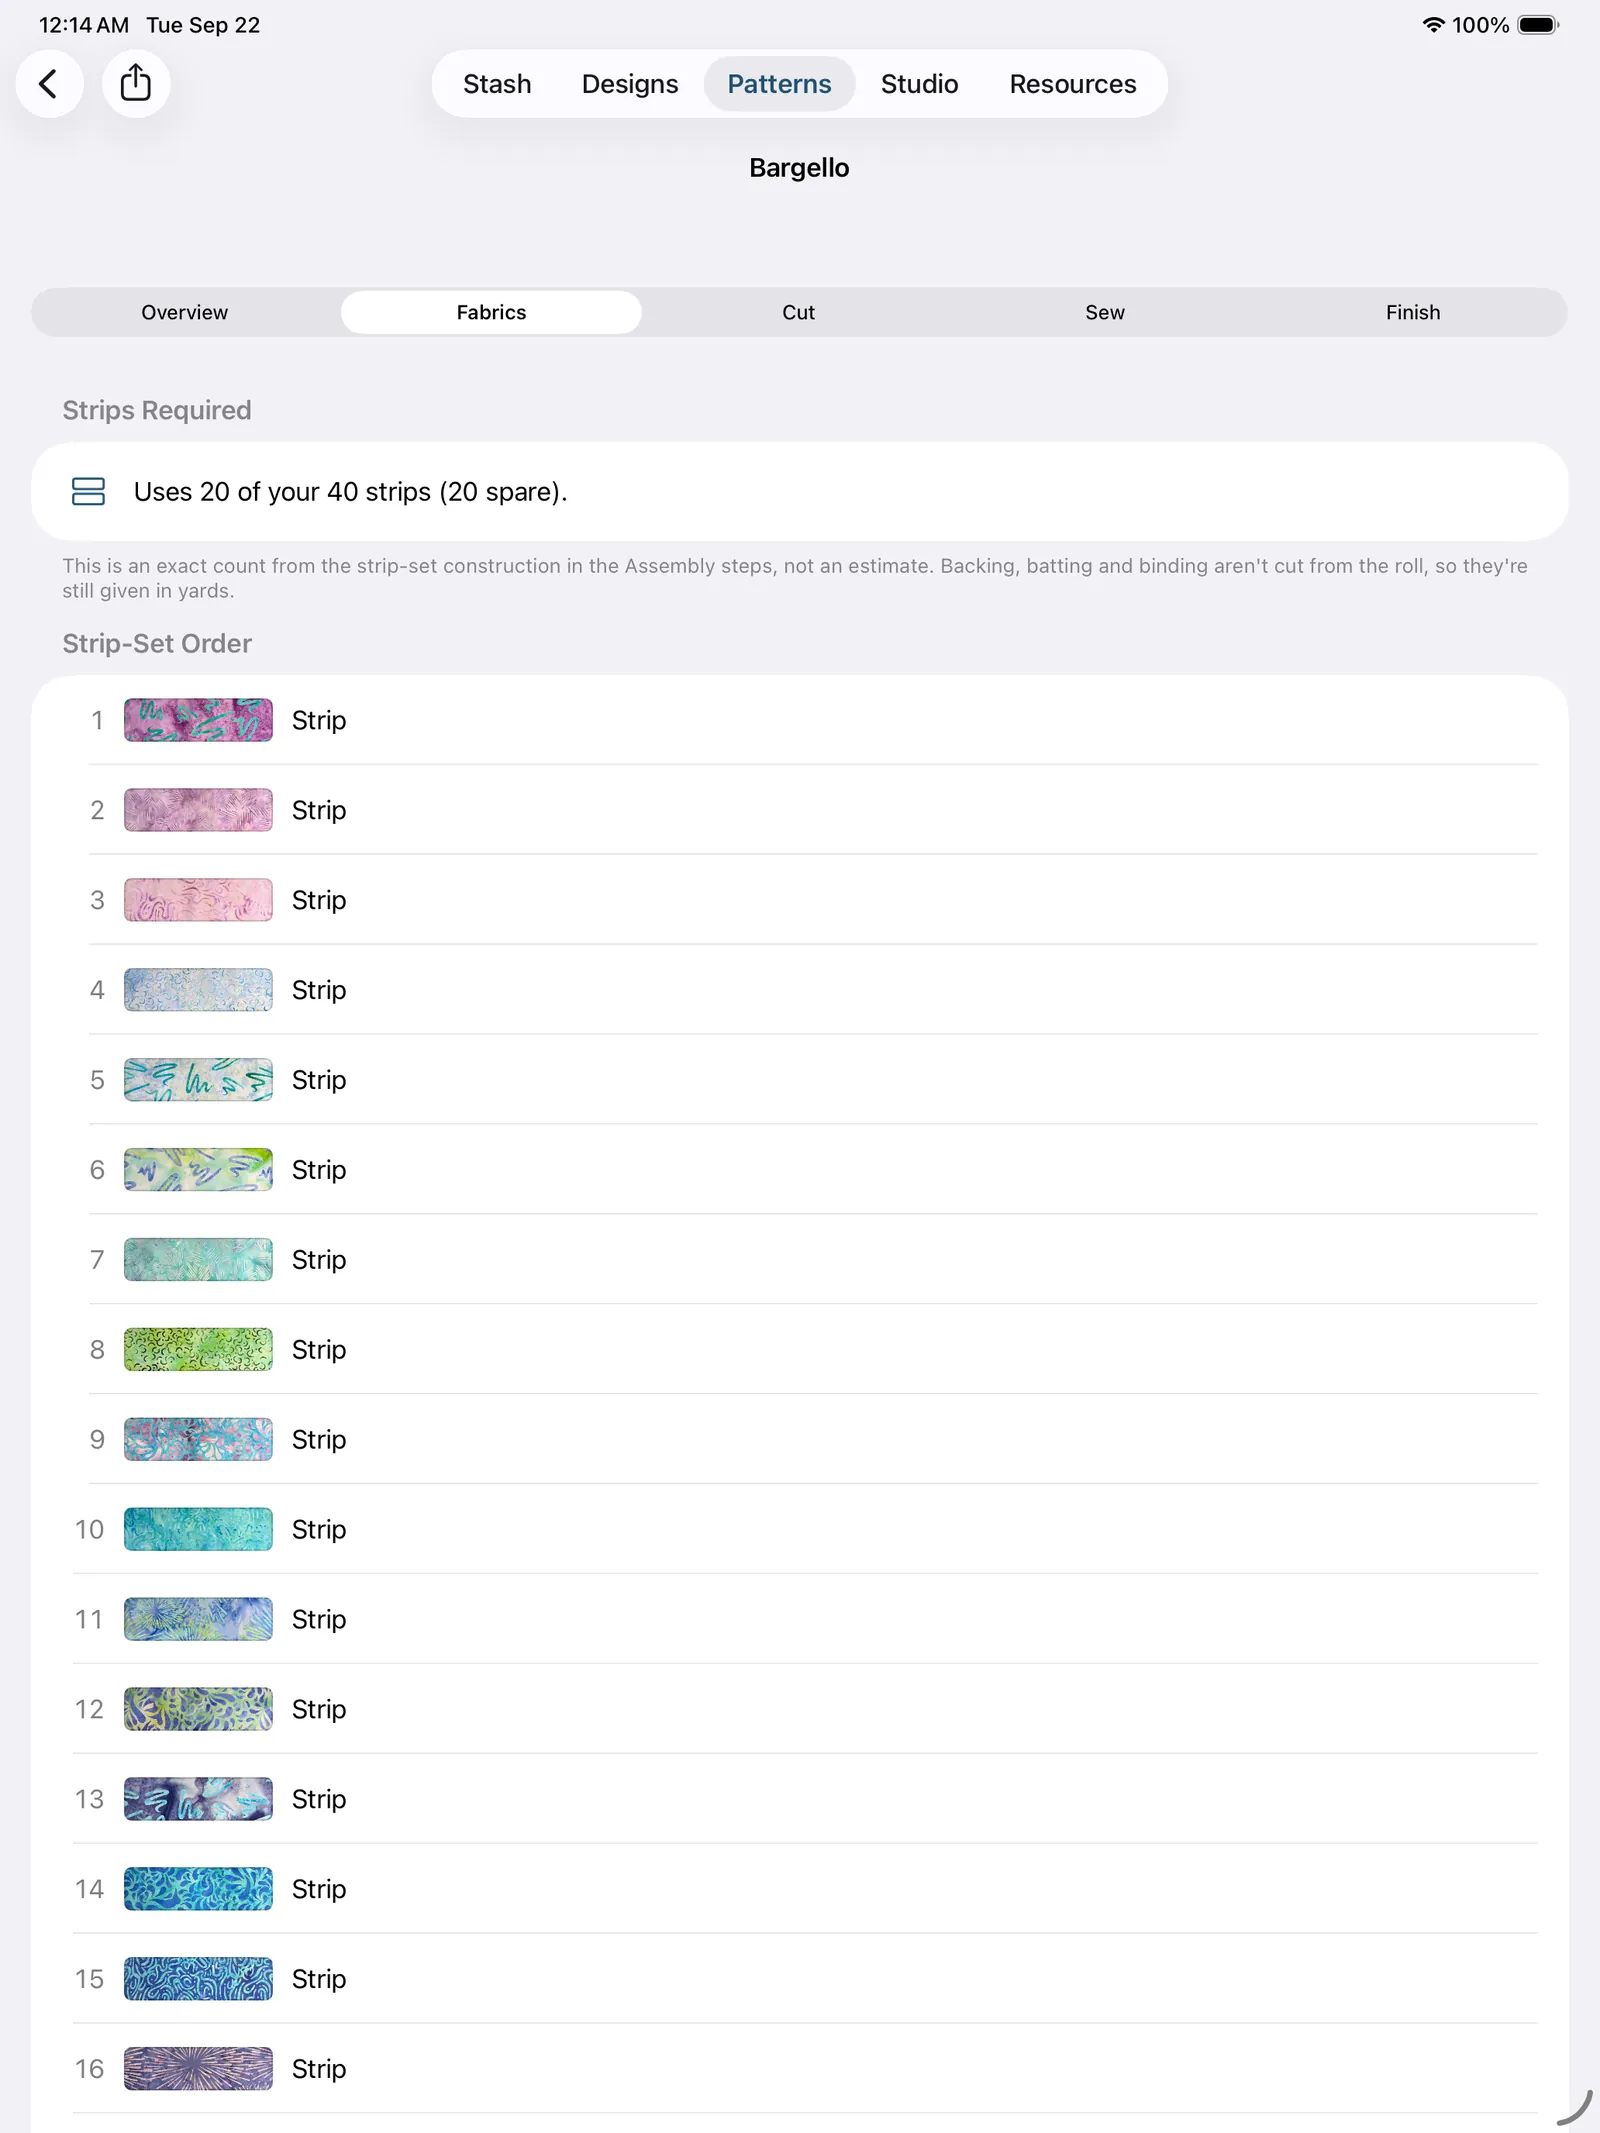
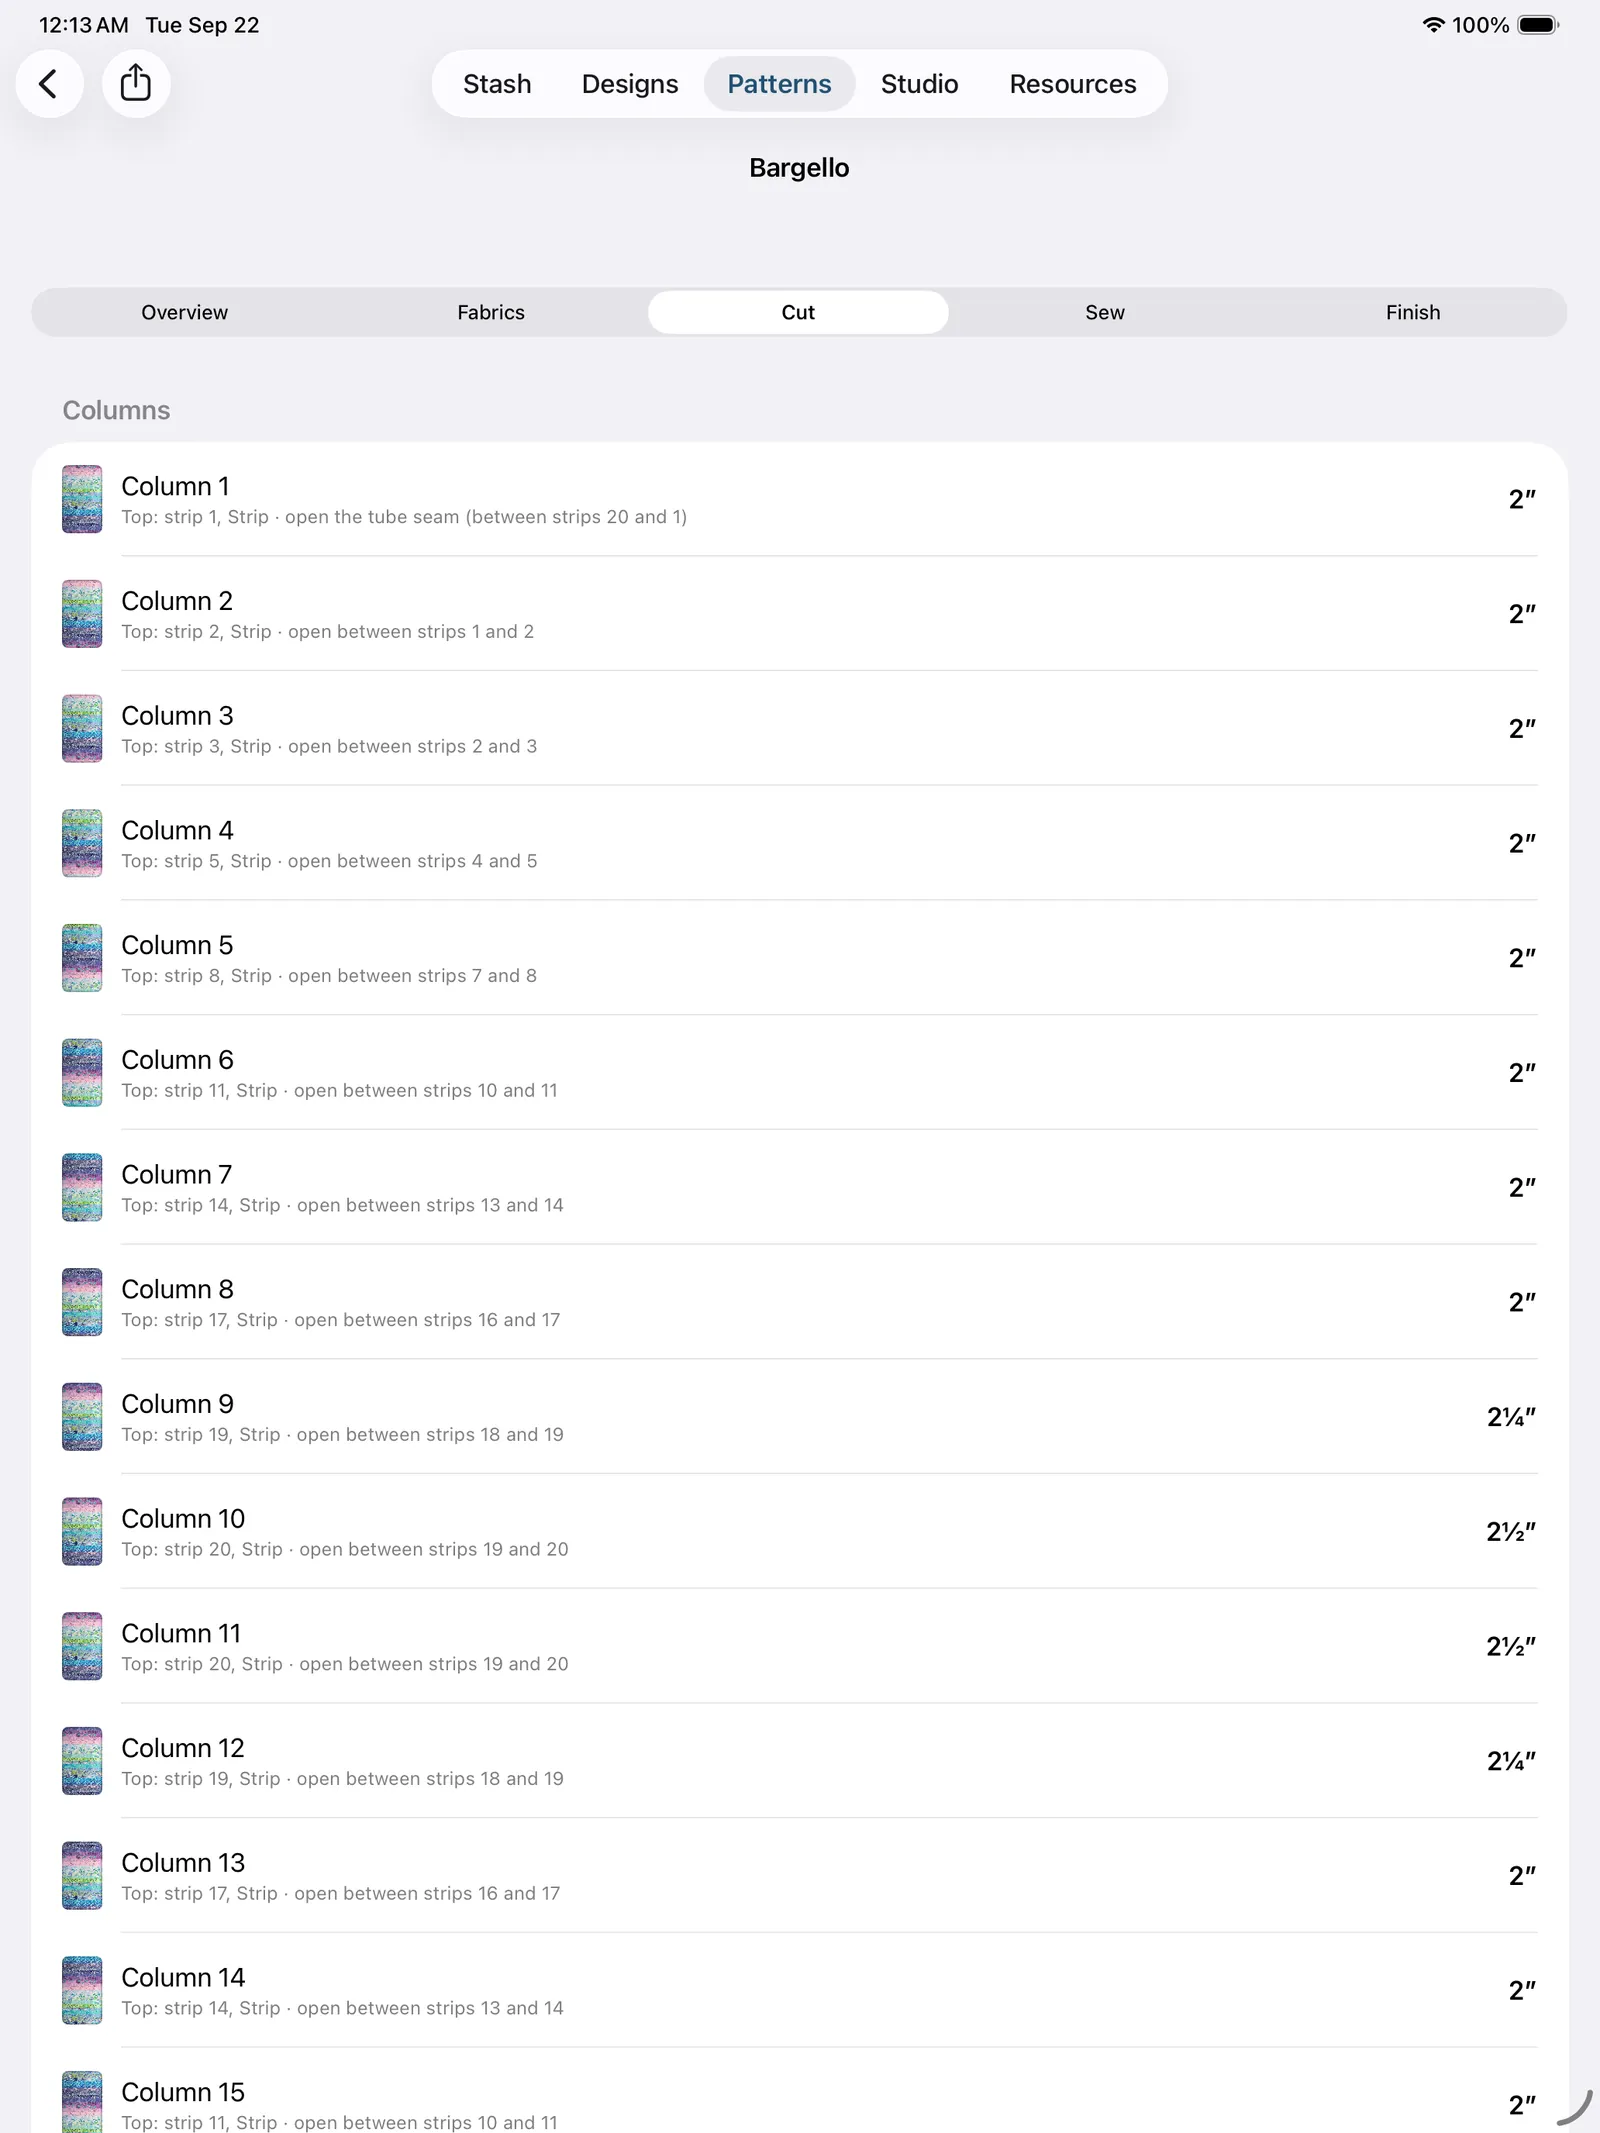
Small pieces are costed as precuts, not yardage. "Buy ⅜ yard" is the wrong answer for a fabric that only owes a few small squares, so where a fat quarter or fat eighth would hold all of one fabric's pieces and cost less than buying it off the bolt, that's the line you get, "1 fat quarter," with the width-of-fabric yardage kept beside it as the off-the-bolt fallback. It packs a fabric's different cut sizes into the same precut rather than buying one per size, and only reaches for a precut when it genuinely comes out ahead, anything too big for one either way (a border strip, a long sashing run) stays on yardage. Because every amount rounds up so you're never caught short, the list can look generous, and a "Why does this look like a lot?" note spells out why: off the bolt, pieces come from strips cut the full width of the fabric, each as deep as its tallest piece, so a few larger pieces can take a whole strip; about 15% goes on top for trimming and the odd miscut; the total rounds up to the next quarter yard; and precuts come in fixed sizes.
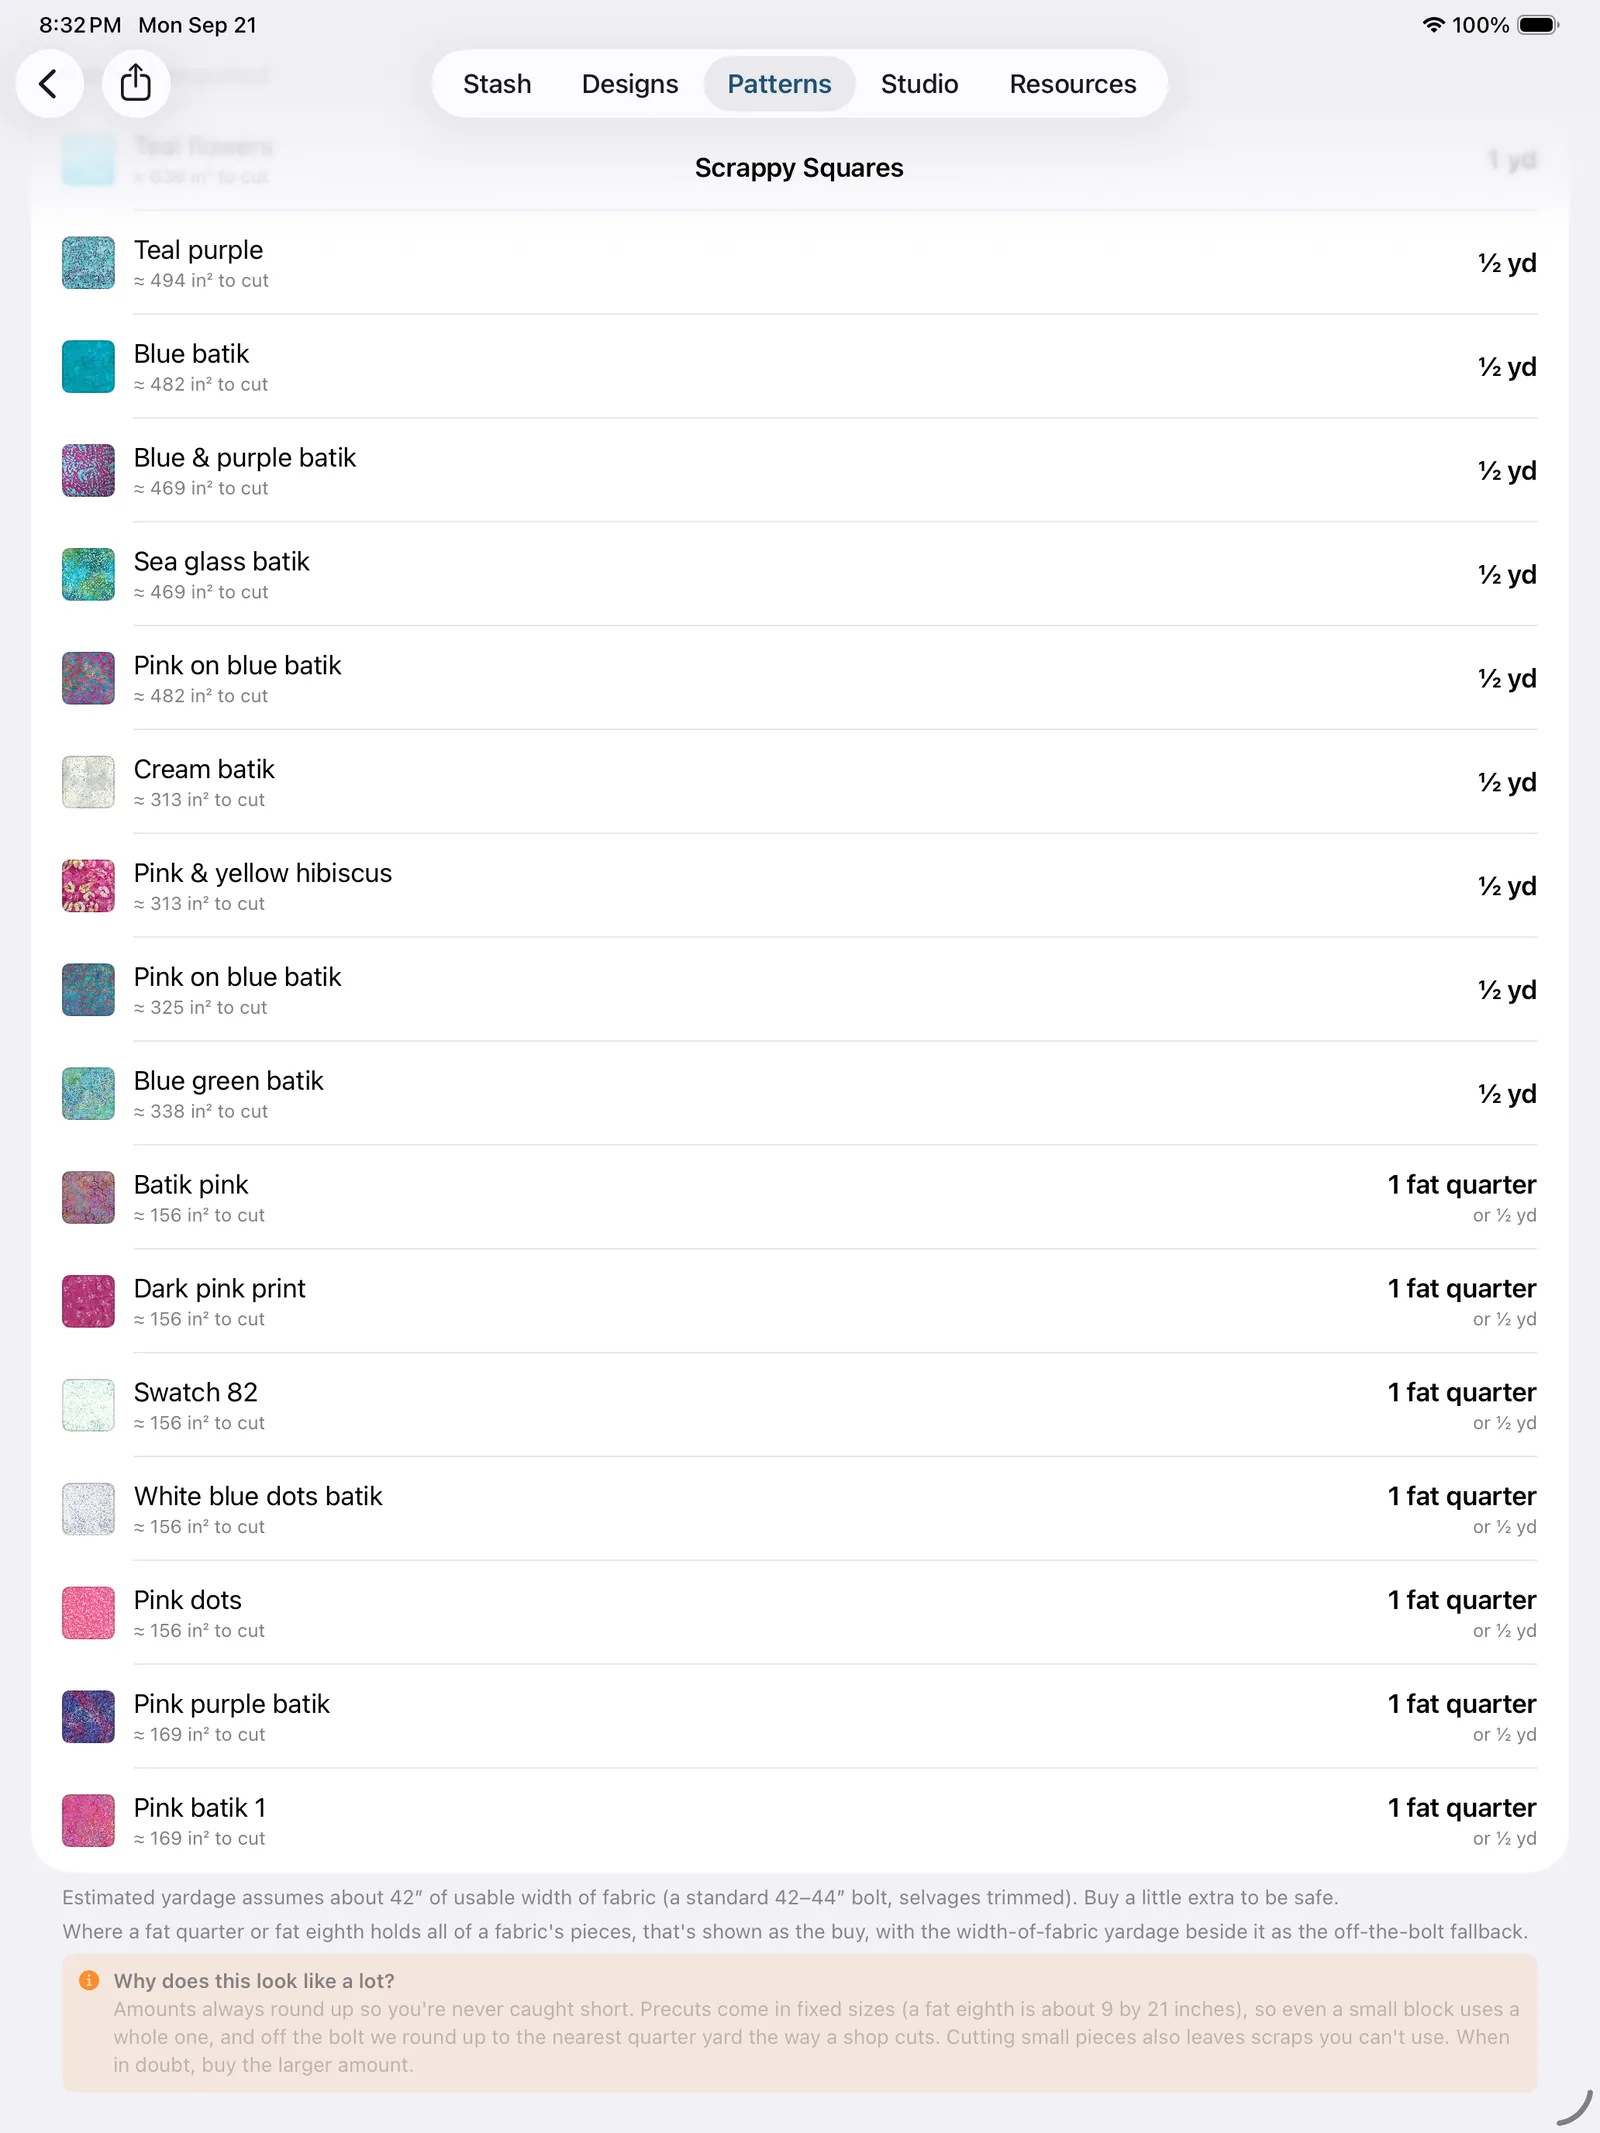
How the off-the-bolt number is figured. The yardage lays a fabric's pieces out in strips across the usable width the way you'd cut them at the table: the tallest pieces set the height of a strip, everything that fits beside them shares it, and a new strip starts only when the row is full. So one 4⅞″ strip holds the six big squares and the odd 4½″, 3¼″ and 3⅛″ squares in its leftover length, rather than each size getting a strip of its own. The strip lengths are added up, padded about 15%, and rounded up to the next quarter yard. The small ≈ in² figure under each fabric is the cut area of its pieces, seam allowances included, so it's the number to check the yardage against if you're doing the math yourself (a fat eighth gives you about 20″ × 9″ of usable fabric once it's trimmed, a quarter yard about 42″ × 9″).
Batched half-square triangles. When a design needs a stack of matching HSTs (same two fabrics, same size), TideStitch batches them for you instead of making them one pair at a time. It groups the HSTs and picks the most efficient mix of 2-, 4-, and 8-at-a-time construction, then tells you exactly how many squares to cut, at what size, and how many finished HSTs each batch yields. If a batch makes a few more than you need, it says so as spares. Under Make, each HST line shows its batch breakdown; under Assembly, you get the right step-by-step method for each batch size (with a reminder that 4-at-a-time units are all-bias and always get trimmed). You control the method and how much to oversize in Settings (see Half-square triangles).
Corners that are sewn on, not cut off. A Snowball isn't made by cutting an octagon and four triangles, and no rotary ruler wants you to. You lay a small square on each corner of the whole background square, sew across its own diagonal, trim, and press the corner open; the octagon only exists once the seams are sewn, and the corner triangles are never cut at all. So the pattern asks for what you actually cut. At a ¼″ seam, a 12″ Snowball with 3″ corners wants one 12½″ square and four 3½″ squares, which is what every published Snowball pattern prints. The same stitch-and-flip treatment covers a square-in-a-square and a folded-corner rectangle at one, two or three corners. Two details the rule of thumb leaves out and TideStitch doesn't: that half inch is 2 × your seam allowance and moves when you change it, and the corner square is not rounded to a friendly ruler mark, because that diagonal is the seam and an eighth over finishes an eighth big.
A shape the rotary ruler can't name gets an honest answer. Cut cells freehand on a Design Your Own board and you can make a trapezoid, a pentagon, anything at all. The pattern doesn't dress those up as standard units: the piece is billed at its own outline (not at the rectangle it sits in, which would charge you for fabric the quilt doesn't contain), the cut list gives you the rectangle to cut it from, and the cut says trim it to the outline in the diagram rather than "use as is". It's filed under the units to build, not under the pieces that are already the right size.
Block difficulty and sew order. TideStitch reads the block's geometry and works out how it goes together, then shows two things. The Difficulty badge rates the block from Beginner to Expert: plain grids of squares and triangles are Beginner, blocks with a busy spinning center or a partial seam are Confident, set-in (Y-seam) blocks like a LeMoyne star are Advanced, and anything with curves or an impossibly crowded center is Expert. The Block sew order then spells out the construction in phases: first the units (with your HSTs batched the efficient way), then the rows or sections with alternating press directions so the seams nest, then the final join. Blocks that need Y-seams or partial seams don't get a fake "just sew the rows" order, they get a clearly-marked advanced-construction order that tells you to stop short of the corner and pivot, or to sew a partial seam and come back to finish it. If a design has no single pieced block, a jelly-roll pattern or a Design Your Own board, the difficulty badge, the line drawing, and the block sew order simply don't appear.
Merge-aware patterns. If you've merged an area (see Merging patches), the pattern respects it: the merged region is cut as one big piece, and the assembly walks you through piecing the rest, then joining the big piece on as a late seam. For a block split on the diagonal (a background triangle behind a pieced design), the steps come out as a proper staircase: rows of decreasing length, each capped with an edge triangle, with press directions that alternate row to row so the seams nest, then one clean diagonal seam to join the background.
On-point patterns are sewn in diagonal rows. A quilt set on point can't be sewn in rows across, because no straight line across the finished top runs edge to edge through whole pieces, so the pattern doesn't pretend otherwise. Assembly lays out the real diagonal rows and how long each one is (a 4 × 3 comes out as "6 rows … of 1, 3, 5, 5, 3 and 1 blocks"), tells you to press each row against the last so the seams nest, joins the rows, and adds the four corner triangles last, after the rows are together. The setting triangles are in the Cut list as real entries, and both documents agree that they're cut oversize on purpose and squared up with the quilt rather than trimmed to a listed size. If you chose pieced edges, you also get the note that the quilt's outer edge is on the bias by construction, with what to do about it. And if your block's seams don't happen to run at 45°, the pattern is honest about the cost: those edge blocks are pieced whole and then cut, in half on the diagonal for a side slot and into quarters for a corner, so the cut list asks for more blocks than the quilt shows and both the Cut section and the Assembly steps say exactly why.
Brick patterns are sewn in strips. A brick set keeps every seam straight, so its pattern doesn't borrow the on-point language. Assembly builds each line along the stagger as a full-length strip, names how many blocks and part blocks each one takes, then joins the strips with straight, full-length seams. The part blocks that cap the staggered lines are cut for what they are, and where a drop cuts across a block's own pieces rather than landing on one of its seams, the pattern says that some blocks are made whole and then cut, so the cut list can ask for slightly more than the quilt shows. The outer edge is cut straight across, so there's no bias warning to give and the pattern doesn't invent one.
Pieced borders in the pattern. A Flying geese or Sawtooth border isn't just drawn, it's cut too. Once you've painted the geese or teeth, they show up in the pattern alongside the center: Make lists them (e.g. "64 × 3″ × 1½″ flying geese" or the sawtooth teeth as batched half-square triangles), Cut gives the exact squares to rotary-cut, and Assembly adds a step to piece each side's row and set it between the corner pieces. Flying geese use the efficient no-waste method (one large point square plus four small background squares makes four geese), and the counts always match the live readout in the border's settings. That method only makes geese twice as wide as they are tall; when the border's fit flexes the cells off that shape, the squares are sized for the smallest goose that covers the true size, and each goose's make line states the exact size to trim it to. Corner squares and corner blocks are cut too, a corner block is broken down into its own units just like a block in the quilt.
Plain strips are cut too. A solid border isn't pieced, but it still has to be cut, so the pattern states its strips: the width, and the length per side, worked out for how that border is actually built. If you've painted one side, one sashing strip or one setting triangle a different fabric, the list splits with it, so eleven strips in one fabric and one in another come out as two lines rather than twelve of whichever you painted first. Butted top and bottom strips span the full outer width; sides with corner squares or corner blocks run between them; a mitered side is given the long outer edge it needs to carry its 45° corners. Sashing strips and cornerstones are listed the same way, either full-length rows or segments plus cornerstones, matching what the canvas draws. And when a strip needs to be longer than the bolt is wide, the line says so and tells you to piece it from width-of-fabric strips instead of pretending a 60″ strip exists.
Exporting a PDF
Tap Export PDF (the share button on the pattern sheet) to generate a printable, multi-page document you can save, print, or send. It leads with a small picture of your finished design, then lays out every section as crisp text: Make, Cut, Fabrics, Assembly, and the Block sew order with its line drawing, difficulty rating, and per-phase checkpoints, with a page number in the bottom-right of every page. Section headers never strand themselves at the foot of a page. It's plain US-Letter paper, ready for the cutting table or the fabric store.
On a Mac the same button reads Save, and it opens a real Save dialog instead of a share sheet, so the PDF goes straight where you want it.
Once in a while, after you've finished exporting a pattern, TideStitch may quietly ask "Enjoying TideStitch?" Tap Yes, I love it to leave a quick App Store rating (it helps other quilters find the app), or It could be better to send a note straight to us instead. It only ever asks at a natural stopping point, never mid-task, and won't pester you if you'd rather not answer.
The Resources tab
The last tab, Resources, holds everything that isn't your quilt: Settings, the free tools, the manual, and the ways to reach us. It's one list, top to bottom:
Settings: the first row. App-wide preferences, backup and restore, purchases, and iCloud sync; see Settings below.
About Studio, on an iPhone only: a short card saying what Studio is and that it runs on iPad and Mac, since a phone has no Studio tab to find it by.
Tools: two rows. Free calculators opens the list of all eight, split into Units and blocks (half square triangle, flying geese, LeMoyne Star, Lone Star) and Finishing and settings (binding, backing and batting, setting triangles, square-in-a-square), each with a line saying what it answers. Quilting on a photo is the longarmer's consult: a photo of any pieced top, flattened, with quilting previewed over the real fabric. See Free tools.
Learn: User Guide opens this manual on the web (tidestitchquilts.com/manual). How-to videos will appear here as they're made.
Community: Send Feedback and Contact Support both open a pre-filled email with your app and device details already attached, so you can tell us what's working and what isn't. @tidestitchquilts on TikTok is where the short tips live. Rate TideStitch opens the App Store straight to the review screen if you'd like to leave a rating (thank you!).
Purchases, at the very bottom, and only while there's something left to buy: Unlock the Full App and, on iPad and Mac, Unlock Studio. They open the same unlock screens the app shows when you hit a wall, without the wall, so you can see what's for sale and what it costs before you need it. Once everything's owned the whole card goes away. Restore and code redemption stay in Settings; see Purchases.
Rows with a chevron (›) open inside the app; rows with an arrow in the corner (↗) open in Safari.
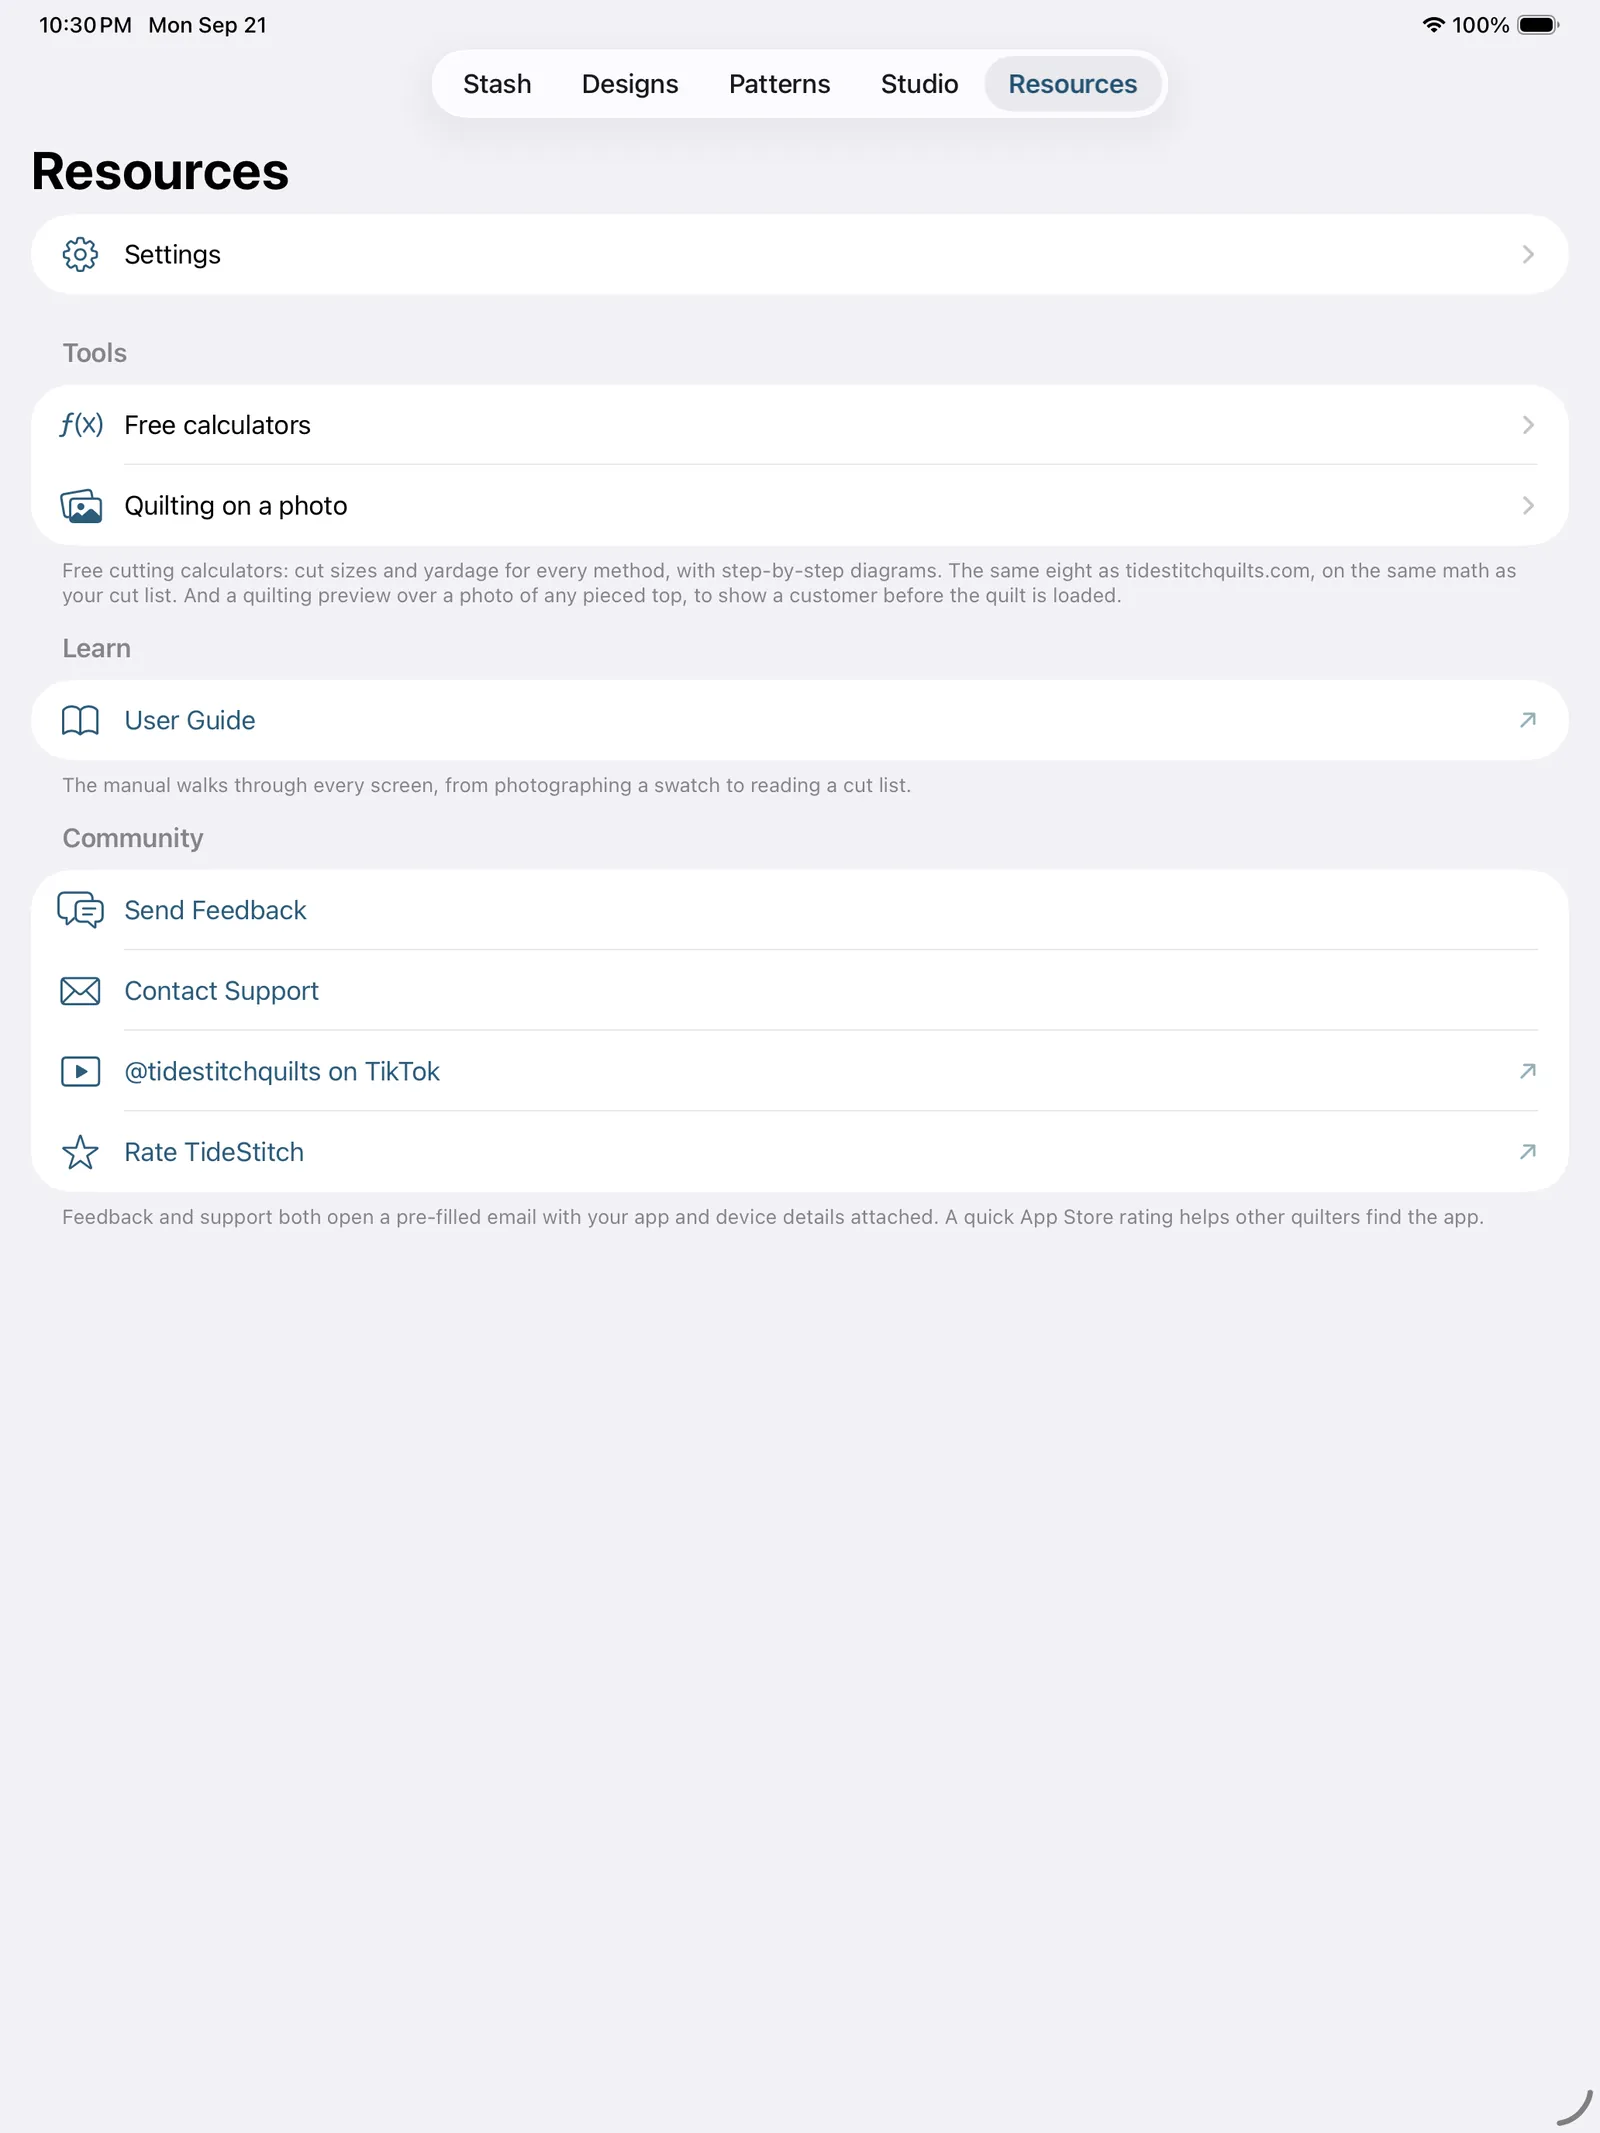
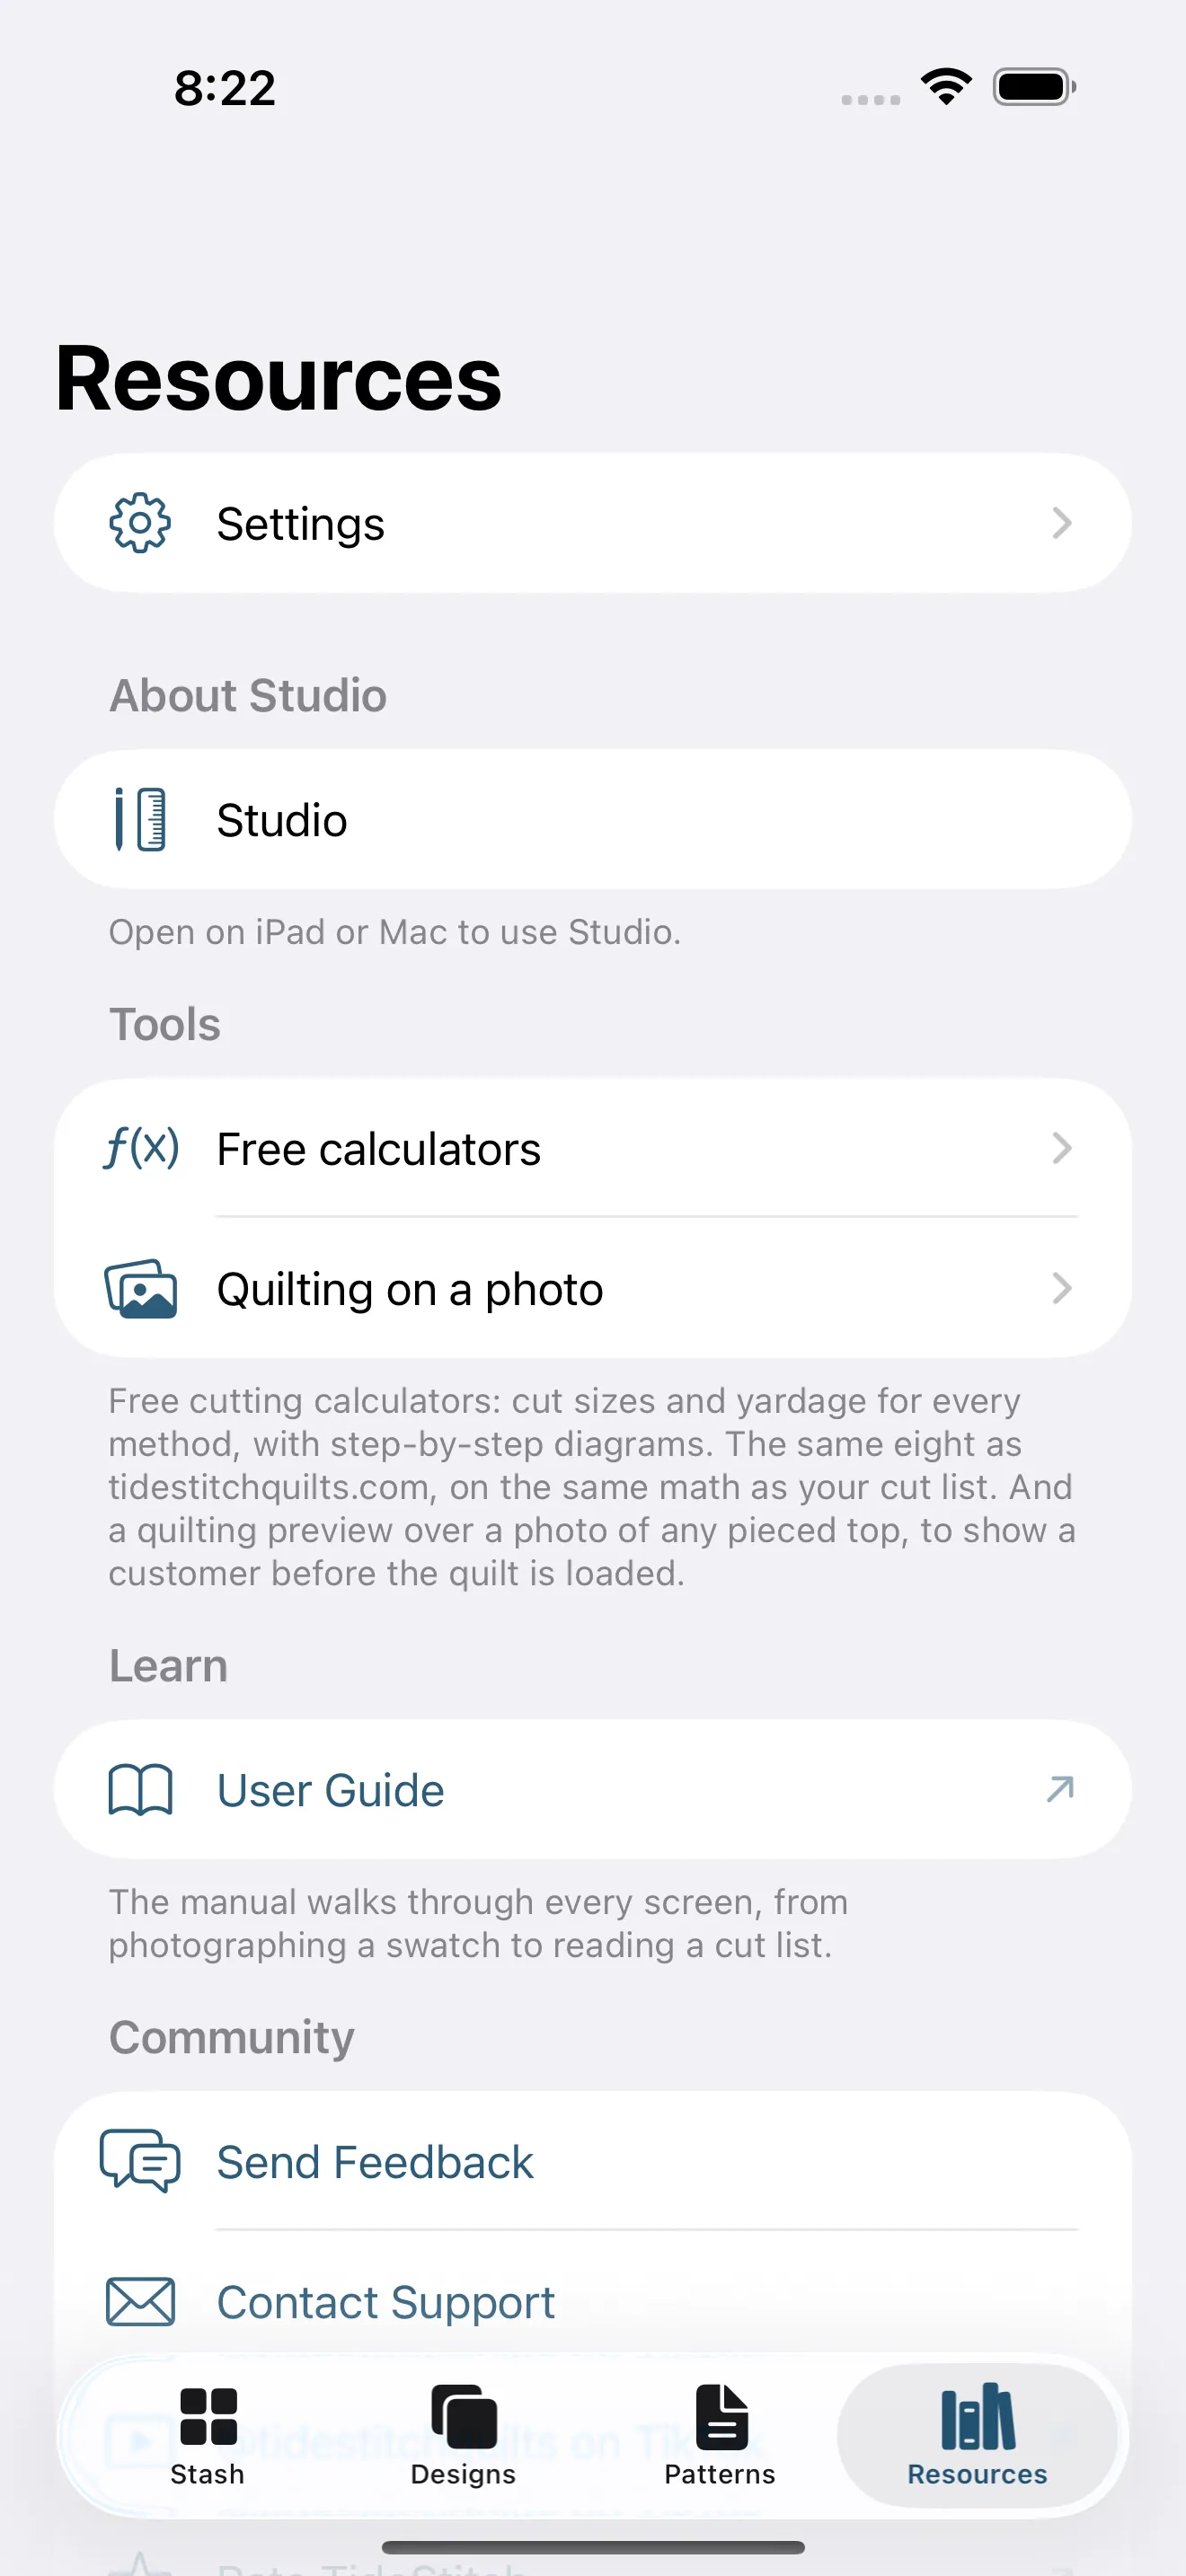
Ratings and feedback genuinely shape what gets built next.
Settings
Settings holds app-wide preferences. It's the first row of the Resources tab (the last tab in the bar): tap Resources, then Settings.
Seam allowance
TideStitch works in finished sizes, the space a piece takes up in the finished quilt, with seam allowances tucked into the seams. Your seam allowance is what the app adds back when it tells you a piece's squared-up (cut) size: finished + 2 × seam allowance per edge. (So a 3″ finished HST with a ¼″ seam cuts to about 3.5″.)
Pick from the presets Scant ¼″, ¼″ (the quilting standard), 1 cm, or 1.5 cm, or choose Custom and dial in your own with the stepper. The "How sizes work" section on the same screen spells out the finished-vs-cut math with your current setting plugged in. Seam-allowance changes can be undone with ⌘Z or a shake.
Cutting mode
A segmented picker with two options that controls how bias pieces (half-square and quarter-square triangles) are cut:
- Square-up (the default, recommended): bias units are cut a little oversized so you can trim them true after sewing. The amount is exactly your Oversize setting under Half-square triangles (⅛″ unless you change it), added on top of the Precise cut. That is the whole rule, for every bias piece and at every seam allowance: a half-square triangle, a lone triangle, a flying-goose square, an on-point diamond and a shaped template each get it once; a quarter-square triangle gets it twice, because two units meet across each diagonal of its square; and the bigger 4-, 8- and 16-at-a-time starting squares get it scaled up to match their size. At a ¼″ seam that lands on the numbers every chart prints (a 3″ finished HST cuts from a 4″ square, a 3″ QST from a 4½″ one). At the 1 cm and 1.5 cm seams the square-up cuts are a little bigger than the old rule of thumb gave, because that rule was only ever right at ¼″: at metric seams it printed the Precise number and left nothing to trim.
- Precise: bias units are cut to their exact finished-plus-seam size, with no margin to trim. Choosing Precise hides the Oversize control, since there's nothing to add.
Your choice flows straight into every pattern's cut sizes.
Half-square triangles
Controls for how patterns build stacks of matching HSTs:
- Method: Auto (the default) lets TideStitch pick the fewest batches of 2-, 4-, 8-, or 16-at-a-time for each group of matching HSTs. Or force 2, 4, 8, or 16 to use that method everywhere; a forced size is always used even when it makes a few spares.
- Largest batch (Auto only), cap Auto at 2, 4, 8, or 16. The default is 8: the 16-at-a-time square is big (an 11″ square for a 3″ finished HST), so 16 is opt-in through this cap rather than something Auto reaches for on its own.
- Oversize (Square-up cutting mode only, see Cutting mode above), how much extra to add per finished unit so there's room to trim it true after sewing. It is the one square-up number in the app: every bias piece in a pattern (not only HSTs) is cut Precise plus this. The default ⅛″ puts a 2-at-a-time HST square on the familiar chart size at a ¼″ seam, and the amount is scaled correctly onto the larger 4-, 8- and 16-at-a-time starting squares so those get their full trim room too.
- Scant-¼″ seam reminder: adds a note to the assembly steps to sew a hair under your seam allowance, so batched HSTs don't come up small.
Cut sizes always use your current seam allowance and cutting mode. At the standard ¼″-family seams every published size lands on a real ⅛″ ruler mark and prints as a fraction; a metric or custom seam can put a size between the marks, and then the pattern prints the honest decimal rather than rounding to a mark you'd cut wrong at.
Fabric preview
Vary fabric placement, on by default, is what makes a repeated fabric look like cloth instead of wallpaper. With it on, each piece shows its own part of the fabric, the way pieces cut from different spots in the yardage do. The print stays at true size and is never turned, only slid, so nothing about the scale or the grain changes.
Turn it off and every piece shows the middle of its swatch instead. That's the one you want when you're lining up a fussy cut and need to see exactly which part of the print lands in a given piece. For everything else, leave it on: a dozen identical stamps of the same square inch is the thing that makes a mockup look computer-generated.
It's a preview setting. It changes how your design is drawn, never the pattern, the cut sizes, or your fabric.
Canvas lines
The thin gray lines around every piece on the design canvas. Three choices:
- Default: the usual soft gray.
- Custom color: pick any color for the lines, handy when gray disappears into your fabrics or fights with them.
- Hidden: no lines at all, so pieces meet edge to edge and the canvas looks more like the finished quilt.
It changes the design canvas only, and it takes effect right away, even with a design open. Thumbnails in your library and the printed pattern always keep their gray lines, because a small picture or a cut diagram with no seams drawn is hard to read. Selecting pieces to merge still highlights them with the lines hidden.
Fabric width
A read-only reference showing the usable width of fabric the app assumes when it estimates yardage, about 42″. Yardage figures assume roughly 42–44″ of usable width after you trim the selvages, a standard bolt. If your fabric runs narrower, buy a little extra.
Actual size
Actual size is the ruler button in the design editor (⌘9), which draws your quilt at true physical size so you can hold real fabric against the screen. For that to be exact, the app has to know how large your screen is, and this section is where that's settled:
- On an iPhone or iPad, TideStitch recognizes the screen and actual size is already exact. The section says so, and you only need to calibrate if it disagrees with your rotary ruler.
- On a Mac, it can't be known, so this is where you tell it. Tap Calibrate this screen, lay your rotary ruler along the line, and adjust until the inch marks agree.
You do it once per screen and it's remembered, so plugging into a different monitor is the one time you'd come back; on a screen that's already measured, the button reads Recalibrate this screen. There's a Forget this measurement button on the calibration screen if you'd rather start clean. Asking for actual size on an uncalibrated Mac screen offers the measurement first rather than guessing.
Blocks
A count of every block design available in the picker: the built-ins plus the ones from the included block pack. It's a reference line, nothing to set.
Add a Block You Were Sent… sits under it, and there are two ways a block comes in.
The usual one needs nothing from this screen: a block file arrives in Messages or Mail, or by AirDrop, and you tap it. TideStitch opens, takes the block, and tells you it's in. Ask a friend to text you a block and that is the whole procedure.
Add a Block You Were Sent… is the other way, for a file that's already sitting in Files: tap the row and pick it.
Either way, the block lands in your library and stays there: it syncs to your other devices and rides along in your backup, and TideStitch never sends it anywhere on its own. In the block picker it gets a shelf of its own, Sent to you, kept separate from blocks you drew yourself, so the app never tells you that you made something you didn't. A sent block is read-only in the same way a starter design is: use it in as many quilts as you like, and duplicate it first if you want to change the block itself. Opening the same file twice is safe, and changes nothing the second time.
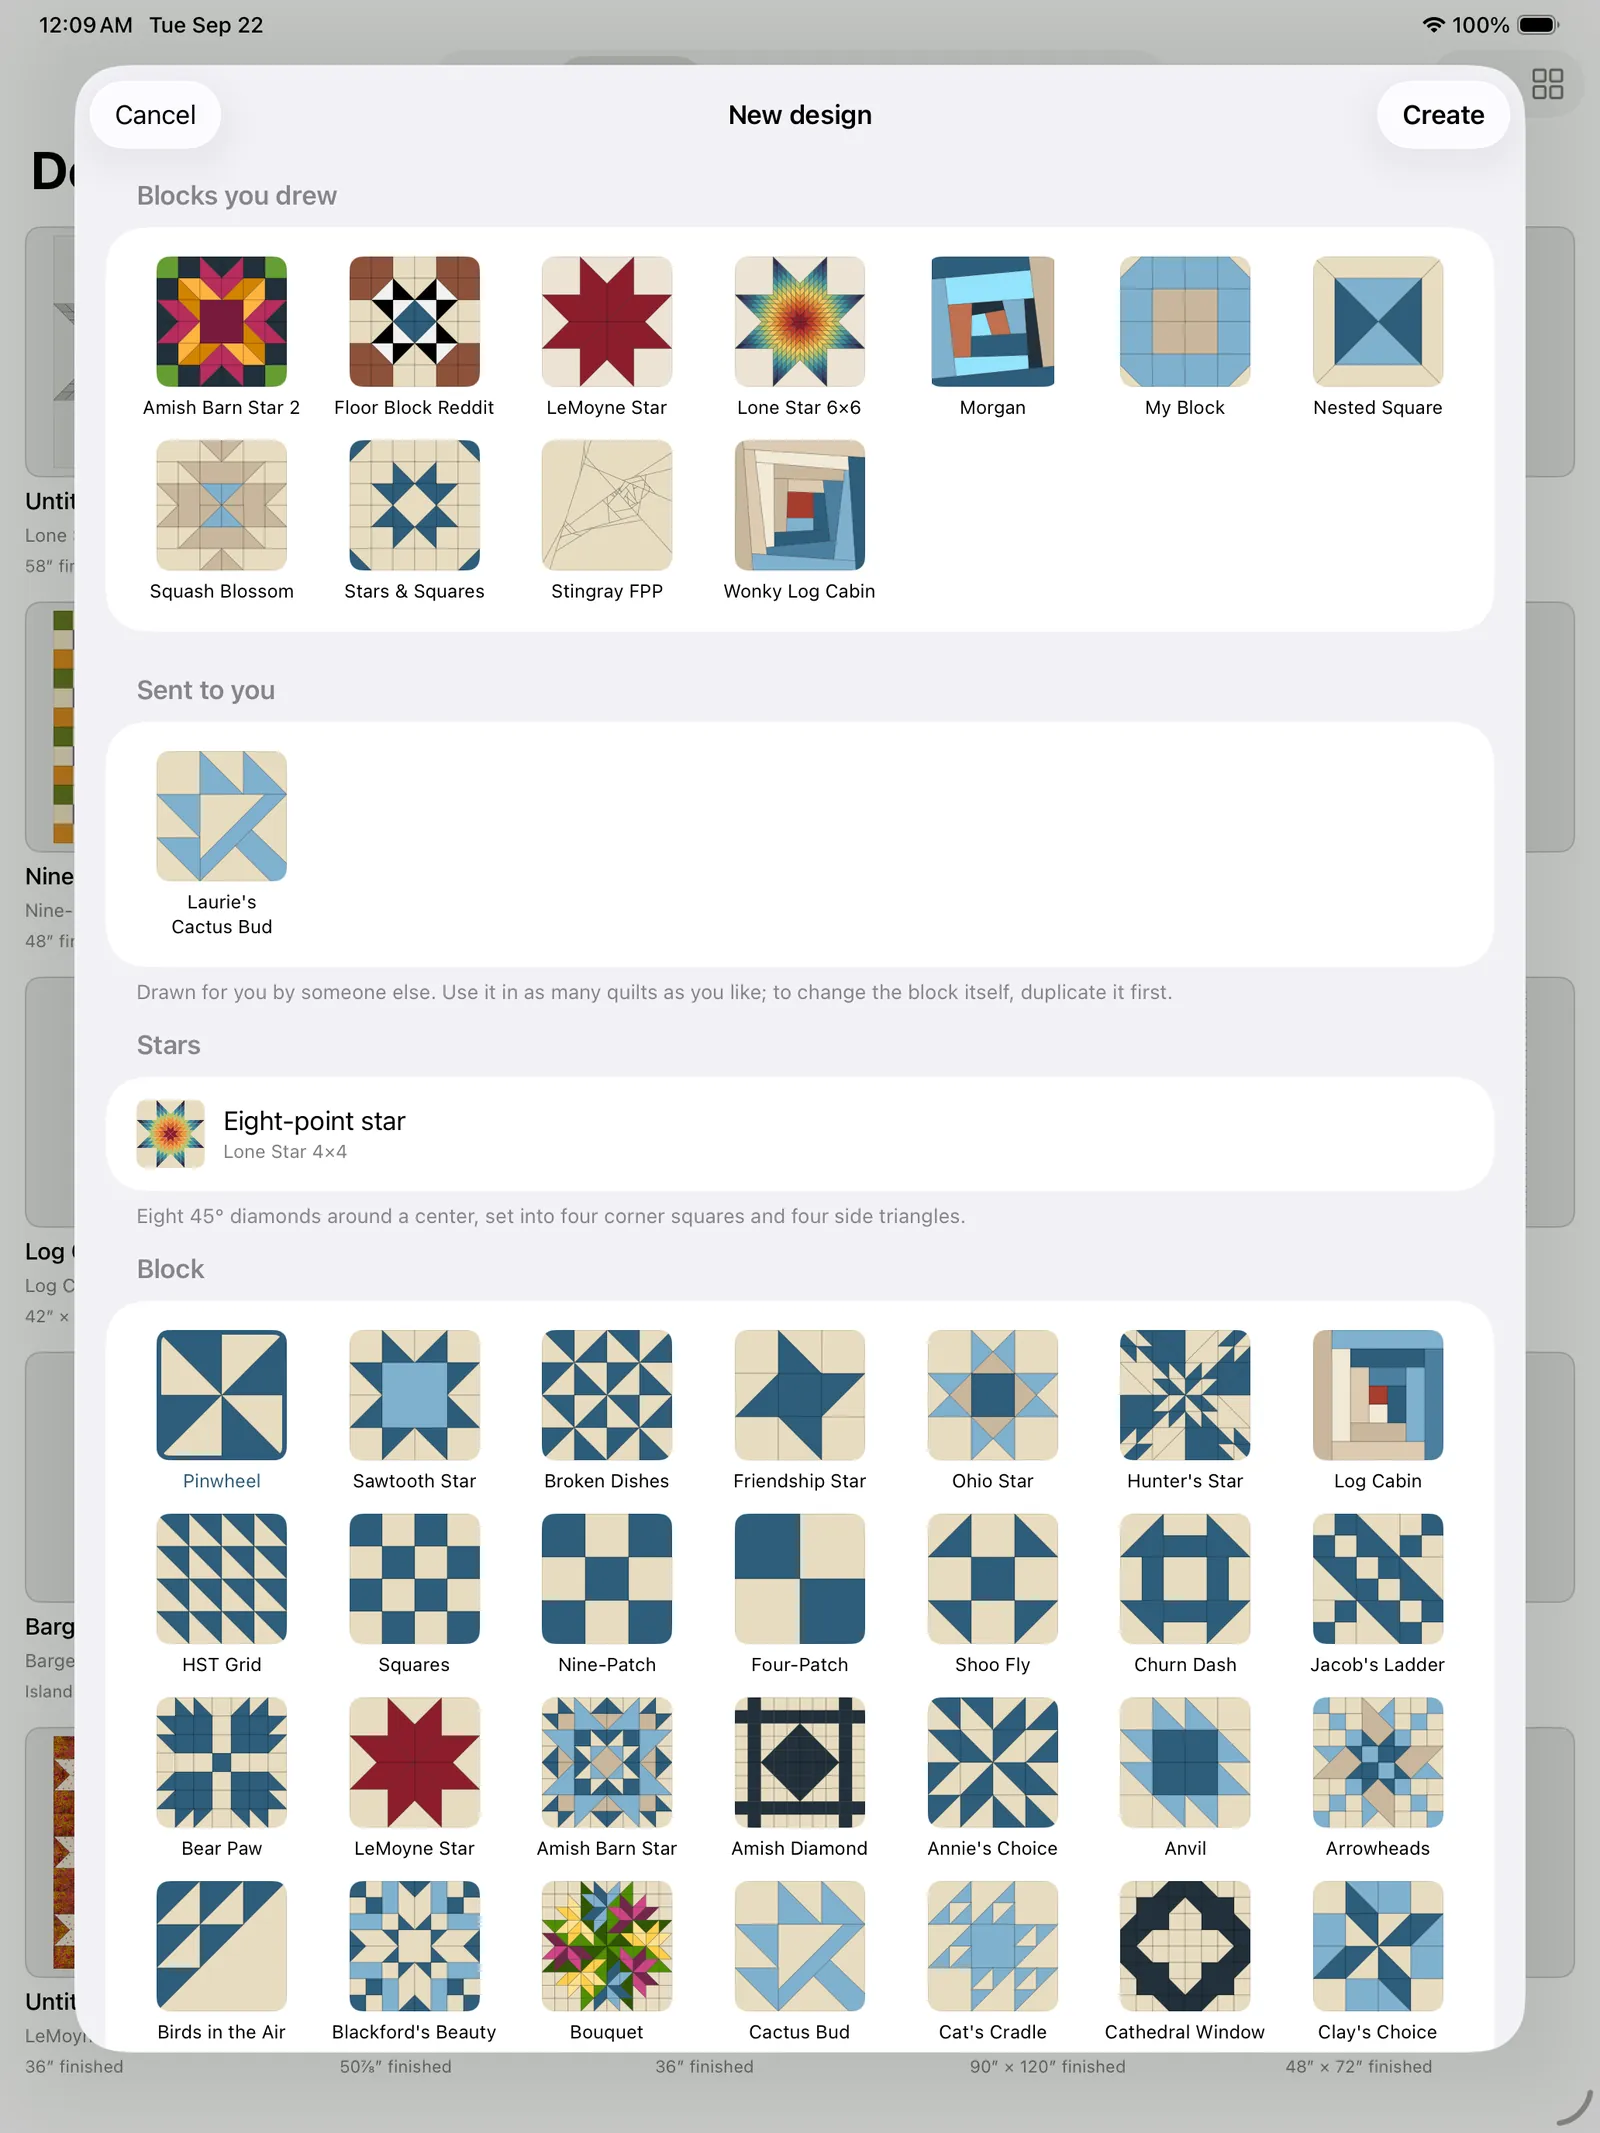
Whether you can pass it on is the sender's call, not the app's. When someone sends you a block they choose one of two things: just for you, or yours to send on. A block that came with permission says OK to pass along and can be sent to anyone; one that didn't, TideStitch won't forward. That is a courtesy the app keeps on the sender's behalf rather than a lock, and it cuts both ways: a teacher can hand one file to a whole class and let it travel, which is the reason the choice exists.
If a design ever opens with a block missing, that's a block in your library that hasn't reached this device yet (or was deleted on another one). The app says so plainly and draws nothing, rather than quietly substituting a block you never chose and printing confident cutting instructions for it.
Backing up your library
The Backup & Restore section lets you save your whole library to a file and bring it back later, useful for keeping a safety copy, moving to a new device, or sharing your designs with another quilter.
- Export Library… gathers everything you've made: every design (with its borders, fabrics, colors, layout, and every colorway you've saved for it), your entire stash of swatches (photos included), all your jelly rolls, and any blocks in your block library (drawn or sent), and packages it into a single
.tidestitchfile. Tap it, then choose where to save or how to send the file (Files, AirDrop, email, and so on). Keep that file somewhere safe; it's a complete snapshot of your library at that moment. - Import Library… reads a
.tidestitchfile back in. It merges: anything new is added to your library, and anything already there is left exactly as it is. Nothing gets overwritten or deleted, so importing is always safe, and importing the same file twice won't create duplicates. To move everything to a new iPad, install TideStitch there, then Export from the old device and Import the file on the new one.
Because the file format is shared across TideStitch, a backup exported on one device opens on any other.
iCloud sync
An iCloud sync row that says what this device is actually doing, because "my designs aren't on my iPad" is otherwise a silent problem. It reads one of three ways:
- On: your designs, fabrics, and jelly rolls sync across every device signed into this iCloud account. A new device takes a few minutes to catch up, and fabric photos arrive after the designs that use them, so a swatch can look blank at first.
- Not signed in: you're not signed into iCloud on this device, so everything is saved here only. Sign in from the Settings app and TideStitch starts syncing.
- Off (this device only): TideStitch couldn't open its iCloud library on this launch. Rare, and restarting the app usually clears it. Until it does, your work is saved on this device alone, so use Export Library above to keep a copy somewhere safe.
The row deliberately doesn't claim "up to date", only whether sync is switched on and signed in. Saying "synced" without having checked would be worse than saying nothing.
Purchases
A Purchases section sits between iCloud sync and the privacy policy. It's where the money lives, all of it, so nothing about buying is hidden behind a wall you have to hit first:
- Unlock the Full App opens the unlock screen (Basic, and on iPad or Mac Complete alongside it) with neutral wording, "Designing is free. Unlock once for unlimited designs, full patterns, and PDF export," rather than the "you've used your 4 free designs" line you'd get from a wall. It disappears once you own the app by any route.
- Unlock Studio, on iPad and Mac, opens the Studio offer the same way and disappears once Studio is yours.
- Support TideStitch is a tip jar, and it's optional in the fullest sense: three amounts, they buy nothing and unlock nothing, and nothing changes either way. It exists because the quilters who got the app free for life asked how to chip in anyway. If you're one of them the sheet says so.
- Restore Purchases. Already paid for TideStitch on another device, or reinstalling? Tap it and anything you've bought (the app, Studio, or Complete) is pulled back down onto this device. Purchases are tied to your Apple ID, so they survive a reinstall and work on every device you sign in with; a restore just asks the App Store to say so again. A successful restore says so. If there's nothing on this Apple ID to restore, or the App Store couldn't be reached, it says that instead rather than pretending. It lives here, and not only on the unlock screens, because the people who most need it never see an unlock screen: someone who bought the app on their iPad and has just installed it on a new iPhone isn't going to hit a wall, they're just going to find the pattern faded out.
- Redeem an App Store Code. Got a code from us? Redeem it here and the unlock lands on your Apple ID like any purchase, for every device. (On a Mac this row tells you to redeem it in the App Store app instead, under your name, Redeem Gift Card or Code.)
The section is deliberately not part of Backup & Restore, which is about your library (a .tidestitch file of designs, fabrics and jelly rolls). This is about your receipts.
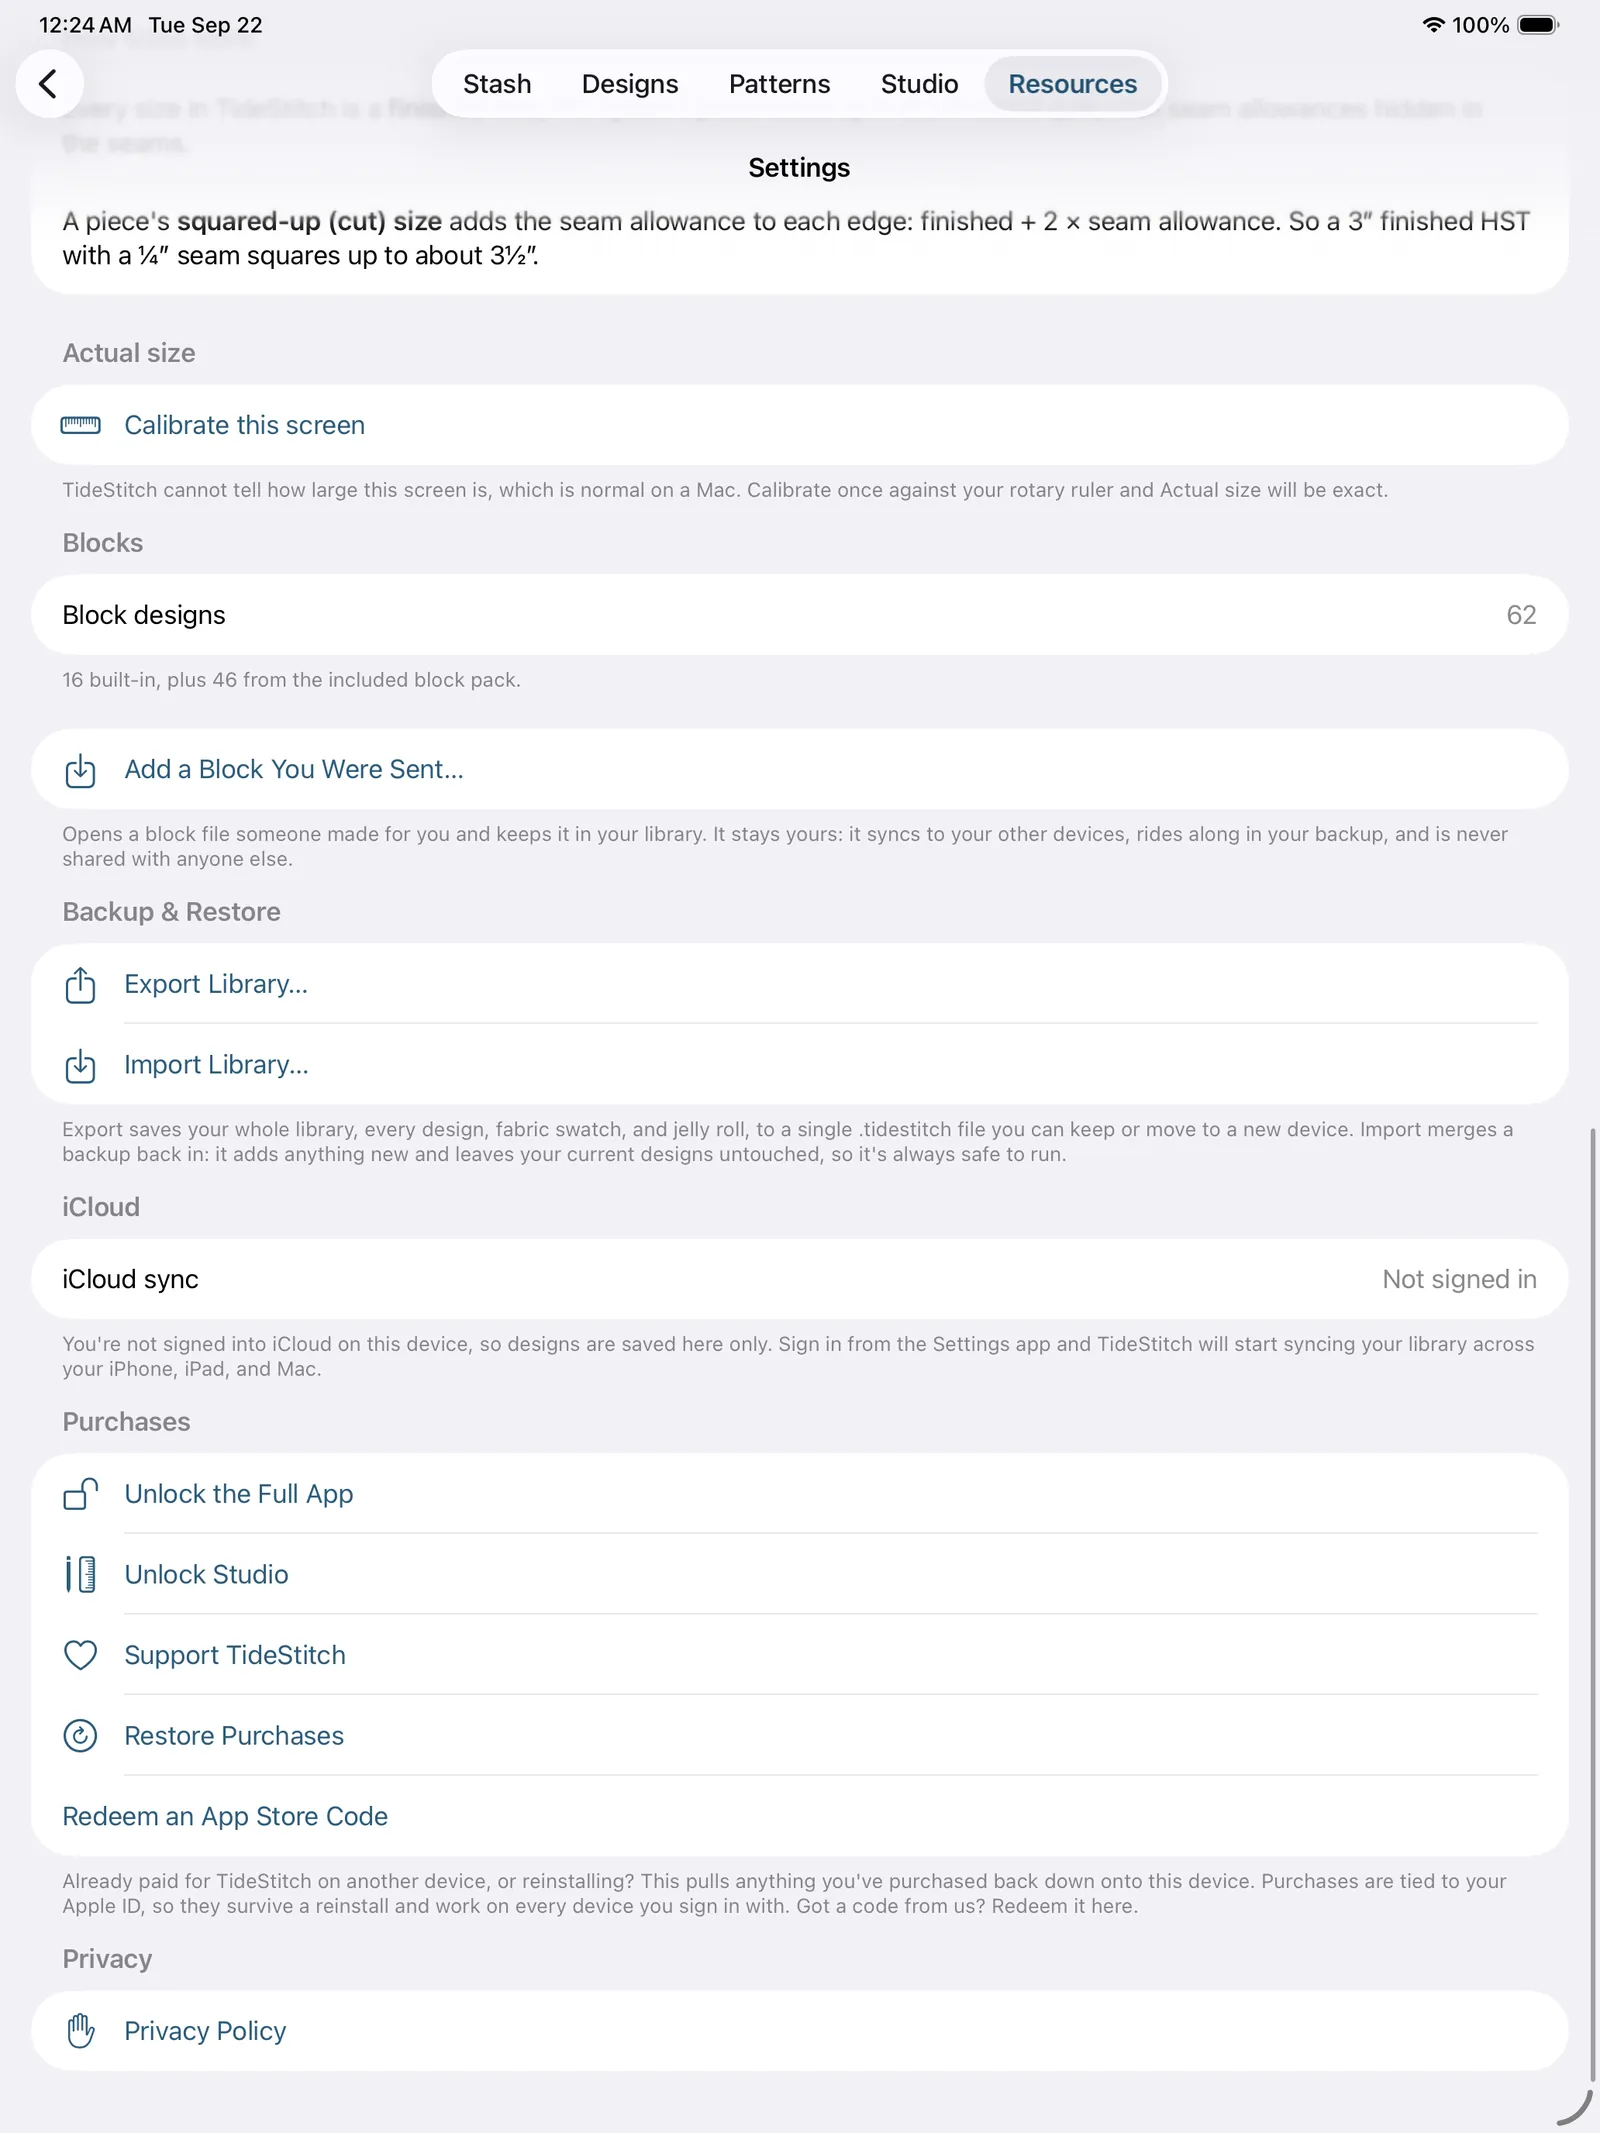
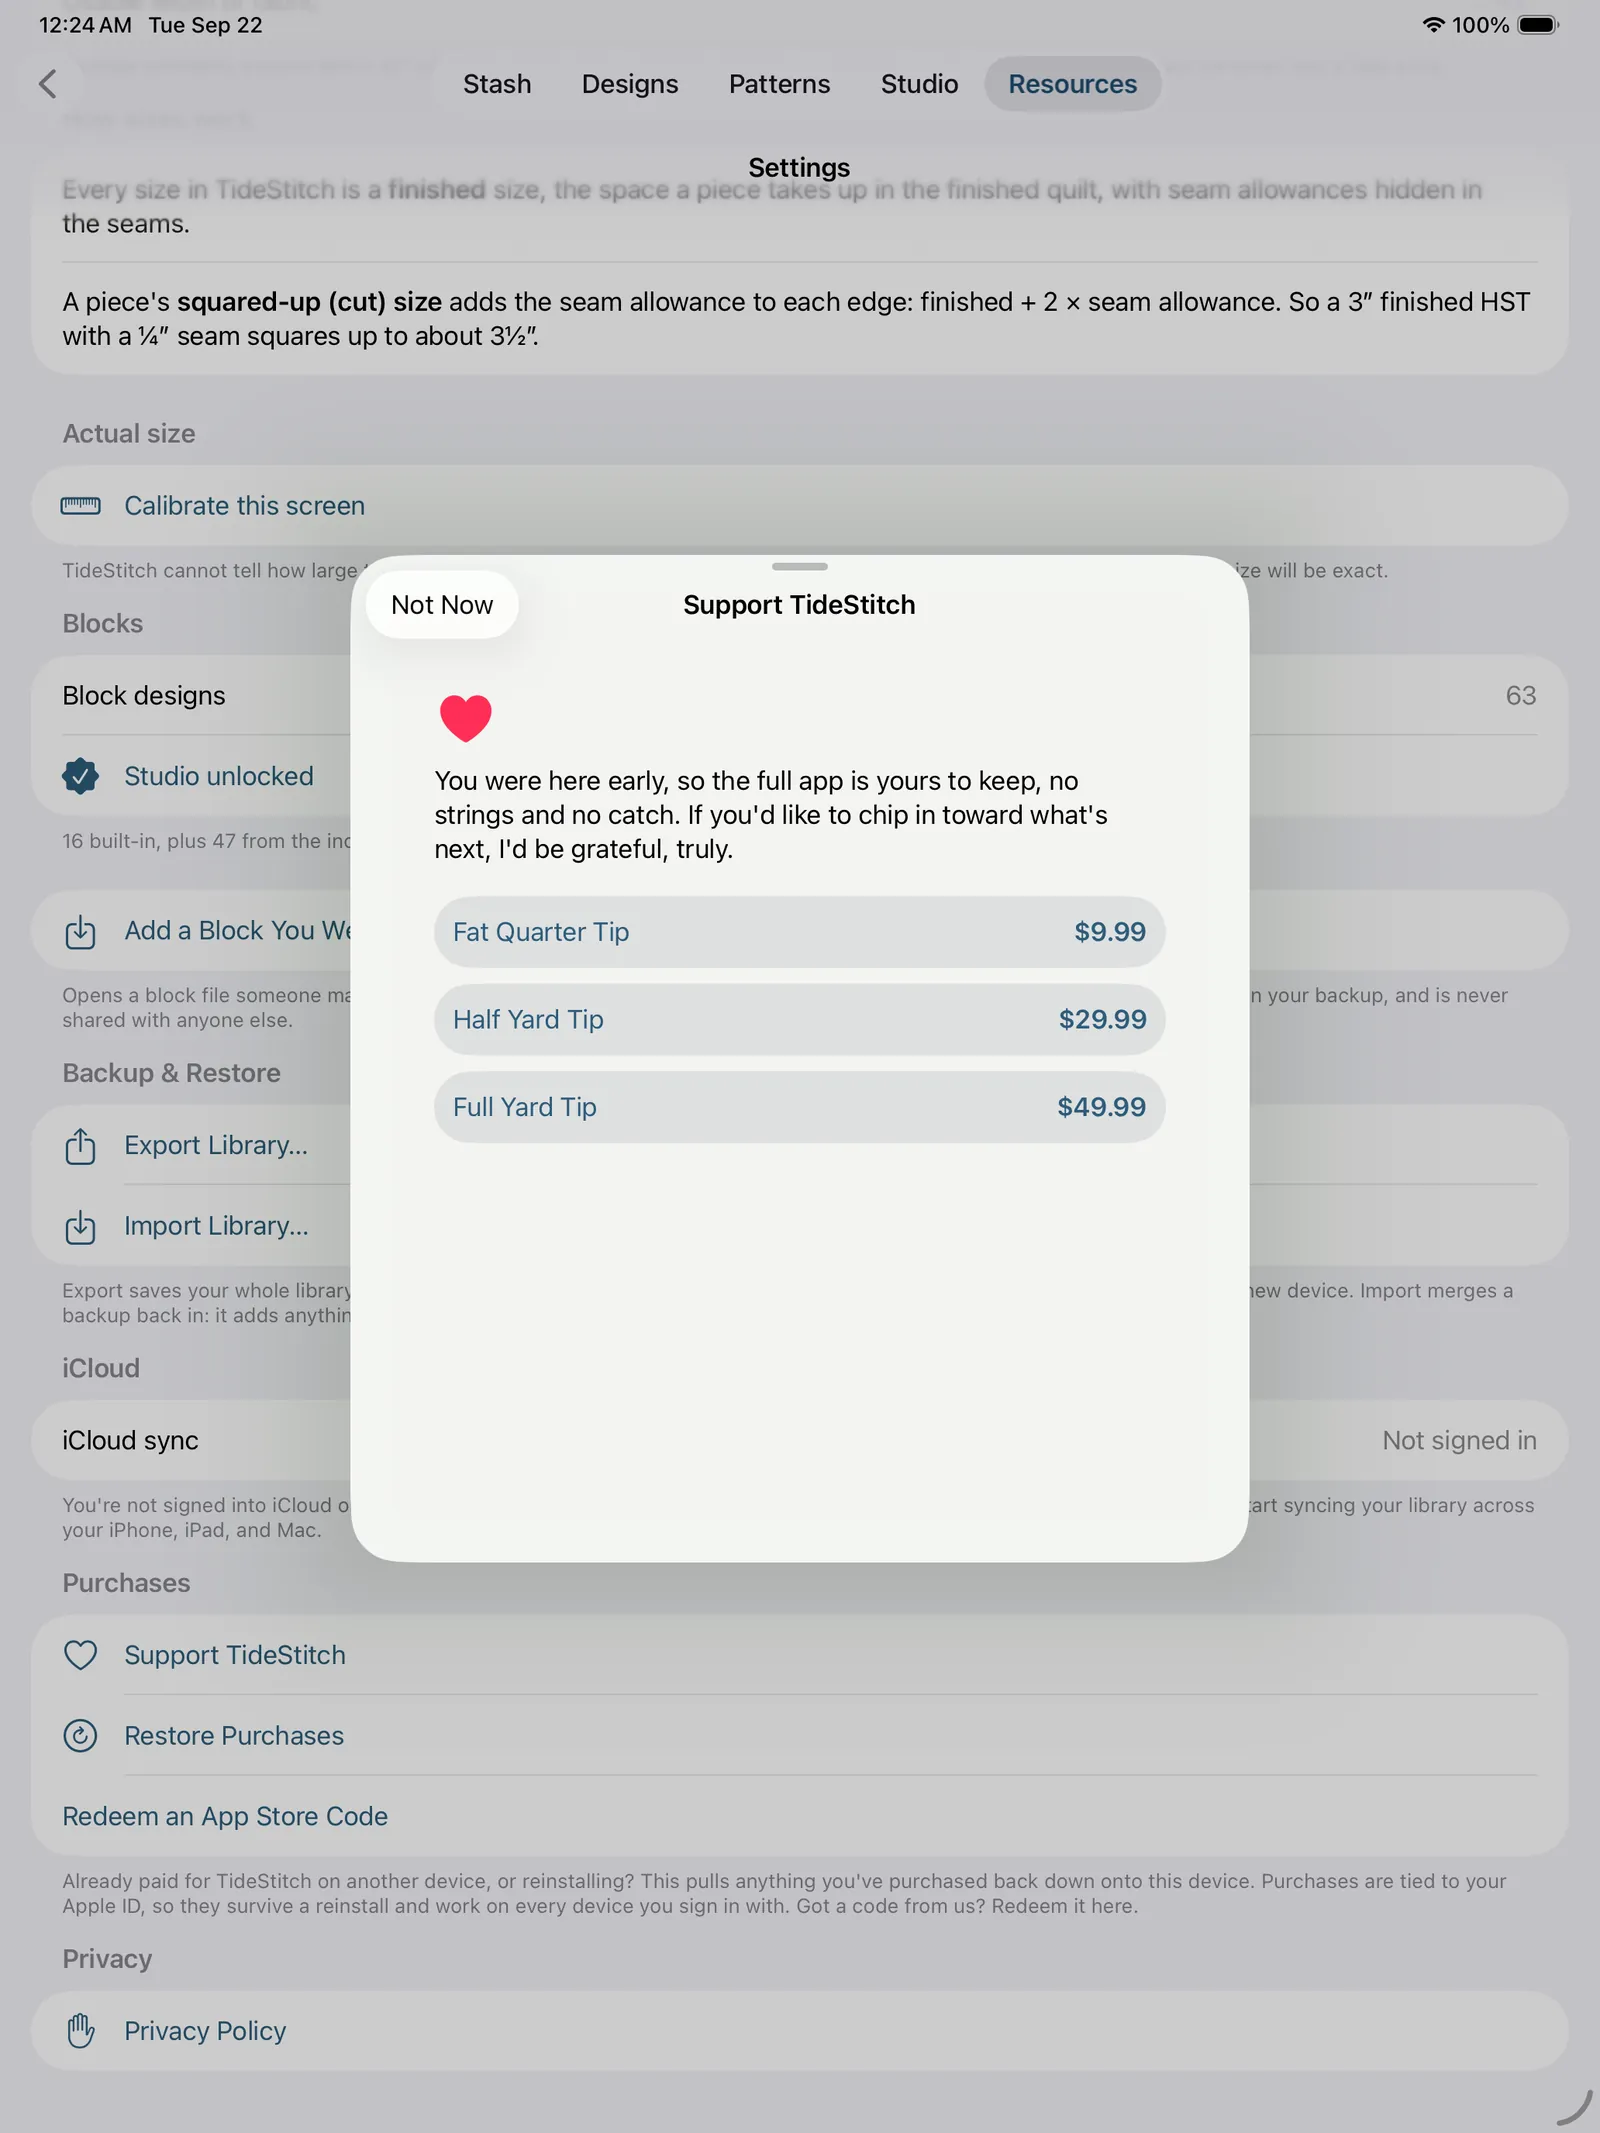
Privacy policy
The Privacy Policy row at the bottom of Settings opens TideStitch's privacy policy on the web. The user guide, feedback, support, and rating rows that used to sit beside it live on the Resources tab now.
Free tools
TideStitch includes free cutting calculators you can reach any time, even at the cutting table, without touching a design. They're under Resources → Tools → Free calculators, the same eight as tidestitchquilts.com/tools, and they're free for everyone, no unlock needed. All eight work the same numbers the app's own patterns print, because they're worked out by the same code, so a value you look up here matches what a real design will tell you to cut.
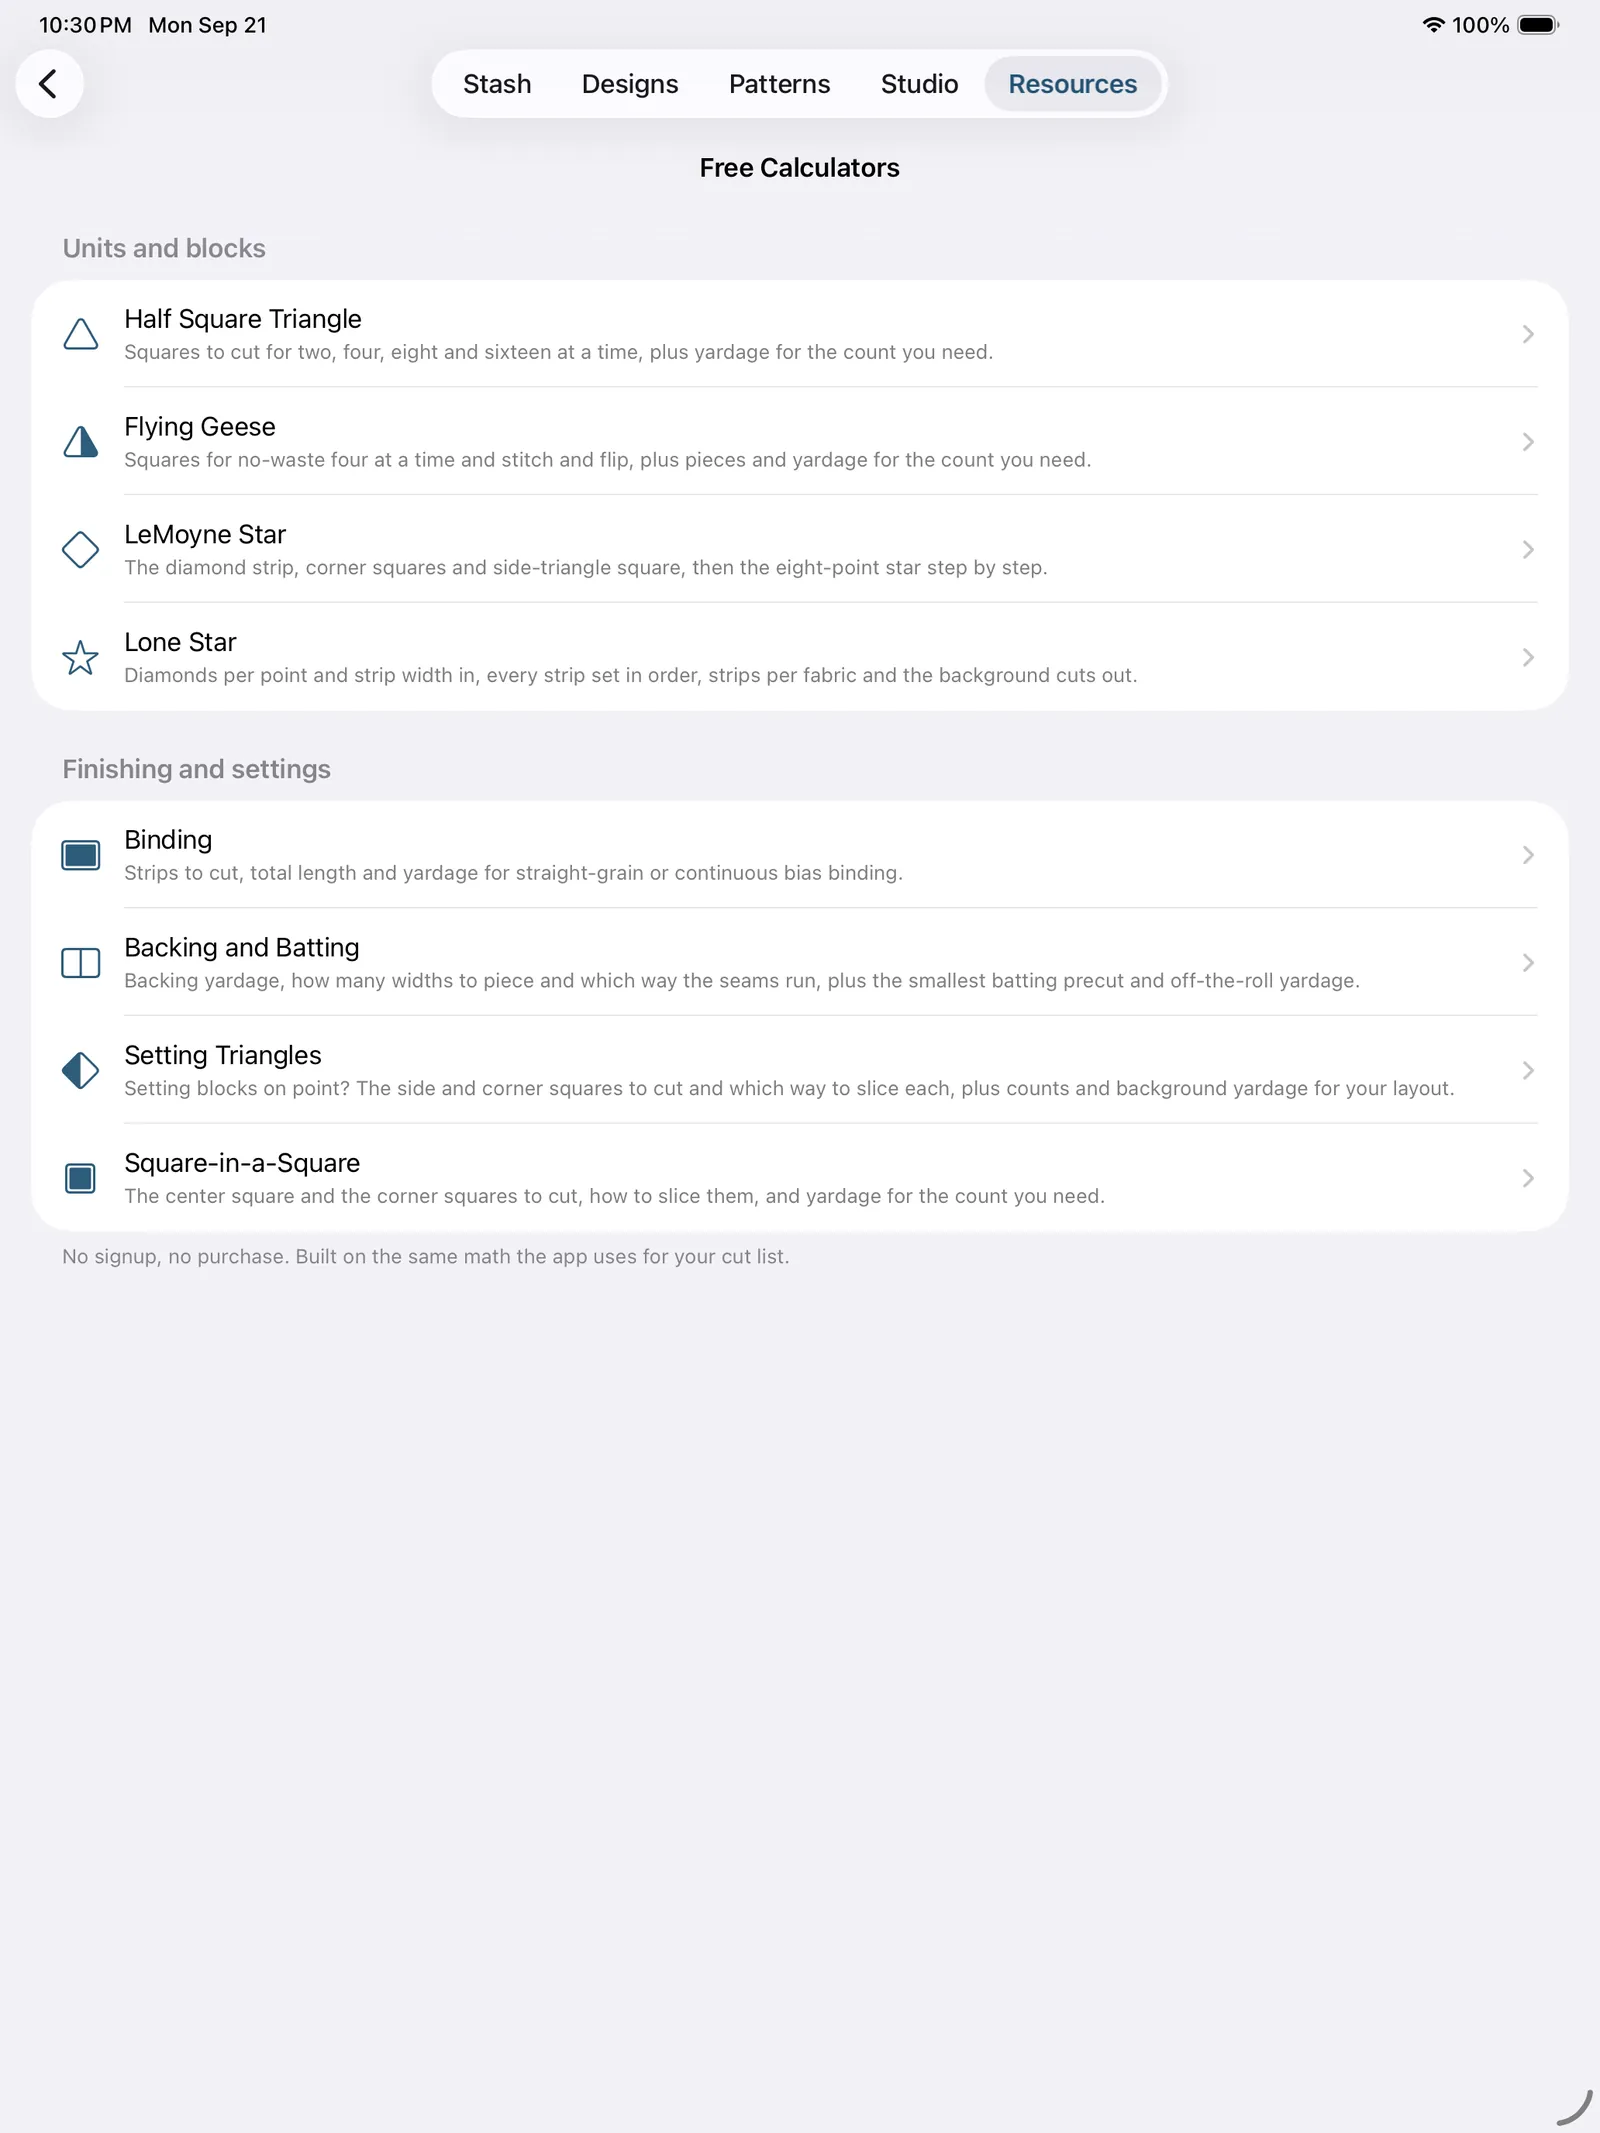
Half square triangle calculator
Tell it the size and how many half-square triangles you need, and it works out the cut squares and the fabric for every method, with a step-by-step diagram for each.
- Size: type a finished size, or switch to Unfinished if your pattern gives you the trim-to size instead (the tab converts between them). Quick chips cover the common sizes (2″ through 6″).
- How many: optional. Leave it blank for cut sizes only, or enter a count to also get squares-to-cut and yardage per fabric.
- Seam allowance: starts from your Settings seam and can be changed here just for the calculator.
- Cut a little big and trim down: on by default (the recommended square-up approach); turn it off for exact cuts with nothing to trim.
The summary at the top shows what you're making, "trim to X, finishes at Y", with a diagram of the starting square becoming the trimmed unit. Below it, a card for each method in beginner order: 2-at-a-time ("start here"), 4, 8, 16, and cut triangles (the old way, marked not recommended because every edge is bias). Each card gives the cut square, how many each set makes, the squares to cut and HSTs produced for your count, the yardage per fabric (it says which usable width it assumed), whether the unit has bias edges, and the numbered how-to drawings.
The cut sizes are the same ones the app's patterns use, so a value you look up here matches what a real pattern will tell you to cut. The Share button (top right) copies a plain-text summary you can paste into a note or a message.
Flying geese calculator
The same idea for flying geese. A goose is always twice as wide as it is tall, so you type only the width and the height fills itself in.
- Width: type a finished width, or switch to Unfinished if your pattern gives the trim-to size (the tab converts between them). Quick chips cover 2″ × 1″ through 8″ × 4″.
- How many: optional, as above. With a count you also get the pieces to cut and the yardage for each of the two fabrics.
- Seam allowance and Cut a little big and trim down work exactly as they do on the HST screen. Leave the trim toggle on for geese: the point has to land exactly one seam allowance below the raw edge, and trimming is how it gets there.
The summary shows "trim to X × Y, finishes at W × H" with a labeled drawing of a goose inside its trim-to outline, so you can see where the seam allowance sits. Then a card for each of the three methods:
- No-waste, 4 at a time ("start here"): one big goose square and four small sky squares, sewn before they're cut, four geese and nothing thrown away.
- Stitch and flip: a goose rectangle and two sky corner squares. It's what most patterns are written with, and it's the one to use with a directional print, because the goose stays a whole rectangle instead of being cut into four bodies pointing four ways. It wastes four small triangles per goose, which you can keep as bonus half-square triangles.
- Cut triangles (not recommended): the same two squares as no-waste, cut up first and sewn bias to bias. More seams, more stretch, same fabric.
Each card gives both cut sizes, what one set makes, the pieces and yardage for your count, whether the outside edges land on the bias, and the numbered how-to drawings. Share copies a plain-text summary.
LeMoyne Star calculator
The cut sizes for the classic eight-point star at any finished size, without making a design. Type the finished block size (12″, 15″ and 18″ land closest to the ruler, and a note under the field tells you when a size is awkward), check the seam allowance (it starts from your Settings seam), and choose whether to cut the triangles a little big and trim. That toggle only reaches the side triangles: the diamonds and corner squares are used as cut either way.
What you're making says what to cut: the strip width for the diamonds (subcut every … on the 45° line, 8 diamonds), the four corner squares, and the one square cut on both diagonals that makes the four side triangles. When a size is awkward it says so honestly: the ideal strip isn't on any ruler, so it rounds up to the next mark and tells you what the pieced block will measure before you square it up.
Below that, Two ways to sew it. Traditional sets the background in with Y-seams: sixteen pieces, eight set-in seams, no extra seams in the background. No Y-seams, marked Easiest, cuts the corner squares and side triangles in half so every seam is straight, at the cost of eight extra seams in the background, invisible on a print and visible on a solid. Each has its numbered steps with a drawing per step: marking the dots, sewing the pairs from the center out and stopping at the dot, setting in the side triangles, joining the halves, closing the center, and setting in the corners last. Share copies the lot as text.
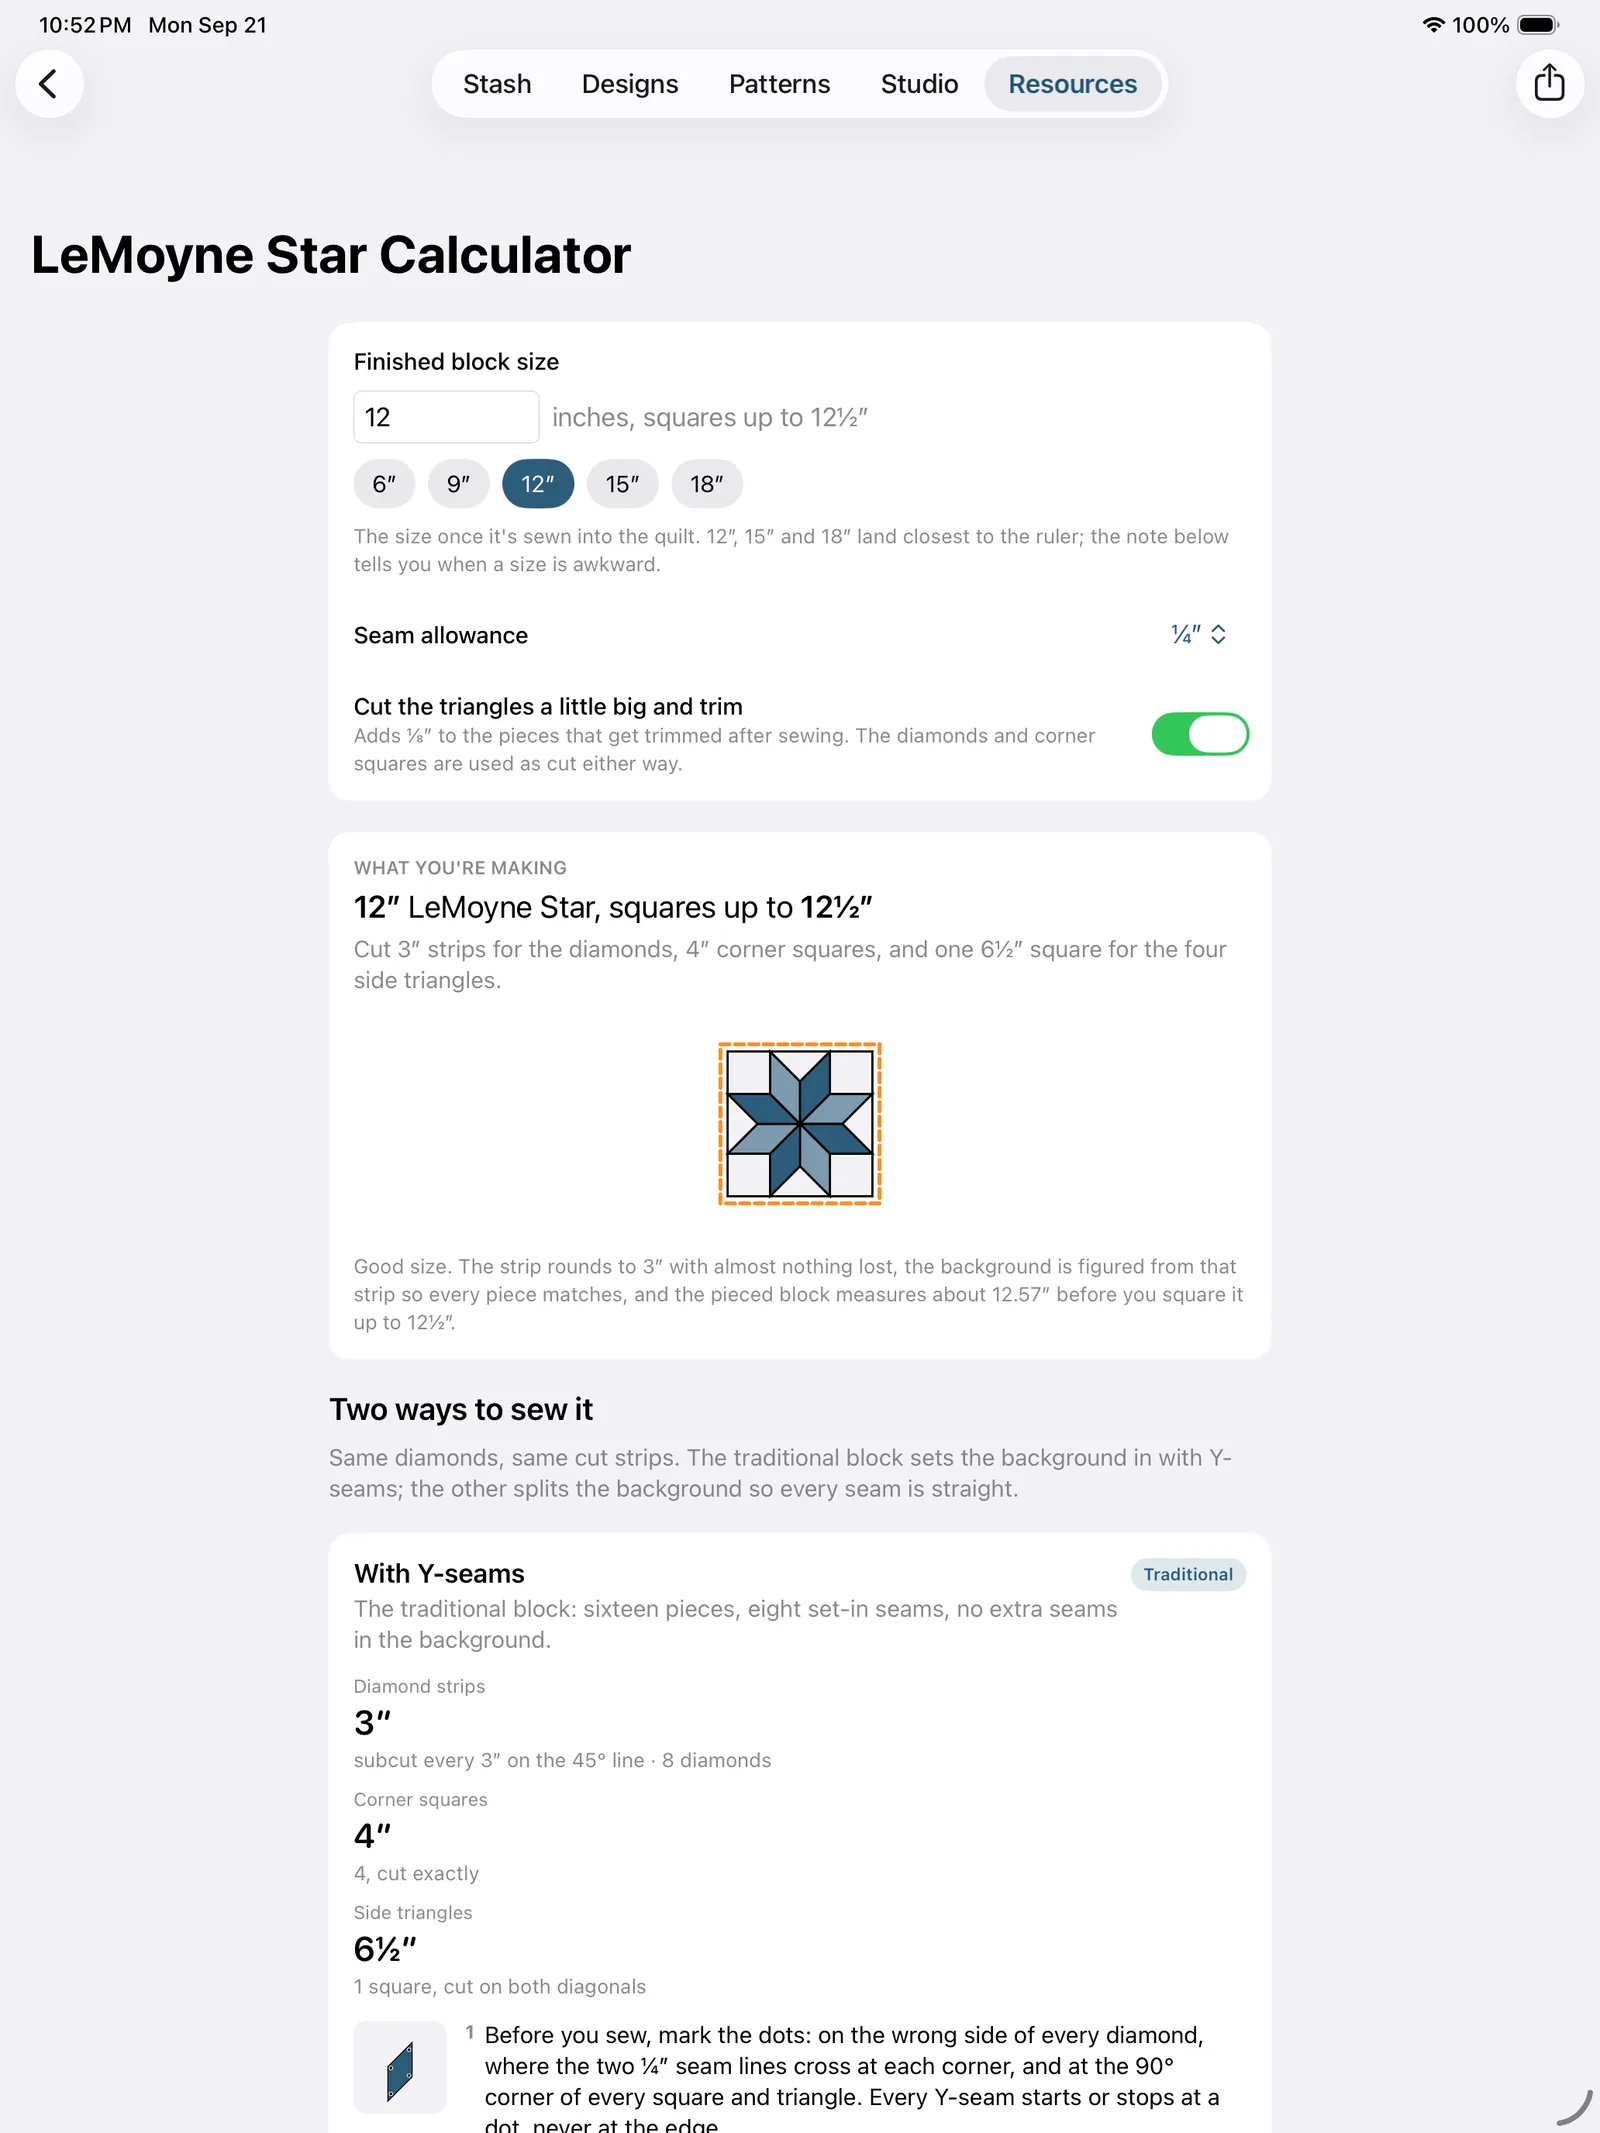
Lone Star calculator
A Lone Star is sized the way it's cut: the strip decides everything. Its width decides the small diamond, the diamond decides the point, and the point decides the block, which is why 2½″ strips (a jelly roll) is where most people start. Pick diamonds per point (3 × 3 through 6 × 6; 4 × 4 is the classic, 6 × 6 a showpiece with eleven rings), then size it by strip and the calculator reads back the finished block, or by block and it tells you the strip that block would take, warning you when that strip isn't on a ruler and offering the nearest cuttable one. The trim toggle here reaches the side triangles alone; nothing in the star itself is trimmed.
What you're making gives the finished size and what it squares up to, the ring count, and the strip sets and strips in all. The Cut list bills every piece: each Set (so many strips of the strip width by width of fabric, sewn top to bottom in the order shown, staggered, then subcut every strip width on the 45° line, with how many segments a set yields), the strips per fabric, the four corner squares cut to match the sewn point's raw edge, and the one square cut on both diagonals for the side triangles. Then the guide walks the whole build with a drawing per step: Read the rows (which strips make which set, and why every set is cut eight times), sewing the sets staggered so the 45° trim wastes less, starching and subcutting with the angle re-checked every few cuts, joining the rows with the seams offset by ¼″ so the small diamonds meet at their points, and Set the star together through the pairs, the side triangles, the halves and the center. It gives you the measurement to check the first finished point against before you make seven more, and tells you to cut the background to the point you actually sewed if yours came out different.
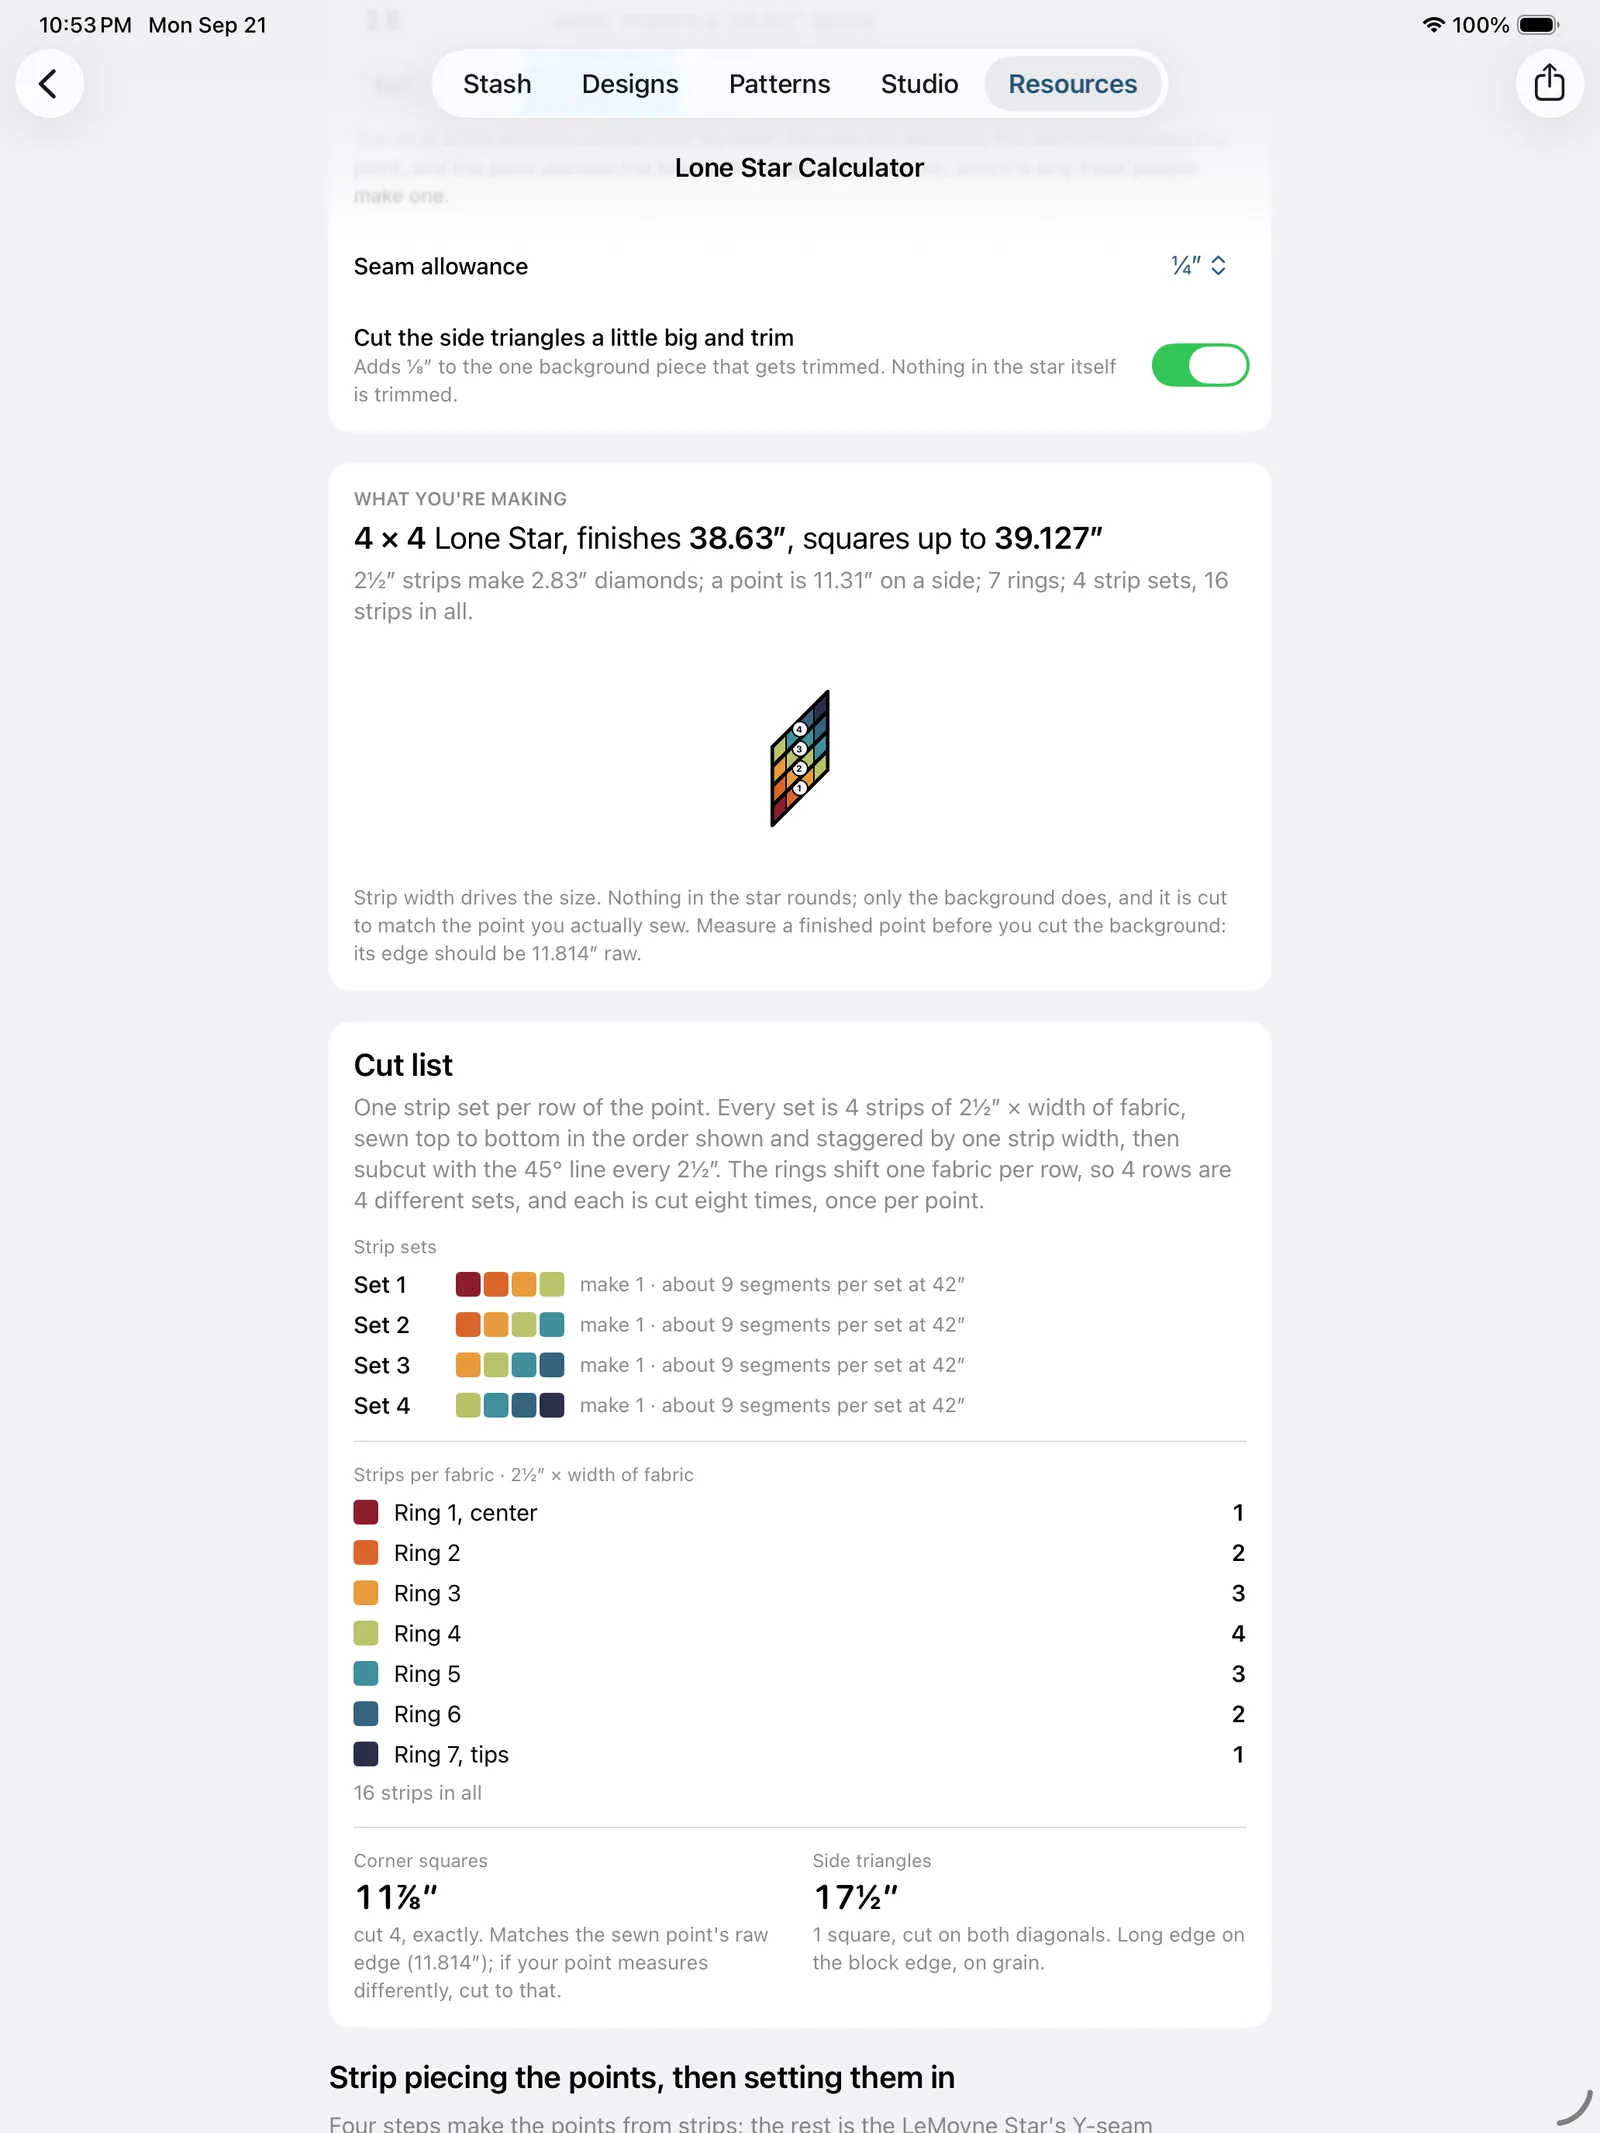
Binding calculator
Type the finished quilt's width and height (measure the top after it's quilted; quilting shrinks it a little) and pick a strip width: 2½″ is the everyday double-fold binding and the default, 2¼″ finishes snugger, 2″ is for a thin, tight binding on thin batting. Both Straight grain, across WOF and Continuous bias (what curved, scalloped or hard-worn edges want, at a little more fabric) are worked out side by side. The summary gives the distance round the quilt, the strips to cut and what they add up to (enough for the edges plus the corners and the closing join), the yardage, and for bias the one square to cut the continuous strip from, or a bolt-height rectangle of the same area when the square would be wider than the fabric. Four drawn steps cover making and attaching it.
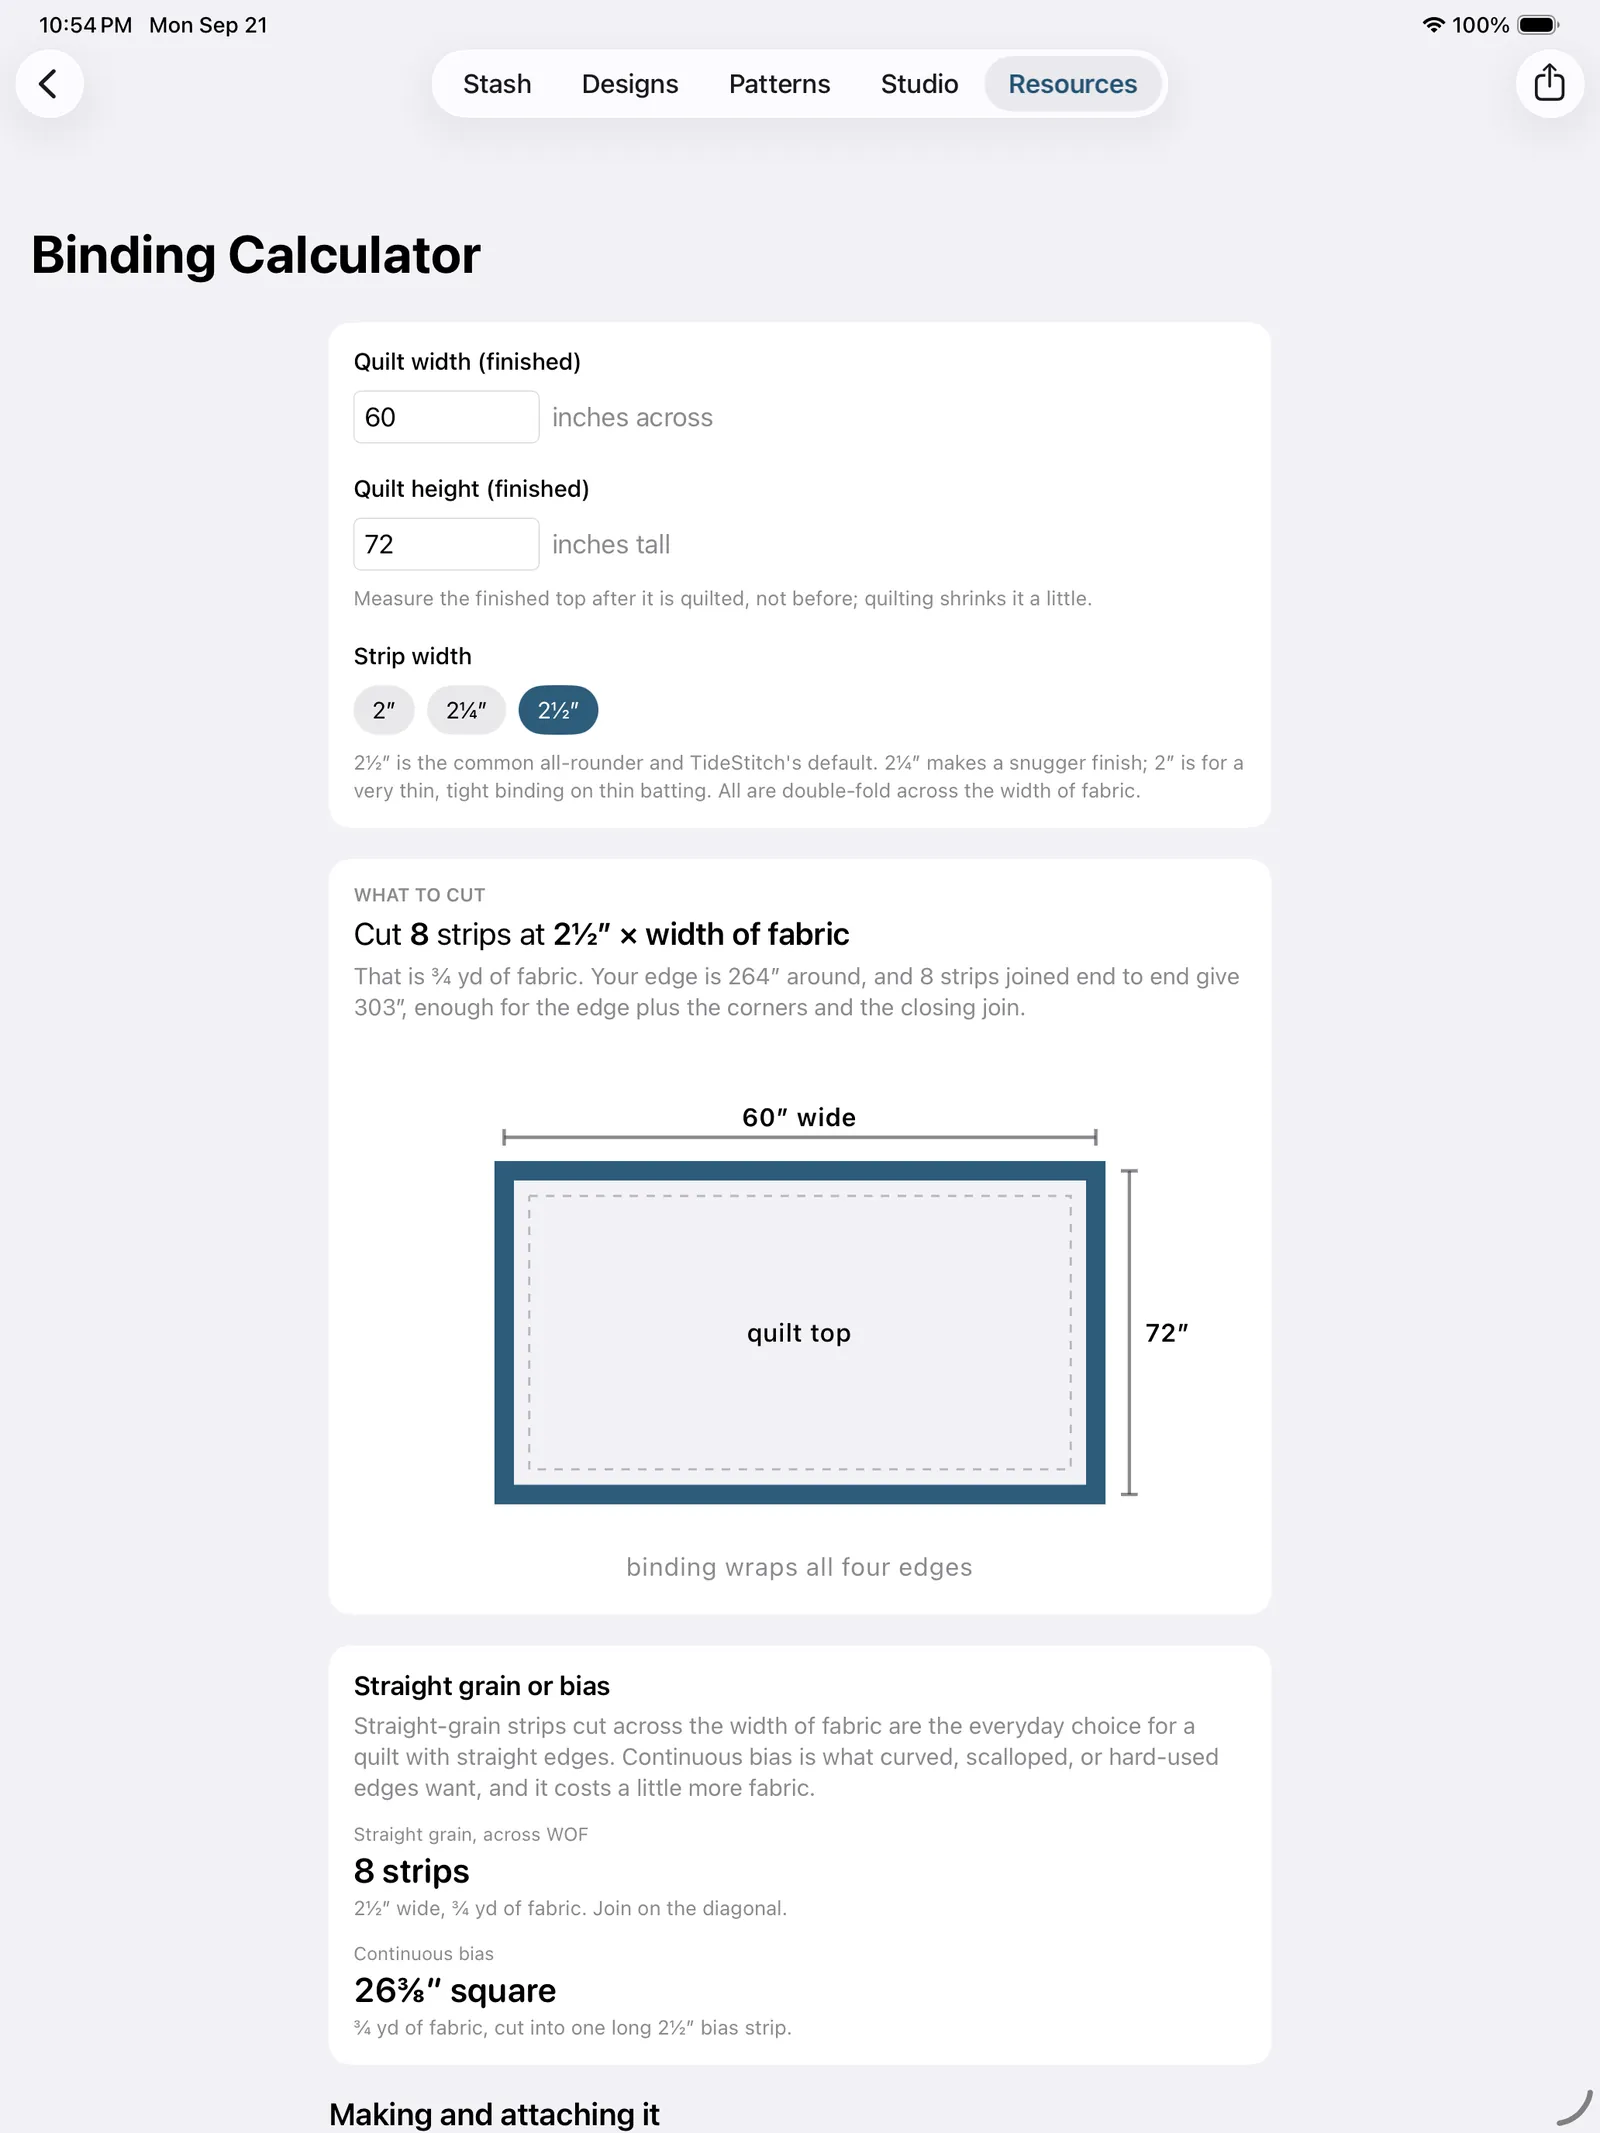
Backing and batting calculator
The finished quilt size in, and the quick chips (Baby, Throw, Twin, Queen, King) get you there faster. Out come four answers: the backing pieced from standard fabric (how many widths, how long to cut each, and which way the seams run, the same butted-lengths arithmetic the pattern's Finish tab uses), the backing off an extra-wide bolt as one width with no piecing, the smallest batting precut that covers the quilt with overhang, and batting off the roll (lengths cut off a roll width, butted and whip-stitched). A drawing shows the pieced layout.
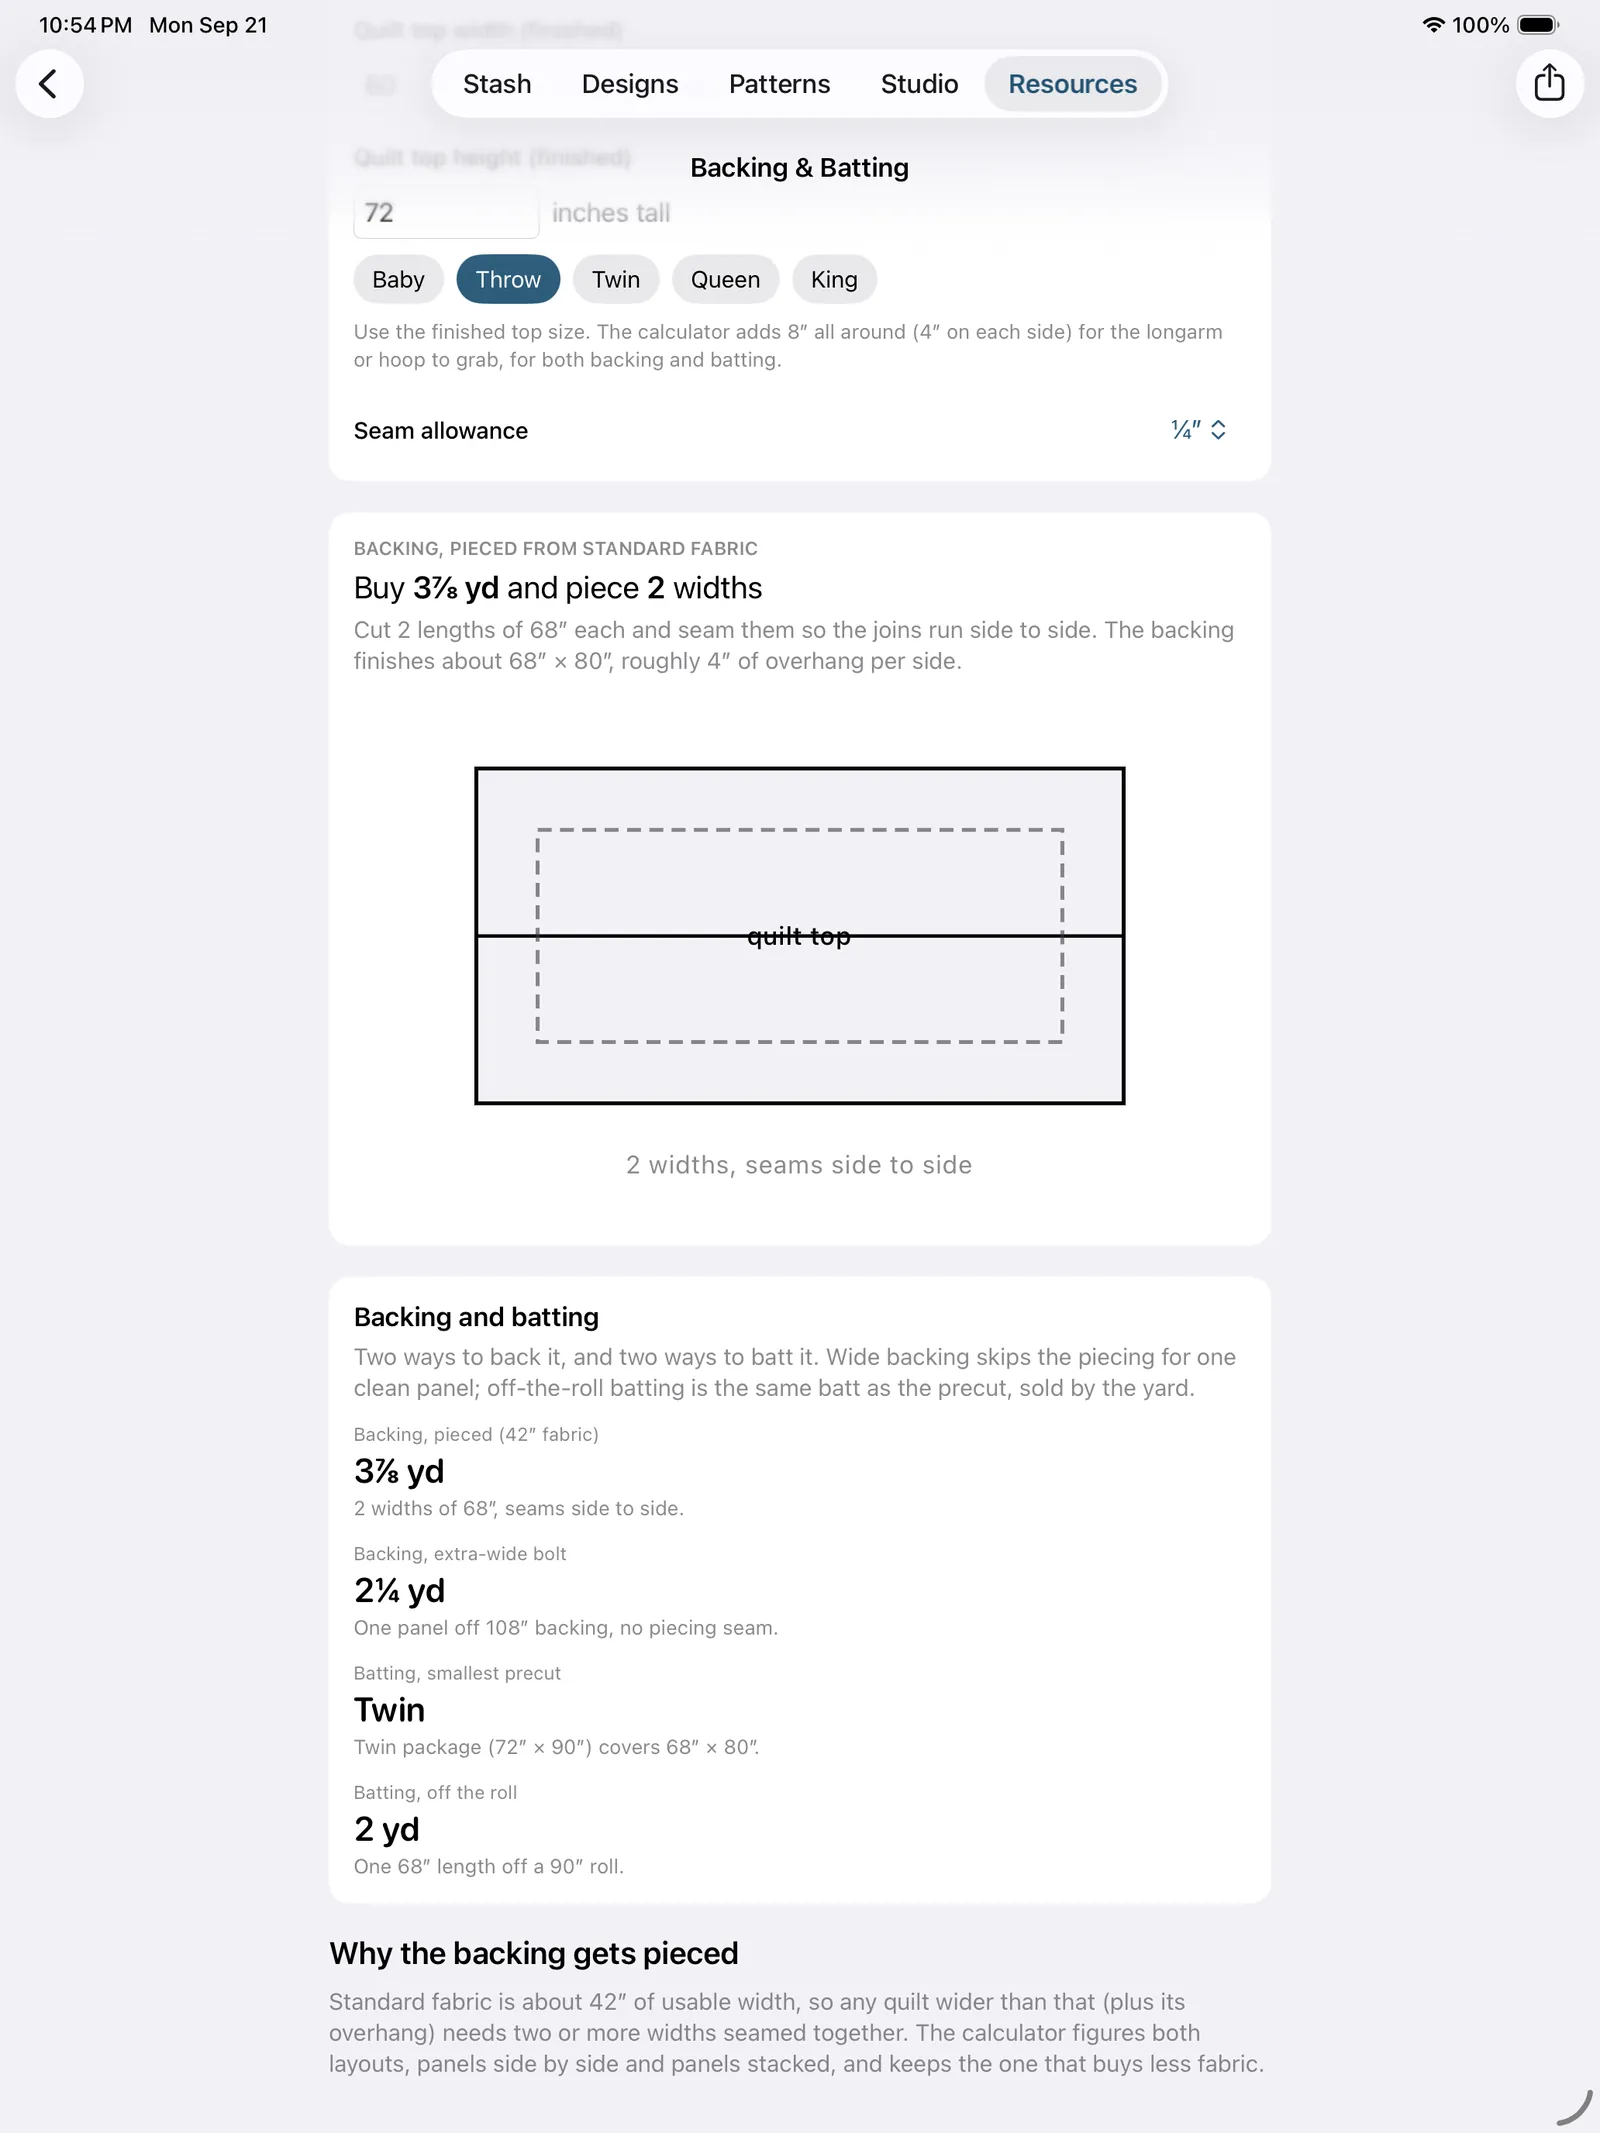
Setting triangles calculator
Setting blocks on point? Give it the finished block size and it returns the two background squares: the side square, sized by the block's diagonal and cut on both diagonals for four side triangles, and the corner square, sized by the block's half-diagonal and cut on one diagonal, two squares for the four corners. Cutting them that way is what keeps the quilt's outer edge on the straight grain, and the three drawn steps say why. With Cut a little big and trim down on they come out a touch over the chart size so you can square the top up; the exact chart numbers are quoted beside them. Fill in the optional on-point layout (whole blocks across and down) and it adds the counts, the finished top size, and the background yardage.
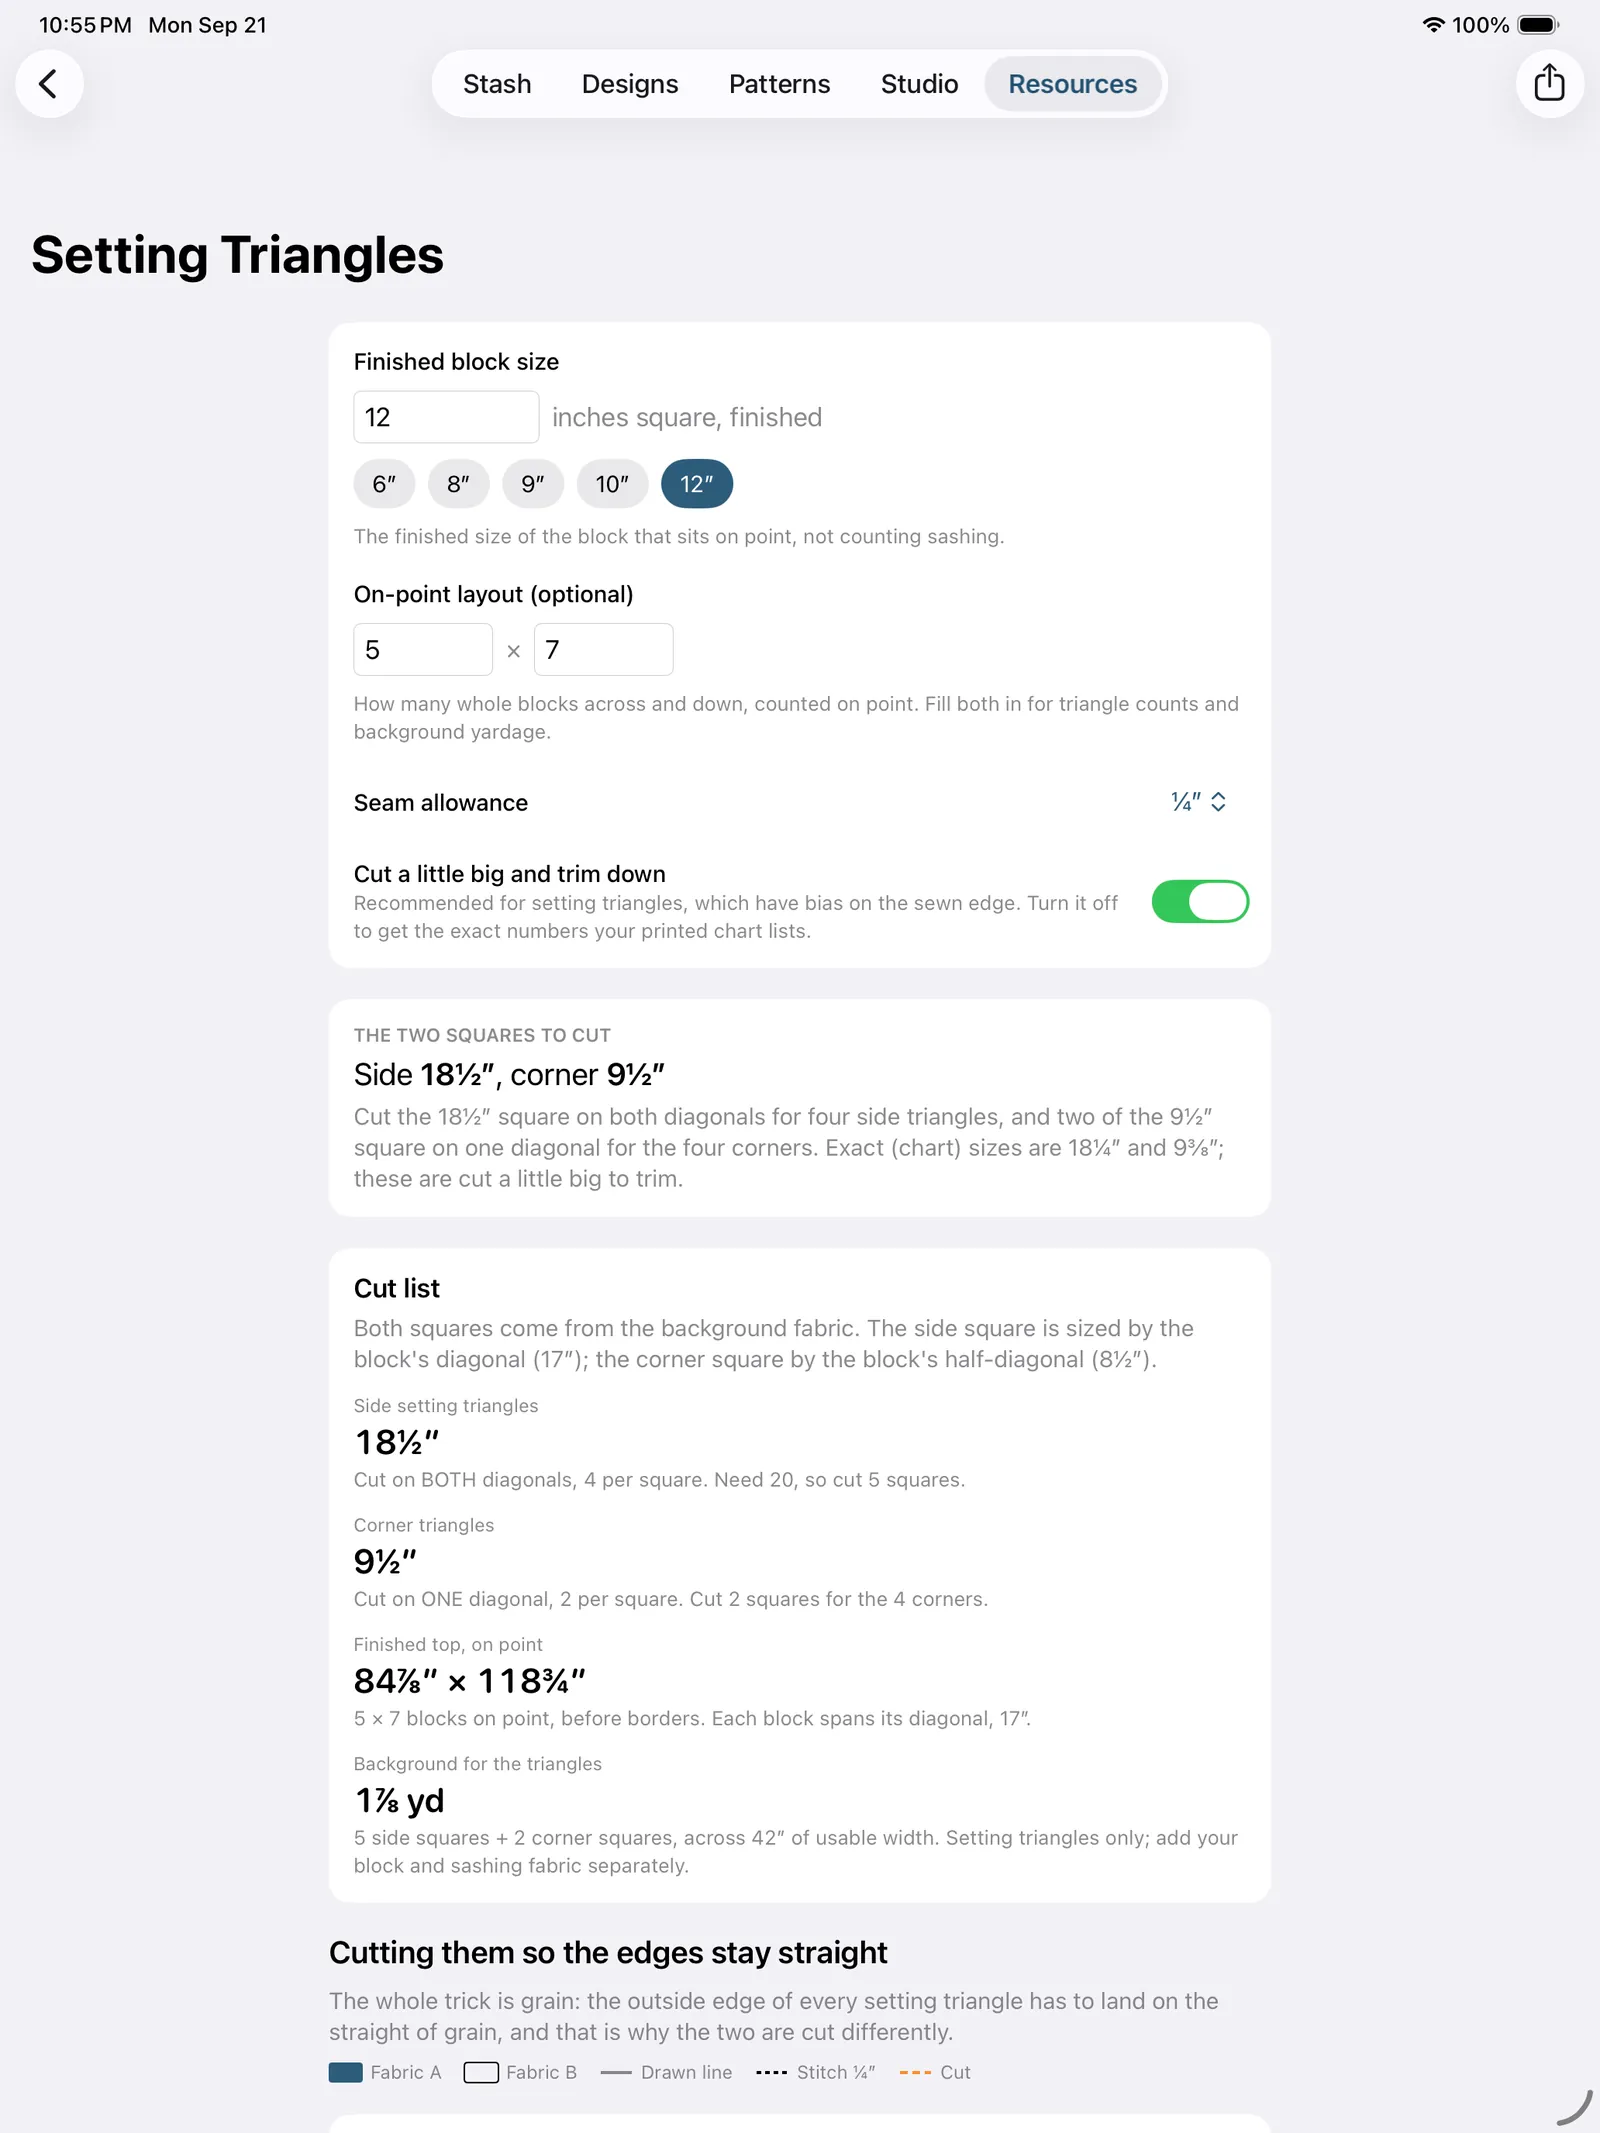
Square-in-a-square calculator
A finished unit size returns the center square (used whole, on point) and the corner squares (cut once on the diagonal, two per unit, two squares' worth of corners each), with the corners cut a little big by default so the unit trims dead square; the exact corner size is beside it. Add how many units for the squares to cut of each fabric and the yardage for both. Four drawn steps: center square, then the four triangles in opposite pairs.
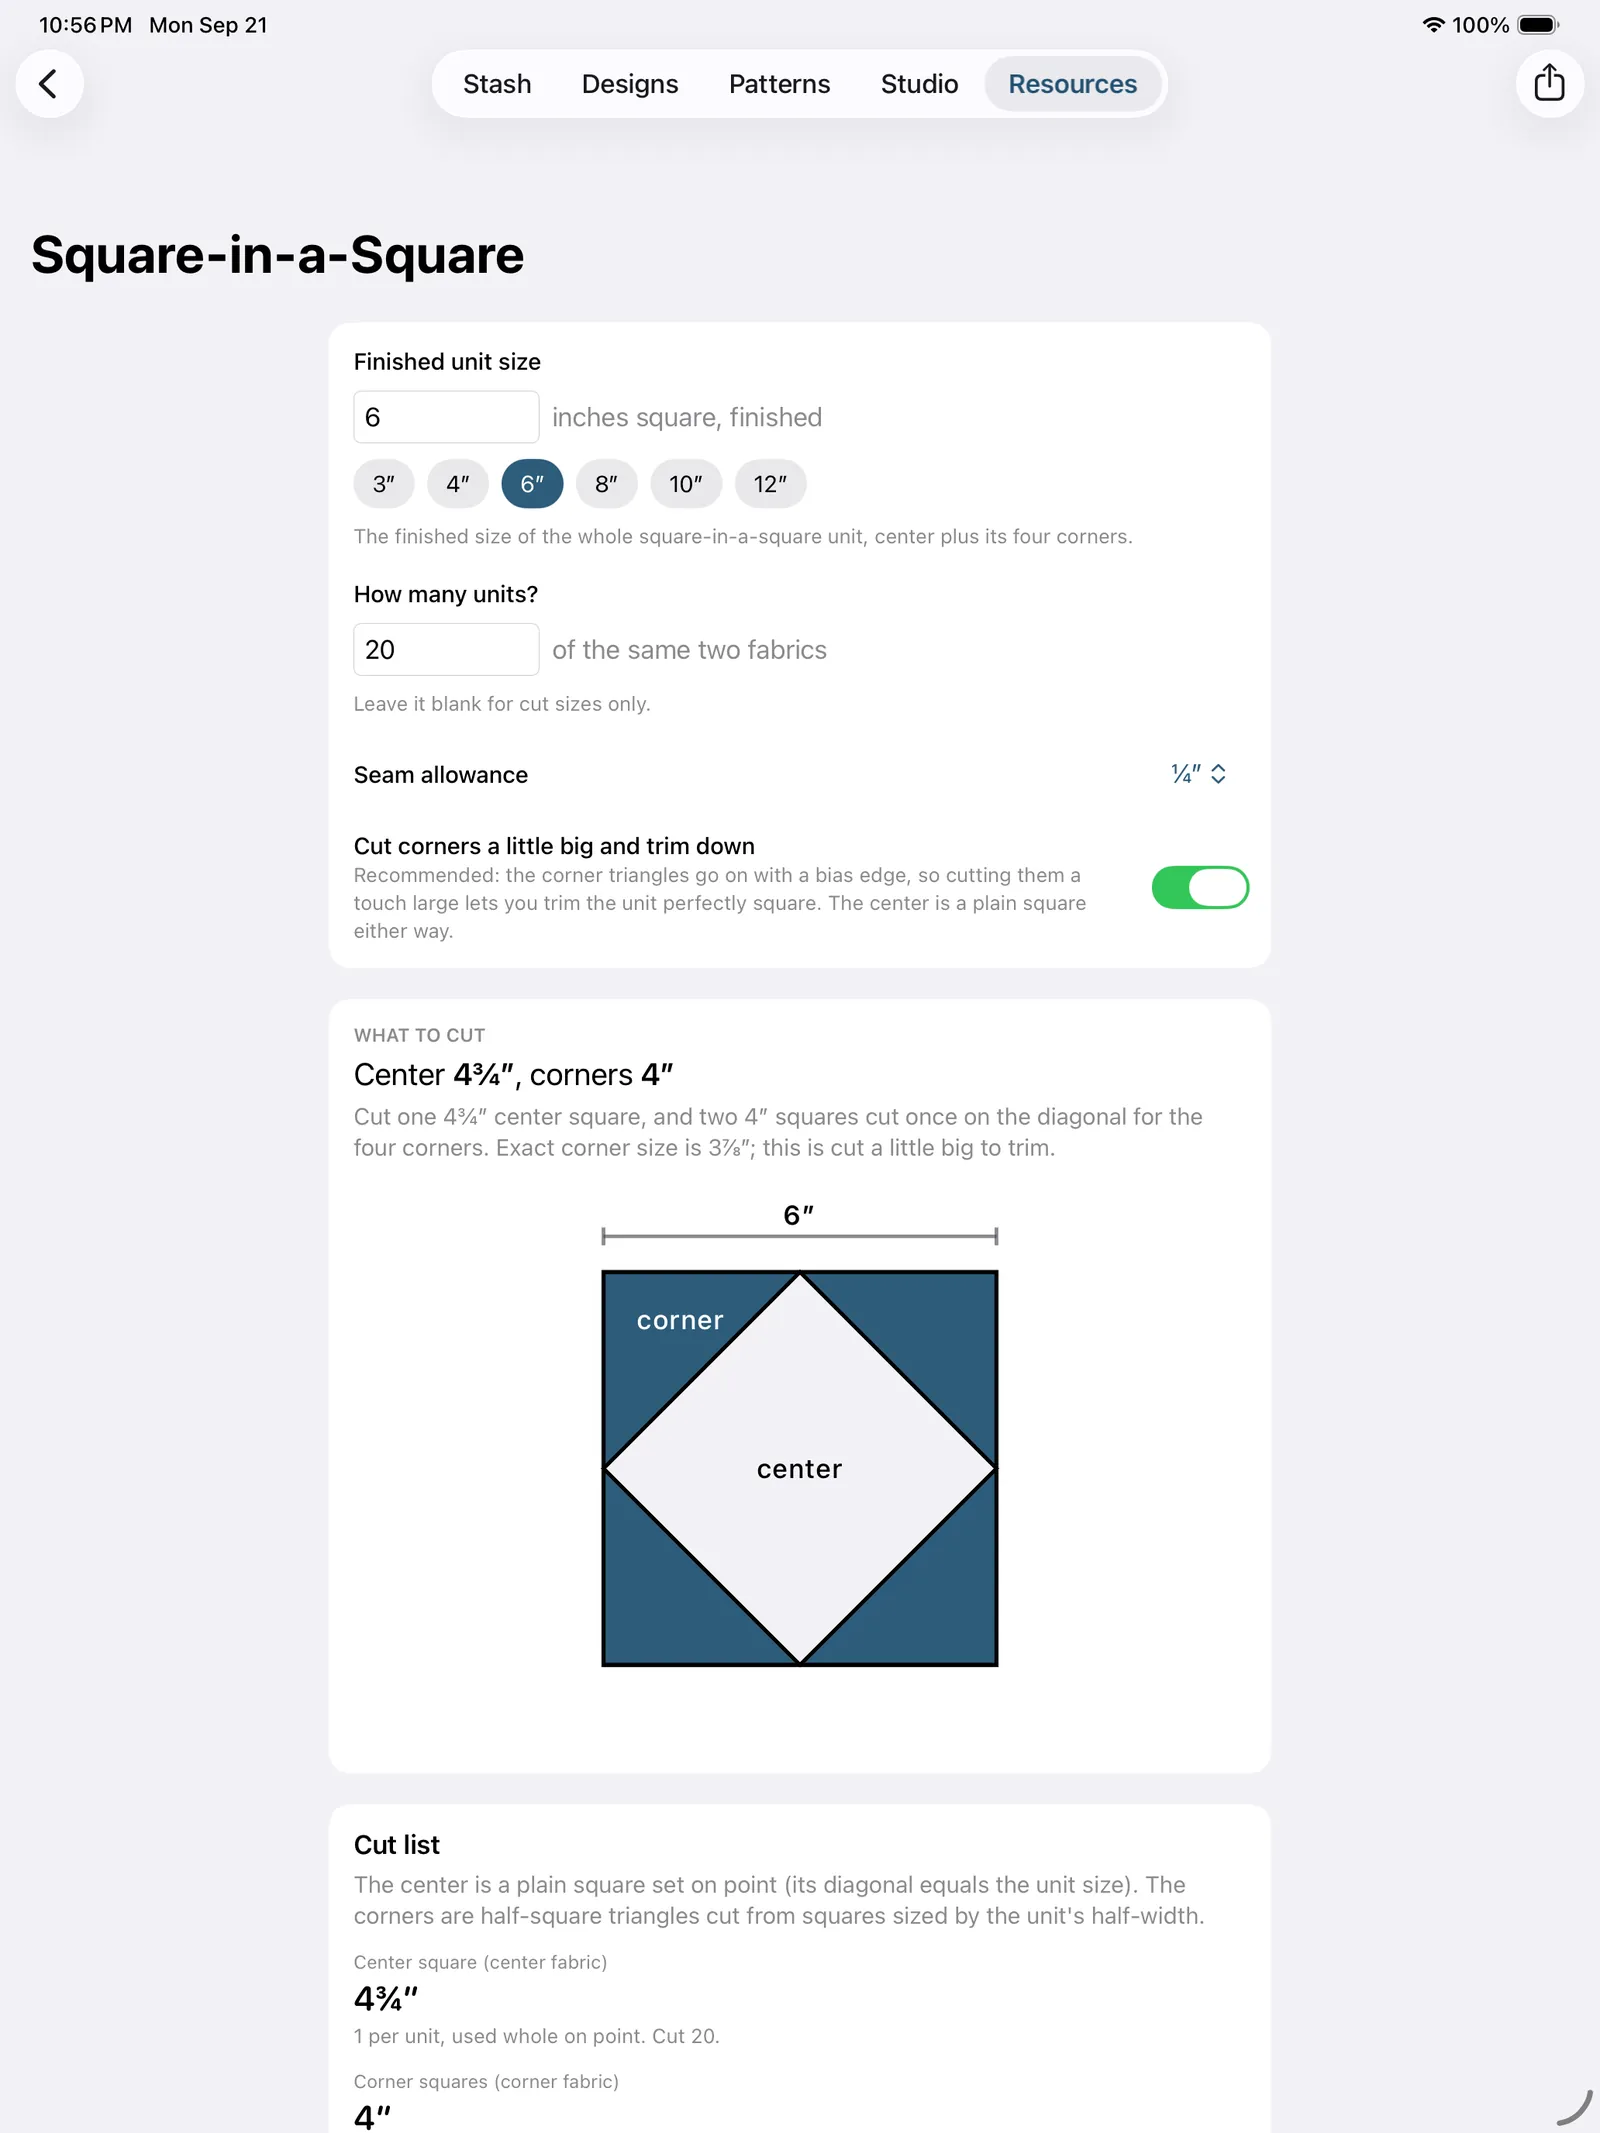
Quilting on a photo
The second row under Tools is for the longarmer with a customer's top on the counter, or anyone who wants to see a real quilt quilted before it's loaded. It's the same quilting preview the editors have, over a photograph instead of a design. It's free to try on four tops. The empty screen counts down ("2 of 4 free previews left"), a canceled picker costs nothing, and sharing the picture is always free; from the fifth photo it's part of the unlock, the ordinary Basic one, not Studio.
- Take Photo or Choose from Library. Get the whole top in the frame, all four corners included; square-on is nice but the next step fixes what isn't.
- Pin the corners. Four handles land on the quilt's corners (the app looks for the quilt in the photo and puts them there itself when it's confident; otherwise they start inset). Drag each one true; a loupe follows your finger so you can put it on the exact stitch. Type the finished size and tap Flatten the Quilt: the photo is straightened to exactly that proportion, at the photo's own resolution.
- Preview. The flattened top with the quilting lofted onto the real fabric. Before and After is the compare. Quilting picks the motif (Straight lines, Wavy lines or Meander, the ones that need only a size; in-the-ditch and echo follow seams a photo doesn't have) with its spacing, angle and Shuffle the wander, and Design file imports your own pantograph, exactly as in the editor's panel above. Loft starts gentle, since the photo already carries the room's light. The thread spools are the same six plus a custom color. Adjust Corners goes back to the handles; the share button in the toolbar exports a labeled before-and-after for the customer.
Nothing here is saved to a design or touches your library; close the screen and it's gone. It's a picture to have the conversation over.
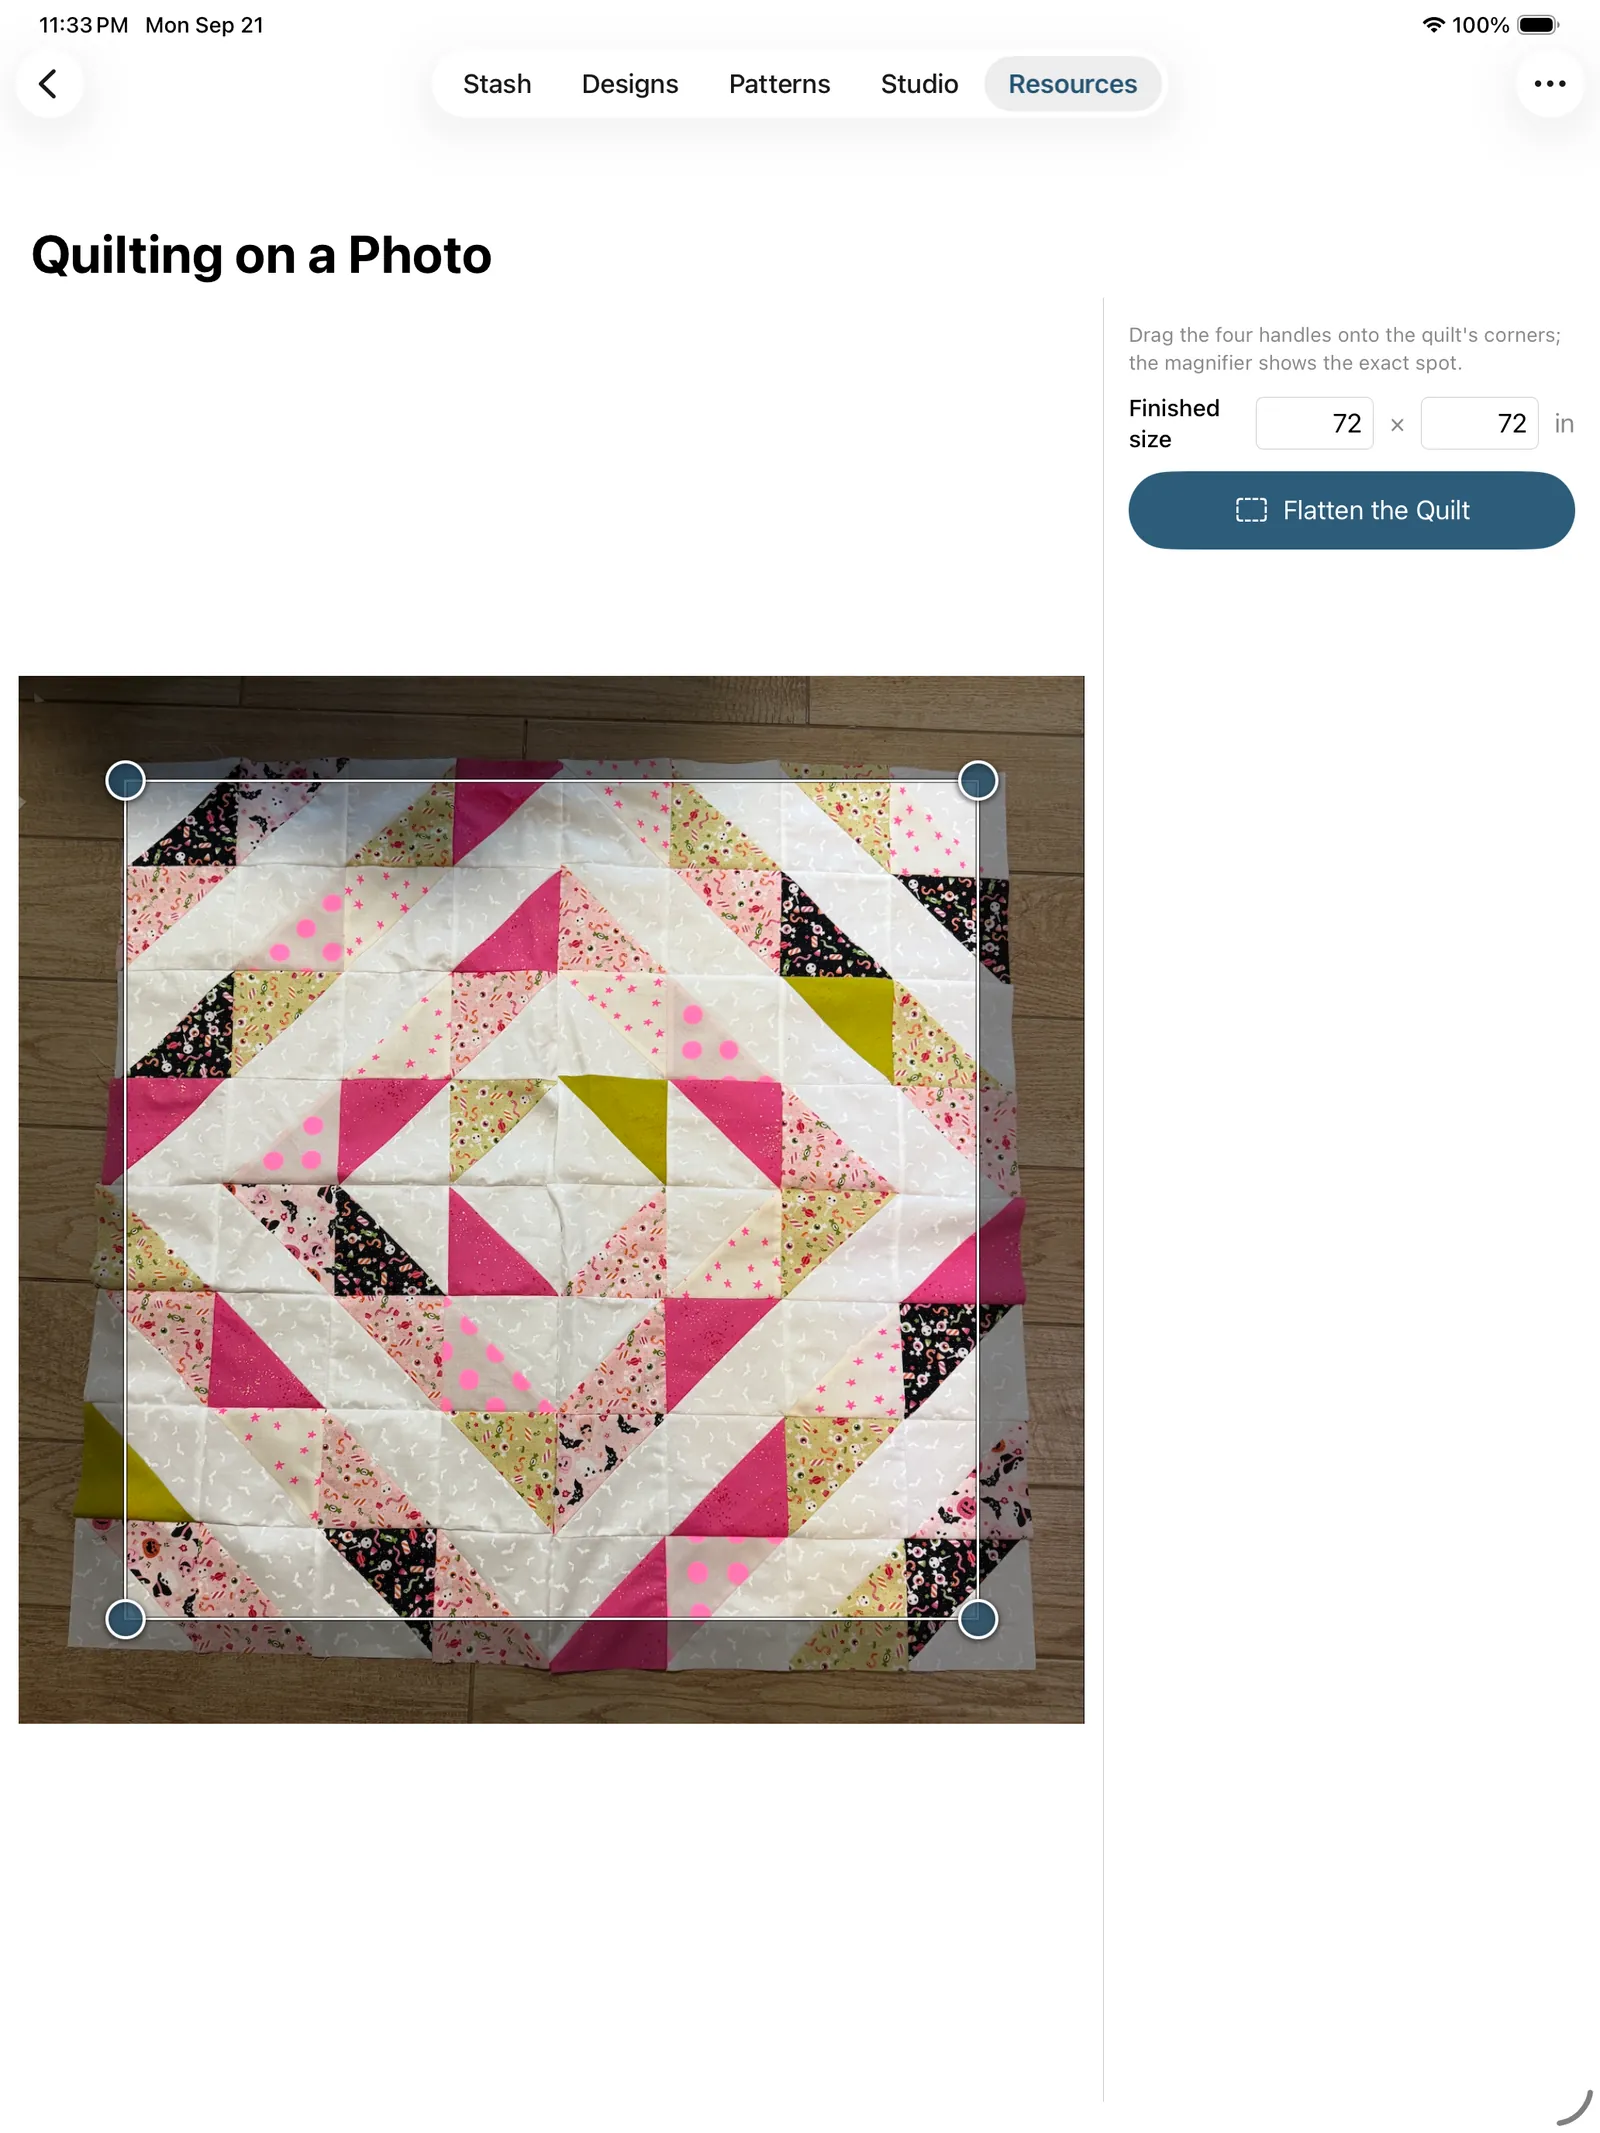
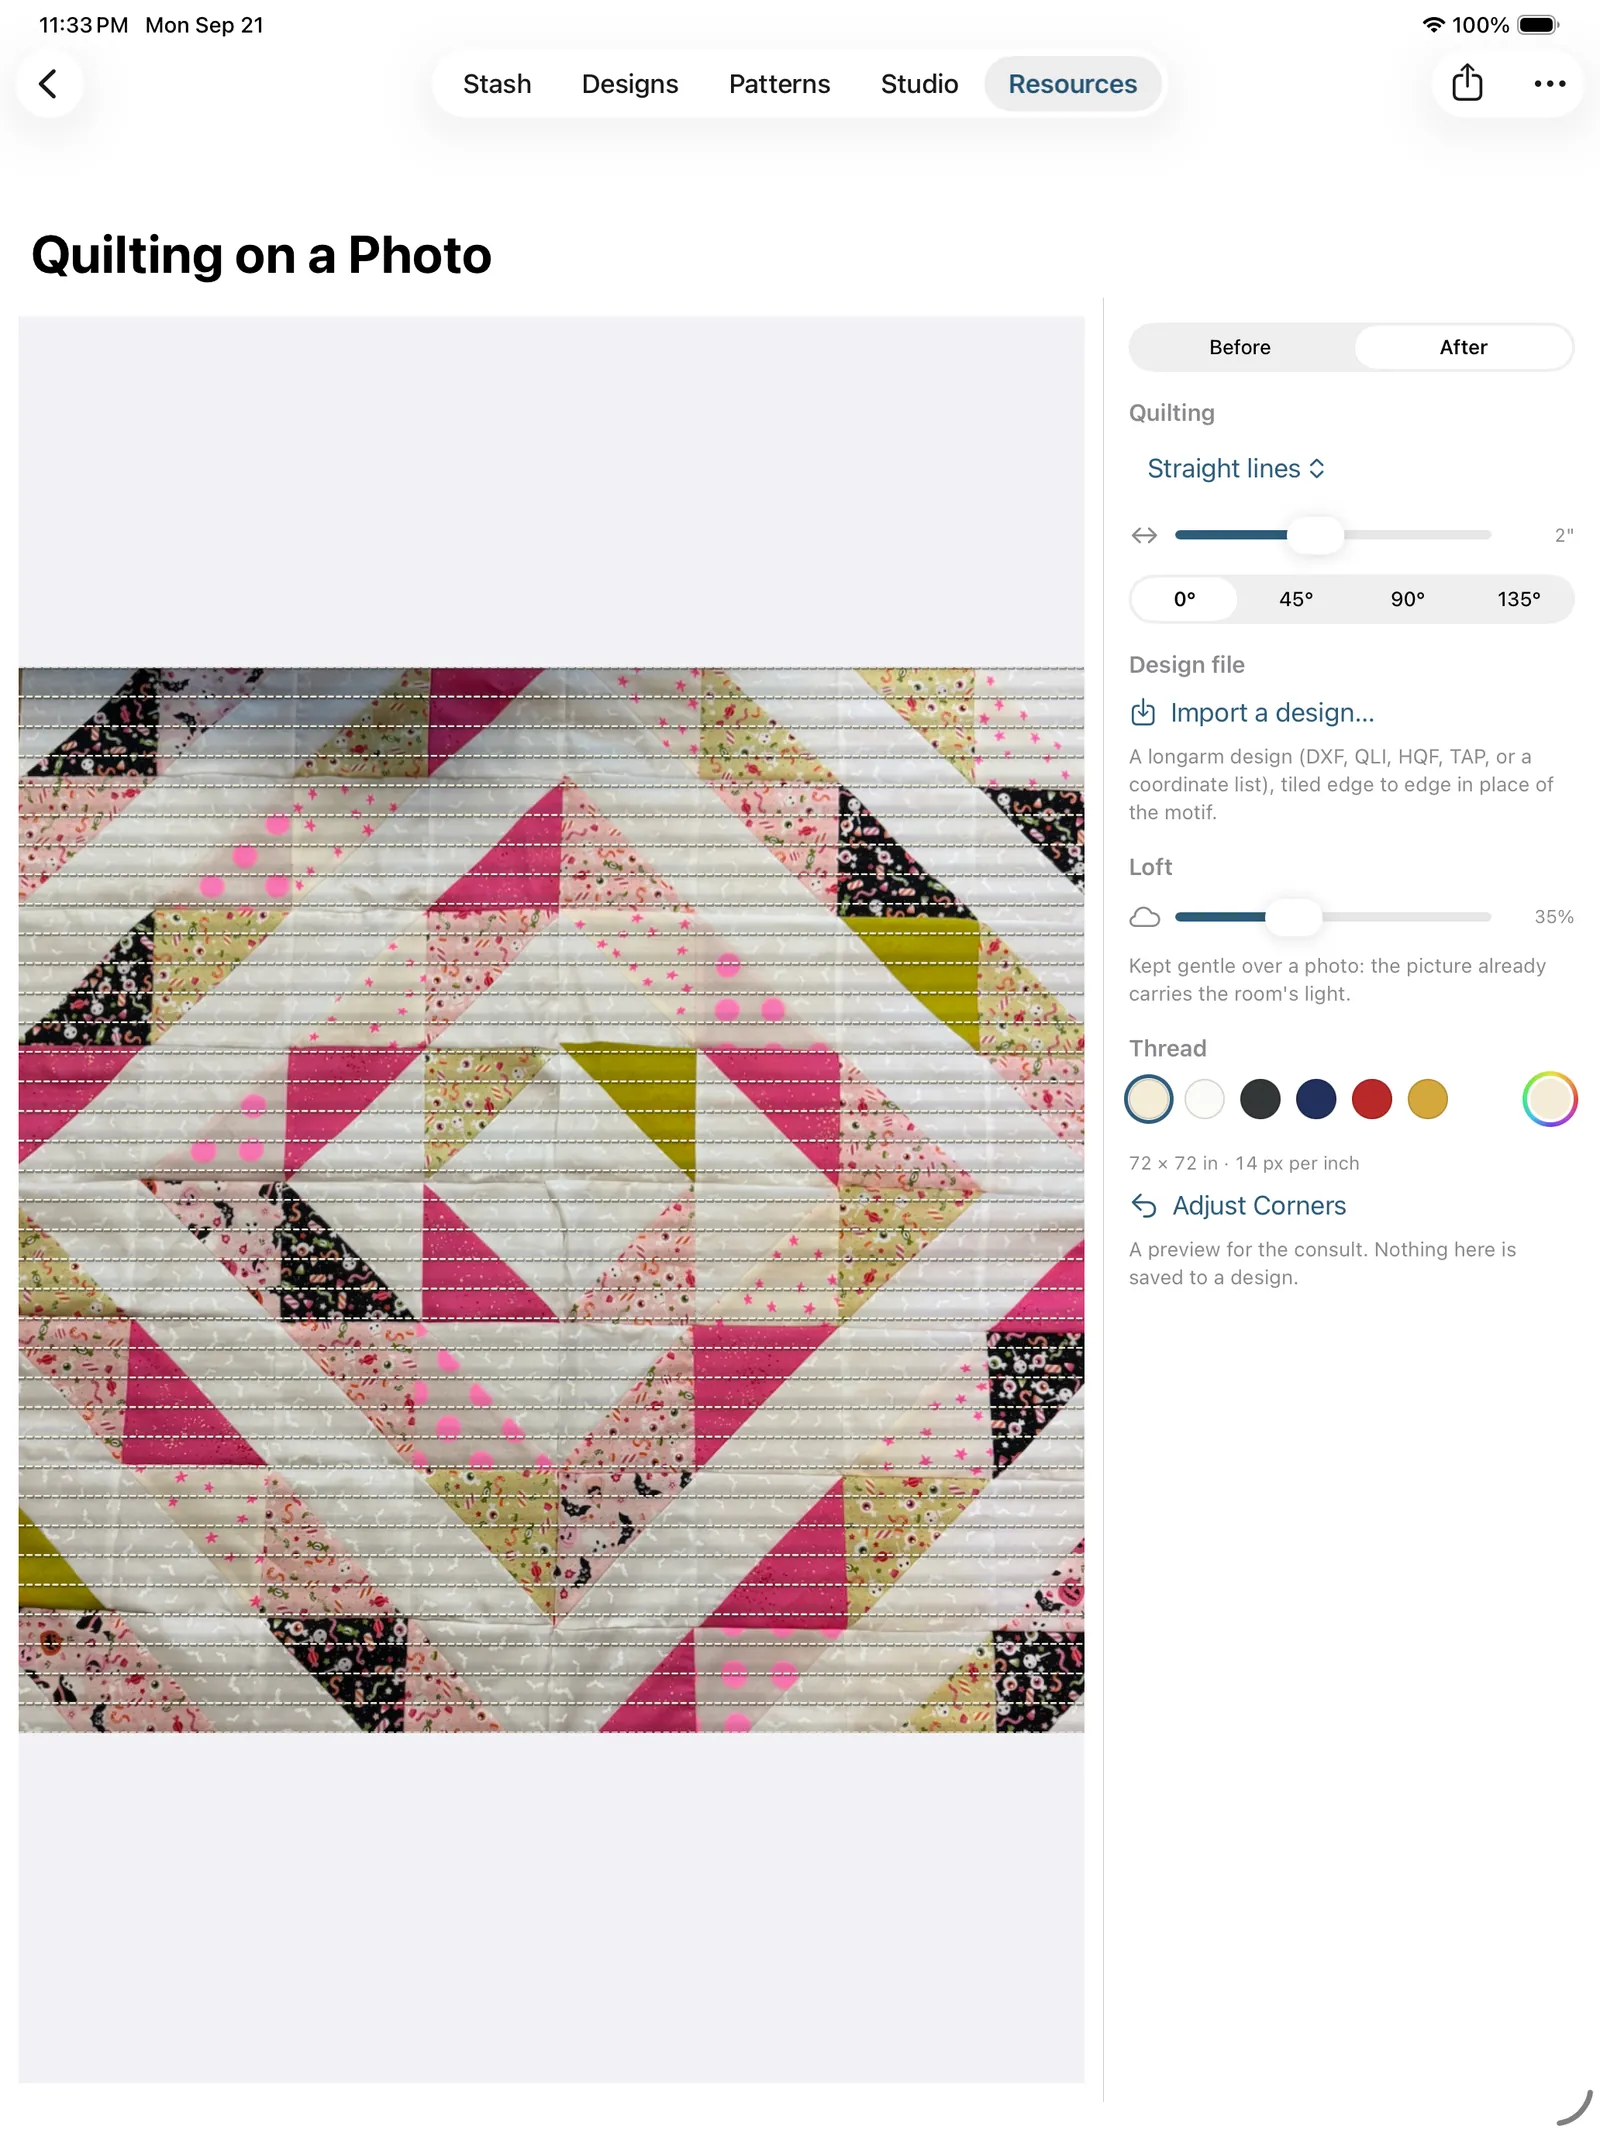
What's free, and what the unlock buys
TideStitch is a one-time purchase, never a subscription, and a good deal of it is free without buying anything:
- Four designs, for the life of the app. It's a lifetime count of designs you create, not slots you can free up: deleting a design doesn't give the count back. Editing a design you already have is always free and never metered, the three starter designs and your painted copies of them don't count, and neither do colorways, however many you make. The two things that do count are making a new design and making a colorway its own design.
- Every pattern is free to preview. The pattern's Overview always works: the quilt, its finished and unfinished sizes, the seam allowance, the difficulty badge and a rough fabric total. The other four segments (Fabrics, Cut, Sew, Finish) and the PDF are what the unlock buys, and each shows you a real preview first, the first few rows of your own fabric list, cut list or steps, before it fades into the unlock, so you can see the complete answer exists for your quilt before deciding.
- Quilting on a photo, four times. Four customer tops, for the life of the app, the same lifetime count as the designs; sharing the picture never counts.
- The free tools, the whole Stash, jelly rolls, and everything else in this manual that isn't named above.
If you were here during the free launch, it stays free for you. Everyone who used TideStitch before the unlock arrived keeps unlimited designs and full patterns for good. The app remembers you through your iCloud account, so the promise travels across iPhone, iPad and Mac and survives a reinstall; staying signed into iCloud is what carries it. It covers the app, not Studio, which was never part of the free app.
Three things can be bought, and you're only ever shown the ones that make sense for you:
- Basic unlocks the full app: unlimited designs, the complete pattern (fabric list, cut list, sew steps, finishing) for every quilt you make, PDF export, Quilting on a photo on as many tops as you like, and the Stars generator. One purchase covers iPhone, iPad and Mac.
- Studio is a separate one-time add-on on top of Basic: the block designer. It runs on iPad and Mac, where there's room for the canvas, and blocks you draw there work everywhere, including on your phone.
- Complete is the two together in one purchase, for less than the two bought separately. It's offered on iPad and Mac only (a phone can't run Studio, so it would be selling you half a bundle), and only to someone who owns nothing yet: once you own Basic, what you're offered is the Studio add-on, so nobody pays for the app twice.
Prices show in the app in your own currency, and you don't have to hit a wall to see them: Resources → Purchases (and the same rows under Settings → Purchases) opens the unlock screens on purpose. Whichever you buy, it's yours forever, on every device signed into your Apple ID. If we've sent you an offer code, Redeem an App Store Code in Settings puts the unlock on your Apple ID the same way.
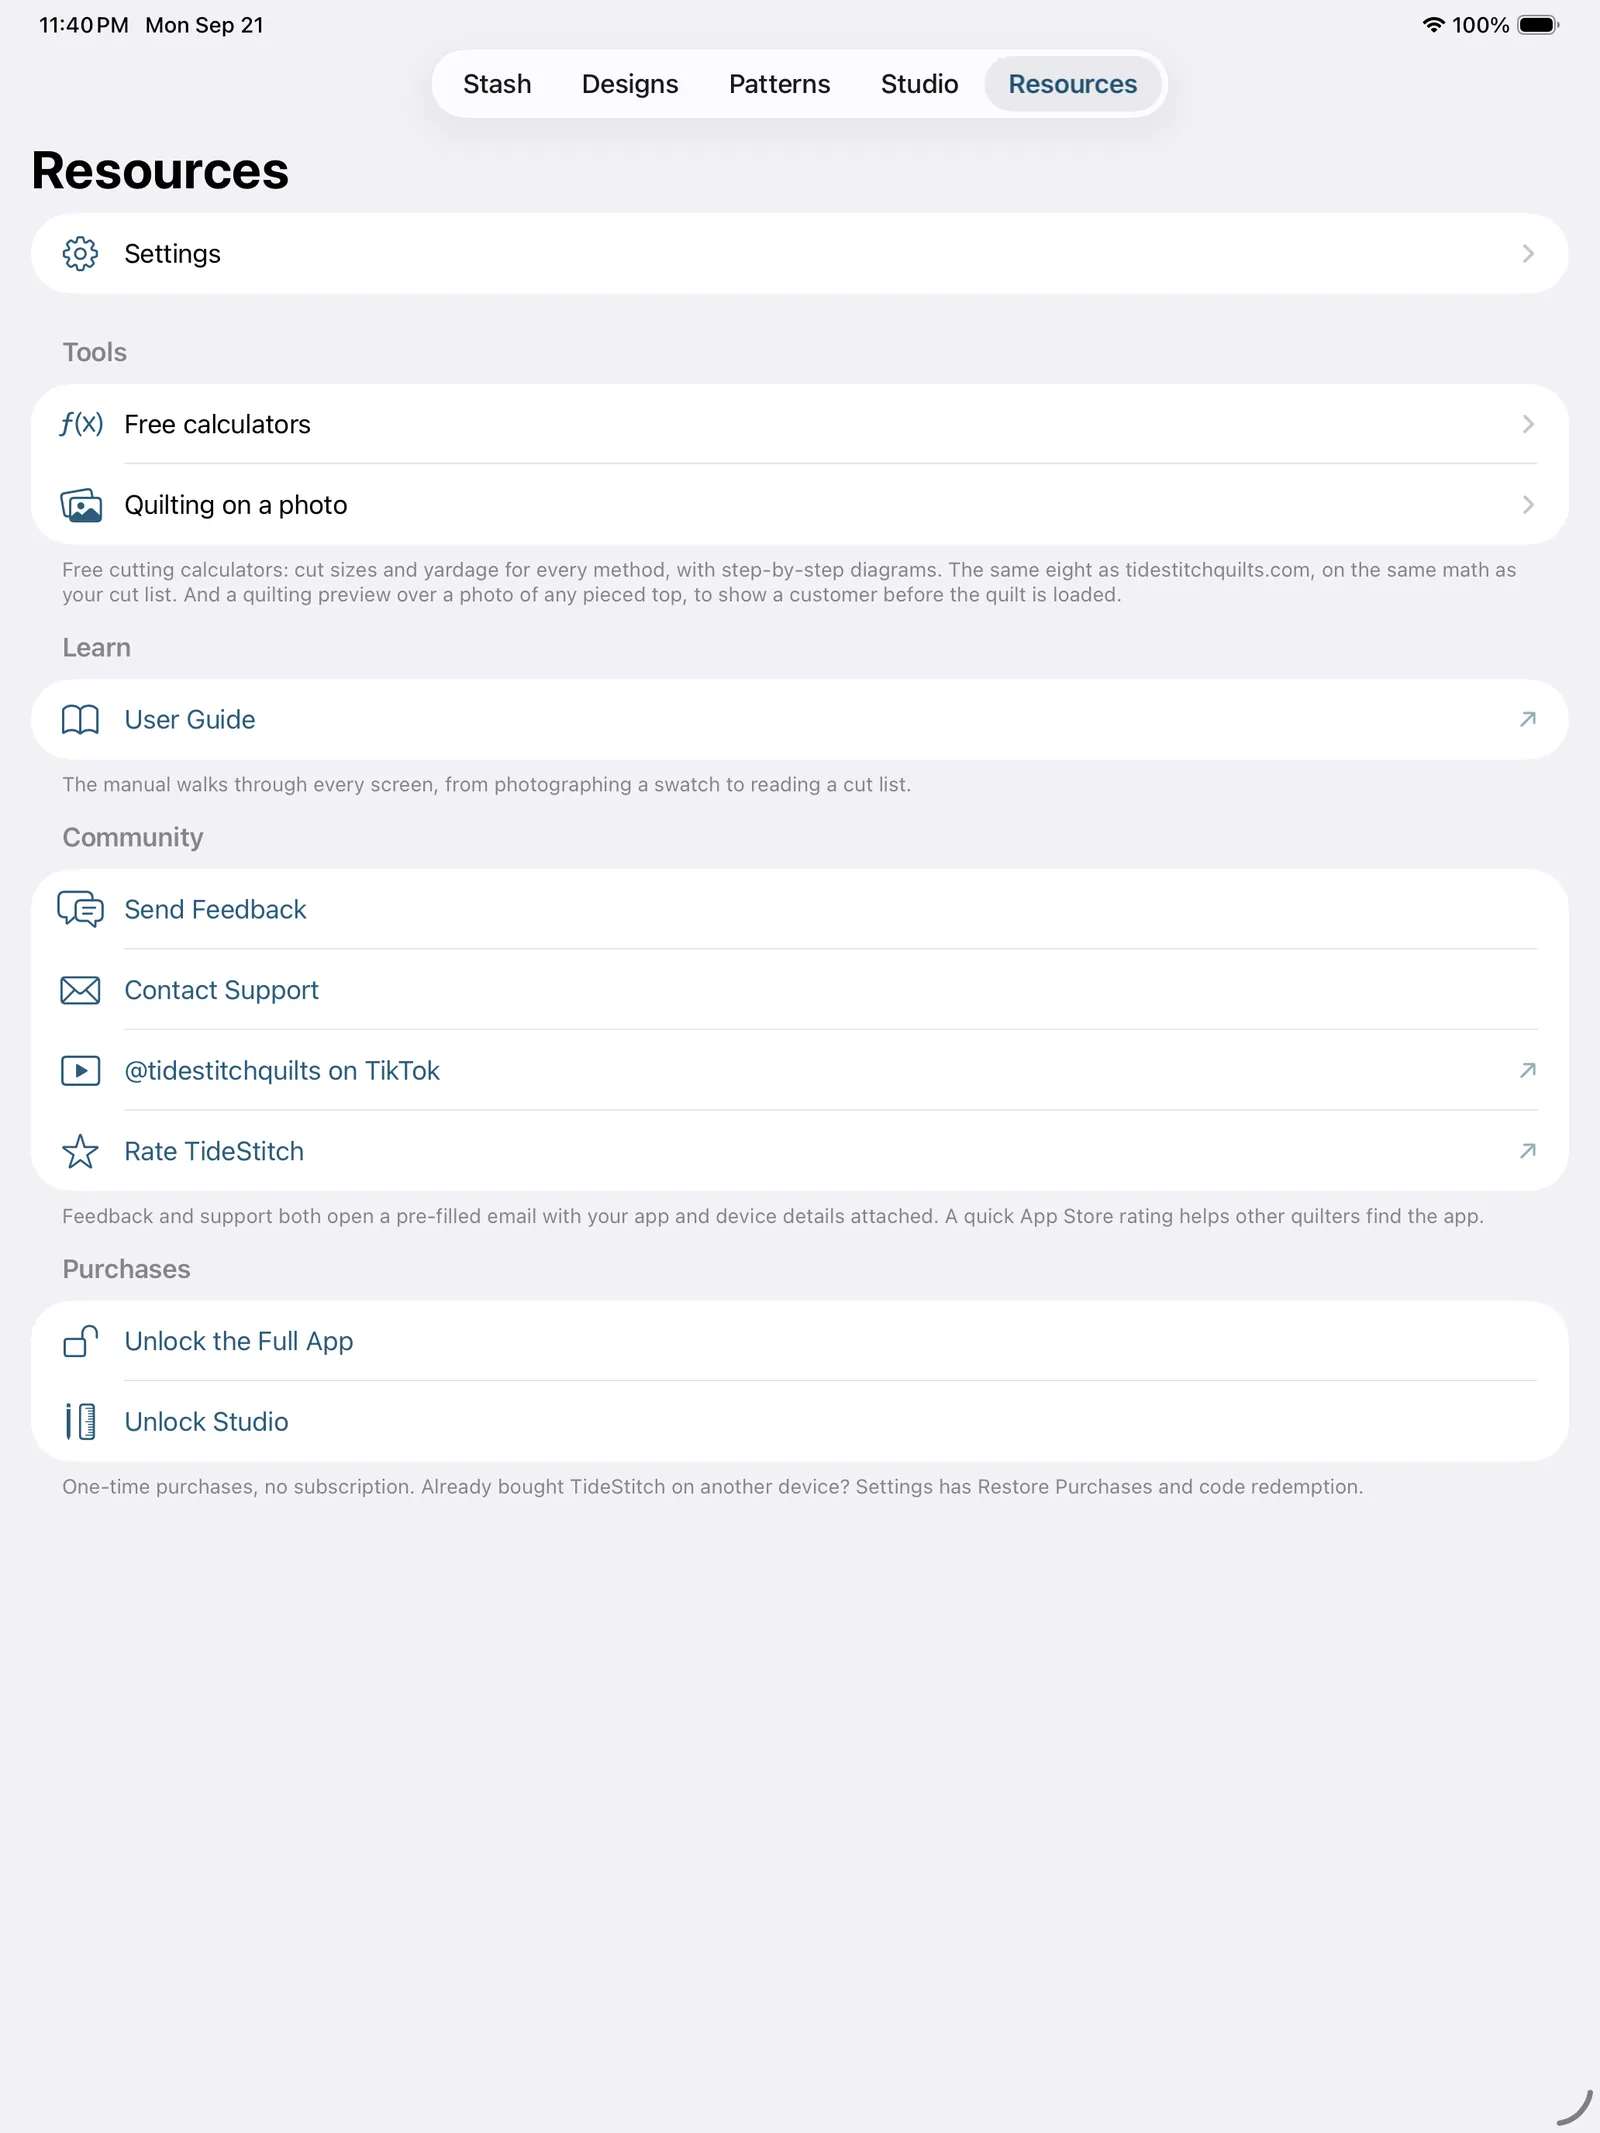
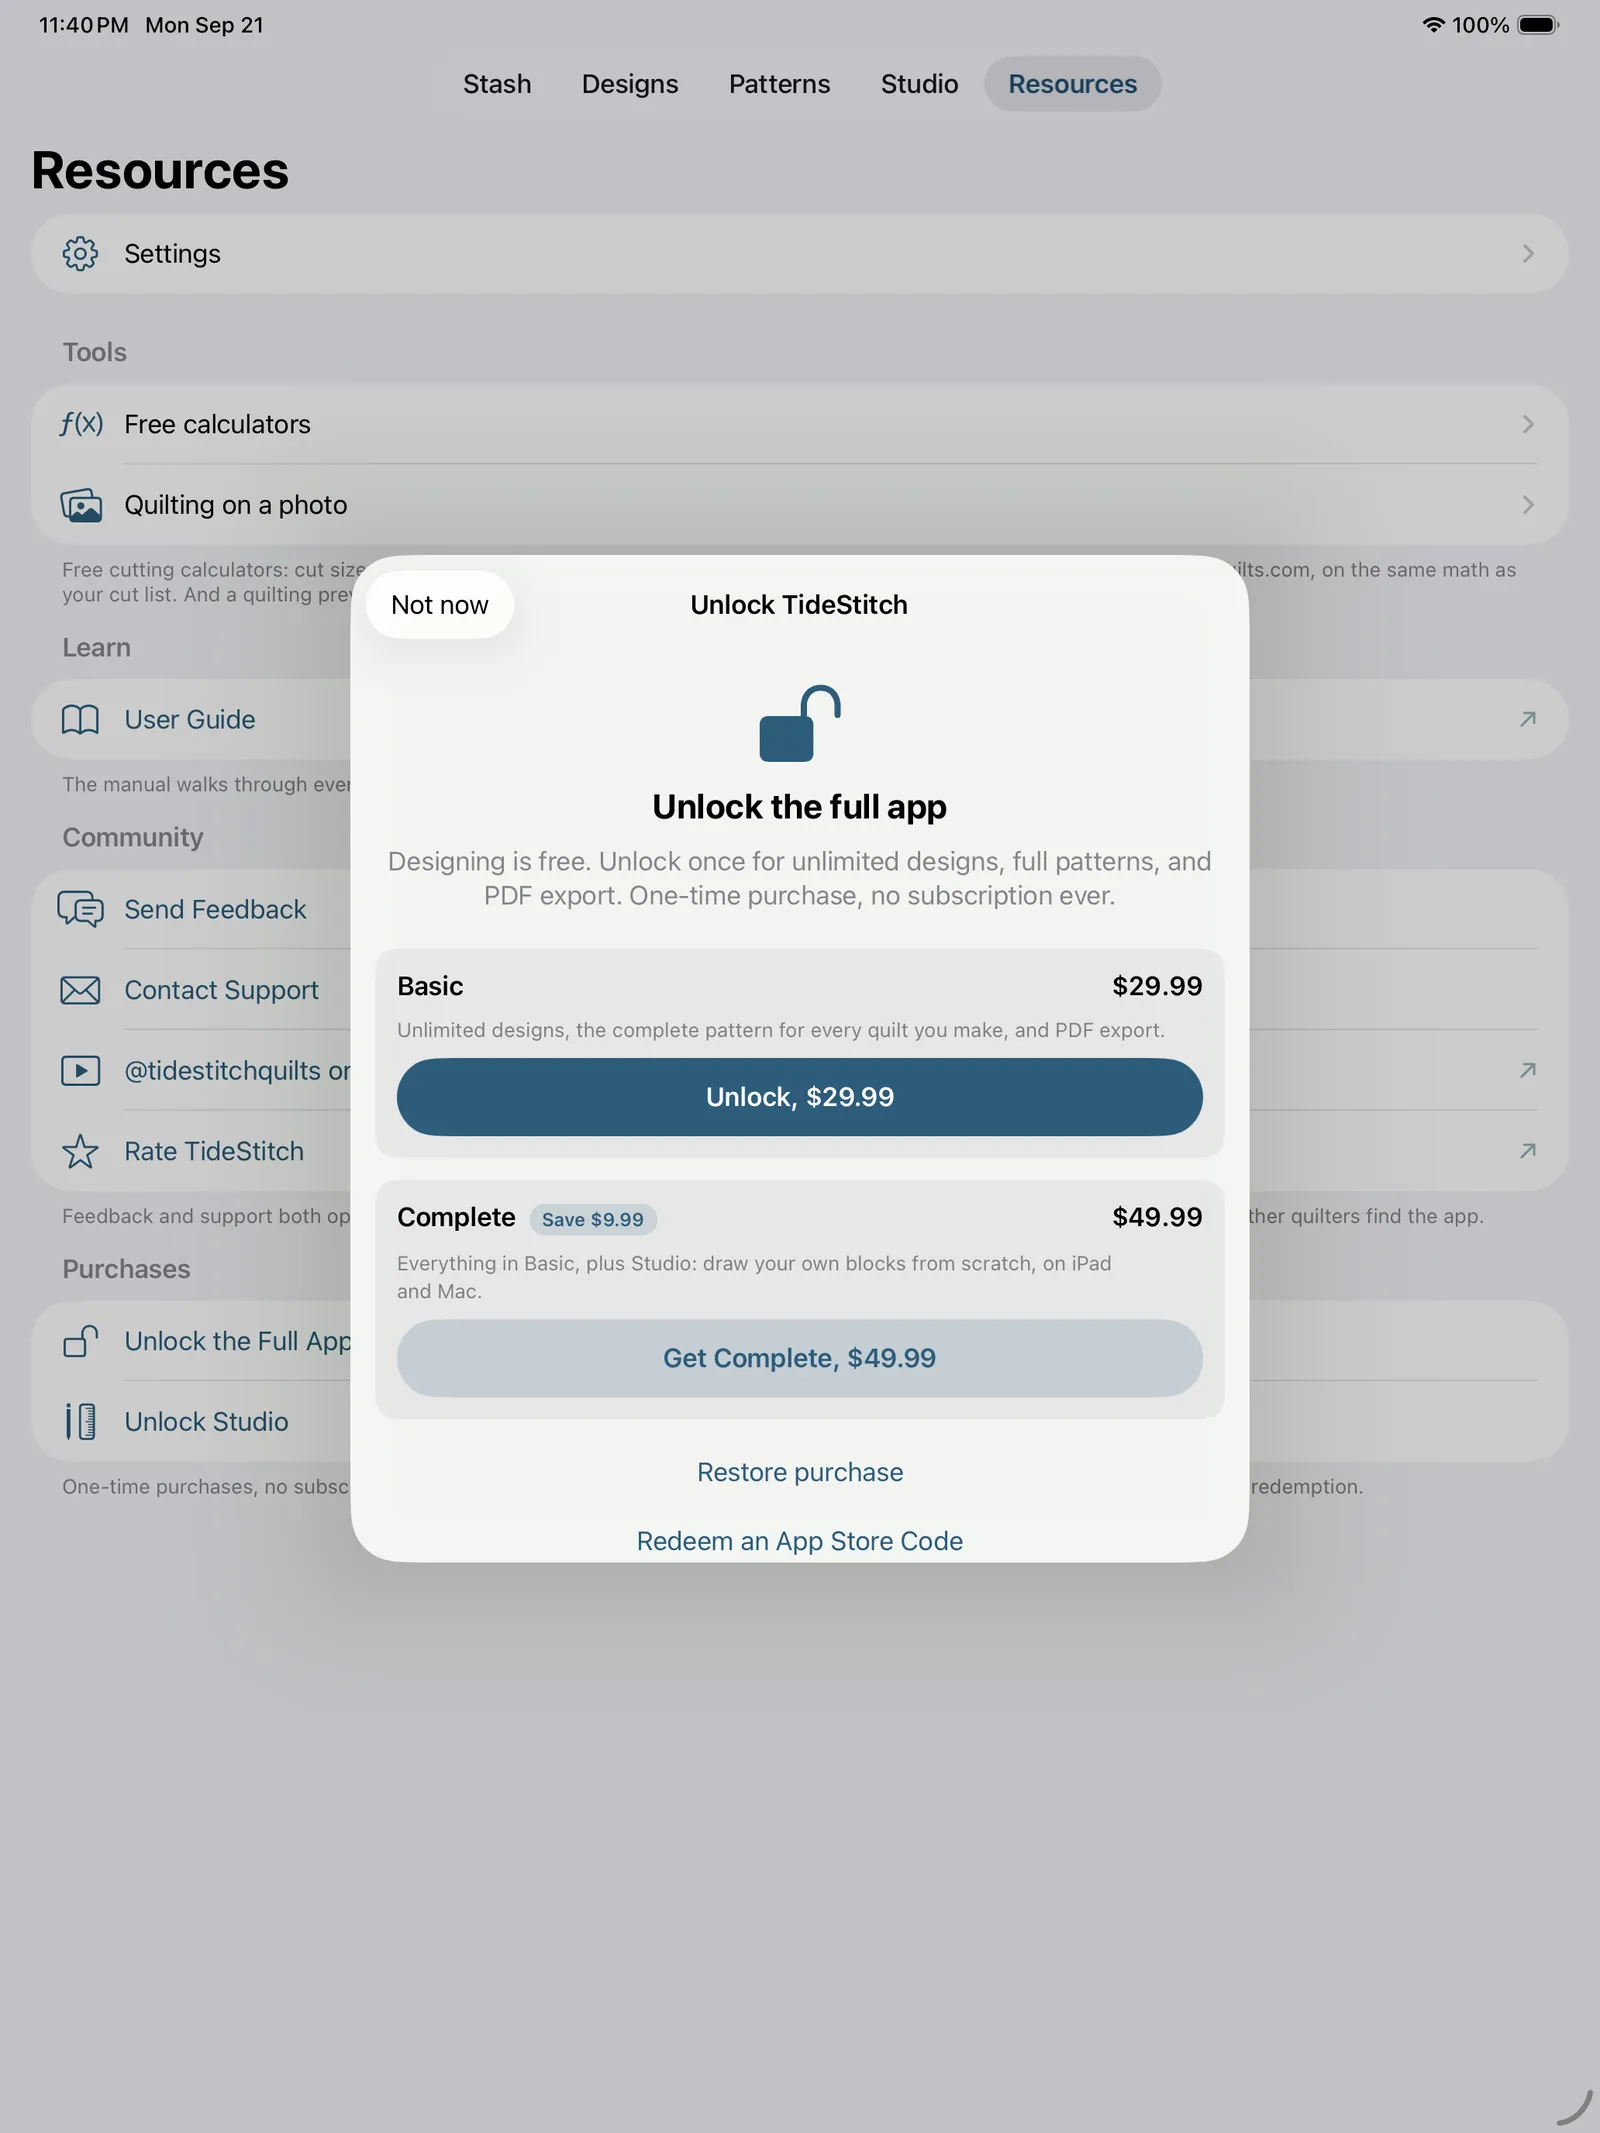
There's also a tip jar under Settings → Purchases, for anyone who'd like to chip in toward what's coming next. It buys nothing and unlocks nothing, and it's there because the quilters who got the app free for life asked for a way to say thanks.
If the app ever asks you to unlock something you believe you own, Restore Purchases under Settings → Purchases pulls your purchases back down, and every unlock screen has a restore button too. If you were a free-launch user, check that you're signed into the same iCloud account you used then; early-adopter access syncs back on its own.
Saving and syncing
TideStitch autosaves every change: adding fabric, painting a patch, renaming, resizing the grid. You can close the app or switch screens anytime without losing work.
If iCloud is set up, your stash and designs sync across your devices automatically. If it isn't, the app still works fully on that device using local storage, and will pick up sync once iCloud is configured. Settings → iCloud tells you which of those is happening right now, and what to do about it: see iCloud sync.
Quick reference
| I want to… | Where to go |
|---|---|
| Add a fabric | Stash → Fabrics → + New |
| Add many fabrics fast | Stash → Fabrics → + New → Add Several from Library |
| Tag or categorize a batch of fabrics | Stash → Fabrics → Select → tap swatches → Edit |
| Delete several fabrics at once | Stash → Fabrics → Select → tap swatches → Delete |
| Replace a swatch's photo | Tap the swatch → Replace photo (keeps the fabric) |
| Fix a dim or off-color photo | Tap the swatch → Exposure / Contrast / Saturation |
| Swap in a better photo | Tap the swatch → Replace photo → Take Photo / Choose Photo |
| Make a sampler quilt | Layout → rows, columns, sashing → Blocks palette section → tap cells |
| Show the same part of every print | Resources → Settings → Fabric preview → Vary fabric placement off |
| Recolor or hide the lines between pieces | Resources → Settings → Canvas lines |
| Browse quilts as pictures | Designs or Patterns → top-right menu → gallery or list |
| Size a Rail Fence or Strip Twist | Open it → Layout → blocks across and down |
| Make a jelly roll | Stash → Jelly Rolls → + New |
| Photograph strips | Jelly roll → Strips → Add |
| Start a block quilt | Designs → + New design |
| Look up HST cut sizes and yardage | Resources → Tools → Free calculators → Half Square Triangle |
| Look up flying geese cut sizes and yardage | Resources → Tools → Free calculators → Flying Geese |
| Look up LeMoyne Star cut sizes | Resources → Tools → Free calculators → LeMoyne Star |
| Size a Lone Star from your strips | Resources → Tools → Free calculators → Lone Star |
| Work out binding strips or a bias square | Resources → Tools → Free calculators → Binding |
| Work out backing widths and batting | Resources → Tools → Free calculators → Backing and Batting |
| Cut setting triangles for an on-point quilt | Resources → Tools → Free calculators → Setting Triangles |
| Cut a square-in-a-square unit | Resources → Tools → Free calculators → Square-in-a-Square |
| Start from a jelly roll | Jelly roll → New design from this jelly roll |
| Design a bargello | Jelly roll → New design from this jelly roll → Bargello |
| Order a bargello's colors automatically | Build the gradient → Light → Dark |
| Change a bargello's wave later | Edit Wave, on the hint bar under the canvas |
| Choose how wide a Race finishes | Open the Race → Layout → Race width |
| Start a freehand board | Designs → + → Design Your Own |
| Split a cell into triangles | Line on the tool rail → Cut: Diagonal → tap near the corner you want |
| Split a cell into four triangles | Line on the tool rail → Cut: X → tap the cell (tap again to clear) |
| Cut a cell straight across / down | Line on the tool rail → Cut: Across or Up-down → tap (snaps to the nearest ¼″) |
| Place several cuts in a cell | Keep tapping with Across or Up-down active; tap a cut to remove it |
| Zoom while cutting | Pinch, or the zoom buttons above the canvas; the ruler, ↔ and the quarter turn work here too |
| Make a radial compass | ••• → Board → Radial → Anchor to place the point → Ray to fan out rays |
| Remove a ray | Ray on the tool rail → tap the ray |
| Pan the radial compass | Two fingers (one finger draws) |
| Place a ray or anchor freely | Turn off the Snap toggle on the control bar under the board |
| Undo anything | Undo (curved arrow), cuts, rays, merges, fills, mode switches |
| Try a second color version | Colorway strip → New colorway (free, doesn't use a design slot) |
| Rename a colorway | Tap the chip you're already on → Rename |
| Replace a fabric everywhere | Swap on the tool rail → tap a patch → load the replacement → Swap |
| Compare two color versions | Colorway strip → Compare |
| Choose how compare lays them out | The arrangement menu in compare's top bar |
| Peek at the other version on a phone | Press and hold the quilt in compare |
| Frame two colorways differently | Border → Fill, or paint the frame, in each colorway |
| Turn a colorway into its own quilt | Tap its chip (or press and hold) → Make Its Own Design (uses a design slot) |
| Copy a whole quilt | Press and hold it in Designs → Save As New |
| Fill a patch | Tap a swatch/color, then tap the patch |
| Fill a run of patches | Load the brush, then drag across them at fit zoom |
| Erase a patch | Tap Clear, then tap the patch |
| Zoom in on the canvas | Pinch to zoom, one-finger drag to pan, tap the zoom-out button to snap back |
| Fill the width with a tall quilt | ↔ in the zoom cluster (⌘8); drag up and down for the rest |
| Fit a long quilt on a wide screen | The quarter turn in the zoom cluster (⌘R). Turns the view only |
| Give the quilt the whole screen | Drag the Palette handle down from shut; tap the pill to come back |
| Undo a change | Undo (curved arrow) in the top bar, or ⌘Z |
| Redo a change | Redo (curved arrow) in the top bar, or ⌘⇧Z |
| Spin a whole block | Rotate on the tool rail, then tap the block |
| Spin a triangle | Rotate on the tool rail, then tap the HST unit |
| Size an HST grid | New design → HST Grid → across/down + Size by |
| Pick a plain LeMoyne Star (free) | New design → block picker → LeMoyne Star |
| Make a Lone Star, or a LeMoyne without Y-seams | New design → Stars → diamonds per point |
| Draw a star in Studio | Studio → Generate → Stars |
| Number a paper-pieced block's pieces on screen | Studio → eye menu → Sew order |
| Print a paper-piecing foundation | Studio → Method → Export Foundation PDF… |
| Print a paper-piecing foundation sized to a quilt | Pattern → Sew → Export foundation PDF |
| Tile one block into a quilt | Layout → keep Fill new blocks from top-left on, then bump Rows/Columns |
| Grow a quilt without blank cells | Layout → keep Fill new blocks from top-left on, bump Rows/Columns |
| Add sashing between blocks | Layout → Sashing stepper (multi-block grids) |
| Set a quilt on point | Layout → Setting → On point (multi-block grids) |
| Stagger the blocks like brickwork | Layout → Setting → Brick, then Stagger and Drop |
| Choose what fills the diamonds between blocks | Layout → Setting → Blocks between |
| Use plain setting triangles at the edges | Layout → Setting → Edges → Plain triangles |
| Mix block types | Blocks palette section → tap chip → tap cell |
| Frame a design with a border | Borders → + Add border |
| Add a flying-geese or sawtooth border | Borders → border → Side style |
| Paint a pieced border or its corners | Set Side style / Corner squares-blocks, then tap the pieces on the canvas |
| Merge patches into one piece | Merge on the tool rail → tap same-fabric touching patches → Merge |
| Split a merged area | Merge on the tool rail → tap the shape → Unmerge |
| Make a cut list and pattern | Pattern in the top bar (••• → Make Pattern on a phone) |
| Find a pattern again later | Patterns tab, where painted quilts appear on their own |
| Jump straight to the cut list | Open the pattern → Cut segment |
| Export a pattern PDF | Make Pattern → Export PDF |
| Check a fabric against the real thing | Ruler button above the quilt, or ⌘9 |
| Trace a quilt from a photo | The photo button in the zoom cluster → Add Photo…; Opacity and Size live in the same popover |
| Check your lights and darks | ••• → Value View (tap it again for color) |
| See the quilt quilted | Quilting on the tool rail → Show quilting, pick a motif or draw your own |
| Crosshatch or lattice quilting | Quilting → Add layer (it crosses the last one by default) |
| See my own pantograph on the quilt | Quilting → Design file → Import a design… (DXF, QLI, HQF, TAP or a coordinate list), then set the repeat width |
| Show a customer their top quilted | Resources → Tools → Quilting on a photo: photograph it, pin the corners, flatten, pick a motif or import a file |
| Measure your screen (Mac) | Settings → Actual size → Calibrate this screen |
| Resize a freehand board | Board → Layout |
| Set a board on point (medallion) | Layout → Setting → On point |
| Frame a freehand board | Borders on the tool rail |
| Copy a quilt without leaving the editor | ••• → Save As New |
| Check whether this device is syncing | Settings → iCloud |
| Get a purchase back on a new device | Resources → Settings → Purchases → Restore Purchases |
| See what the unlock costs before you need it | Resources → Purchases (bottom of the tab) |
| Redeem a code we sent you | Resources → Settings → Purchases → Redeem an App Store Code |
| Leave a tip | Resources → Settings → Purchases → Support TideStitch |
| Hide the inch labels while cutting a board | Line on the tool rail → Sizes off |
| Read a bargello's strip order or column cuts | Its pattern → Fabrics → Strip-Set Order, and Cut (tap a column to see it large) |
| Auto-fill a jelly-roll design | ••• → Shuffle |
| Rename a design | ••• More menu → Rename |
| Clear every fill | ••• More menu → Clear All Fills |
| Collapse a palette section | Tap the section's chevron |
| Shut the whole palette | Tap the Palette handle (stacked layouts only) |
| Browse a whole family of pinks | Palette → Colors → Color families → tap the pink dot |
| Set the quilt's background | The Background button on the tool rail, then a chip in the palette |
| Add a block someone sent you | Tap the file in Messages or Mail |
| Add a block file already in Files | Settings → Blocks → Add a Block You Were Sent… |
| Set your seam allowance | Settings → Seam allowance |
| Cut pieces exactly (no trim margin) | Settings → Cutting mode → Precise |
| Back up your whole library | Resources → Settings → Backup & Restore → Export Library… |
| Restore or move to a new device | Resources → Settings → Backup & Restore → Import Library… |
| Edit a starter design | Open it → Duplicate to Edit |
| Share one design with another quilter | Press and hold it → Share… (or ••• → Share… in the editor) |
| Open a design someone shared | Tap the .tidestitch file in Messages, Mail, or AirDrop |
| Add fabric on Mac | Stash → Fabrics → + New → Choose One (crop it) (no camera on Mac) |
| Delete on Mac | Control-click (or right-click) the card → Delete |
| Zoom on Mac | Zoom buttons above the quilt, or ⌘− / ⌘0 / ⌘= |
| Undo / redo on Mac | ⌘Z / ⌘⇧Z |
Draft. Current as of version 1.9 (34): seam-allowance and cutting-mode settings (square-up / precise), undo/redo, zoom/pan on every canvas including the drawing tools, fit-to-width and a view-only quarter turn on all three canvases, actual-size rendering with per-screen calibration, configurable HST grids, one unified editor across the block editor and Design Your Own (a shared tool rail carrying the whole-design Background, Borders and Layout buttons, a colorway strip, and a collapsible palette panel that repacks by the shape of the container, and a drag-away focus mode on a phone), a generated color-family browser in the palette, blocks someone sent you living in your library on their own shelf, nested borders on every design type (solid, flying-geese, and sawtooth sides; corner squares and corner blocks), whole-block rotation for every block, cut-as-one-piece merging, re-croppable swatches, true-physical-scale fabric rendering, a segmented Stash with confirmed deletes, auto-filled new layout cells with sashing and cornerstones, straight, on-point and brick settings, 51 blocks across the built-ins and the included pack, colorways with a measured side-by-side, stacked or one-at-a-time compare on every hand-painted design type, per-colorway solid border fills, Design Your Own boards with resizing, borders and their own cut lists, bargello wave design from a jelly roll, a chosen finished width for the Jelly Roll Race and editable grids for the strip-set patterns, strip-counted fabric requirements for every jelly-roll pattern, one adaptive swatch editor with photo replacement and color correction, structure-shaded unpainted pieces, gallery and list views for both libraries, full pattern generation (cut list with per-cut purposes, yardage, assembly steps, a seam-line block diagram, per-phase checkpoints, and a printable PDF) reachable from its own Patterns tab, full-library backup/export to a shareable .tidestitch file, an iCloud sync status readout, a Mac release (pointer, hover, keyboard-shortcut, and library-import adaptations of the same app), and the 1.6 additions: a Make seamless control that lines a print's repeat up so it tiles without a join, a white-balance eyedropper in the swatch editor, an in-camera framing guide with an optional alignment grid, shop-detail metadata (designer, manufacturer, line and tags) you can enter and filter by, multi-select delete in the stash, a per-design fabric palette that narrows the paint tray to one quilt's fabrics, copy-and-stamp on a Design Your Own board, HST grids up to 128 a side with type-in counts, and fat-quarter / fat-eighth precut buying in the pattern's fabric list; and the 1.6.1 additions: every border side, sashing strip, cornerstone and setting triangle painted on its own and per colorway (and cut as its own line in the pattern), the quilt's background set from the palette itself instead of a sheet, and a Stash multi-select that edits shop details, categories and tags across a whole batch instead of only deleting it; and the 1.7 additions: a reference photo under any board, with opacity and size, to trace a quilt from, a grayscale Value View for judging lights and darks, a Resources tab that gathers Settings, the free tools, the manual and the ways to reach us, a free LeMoyne Star block in the picker and a Stars generator for LeMoyne and Lone Star blocks with one-tap Ring · Point · Row painting, a star sew order with a drawing per step and Lone Star strip sets read off your paint, free LeMoyne Star and Lone Star calculators, a cut list with checkboxes and merged same-size lines, sashing on an on-point and a brick set, a cell that splits into an X, an on-point board told its edge is bias, one square-up rule for every bias piece, foundation paper piecing in Studio with the sew order drawn on the canvas and a printable foundation, a My Blocks gallery, and the paid release: Basic, Studio and Complete as one-time purchases with a Restore Purchases row in Settings; and the 1.7.3 additions: a quilting preview on the tool rail (in the ditch, straight, wavy, echo and meander motifs, up to four layers, free-drawn strokes, loft and thread), four more free calculators (binding, backing and batting, setting triangles, square-in-a-square) behind one Free calculators row, Purchases rows that open the unlock screens without a wall plus an optional tip jar and App Store code redemption, a bargello pattern with its strip-set order and a per-column Cut list, paper-pieced blocks that split into lettered sections with one foundation each and an assembly page, a reference photo from Photos or a file, a Sizes toggle on the Line tool, and rectangular Studio blocks that read as both their sides in Layout.